Mystery Clinker & Engine

Screen Shot 2017-12-13 at 4.47.14 pm

Screen Shot 2017-12-13 at 4.49.59 pm

MYSTERY ENGINE

In the latest Lake Rotoiti Wooden Boat Association newsletter, one of the members, Andy Hammond, was looking for help to ID the engine in his 14’ clinker run-about.

Andy commented that the engine was a proper marine unit with F & R gearbox, and almost certainly “Made in England” as it says so on the fuel filter housing. Also has A/F spanner sizes.

Any woodys able to help Andy out on the engine? & what do we think about the design of the boat?


A Master Class in Wooden Boat Building


A Master Class in Wooden Boat Building

In the past I have published several links to retired Australian boat builder, Ian Smith’s blog (Smithy’s Boatshed) on the building of his 24’ Ranger Class yacht. Today’s link is to the full blog; it is a truly amazing record of how to build a wooden boat. If Ian was to appear on the TV program Mastermind, his specialist topic would be ‘Australian Open Boats’, the man is a living legend. Read / view the story, if you are too busy, bookmark it for later reference.

(thanks to Robin Elliott for pointing me in the direction of Ian’s build / blog)  

http://smithysboatshed.weebly.com/blog


Waiata H15

Screen Shot 2017-12-13 at 1.53.30 pm

2017

WAIATA H15

 A gent by the name of Billy Bott called me last week with a wee problem, with a such a cool name, I couldn’t not help him out

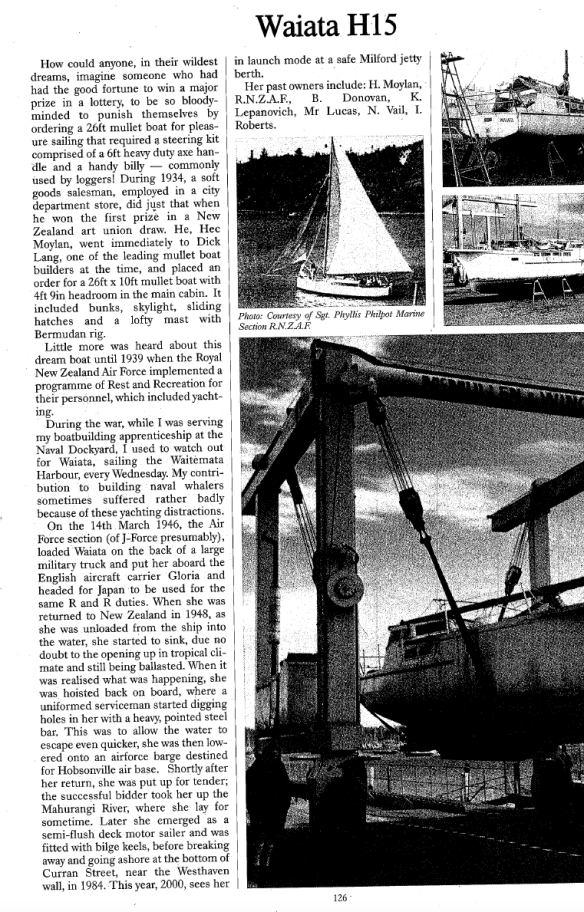
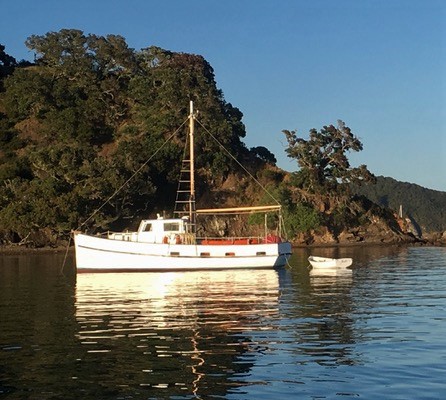
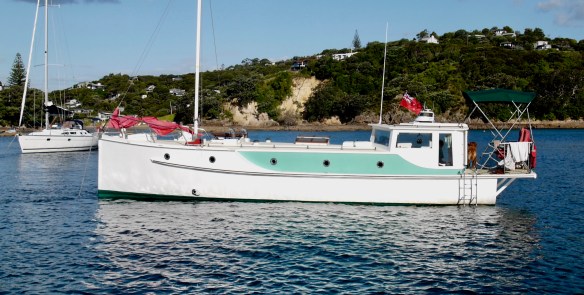
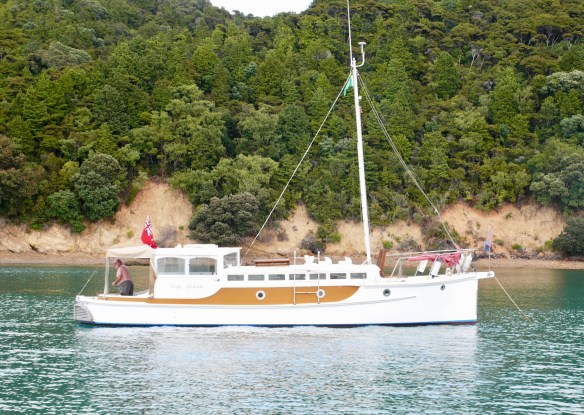
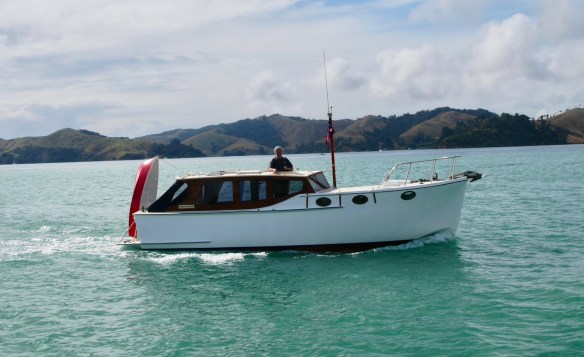
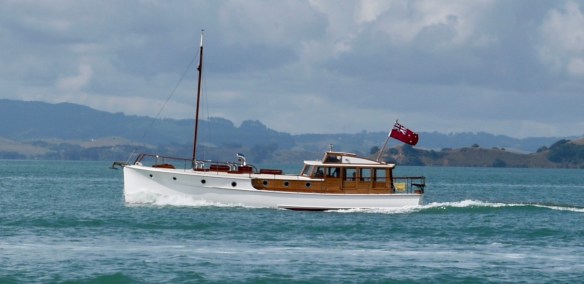
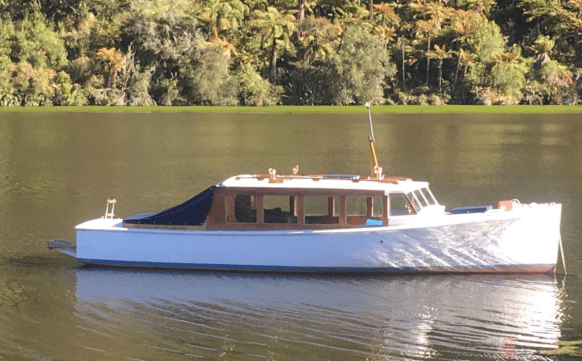
Billy has a 26ft Mullet boat (now in motor launch mode) with a very colourful history. Built by Dick Lang, one of the leading mullet boat builders at the time and launched in 1936. One of the last boats launched before the man power project in 1938. Her first owner, Hec Moylan, won 1st prize in the ‘NZ Art Union’ lottery & commissioned Lang to build the yacht.

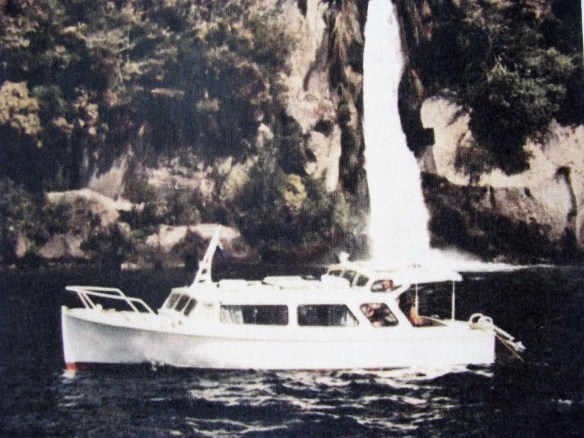
Waiata was transported to Japan in 1946 aboard the English aircraft carrier “Gloria” to be used for Rest and Recreation duties by members of the Royal New Zealand Air Force. Waiata was also used for recreational sailing at the RNZAF Sunderland base at Lauthala Bay, Fiji.

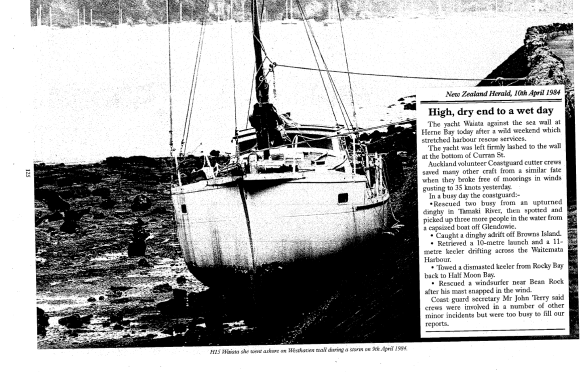
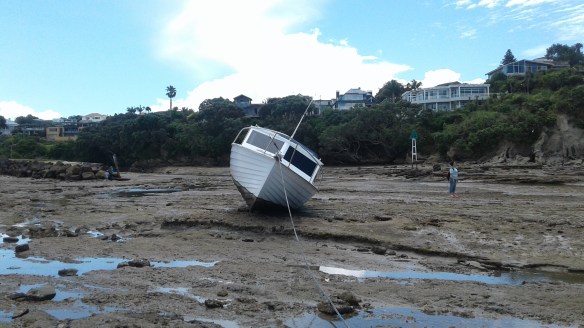
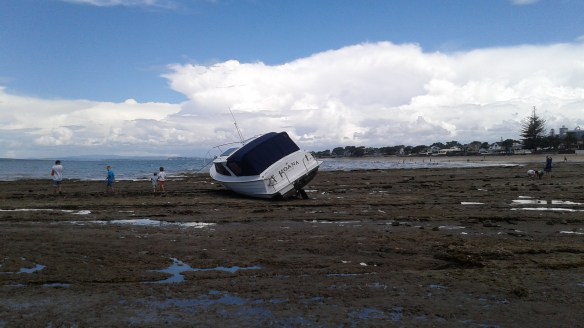
In 1984 as the result of a rather big storm, she had a wee altercation with the Westhaven sea wall, at the bottom of Curran Street, Herne Bay (refer press clipping below) & more details on her past.

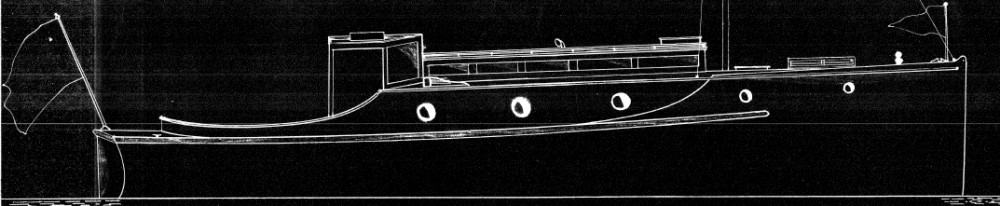
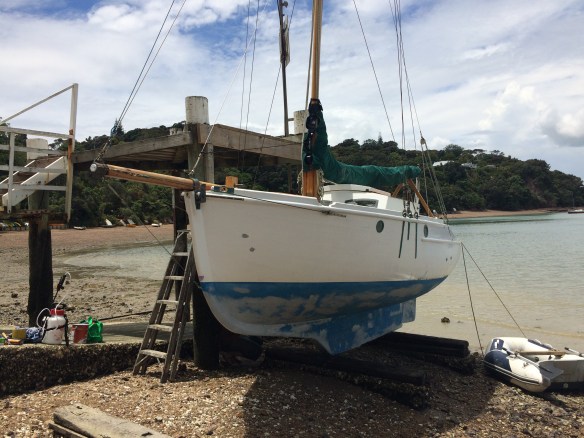
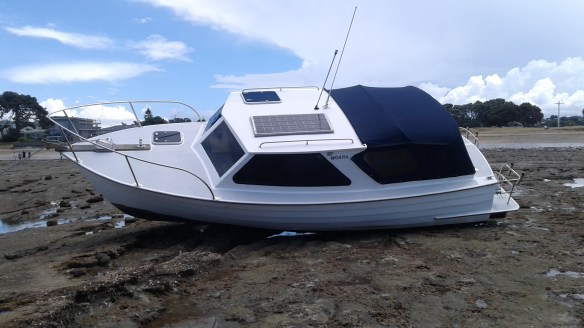
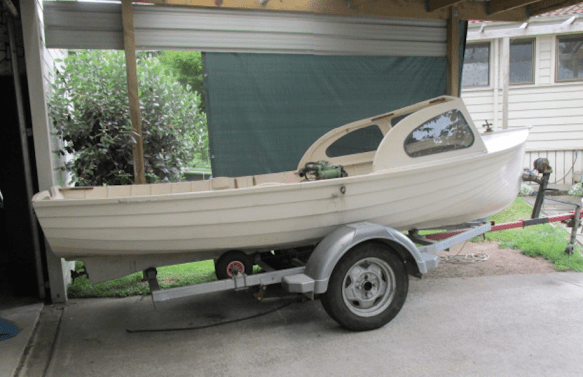
Today Waiata resides in the Milford Creek. Powered by a 25hp Volvo diesel motor and gearbox. The motor has only done a few hundred hours since being reconditioned. She is very roomy for a 26’ boat, with full head room throughout.

Billy’s problem ? – Waiata needs a new owner, sadly she has not been used lately & someone could acquire her for not a lot of money, in Billy’s words “I’m open to all offers”

For more information call Billy on 0274956561

ERNIE SEAGAR RIP – Saddened to learn of the passing last week of Ernie Seagar, one of the giants of our wooden boating community. 

Harold Kidd Input

Sad indeed to hear about Ernie Seagar’s death. He was already a legend as a boy. He was Head Prefect and Captain of the First XV at Takapuna Grammar in the 5th Form and a very useful cricketer, track and field athlete and yachtsman. In his later years he became a truly admirable hard man from his experiences at sea and in life. A true two-fisted tough-minded Seagar of the great New Zealand engineering family. His great-grandfather worked under Isambard Kingdom Brunel in the construction of the GWR Saltash Bridge and the SS GREAT EASTERN at Milwall.
My sincere condolences to his family.
WAIATA was launched by Dick Lang on October 5 1934, not 1936. My father and mother lived in London Street, just up from St.Mary’s Beach. Dad knew Dick Lang well (as well as Lloyd George).
Boylan raced her infrequently with Ponsonby Cruising Club and Richmond but she was well-known on the waterfront.
This “manpower” comment is way off beam. Between 1934 and 1940 (not 1938….WHY 1938, the war was a year in the future?) when tradesman began to be “manpowered”, many hundreds of yachts and launches were built in Auckland, a large number by Dick Lang.

Screen Shot 2017-12-13 at 1.55.05 pm

Screen Shot 2017-12-13 at 1.56.18 pm


Harmony


Screen Shot 2017-12-12 at 11.41.47 am

Screen Shot 2017-12-12 at 11.42.07 am

Screen Shot 2017-12-12 at 11.42.26 am

HARMONY

Harmony ticks an awful lot of boxes for anyone looking for a ‘spirit of tradition’ woody. First – she was designed & built by Robert Brooke, that alone makes her very special. Robert launched her in 2014 & as you would expect only the best materials were used in the build – with the hull being 9mm ply, epoxy glued.

Harmony measures approx. 15’ & is powered by a 20hp Honda o/b & comes on a customized galvanized trailer.

Harmony has only been in the water around 7 times & while she performs beautifully, the Honda has never been up to full speed.

Robert built Harmony for his own use but circumstances have changed & now she is reluctantly offered for sale.

Any woodys looking for a lake boat for Xmas? If so I would move quick, as Harmony will not be on the market for long

(thanks to Ian McDonald for the listing heads-up)

It’s Hard to Find the Perfect Wife….

Unknown-1

Unknown

It’s Hard to Find the Perfect Wife….

……But woody Rod Prosser has. Over the last couple of years Rod has been acquiring a flotilla of classic woodys in various stages of restoration.

You may recall that he already owns ‘Firefly’ the 1882, 25’ counter stern day launch & the late 1950’s / 60’s Chev 327 V8 powered flat-bottom ski boat ‘Kiri Moana’.

Rod was doing a trademe troll & came across the old Lake Karapiro ski boat above, desperately looking for a new home. Given that Rod had a set of deck vents, step pads, windscreen supports, plus flags and other various other bits and pieces sitting on a shelf, in the garage, left over from when he was doing the Classic Craft boats way back & they would not suit the flat bottom ski boat – it seemed like a marriage made in heaven. Just needed wife Florence’s nod of approval & seeing that she had been asking what Rod was going to do with the bits, he suggested a family trip to Tauranga & surprise, surprise – came back owning the Karapiro boat.

As a bonus it came with a pretty rare Gray Marine AMC Rambler 327 Fireball V8 from the early sixties.

Even better news, Lake Rotoiti boat builder Alan Craig may have an old farm shed to store her until she gets her time in the sun.

So short, long story – Rod must have the perfect wife. 3 boats, that beats me.


Swiftsure – Restoration Project In-Waiting

Unknown-1

Swiftsure – Restoration Project In-Waiting  

I was recently contacted by Harold Kidd in regard to Swiftsure the 1921 centreboarder that needs major restoration and to the right person –  is free for collection.

Harold supplied some history on the yacht below.

SWIFTSURE was built by George McLean of Birkenhead in 1920 a bit under 16ft and a bit over 14ft (about 4 inches) because of the available lengths of timber.

Her first race appears to have been in November 1921 with the Ponsonby Cruising Club in their “14ft handicap class” i.e. not square-bilge and not Jellicoe Class 14s, owned by G. McLean. She was on scratch which indicates a first race. She raced consistently much of her life. She was registered with the 14ft T Class when the AYMBA introduced its alpha-numeric system in 1922. She was allotted T38.

By the 1923 Anniversary Regatta her oversize had apparently been picked up and she was moved to the 16ft S Class as S62. She was then owned by George’s nephew Ted Fitzgerald. After a protest she had the offending bit sawn off her stern and was reregistered as T6 in 1934. Later he put the 4 inches back on and she raced with the 16 footers as S62.

After he retired her from racing as an open boat post WW2 Ted built on a raised foredeck and a bigger cuddy.He took her on an annual cruise to Great Barrier with his two little girls. Amazing!

Swiftsure is now stored under cover at Beachhaven and stabilized but needs a total restoration. The above photo shows her racing as an S Class. Harold commented that it was hard to photograph her under her current shelter (see below bottom). The 1st group of photos below were taken some years ago before she deteriorated but give a good idea of her final, “cruising” configuration under Ted Fitzgerald’s ownership.

Interested parties can contact Harold via WW  or Grant Firth at gfirth1955@gmail.com

Unknown-9

RECENT PHOTOS

Spangalang

Unknown-1

SPANGALANG 4-Sale

Back in 2012, in the days before waitematawoodys.com , I posted a story on the WoodenBoat magazines online forum about the building of Spangalang, a 14’6” Whilly sail boat, designed by Iain Oughtred.

She was built by Gary Drummond, who lives in Nelson & is the father of a good personal friend. Gary started the build in May 2011 & finished her in March 2012.

I followed the build with much interest & was amazed by Gary’s build quality & attention to detail. The boat won best new build at the Lake Rotoiti (Sth Island) classic boat show in 2012.

Last week I was contacted by Gary who sadly is having to look for a new owner / custodian for Spangalang. It’s not often that any Ian Oughtred craft pop up for sale in NZ & even rarer for one of this quality.

Interested parties could initially contact Gary via email    gvdrumdoon@gmail.com

I have reproduced Gary’s story on the build – it’s a good read – Enjoy.

PROJECT – WHILLY BOAT   (as told by Gary Drummond)

“This is my fourth boat project. For many years I have been looking for a suitable dinghy design and finally after checking out many designs settled on this one admiring the lovely sheer line. The other criteria was that it had to fit in my existing workshop. After cramming all my machinery in a huddle between two doors there was enough room including a fold down plan desk.

The frames were all 25mm dressed cypress fastened with reclaimed 65mm roofing screws and Titebond adhesive. The building frame was bolted to the concrete floor which allowed me to pack and level to adjust for the uneven floor  and a slight bow in the main 140×45 bed beams. All of the framing timber came from trees that we had planted years earlier in our small forestry block.

Screen Shot 2017-12-06 at 3.30.10 pm


(Building frames setup)

DSCF3157

STEMS – The stems were laminated using Rock or Cork Elm (Ulmus thomasaii) as the timber was recommended for boatbuilding in Iain Oughtred’s book “Clinker Plywood BB Manual” and also in Clinker Boatbuilding by John Leather. I had previously flitched some trees we had growing on our creek bank and was aware on how well it bends. Not wanting to set up a steam box I first tried a wet soak for a day then clamping in the mould with additional spring chocks and left it to dry out. That was successful but it was quite easy to pull the laminates round the curve dry and clamp in place, so that was the method adopted. The building notes suggested a 3mm spring each end to the curve, but after release from the jig 5mm would have been better to allow for the relaxation or creep after gluing.

Screen Shot 2017-12-06 at 3.29.41 pm

(Stem pre-soaked bending trial)

 PLANKING – I discussed plywood species and potential suppliers with two local boat builders and the recommendation was, “Meranti Ply” Part of our local coastline has beautiful golden sandy beaches compete with rocky granite headlands and submerged rocks, so reckoned a heavier garboard strake could be an advantage. I settled on the 9mm for the garboard and 6mm for the upper strakes. (8mm thickness is unavailable in NZ)

It was only when I was cutting out the garboard planks that I realised all laminates were not of the same species. On enquiry the suppliers comment was “Well 100% Meranti would be expensive and it is normal to have a mixed hardwood core” After all of my research on attributes of marine ply I had missed this one. A usual, don’t assume anything. The supplier was in another city so I didn’t see the ply before purchase. By comparison the 6mm ply appears to be 100% Meranti.

With some careful placement of the templates I managed to cut both of the garboard planks from one 2440×1220 sheet. Still I assume that is how it was supposed to be. I have been using my Hitachi jigsaw to cut out planks and have found that hollow ground Makita 2mm tpi blades give a good clean cut without the usual hairy edge.

Screen Shot 2012-03-11 at 11.50.53 AM

(Fastening the Garboard plank)

Bending the 9mm garboad plank to the stems seemed a bit of a mission for a start, until I devised a simple lever system with some short rope ends fastened through the frame one side, timber batten and light chain to hook over screw head fixed to each mould. This was especially useful when fixing the second plank, being unable to use clamps to the keelson. I have delayed fastening the ply until after the epoxy has set up for a couple of days and after trimming down to the stem-keelson surface. This was so I could locate a nail line that would be below my plane blade.

(Fastening the second Garboard plank 9mm+ ply)

 To locate the plank template and ply strake precisely in the same place each time for fitting and especially when at the glue stage I drilled two push fit holes for 50mm nails (minus heads) just below the 20mm joint through the template and into two of the station moulds. When I was happy with my template, marked and cut the paired planks about 2mm oversize (Not forgetting to drill the two location holes). Next I sandwiched the template between the two ply strakes and the faired the ply carefully to fit the template. On the second plank I glued the scarf as part of the plank gluing operation. The scarf was just clamped between two 40mm wide timber pieces without any location screws at the upper edge and to my horror after cleaning up and eyeing over the upper edge noticed a slight out of a  fair alignment. Oh well with a little luck it should take up with the fitting and fastening of the next strake. Just one temporary screw would have kept all in line. Oh bother.

For additional temporary fastenings in between clamps I have been using 30mm “Button Head” screws which worked well except for at the finishing stage having to plug the many screw holes. The plank scarf misalignment didn’t go away, I just had to rectify it before proceeding further it so purchased the second Japanese Saw without the backing rib, recut the epoxied scarf and also cut back 200-300 along the glue line between planks all to allow some movement. To ensure the correct fair line along the strake I cut and fitted a curved beam between the adjacent frames that I could clamp the re-cut scarf to achieve a fair line.

When fitting the outer stems, skeg and brass wear strips I made a sketch locating all of the screw locations to ensure when fastening the next layer I didn’t end up drilling a screw hole into an existing one below, however I did have one senior moment and had to move one hole.

This brings to mind the fragility of the posidrive square head silicon brass screws when forgetting to back off the torque setting on the drill. After shearing off a few I resorted to a hand held square driver for the final tightening.

The brass wear strips were, for better or worse polished and coated to minimise later tarnishing. When countersinking for the screw heads using a suitably reground 10mm twist drill the drill picked up the brass strip and a formed neat 10mm hole clean through. A moment of dilemma as I didn’t want to alter the screw spacing and have a spare hole. Anyway I didn’t check on the potential difference between brass and solder and soldered up the hole and started again this time with the strip in the drill stand vice. Since then I am told when modifying a twist drill for countersinking grind back the spiral cutting edge to near vertical so it is working with a scraping shearing action. This modification has since worked satisfactorily on some stainless steel.

Turnover – At Christmas time with the help from daughter Paula and two nephews we carried the hull out on the lawn and made the turnover, replacing it back on the build frame. I took care to reposition the hull exactly beneath my overhead centre line fixed to the roof truss collar tie and then set up a system of props and braces making sure all was vertical so I could make use of the level to align some of the interior components.

Interior Fitout – The mahogany strips for the gunwale needed scarf jointing in two places over the full length so set up a jig for cutting them on the circular saw which was quick and accurate, but in hind sight wonder if hand formed scarfs with the plane (once I got the hang of it) would have been just of quick. A lesson learned. I machined the qunwale strips to final dimensions, when I should have allowed say 3mm extra width for the final top trim of the four laminations incl, the ply sheer strake. To form the quarter round edges to the gunwale I cut them using the router hand held and inevitably left some black burn marks which would require a filler to disguise, so have left them as is just as a reminder of my folly.

Once again, sometimes a hand formed shape can be equally crafted successfully without the potential problems inherent in using power tools.

I formed the breasthooks from southern rata and the individual pieces when finally formed almost looked like small pieces of a sculpture. I opted for two 13mm oak dowels to reinforce the two halves. Setting up a jig on the lathe to drill the dowel holes was more of a challenge than making the dowel pins. Just this small operation to form and fit the two breasthooks ran away with three days.

Interior layout – Locally we have several tidal estuaries and a maximum high tide of some 4.8 metres and so decided on the pivoting centre board as being the best option for these conditions.  This option required the center thwart to be moved aft 200 mm. Next I decided to include the stern sheets (Aft decking) for which the forward bulkhead is positioned 150mm forward of station#6. Now, all of that was hopefully simple until you get in to start rowing only to find that with my 1.8m tall frame I couldn’t straighten my legs out for a comfortable rowing stance with the shortened cockpit length.

 Well at the Lake it wasn’t a problem to sit on the stern sheets and row looking forward and it also helped in keeping clear of all of the other canoes, yachts, skiffs, steamboats etc, during the drive past. To sort the problem, I have formed a shaped clip-on thwart extension that sits over the center case. The only potential problem being that the seating position will be further away from rowlocks requiring a bit more back bending when rowing.

Screen Shot 2012-03-21 at 3.24.02 PM

Protective Coatings – The complete hull firstly had two coats of West Epoxy. The exterior then had two prime coats, two undercoats, and two finish coats of paint, all wet and dry sanded I could only find one small flat on the second strake. Those final glossy finishes sure show up any earlier mistakes, and at that stage  too late to rectify just like the odd pencil line I failed to erase before applying the epoxy. The interior is all bright finish using a two pot varnish.The thwarts and floor boards received an matt oil finish with “Deks Olje”

Timber Spars – My idea was to obtain some unwanted spars and recut and reshape them to meet the requirements. Well what was a light rectangular boom to be formed into the yard, was after I had started splitting it longitudinally turned out to be a hollow spar and what initially was to be a simple say cut and re-glue turned out to be a little more complicated. On completion though I must say that it is light. A similar complication with the mast thought to be hollow as it was so light, I think it is spruce timber. After detailed checking of the diameter I found that it required widening in one direction to achieve the design. So it has ended up also as hollow spar. Next was the boom. A friend of a friend had a surplus oregan flagpole which after splitting it on the bandsaw and being careful not to cut it with a longitudinal wind managed to machine two suitable pieces from it. Having two hollow spars couldn’t resist now running the router along each piece to hollow them out. All went well but I will be holding my breath when under sail and the first big gust swoops in.

Screen Shot 2012-03-21 at 3.24.31 PM

 Rudder- I chose the swivel rudder option and it was all fairly straightforward until I came to choosing the gudgeon and pintals.  No one locally seemed to have anything like what I needed and I am now wary of purchasing fittings from the net as the nice pictures you see and the product you receive aren’t always the match your expectations. Anyway I drew up what I needed and had a Stainless Steel Fabricator make them without any fastening holes and extra length to allow for fitting modifications. There just aren’t that many double ended boats around to get any ideas from. Luckily there was sufficient room behind the formed pin holes to be able to redrill a set of new holes in a straight line for the pins with the pintal frame sitting snugly against the curved stem. I should have drawn them on the full sized on plan and then could have worked out the offset hole positions pre fabrication. Next time.

The Tiller is laminated cork elm with a 10mm hardwood dowel either side if the slot which fixes over the rudder head to ensure it doesn’t part company.

Choosing the name – With both sides of our family being of Scottish decent and the boat design coming from the Shetland Island the name just had to reflect all of this history. Firstly I scoured Celtic Scottish on line dictionaries and finally resorted to making contact with a relative from the Shetlands. He supplied me with a list and that was it.

Building Aids – Masking tape – should have used it more often to eliminate the many epoxy runs that are difficult to clean away under clamps.

Skarsten Scraper – great for removing epoxy runs and gauging grooves in the ply.

Steel Scraper – As well as straight I have made several with varying curvatures from old band saw blades.

Cam Clamps – Hadn’t seen one until I read Iain Oughtreds book, made a prototype and then a few more with a 200mm reach. Clamping pressure is not as great as a G Clamp, but is quite adequate for clamping glue jobs and just holding things.

Drawings  – These were good to work from, but, always read the fine print as I have in the rack a 1.97m half made boom. The actual Balanced Lugsail boom was 2.62m long.

Rigging – Iain Oughtred directs the builder to previously written articles, none of which I managed to locate. However on one of the many web searches via the site “The Mother of all Maritime Links”  http://www.boat-links.com  From this site I found just what I needed at,  http://www.storerboatplans.com/GIS/GISRigging.html

Now for some rope and fittings and we will finely be under sail on the water.

 Conclusion – This has been a great project and has drawn many favorable comments. Apart from the personal satisfaction of having created this thing of beauty it has been a great brain teaser. Every day there have been problems to solve such as how do I, set that out, clamp it, etc., etc.,. I am sure the brain has had a good workout and I will miss all of the challenges.

However, getting out on the water is going to be fantastic.”

DSCF3326


Mystery Location With Lots of Woodys at Anchor

Unknown-1

Mystery Location With Lots of Woodys at Anchor

The photo above was sent to me by Heather & Keith Nicholson, it was originally posted on the ‘Whangarei Way Back When’ facebook page – Heather thought it might be Mansion House Bay but it could also be Russell.

Whatever the location, there is a great collection of launches in the bay.

Can we confirm the location & ID a few of the woodys at anchor?


Lake Rotoiti Launch – Rescued & Lost?

Unknown

Lake Rotoiti Launch – Rescued & Lost?

The above photo was sent to me by Greg Noble & would have been taken around 1973/4. Greg found this launch half submerged, just south of the Okiri Falls side of Rotoiti, Rotorua, miles from any houses.

Greg got her floating and towed her to a pull out on the Maori Land between the two lakes. Initially Greg lots of ideas of restoring her but as often happens, never got round to it. While she was there somebody told Greg that she had broken a speed record on Auckland Harbor, this impressed Greg at the time but he can’t recall any of the details now, nor her name.

Sadly, she was left there and Greg has no idea what became of her. The thinking was that at least she was safe & people could see her and admire her and hopefully she would be saved from eventually going under.

So woodys – the big question Greg would like answered is – did she survive & if so what became of her.

Would be cool to also put a name to her & confirm the racing pedigree.

What prompted Greg to send me the above was the Mystery Launch story on 08-11-2017 (link below), what say those with an eye for lines – similar / same ?

Mystery Launch   08-11-2017


CYA Patio Bay Weekend – 2017 – 50+ Photos

P1250526

P1250630

P1250596

P1250681 (1)


P1250732

P1250733

P1250725

CYA Patio Bay Weekend – 2017

The photos show that 2017 was another cracker Patio Bay year, but what photos don’t get across is what a great group of woodys were there. The numbers were down a little on previous years but those that made the trip will remember it as one of the best. Plenty of room to walk around & mingle without standing on someones dinner plate.

Several Riviera owners, did they bit to re-confirm that they all have big egos & small brains – motoring thru the race finish line at 25+ knots & creating wakes you could surf on. A little exciting if you are sitting in an 8’ dinghy taking photos & wondering if the Riviera is on autopilot & the skippers playing with his small willy 😦

One of the Patio Bay race traditions is the winning skipper of the A Division has to fill the trophy barrel with rum for the following years party. Last year Prize was the winner & based on dock chatter, a sample was drawn off for analyse at the Mount Gay distillery –  purity & alcohol content results to follow 😉

(remember to click on photos to enlarge)

P1250726