Today’s tale comes to us from Bay of Islands woody – John Gander via Dean Wright and covers a wee oops that the 1967 Jorgensen built woody workboat had in Port Hardy, in the Marlborough Sounds in the mid to late 1970’s. As always,I’ll let John tell the story.
“Our phone rang in the early morning and there was a certain amount of urgency in the callers voice ‘Rutherford’, the ‘Matai’ is aground in Port Hardy, get your gear together, I have a chopper standing by at Omaka get here as quick as you can.
The caller was Bill Rutherford, marine assessor, I had done a lot of salvage work and repairs with Bill, and I knew the Matai and Gerry Fissenden her then owner-skipper.
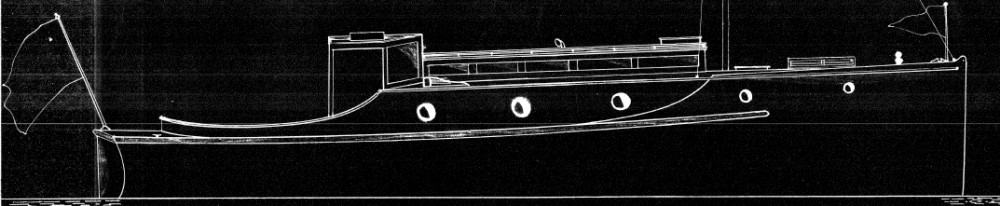
Maitai is a carvel built launch designed and built by Peter ‘Pop’ Jorgensen at his Waikawa Bay boatyard for Ray Roach. Ray was a well known and very experienced commercial launch man in the Marlborough Sounds, and with a majority of properties in the Sounds having no road access at this time, tow boats with a punt astern or alongside were a common sight, often loaded with building materials and machinery, or farm stock.
Pop Jorgensen’s brief was to design and build a manoeuvrable, strong tow boat with a good towing post, to handle a sixty foot punt, she was powered by a 4-71. N series G.M. with a 3:1 reduction with a four blade Nalder propeller, and launched in 1967.
I arrived at Omaka airdrome as the helicopter was being made ready, a quick loading of my tools including dive gear, tanks and air lift bags. We didn’t know at this stage if Matai would be above or below water, there was one possible complication. It is very rare to see fog in Blenheim, but this day was one of those rare days, thick fog not ideal for flying in such restricted visibility. With a heavily loaded helicopter with three of us aboard the pilot’s option was to fly just above the main highway and follow it to Havelock, I was relieved to see the fog was clearing as we flew out over the water at Havelock, it was here that the pilot thrust a lands and survey map into my hand, saying you know the way guide me in the right direction.
I was a bit concerned at this low altitude flying it takes a bit of getting used to, but one thing we wouldn’t have far to go before a splash, and it was a bit of a relief for me, as we just cleared the hills at Port Ligar to fly across Admiralty Bay to Port Hardy, d’Urville island. As we flew over we could now see the predicament that Matai was in.
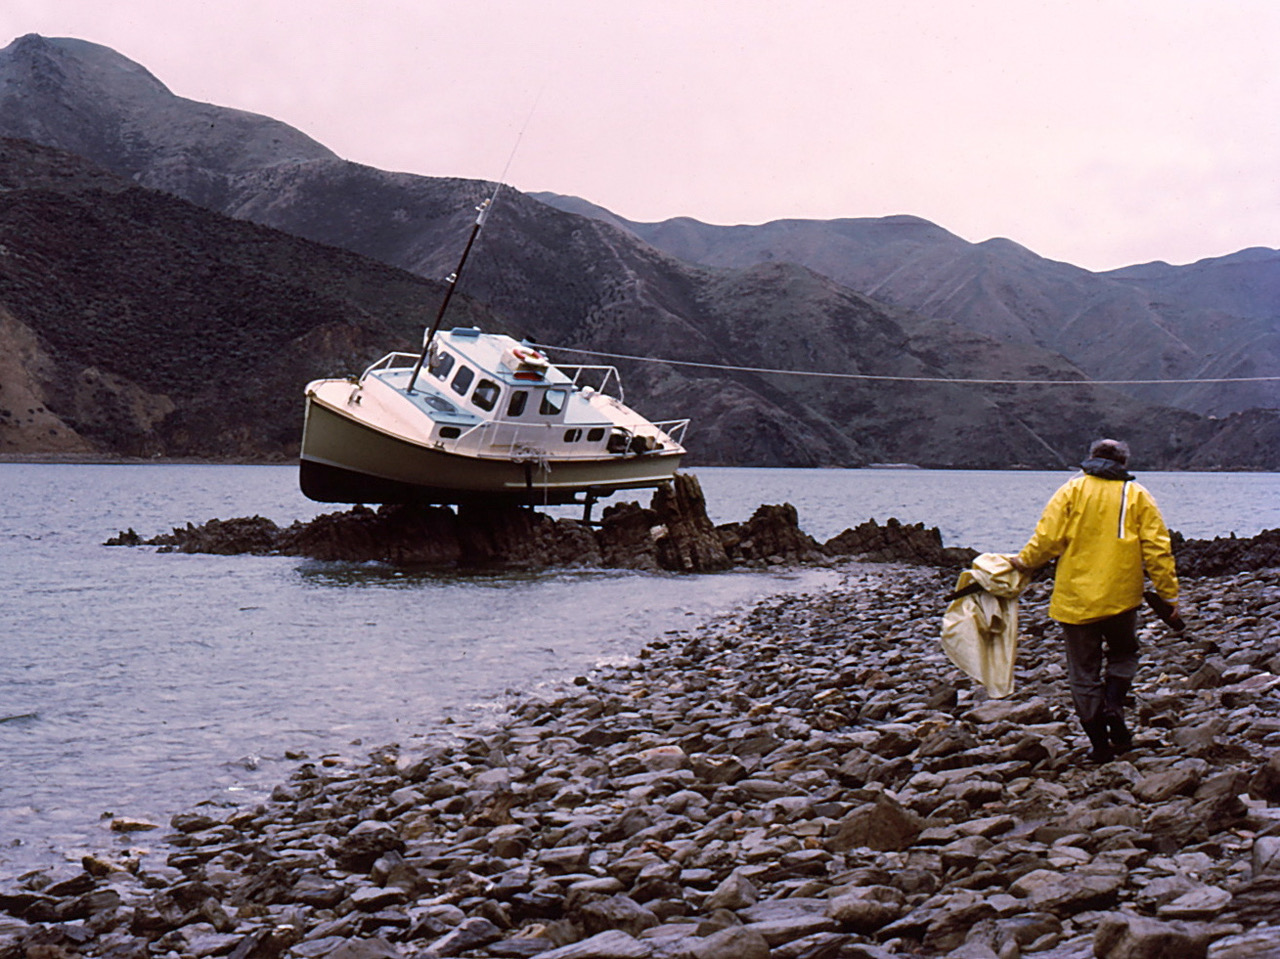
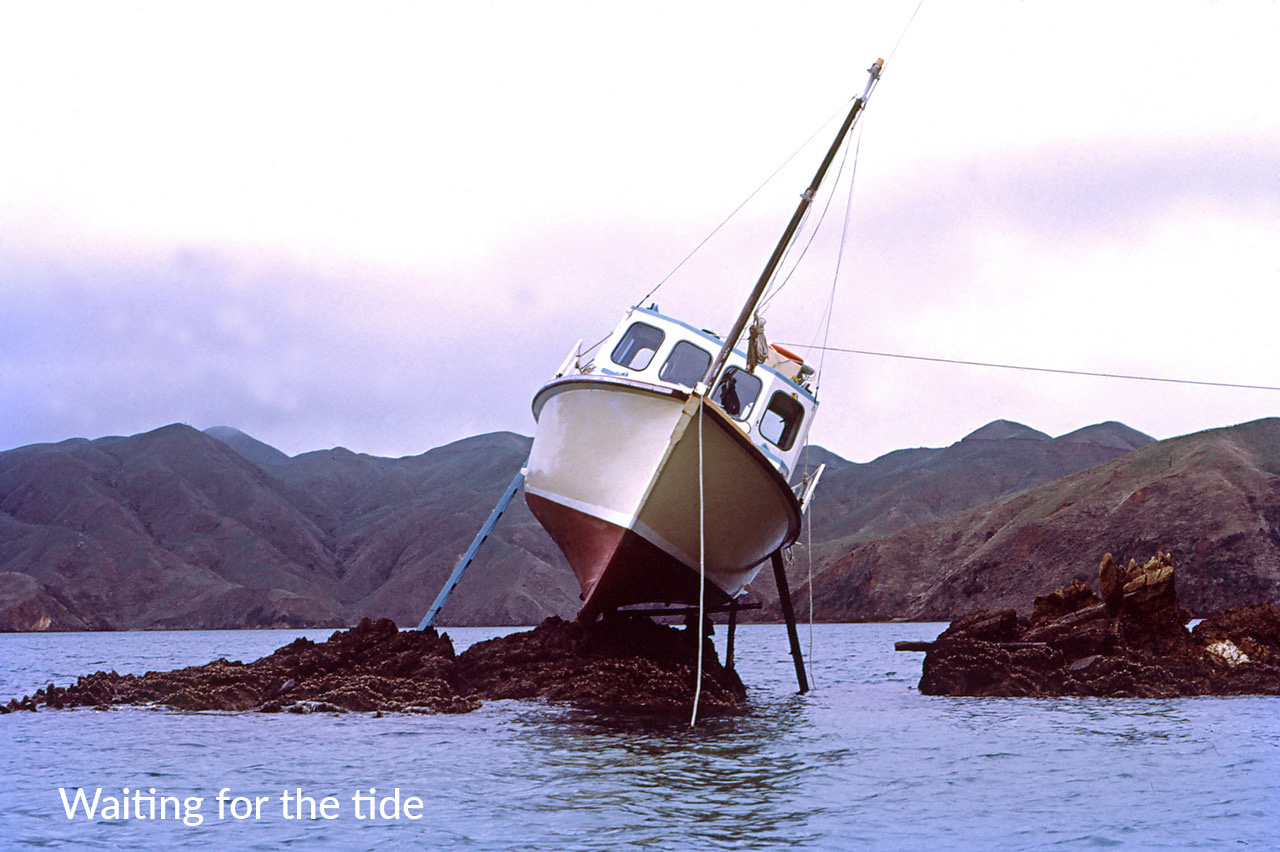
There was a gale of N.W. in Tasman Bay and the Cook Strait, and Gerry had left the punt anchored with a load of sheep aboard in Wells Arm, and was then making his way in East Arm towards Allman Bay when right on H.W. Matai went up on an off lying rocky point, it was about a 3.2 m.tide that was falling and we could see the urgency of the situation.
A great thing about a chopper is that a quick fly around gave us a good look and we could see that some props were needed and fast before she healed over much more, there were some sizeable Manuka trees further up the hill but nowhere to land nearby on the flat at hight tide. As the pilot brought one skid to rest on a rocky outcrop on the side of the hill, I was given instructions to keep my head down when I got out with sharp saw in hand, he didn’t have to emphasise these instructions. In quick time I was up the hill to cut three good size Manuka and then slide these down to the waiting dinghy, it was a wet job but we had these in place with not too much time to spare and Matai was made secure as she continued to dry out.
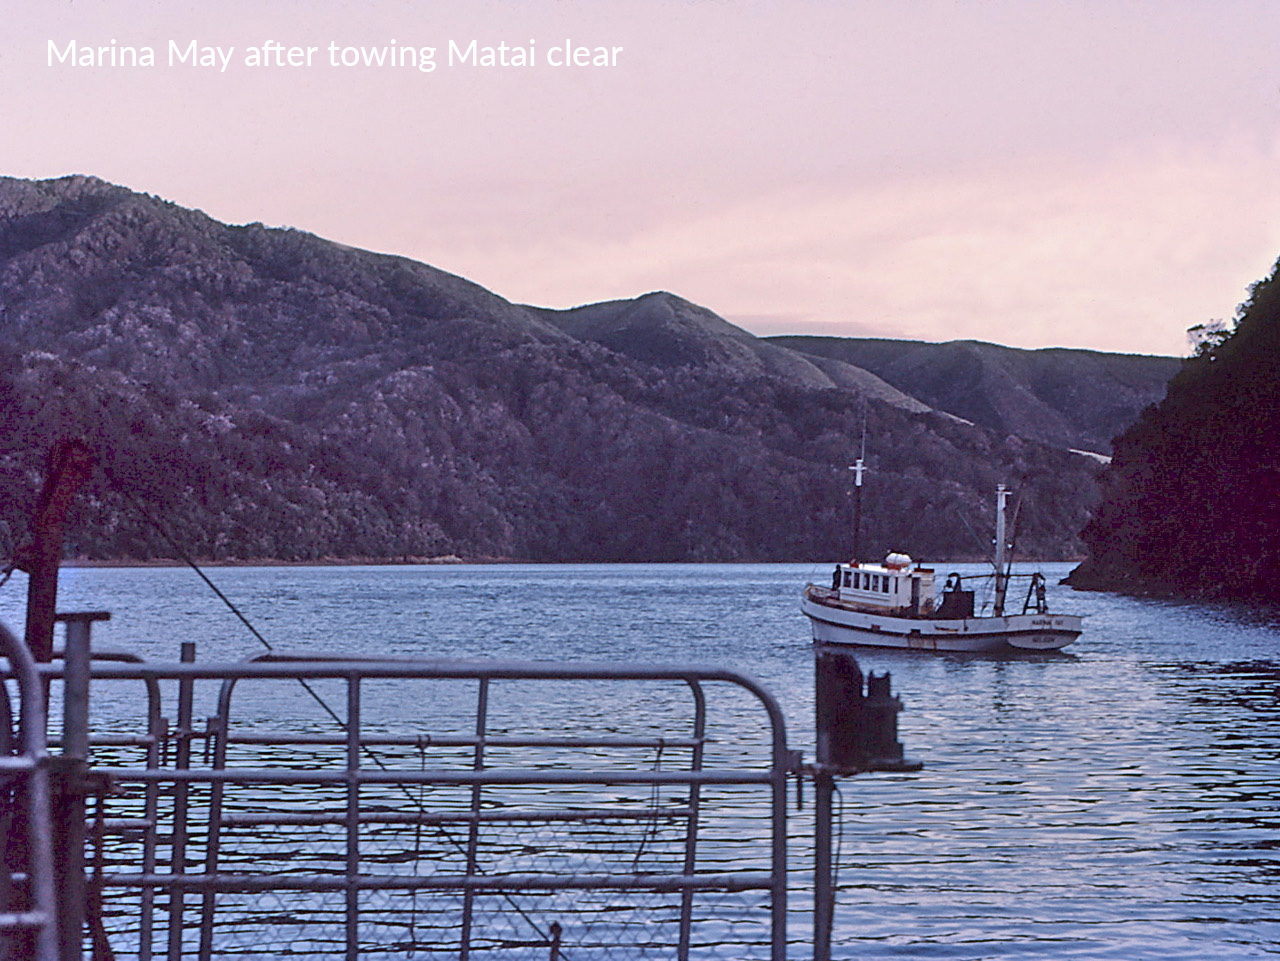
Bill put a call out and the Trawler ‘Marina May’ left Motueka to make her way to d’Urville Island in heavy seas, she had a rough passage but arrived before high water in the late afternoon and a tow line was made ready. Her skipper Robie Bloomfield positioned her just right and with a gentle hand on the power, eased ‘Marina May’ ahead quietly and with her own engine assisting Matai cleared the rocks and was afloat and away from the point.
It was three days before the sea subsided enough for us to leave and see Matai on her way, but she had comfortable accomodation and Bill and I were still on the payroll until we left Port Hardy. I think the Insurance company was well pleased with only a slipping and a small section of keel batten to be replaced”.
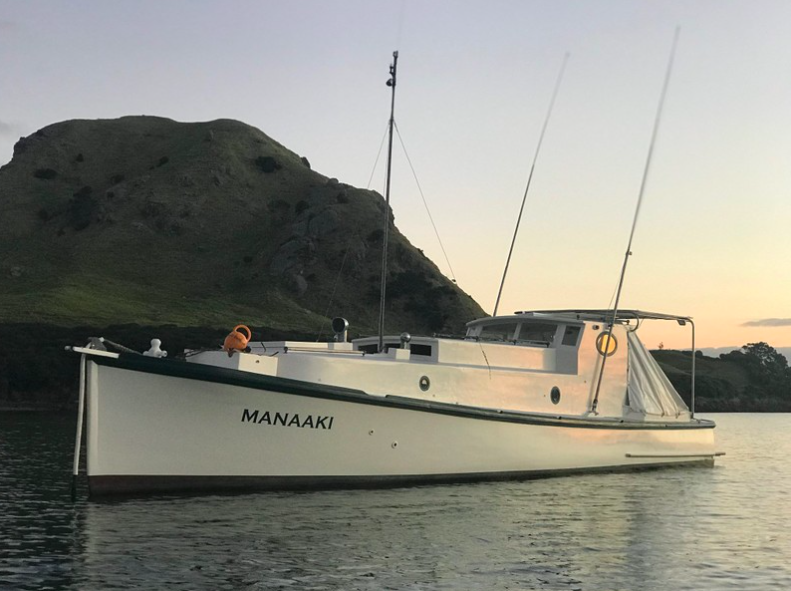
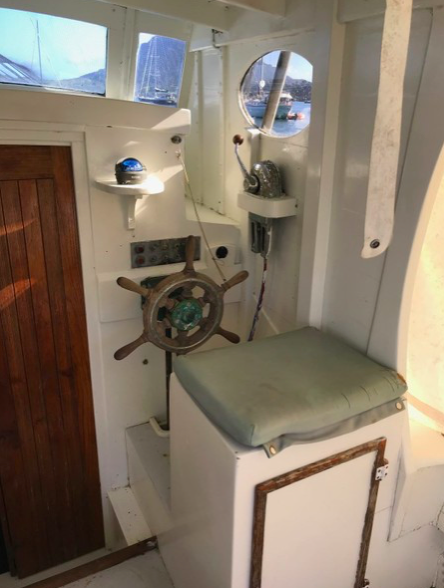
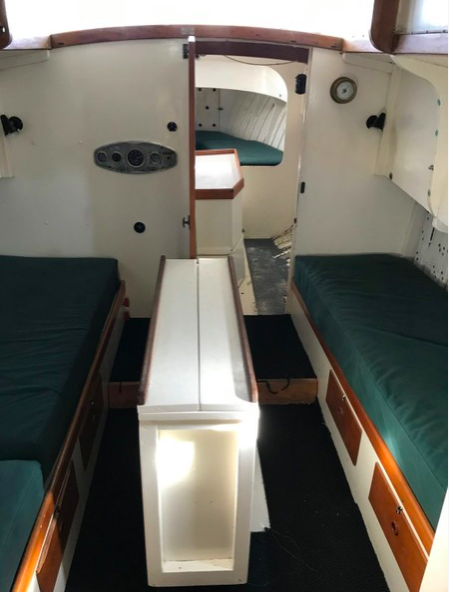
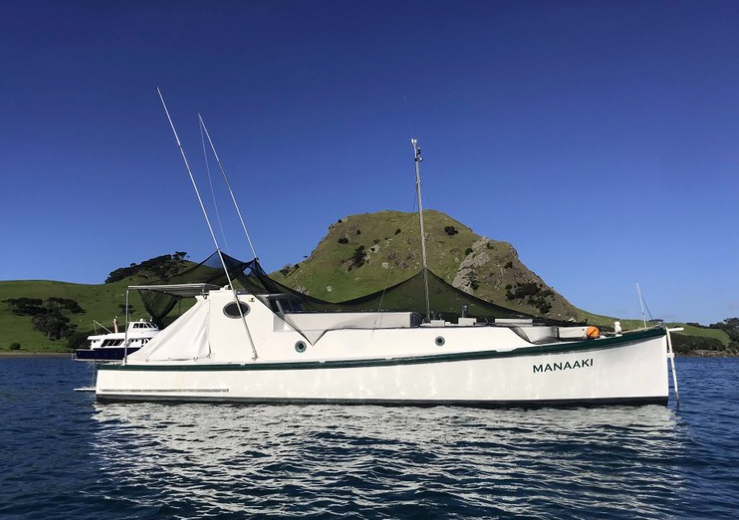
The 1928 Collings & Bell built 36’ launch – Manaaki appeared on WW back in 2015 (updated in 2018) and now thanks to a tme listing, we get to see down below.
Powered by a 75hp Ford, Manaaki has a 95 year old history of game fishing in the Bay of Islands, which she is still doing today. Check out the WW link below for lots of history and old photos on Manaaki https://waitematawoodys.com/2015/08/10/manaaki/
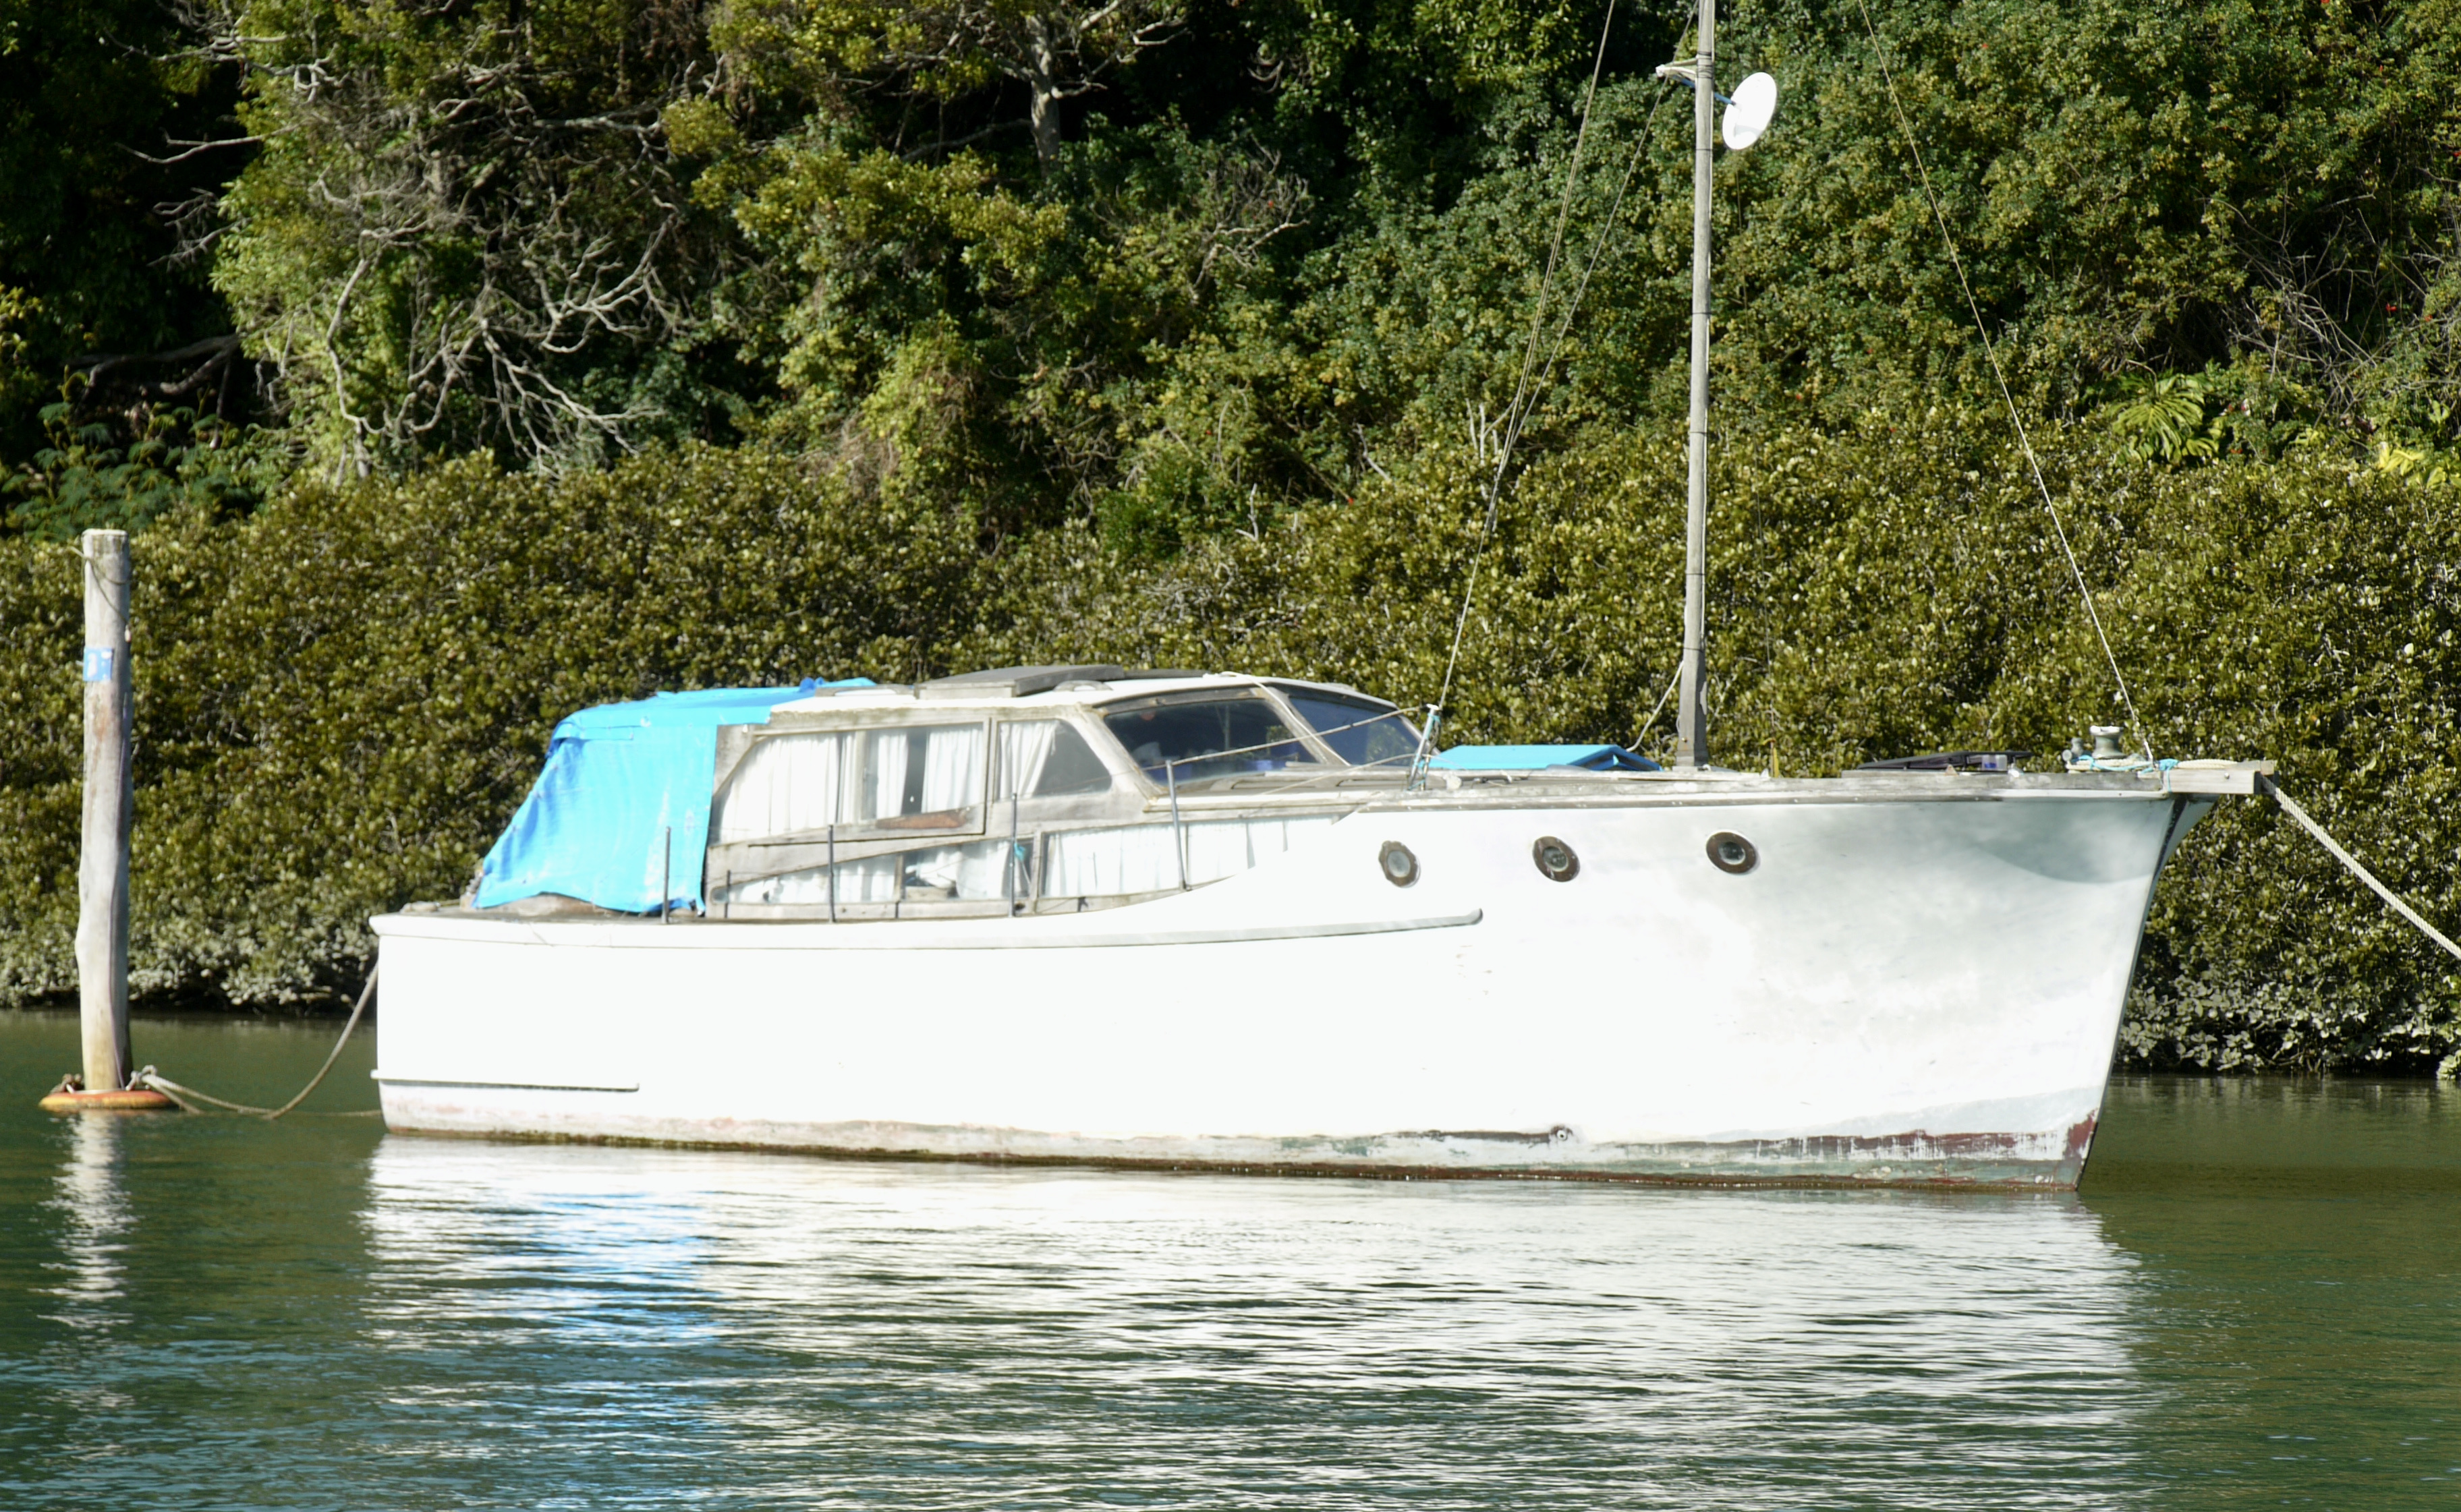
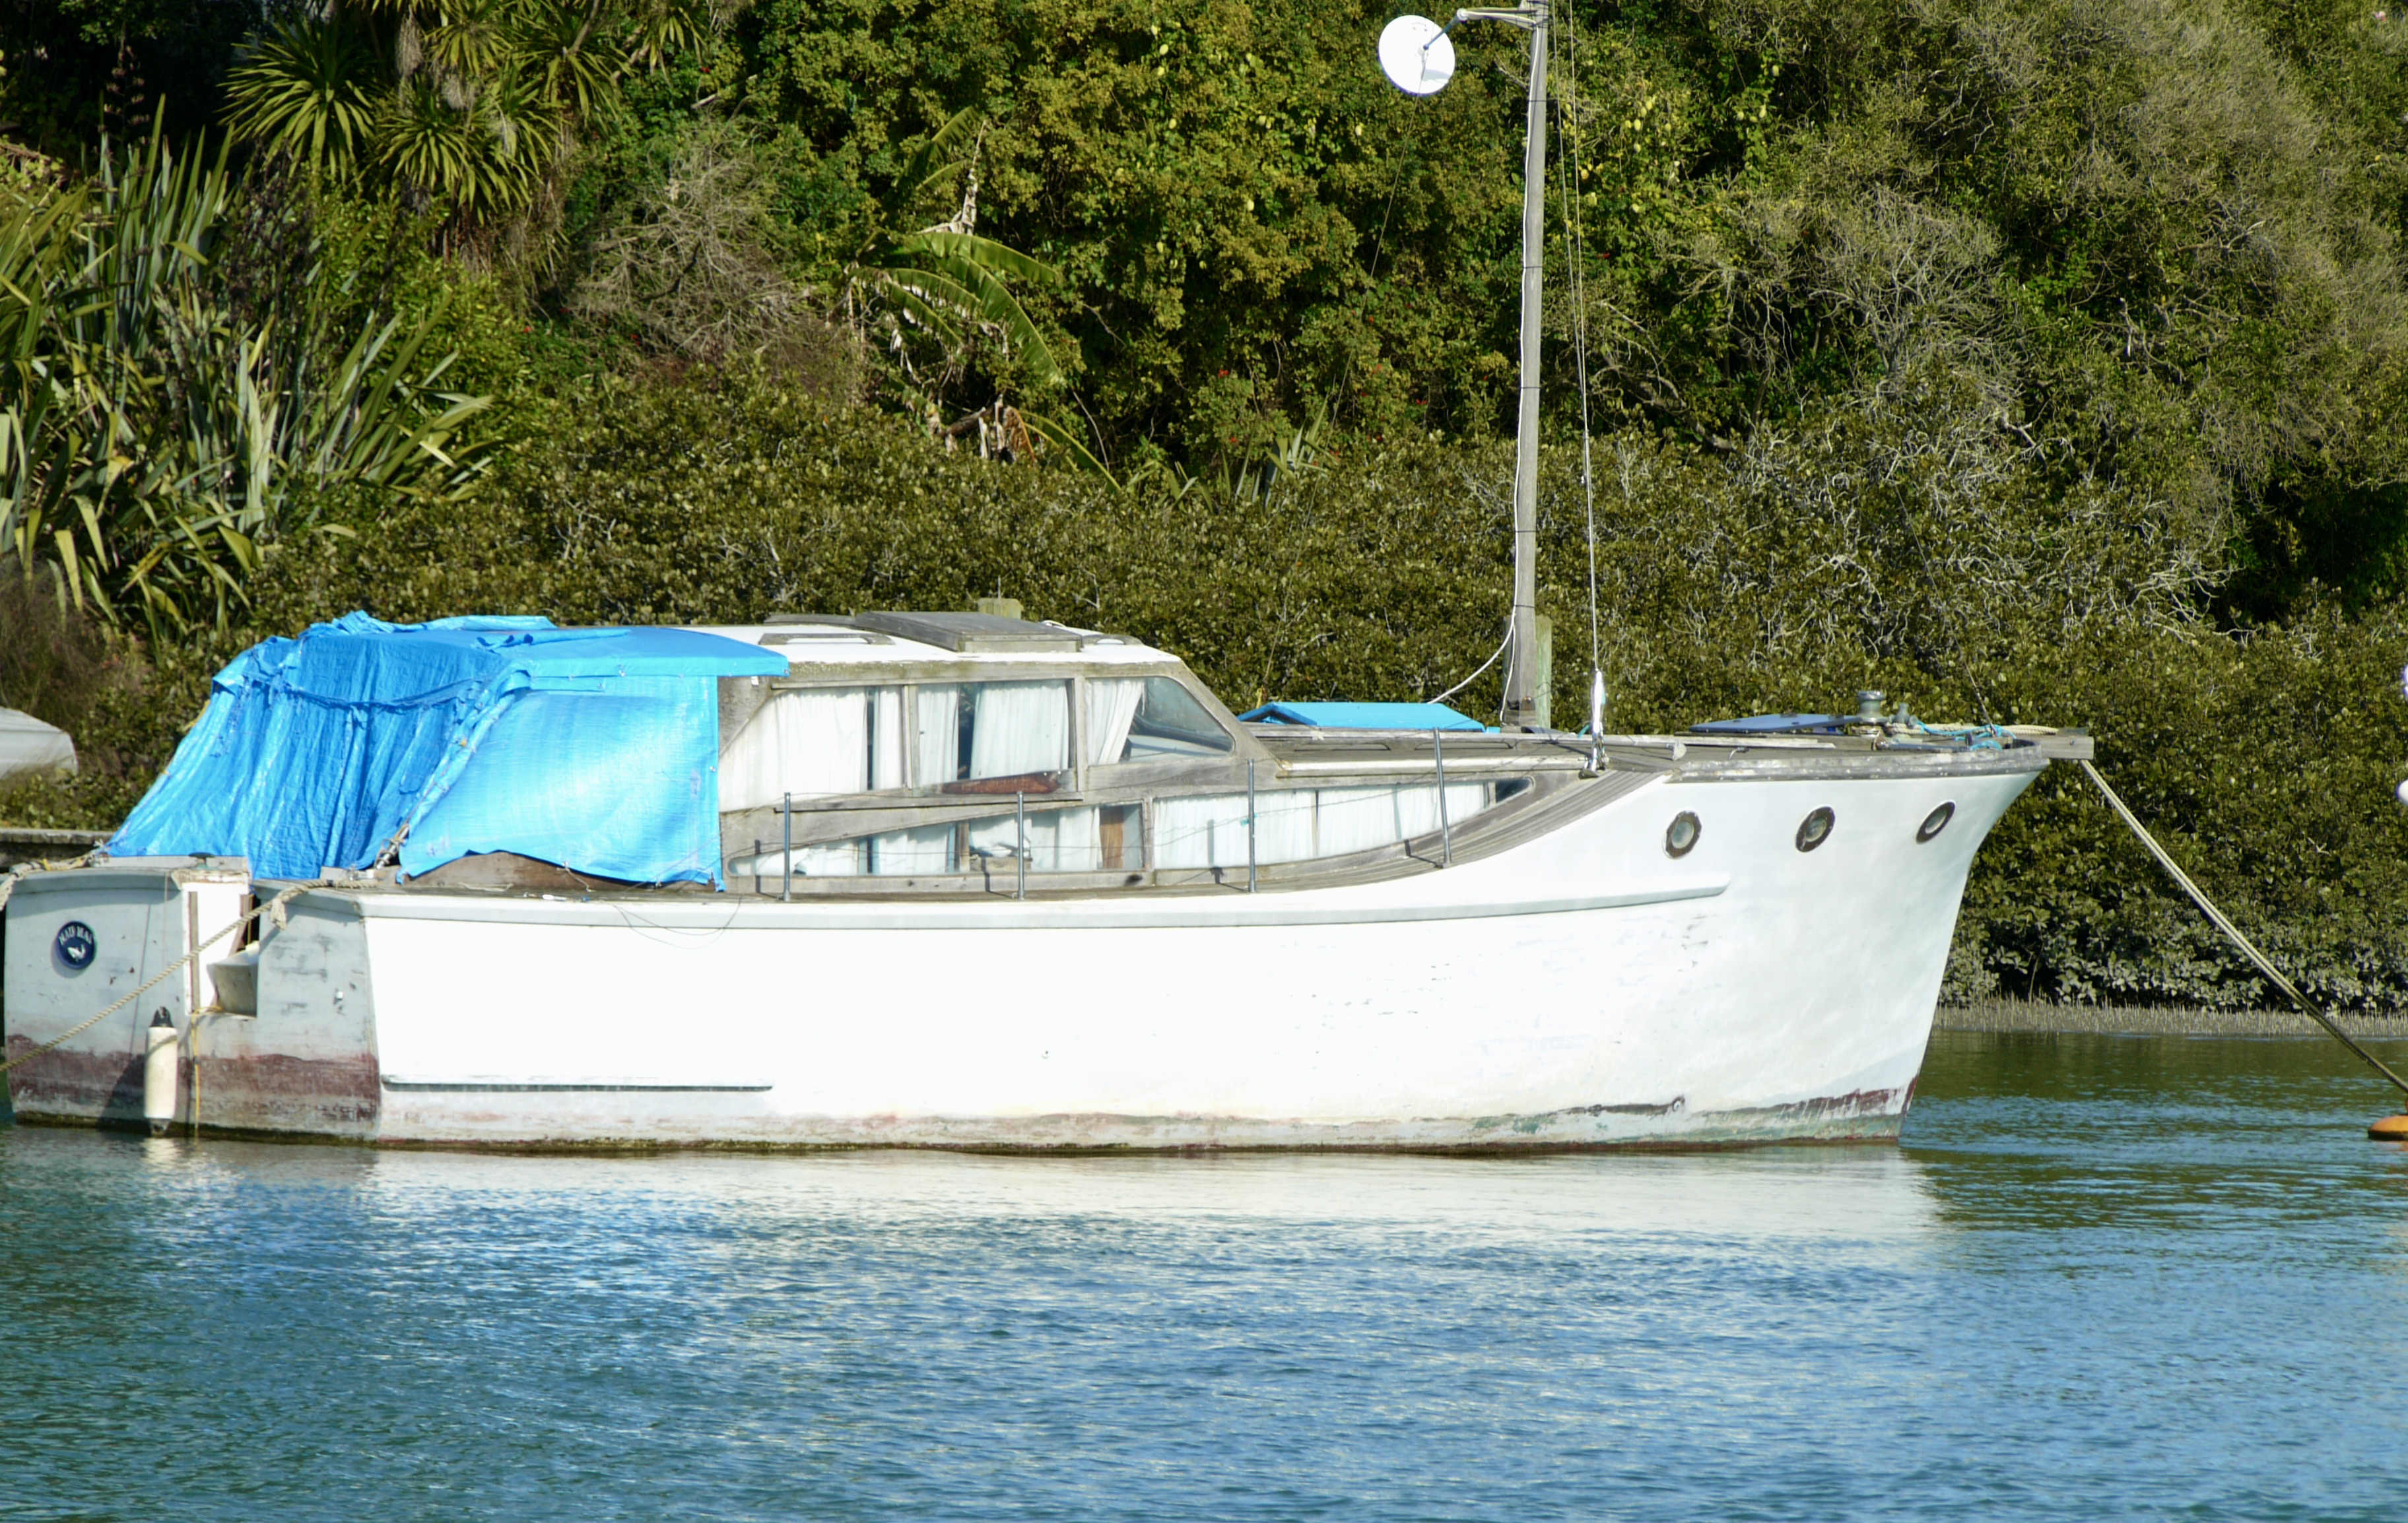
NAU MAI Cruising up the Tamaki River the other day I was saddened to spot the launch Nau Mai looking very neglected and run-down. Approximately 12 years ago the then owner was a friend of a friend and she was kept at Bayswater Marina near my berth. I believe these days he has moved one step closer to a coffin eg a camper van, but I’m sure he would still be stocked to see the boat these days.
Anyone able to tell us anything about her past?
John Bulivant photos below ex Ken Ricketts
09-05-2021 Harold Kidd Update – Alan Williams built her in 1964 for M.W.Mathieson.
Have had a wee bit of a technology mishap – so this story could look a wee bit different – will fix up tomorrow 🙂
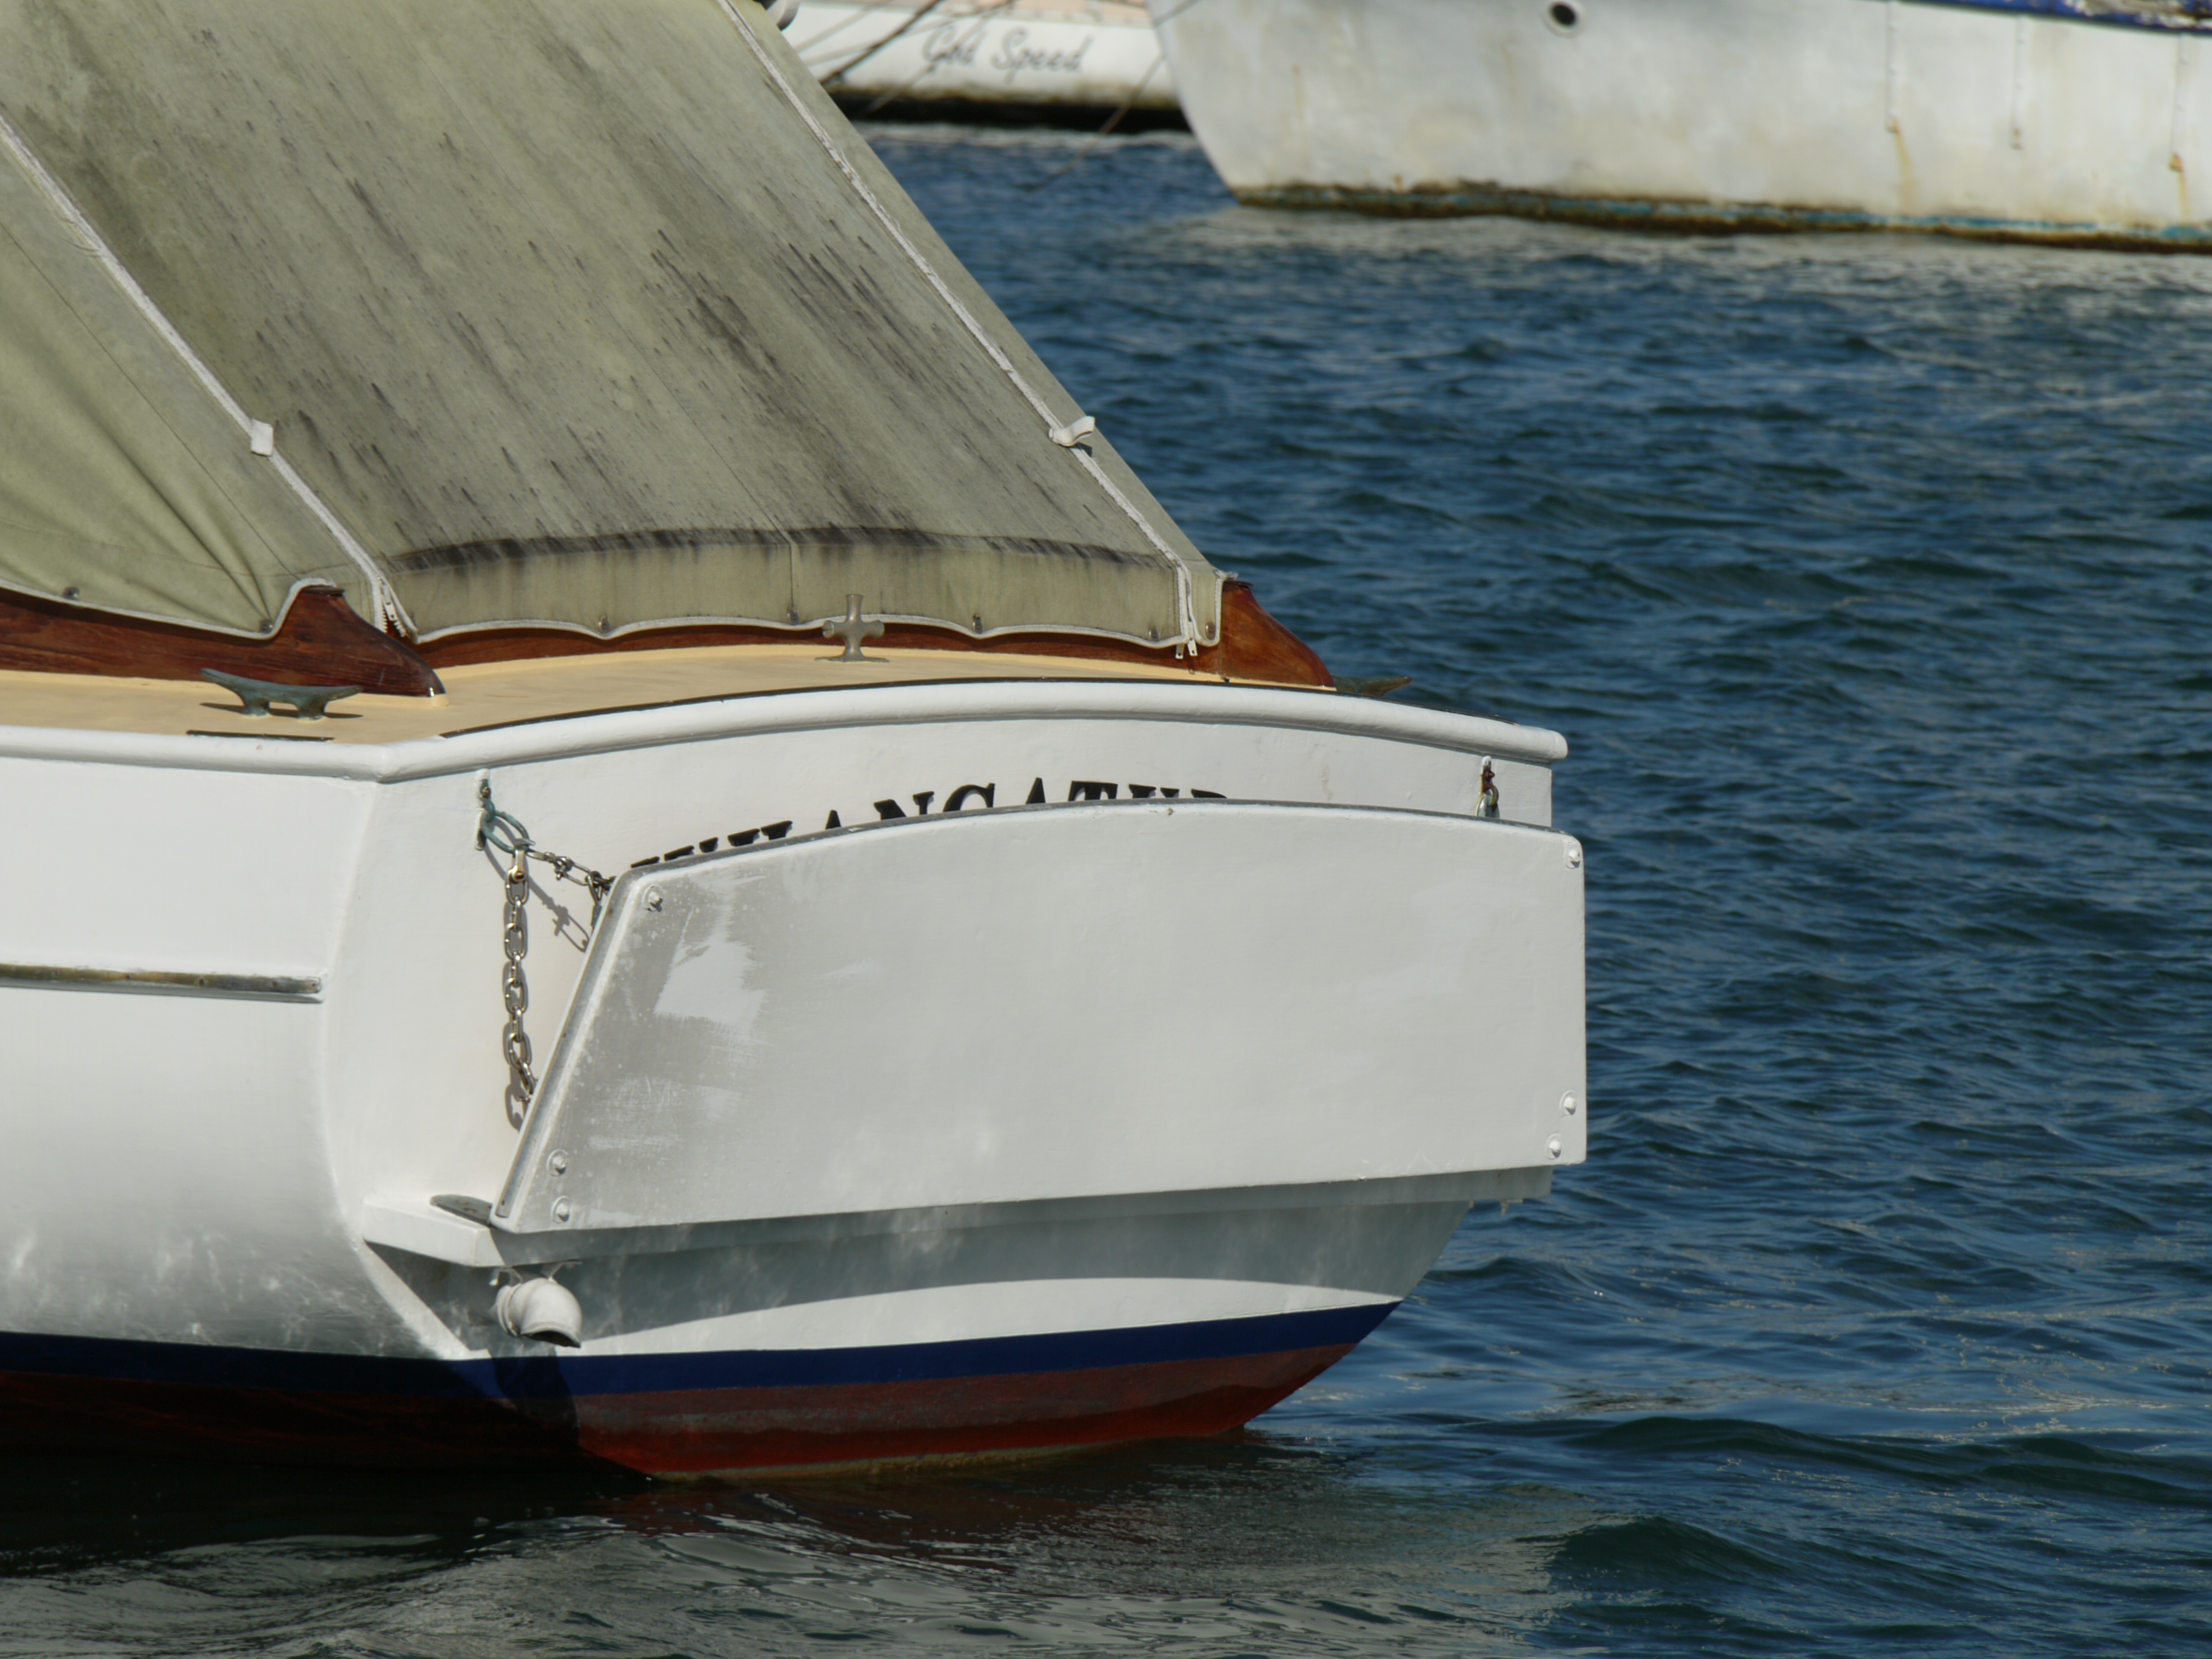
Travelling up the Tamaki River this afternoon aboard Angus Rogers launch – Centaurus, another story for another day, I spotted the above launch. I would very much like to get its name, it looks very familiar to me. If we can ID her, I’ll bore you with the details.
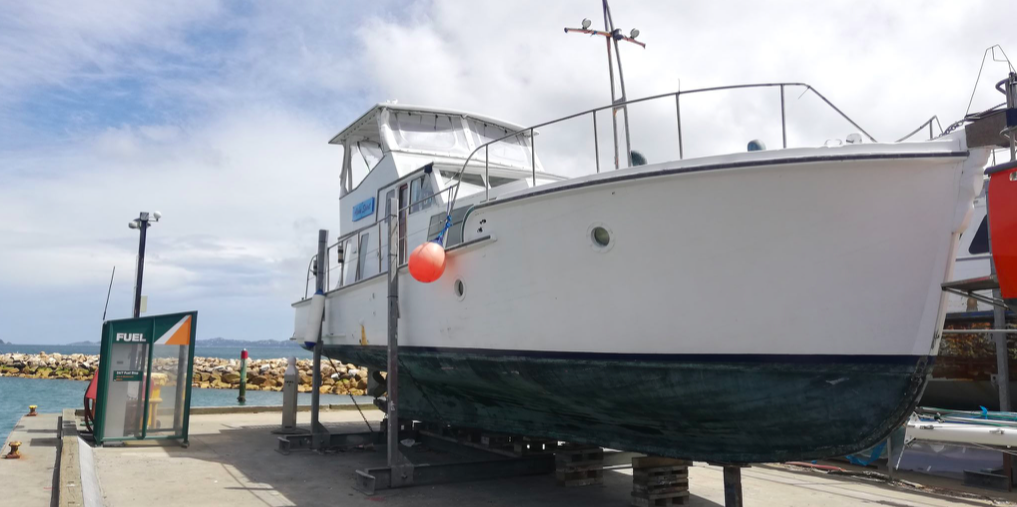
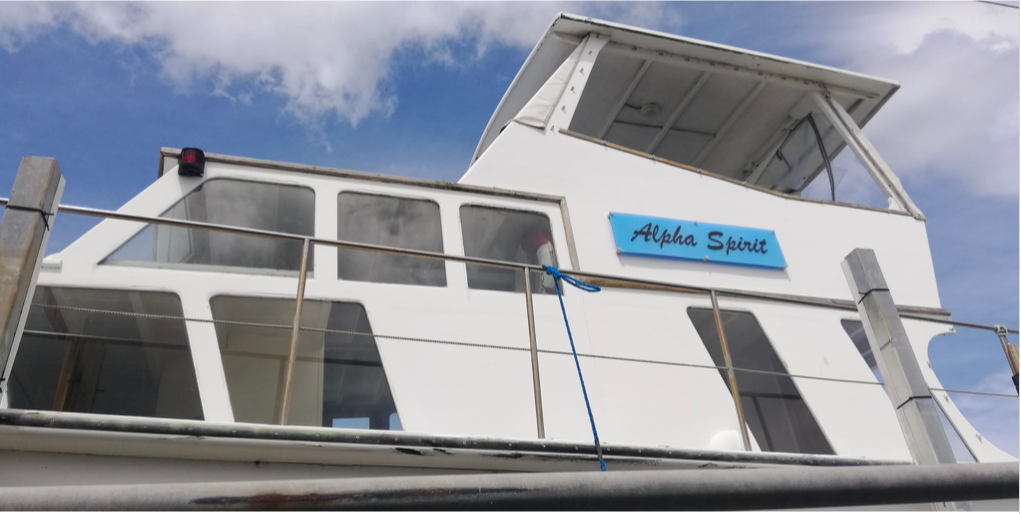
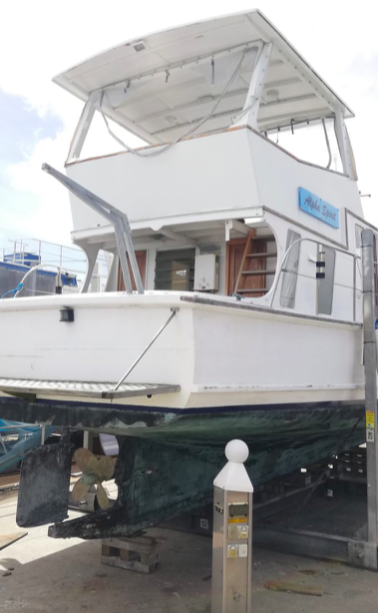
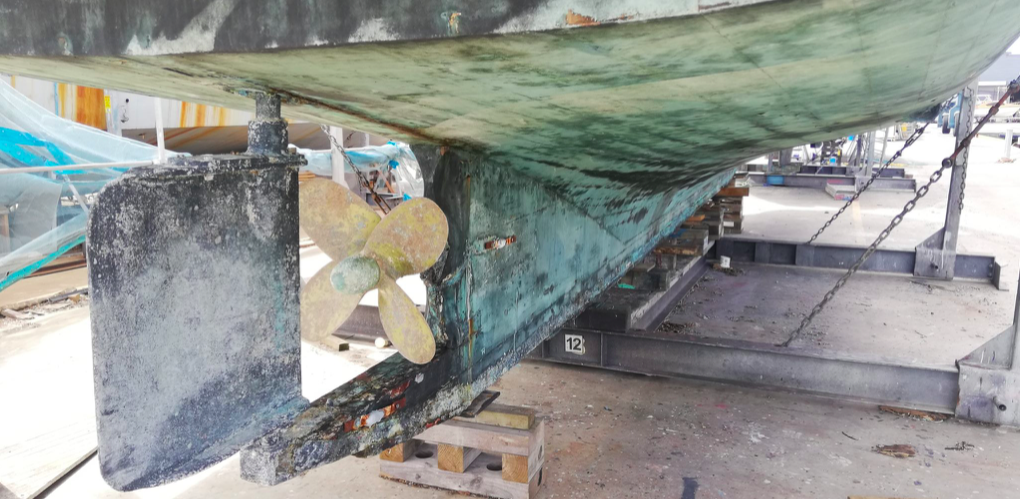
ALPHA SPIRIT Todays boat has me a little confused, the tme listing had a build date of 1970 but that hull looks older to me. The listing (thanks Ian McDonald) tells us very little other than that the engine is a Ford 4 cyl 2715E. There is a video link below for a peek down below.
Interested to hear if she sold and is there a plan to – ‘bring her back’
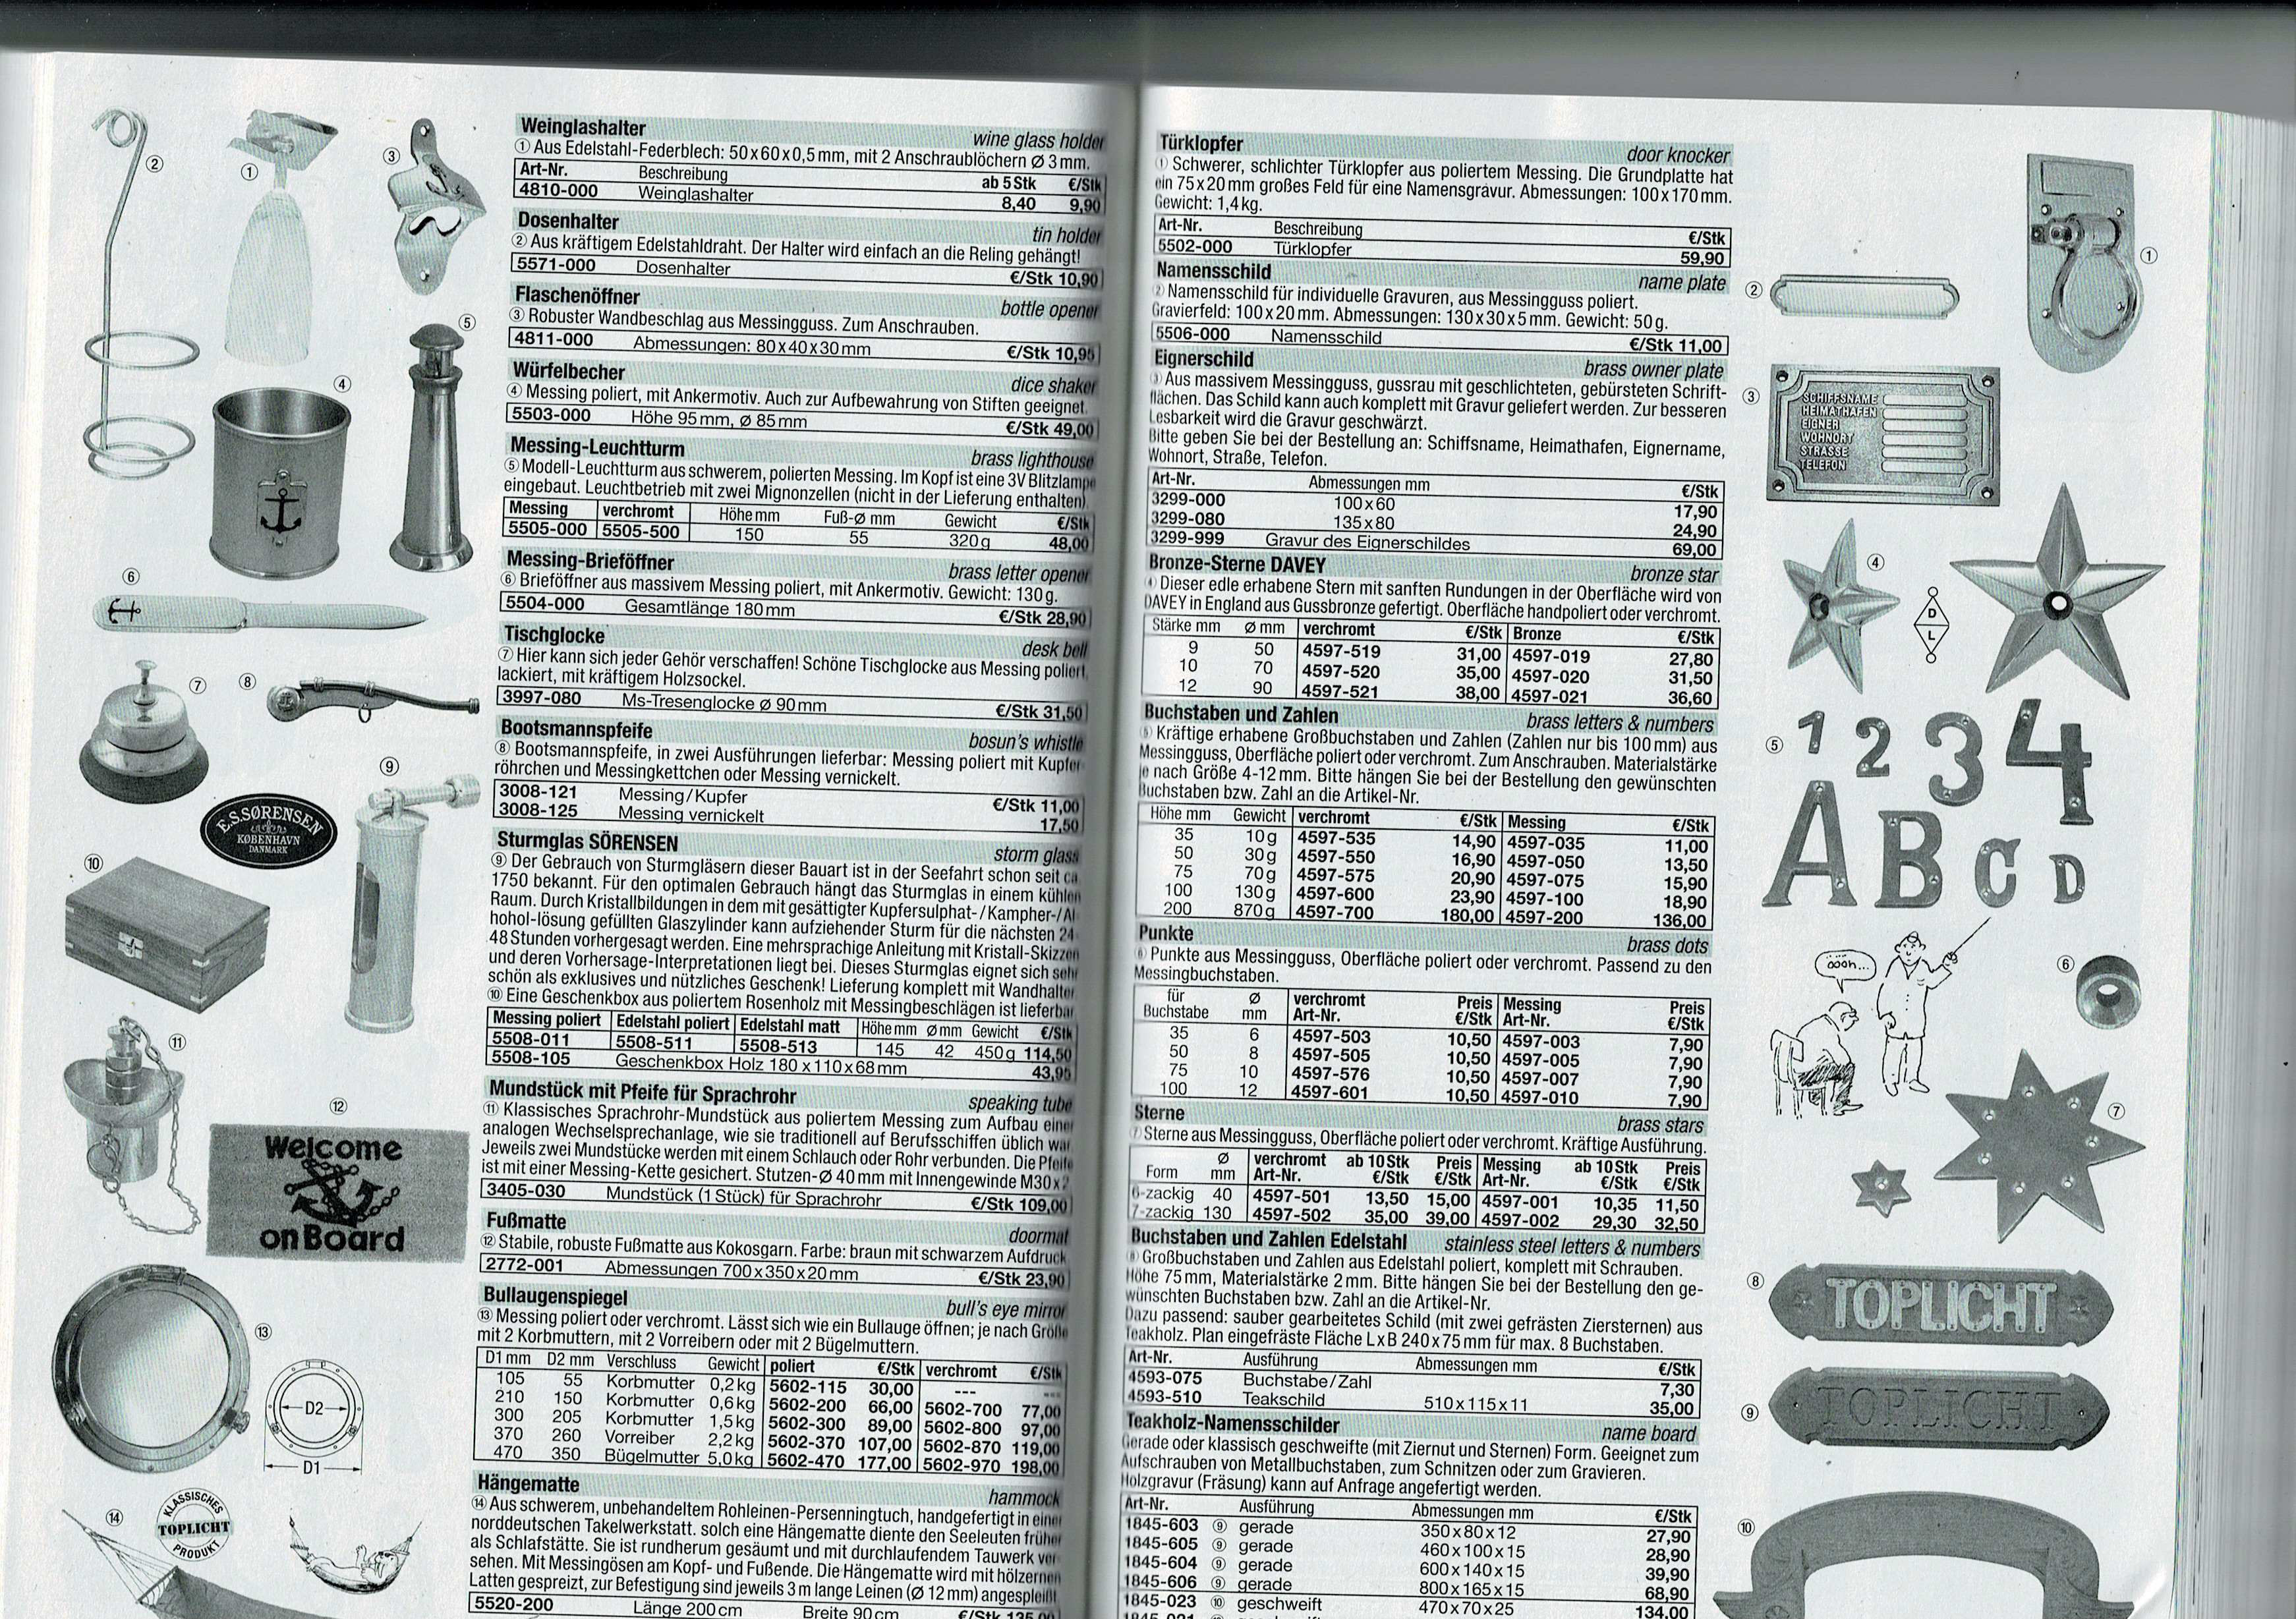
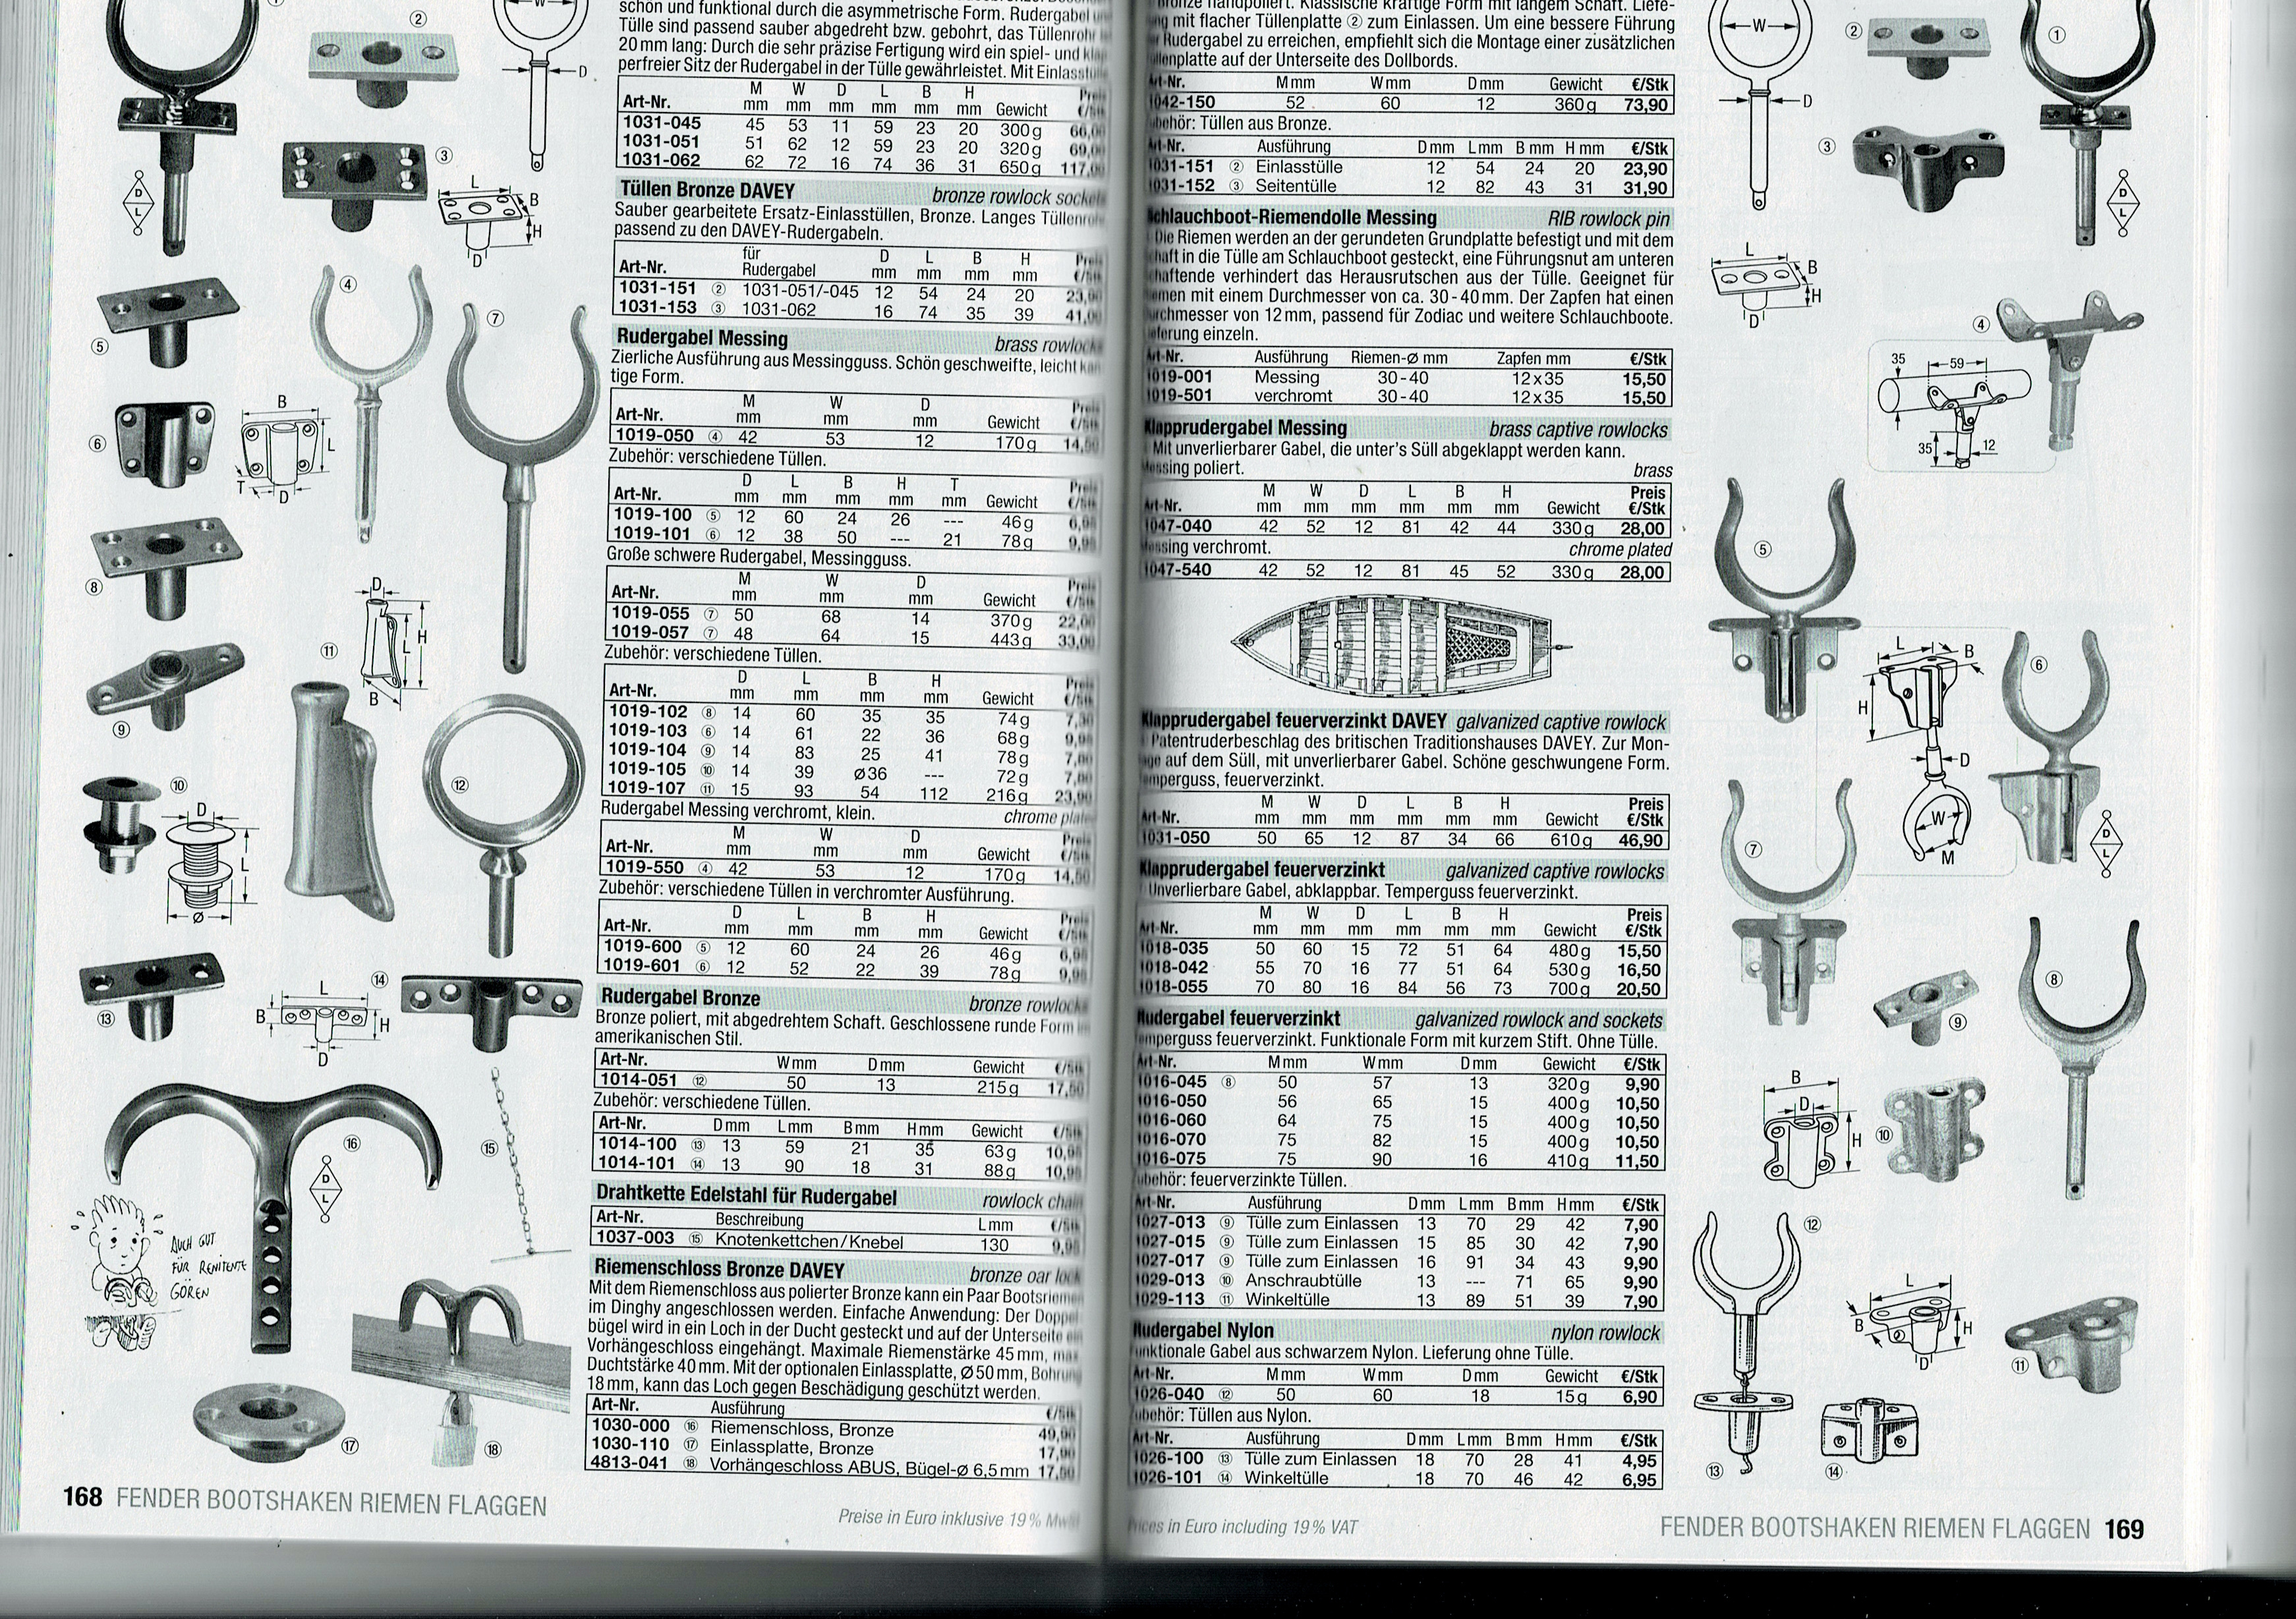
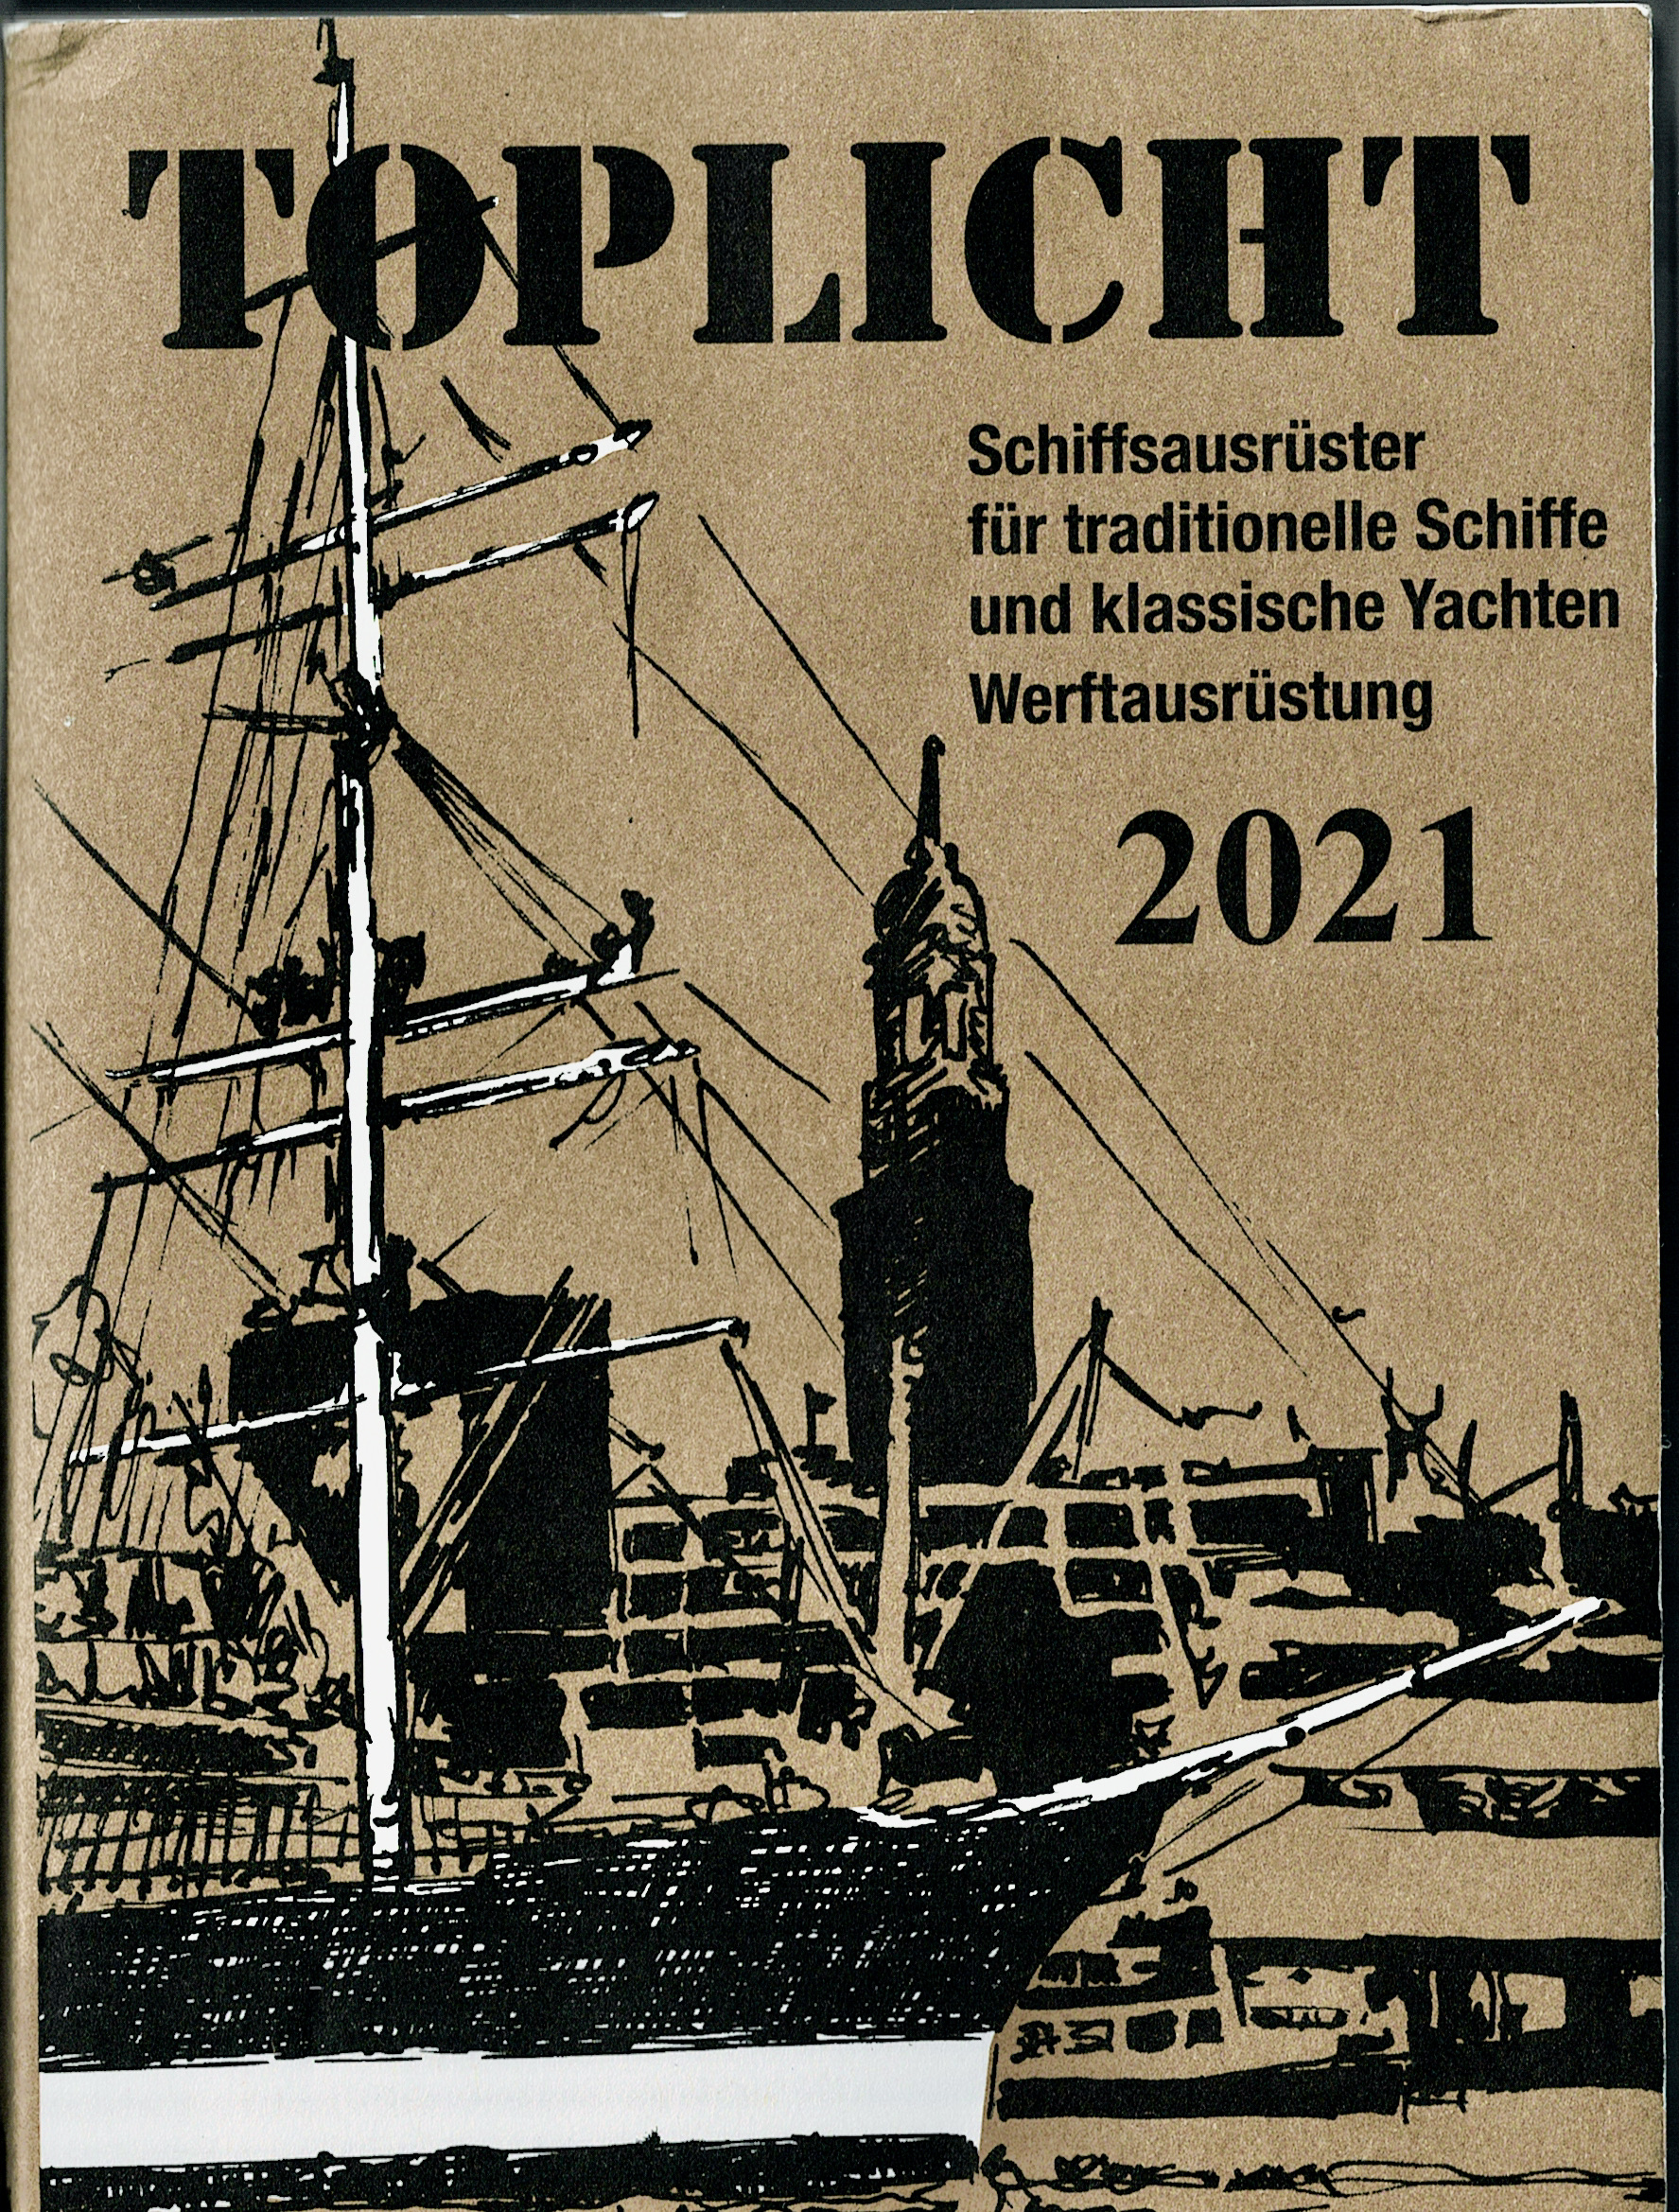
Much excitement at the letterbox today – after what must have been a 4>5 month wait, my copy of the Toplicht 2021 catalogue arrived from Germany, my last one is dated 2014.Its really the holy grail of traditional boat stuff – 100’s of pages, what ever you need its here, and they ship worldwide.
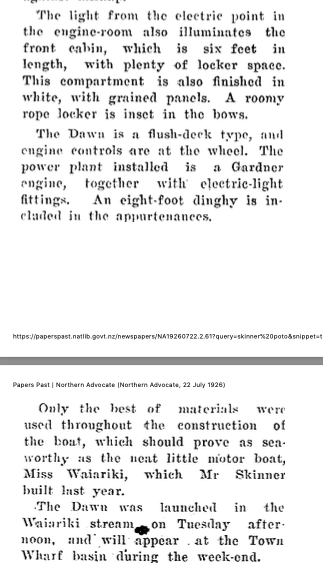
Daryl Patterson’s email to me started out like a lot of the correspondence WW gets – “This is a very long shot but I’m looking for any information on my great grandfather’s boat, a 30 footer he built himself” It turns out that Daryl’s GGFather – William Skinner, was a member of the Whangarei Cruising Club and built Dawn in 1926, there is a good article from the Northern Advocate recording its construction below. The photos above are of Dawn on Whangarei Harbour between 1926 and 1931. Daryl’s family records has the boat being sold in 1934 to another WCC member – Percy J Basley. She disappears from the WCC records a short while later and Basley retired to Waiheke island.
Daryl would greatly appreciated any intel on the boat from over the last 95 years.
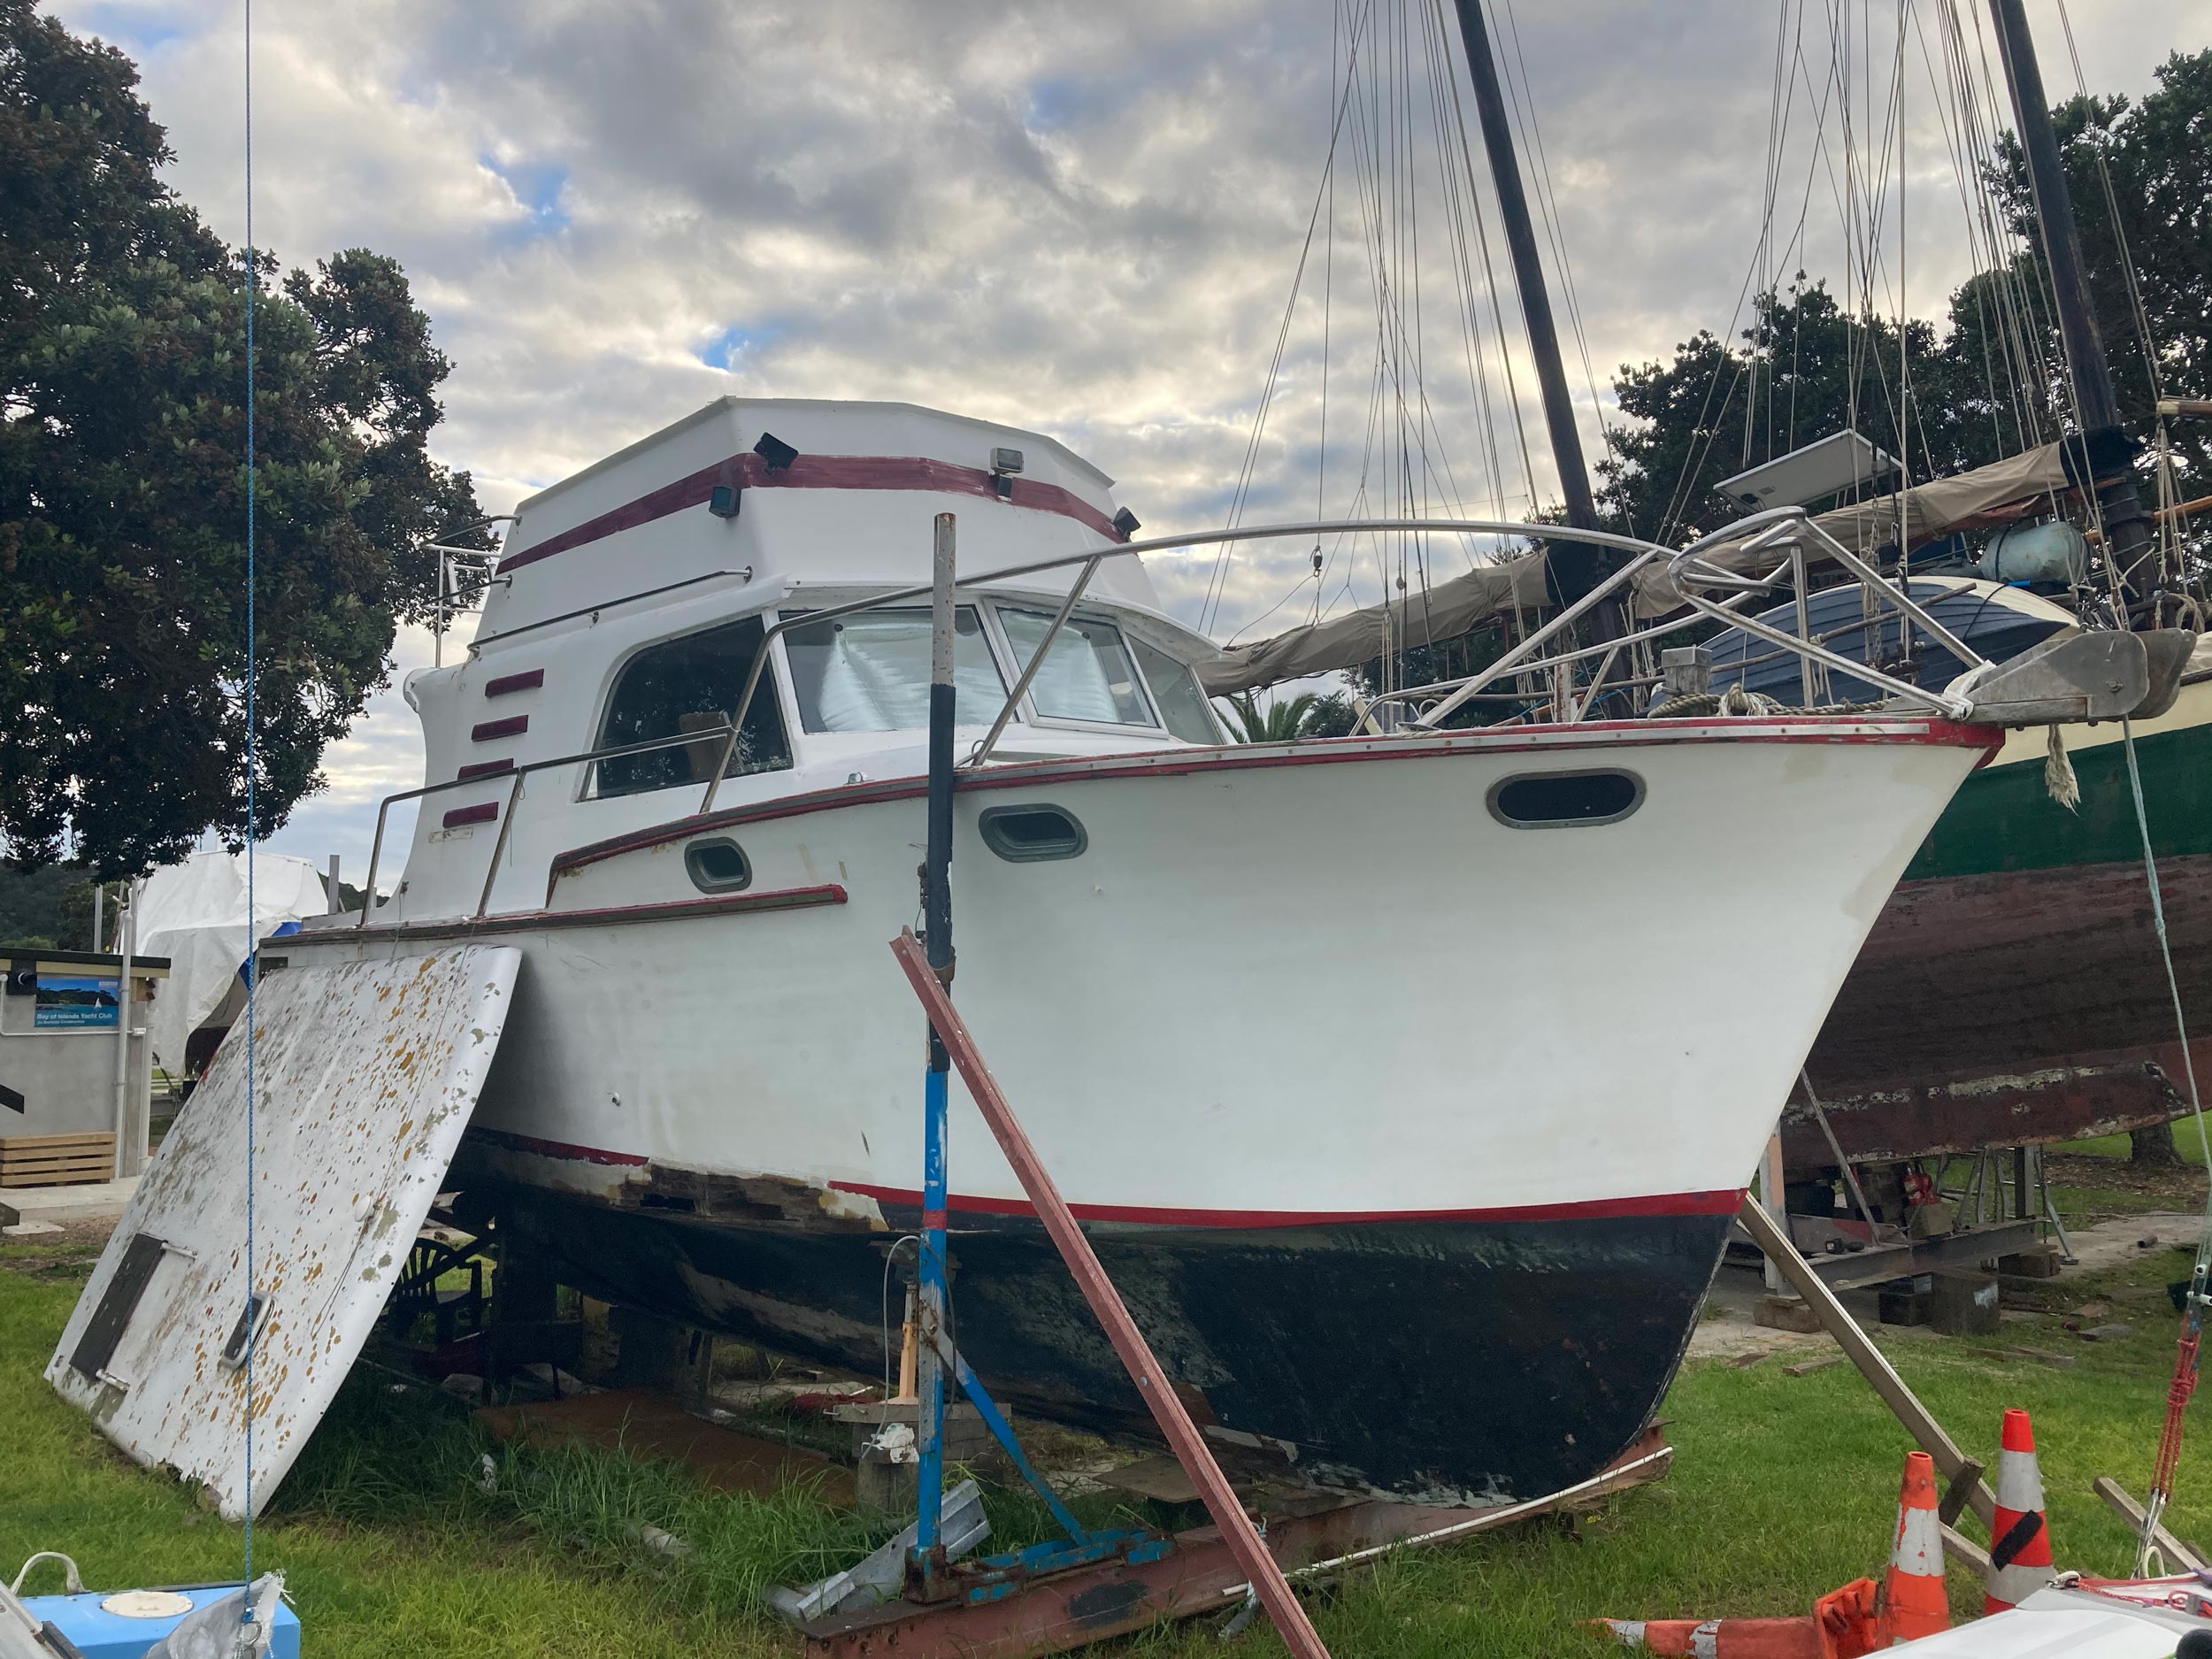
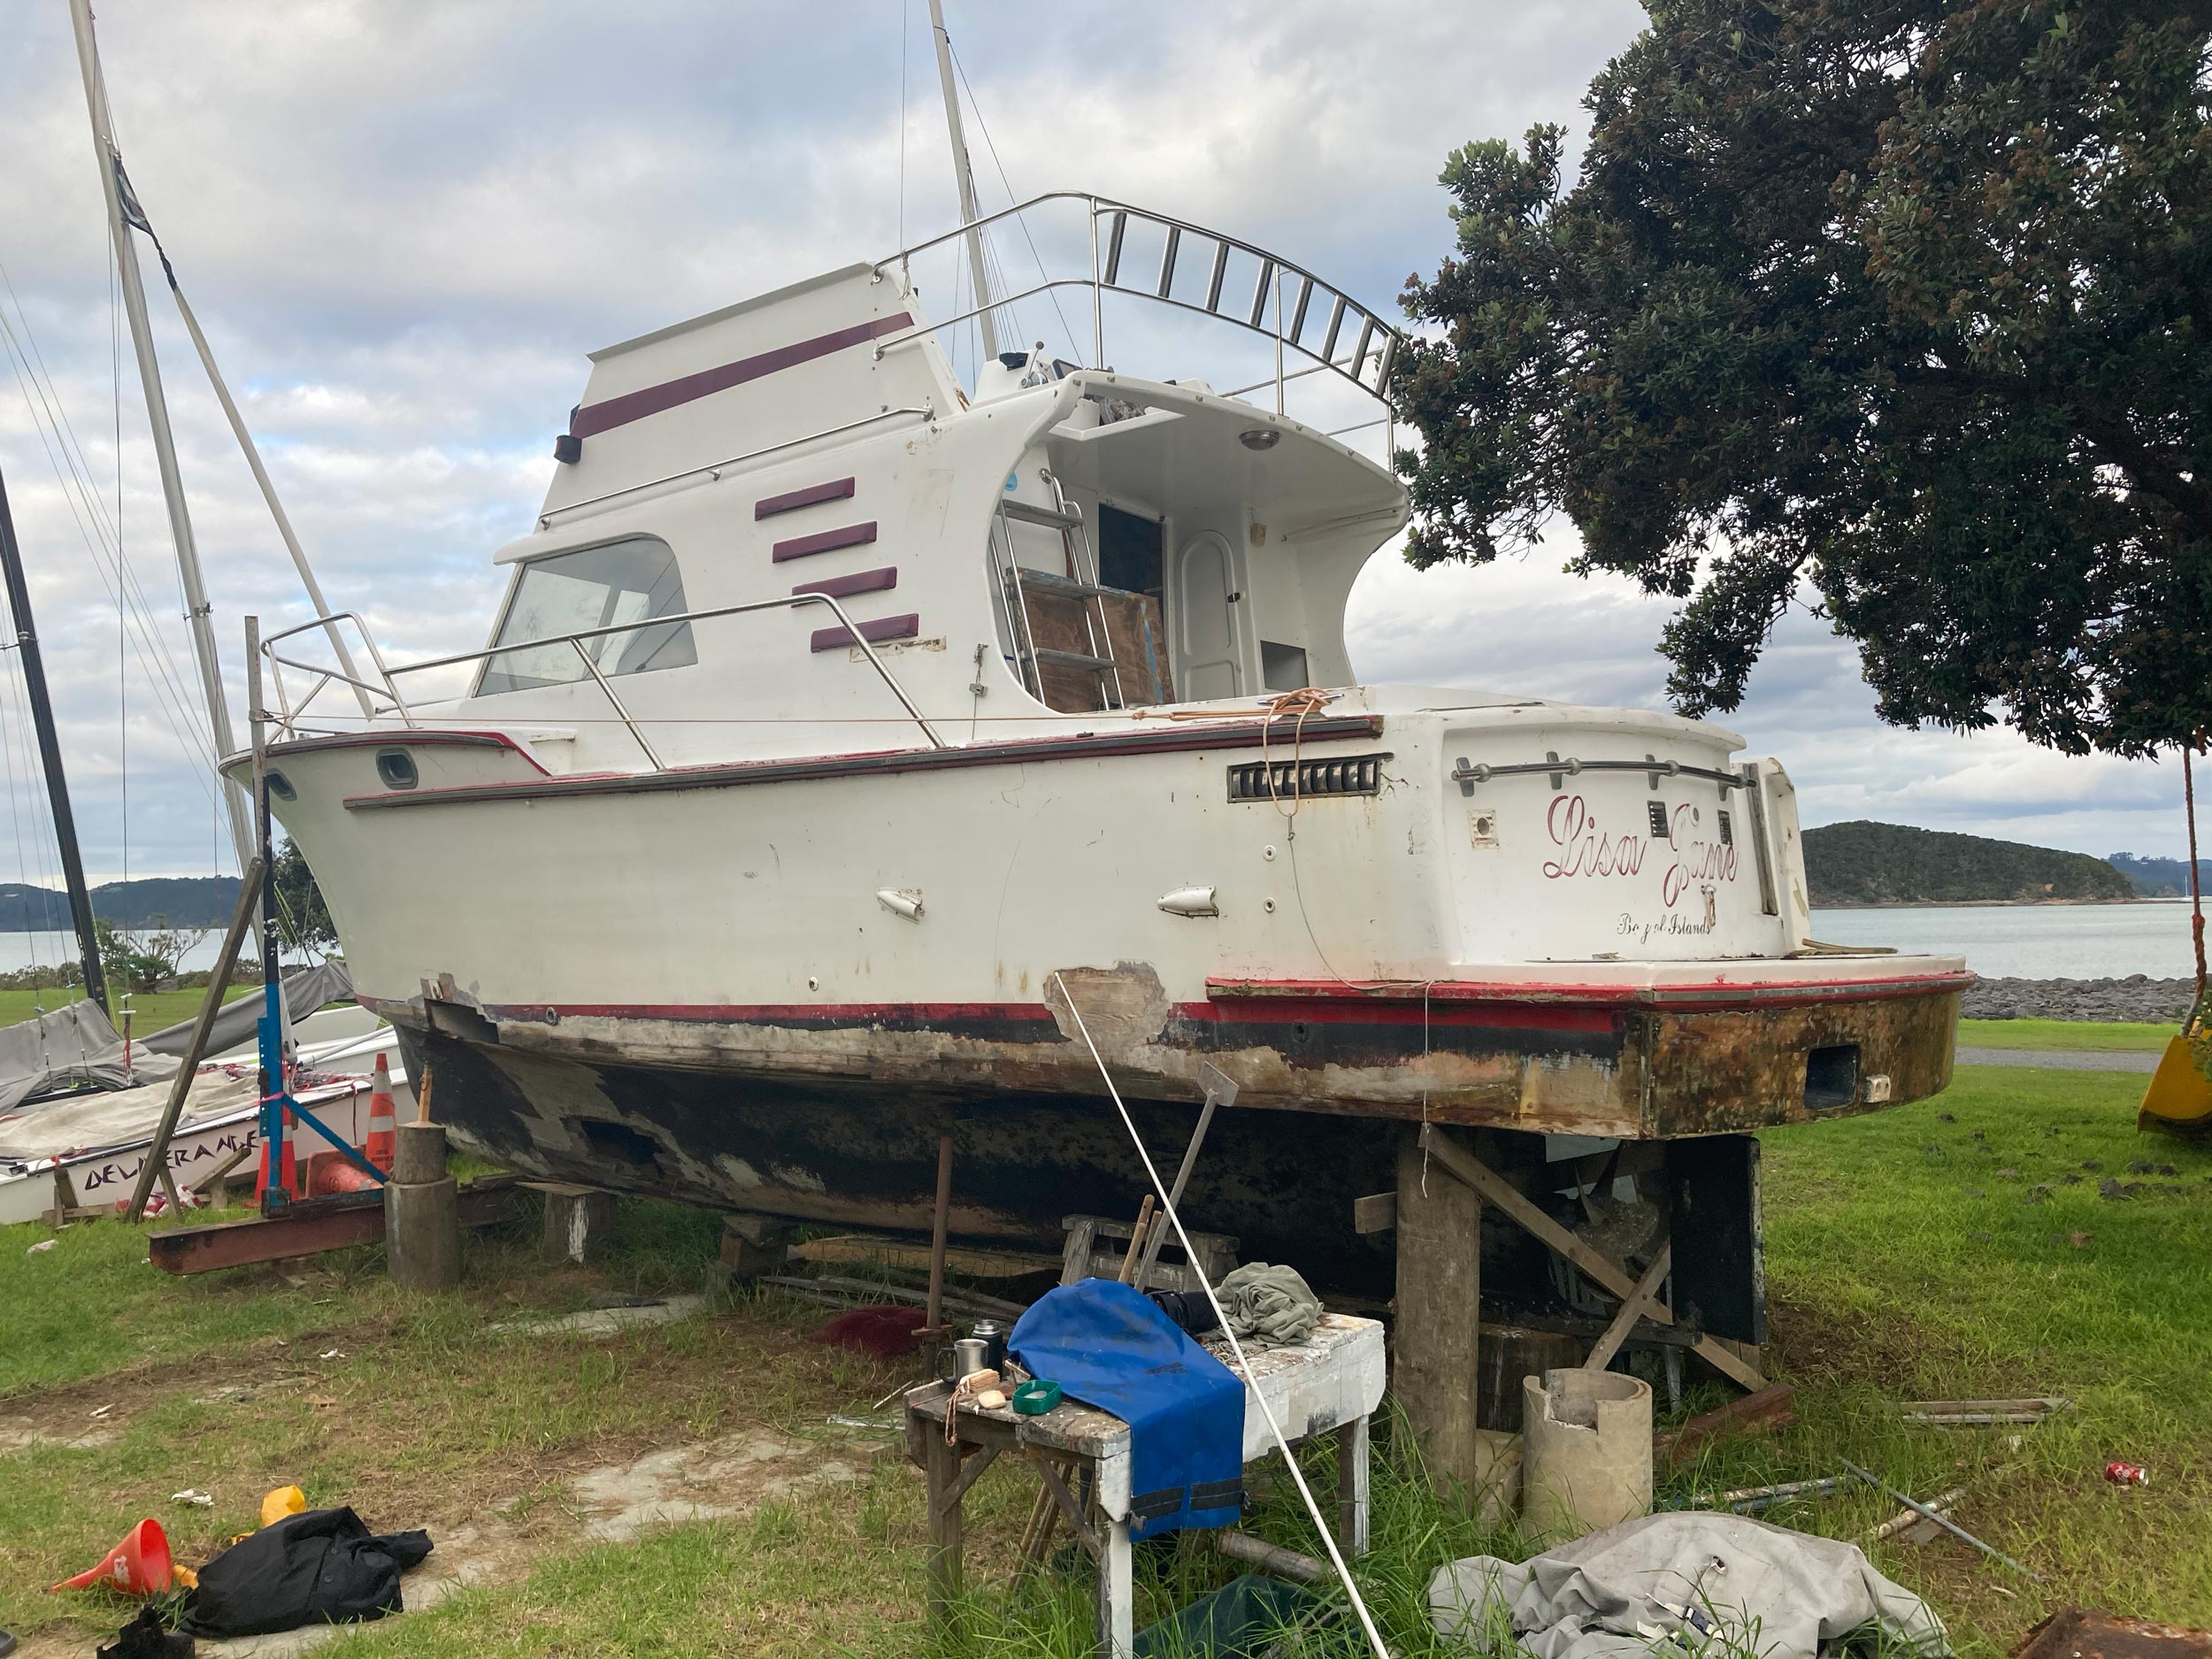
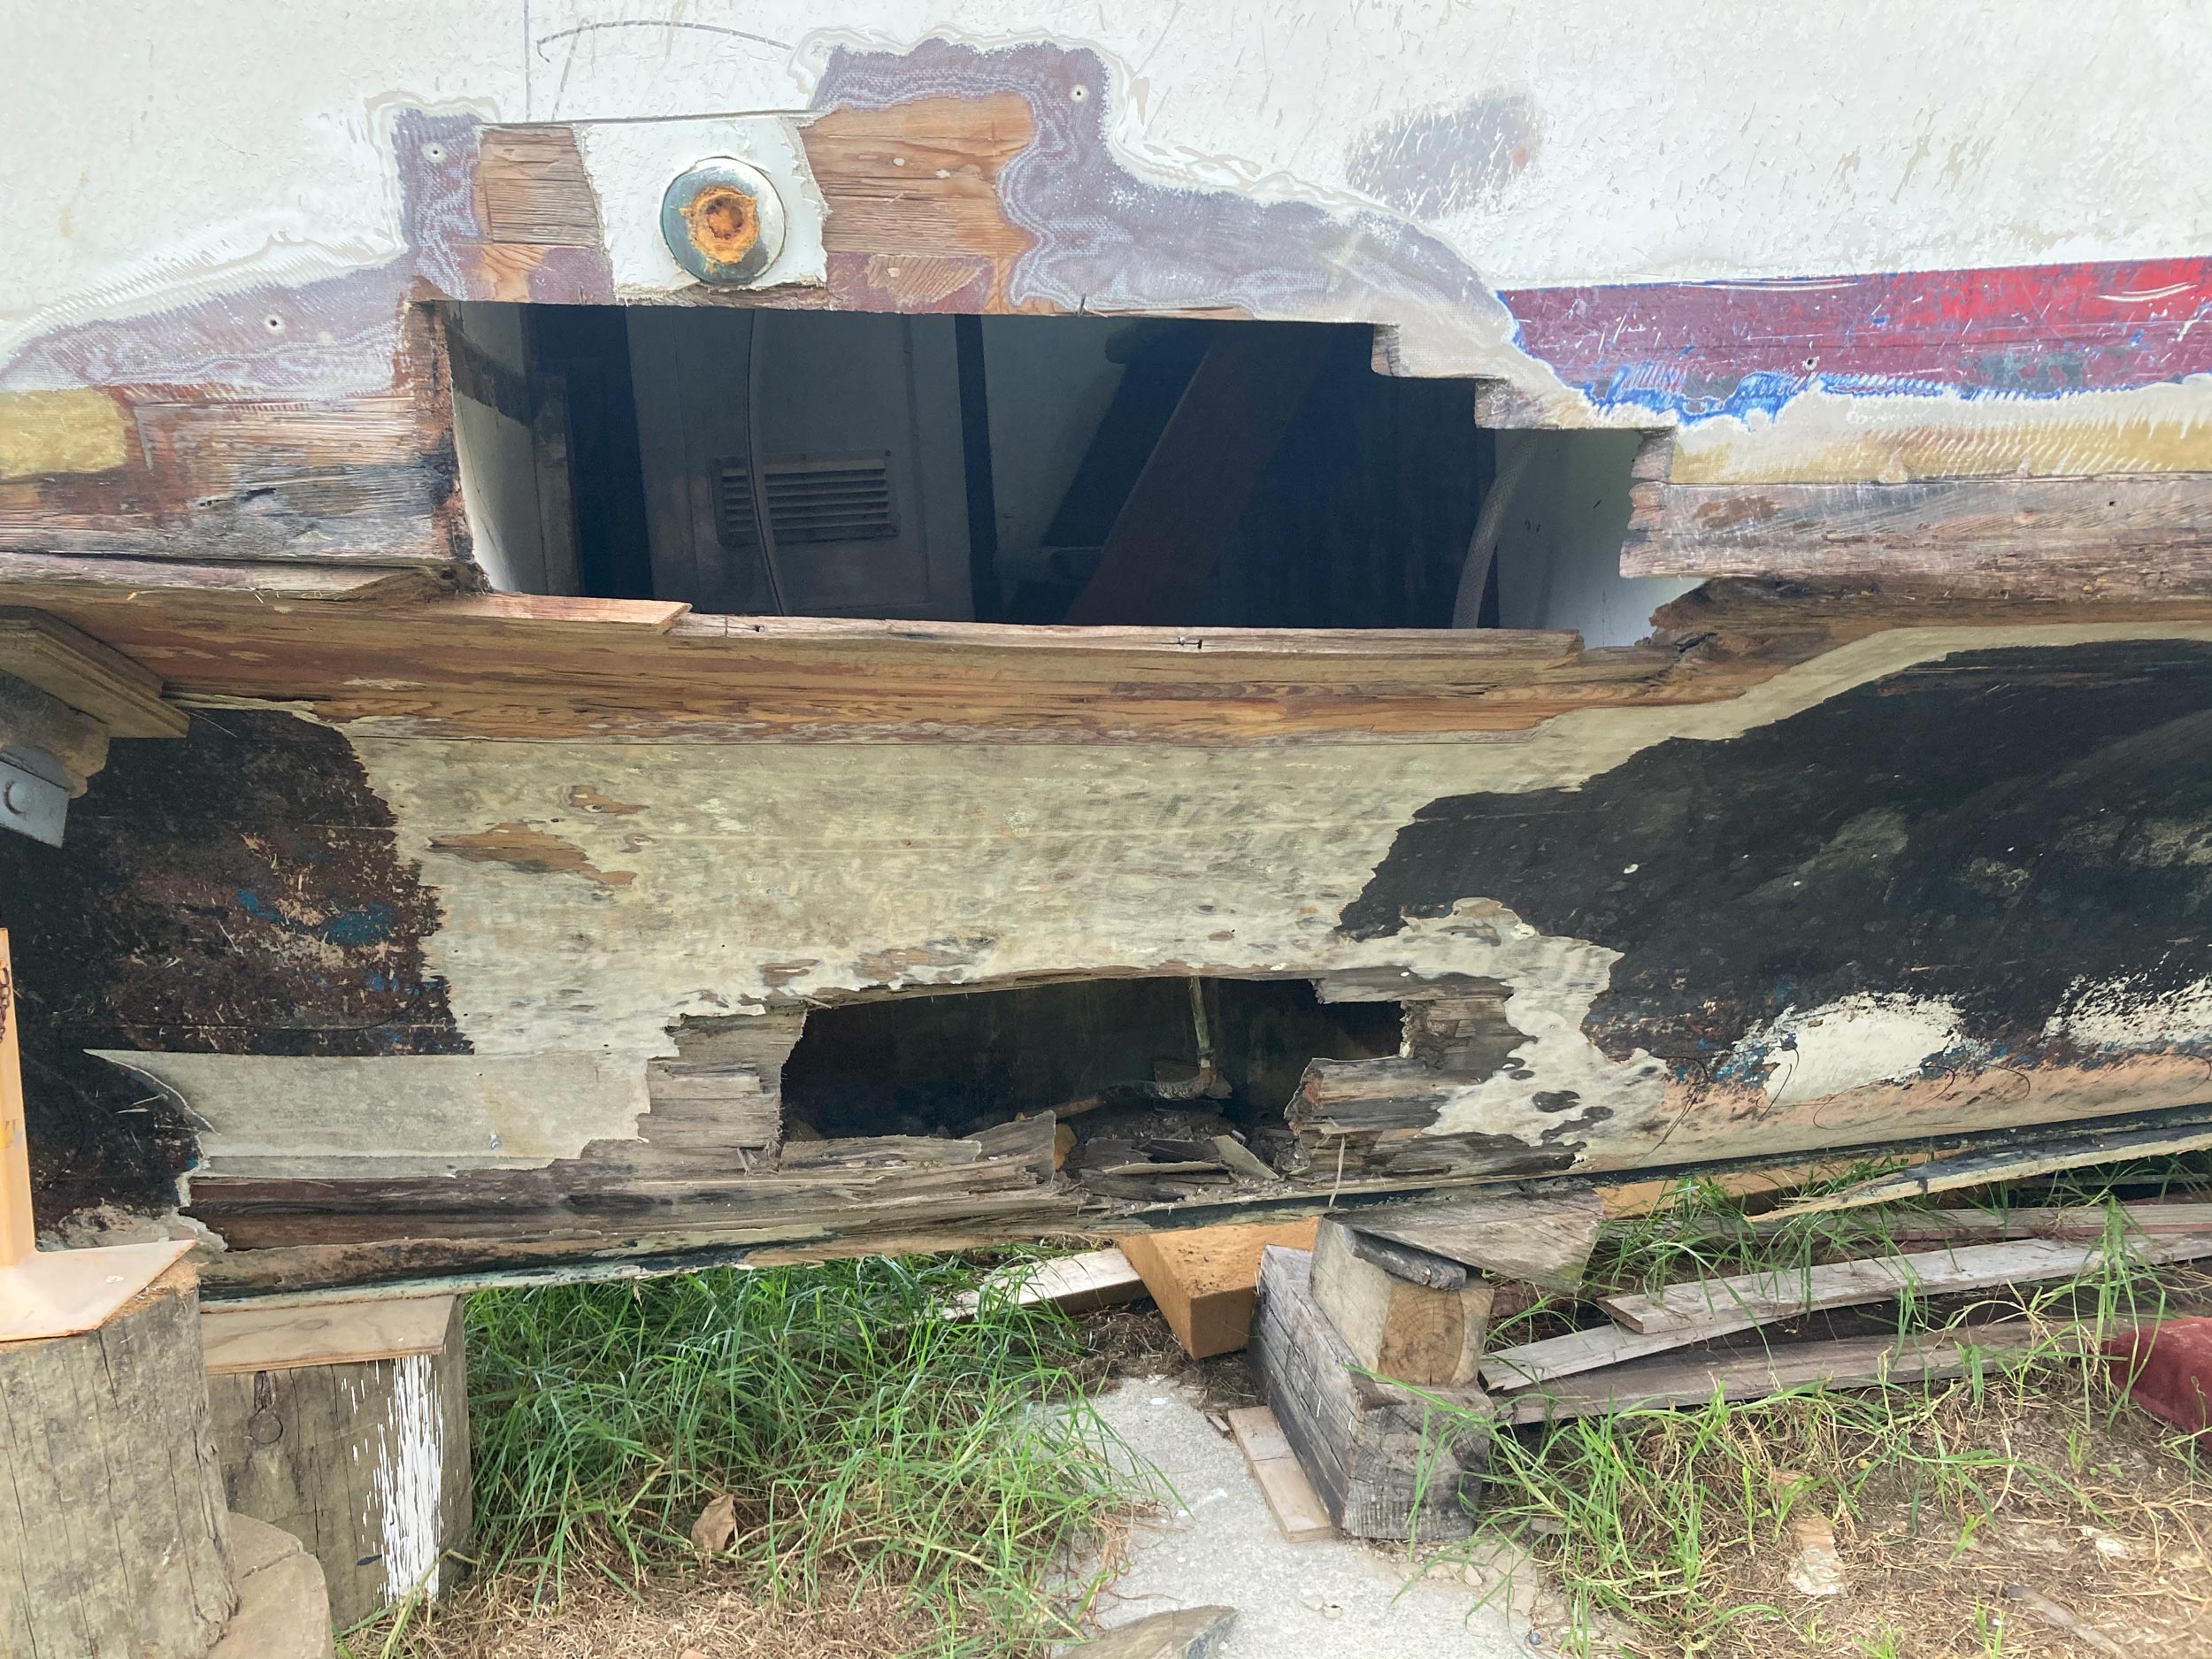
Lisa Jane The launch Lisa Jane is currently on the Waitangi Yacht Club slip, looking at the photos, probably been there for a while and probably for a while yet. Dean Wright who sent me the photos commented that she used to be a charter boat in the Bay of Islands and owned by Peter Rosoman, who had the launch – Cara Mia before it. The rather large holes both sides of the hull indicate the ‘removal’ of a significant amount of rot.Dean’s memory bank is reminding him she may have hit a rock off Tapeka Point in the B.O.I., travelling at a good clip, maybe in the 1990’s. The same memory is also recalling she was capable of 15 knots. Can anyone tell us about the boat – designer / builder/ date launched etc and what the future plans are.
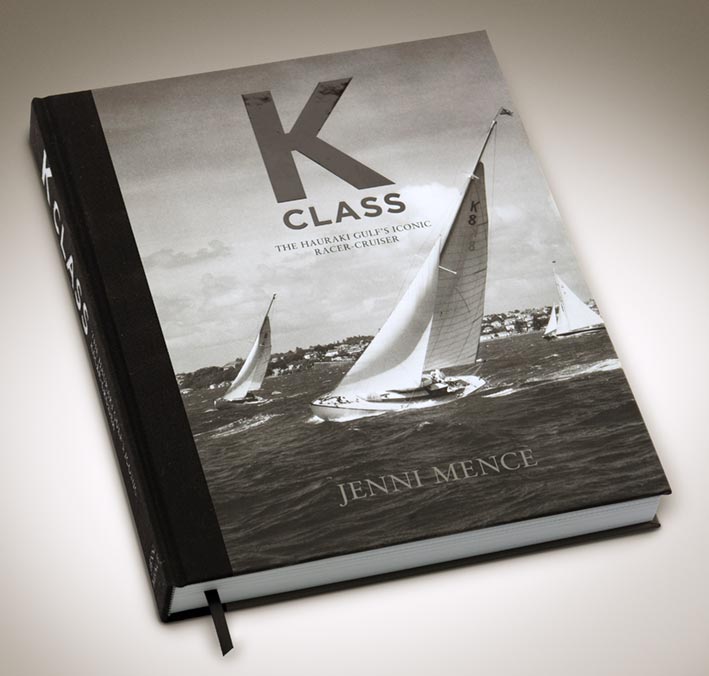
Do You Own – Have Owned – Or Know Someone That Has – A Bill Couldrey Boat WW has been contacted by Jenni Mence who is researching the boats of boat designer/builder Arnold Francis (Bill) Couldrey for a book she is writing about him, and is currently trying to locate as many of his boats as as she can. I’ll let Jenni tale the story: “Despite having made a great contribution to our maritime history, Bill is relatively unknown as a designer and builder. He worked for many years out of the ex Bailey and Lowe shed at Shoal Bay, Auckland, before retiring to Rotorua where he continued his design work. My husband and I have fully restored two Couldrey boats, a 1933 26 ft launch, and a 1950 38ft K Class yacht and these projects have sparked our interest in tracing and documenting the rest of his boats. Bill’s family have provided a list of the 83 boats Bill designed and/or built throughout his working life, which spanned from 1924 to 1975, and includes everything from sailing dinghies to launches and yachts. Unfortunately many of them are unnamed which has made tracing them difficult. I have recently published a large ‘coffee table’ book tracing the history of the K Class yachts, which includes many photos and stories of the boats, the people, and the racing, on the Hauraki Gulf throughout the 1950s and 1960s; and I would like to create something similar around Bill’s boats. As well as tracing the boats – in whatever condition they may be in now – I would also like to make contact with any previous or current owner of a Couldrey boat so that their experiences and stories may also be included in this book.” So woodys can we help Jenni with any known boats, owners (past and present), photos etc. Even if you just know the name of a boats owner, Jenni will endeavour to track them down. Jenni’s K Class book was a master piece (see below), it would be great to help bring this one to life. Jenni can be contacted at jenni@kclass.co.nz or jennimence@gmail.com
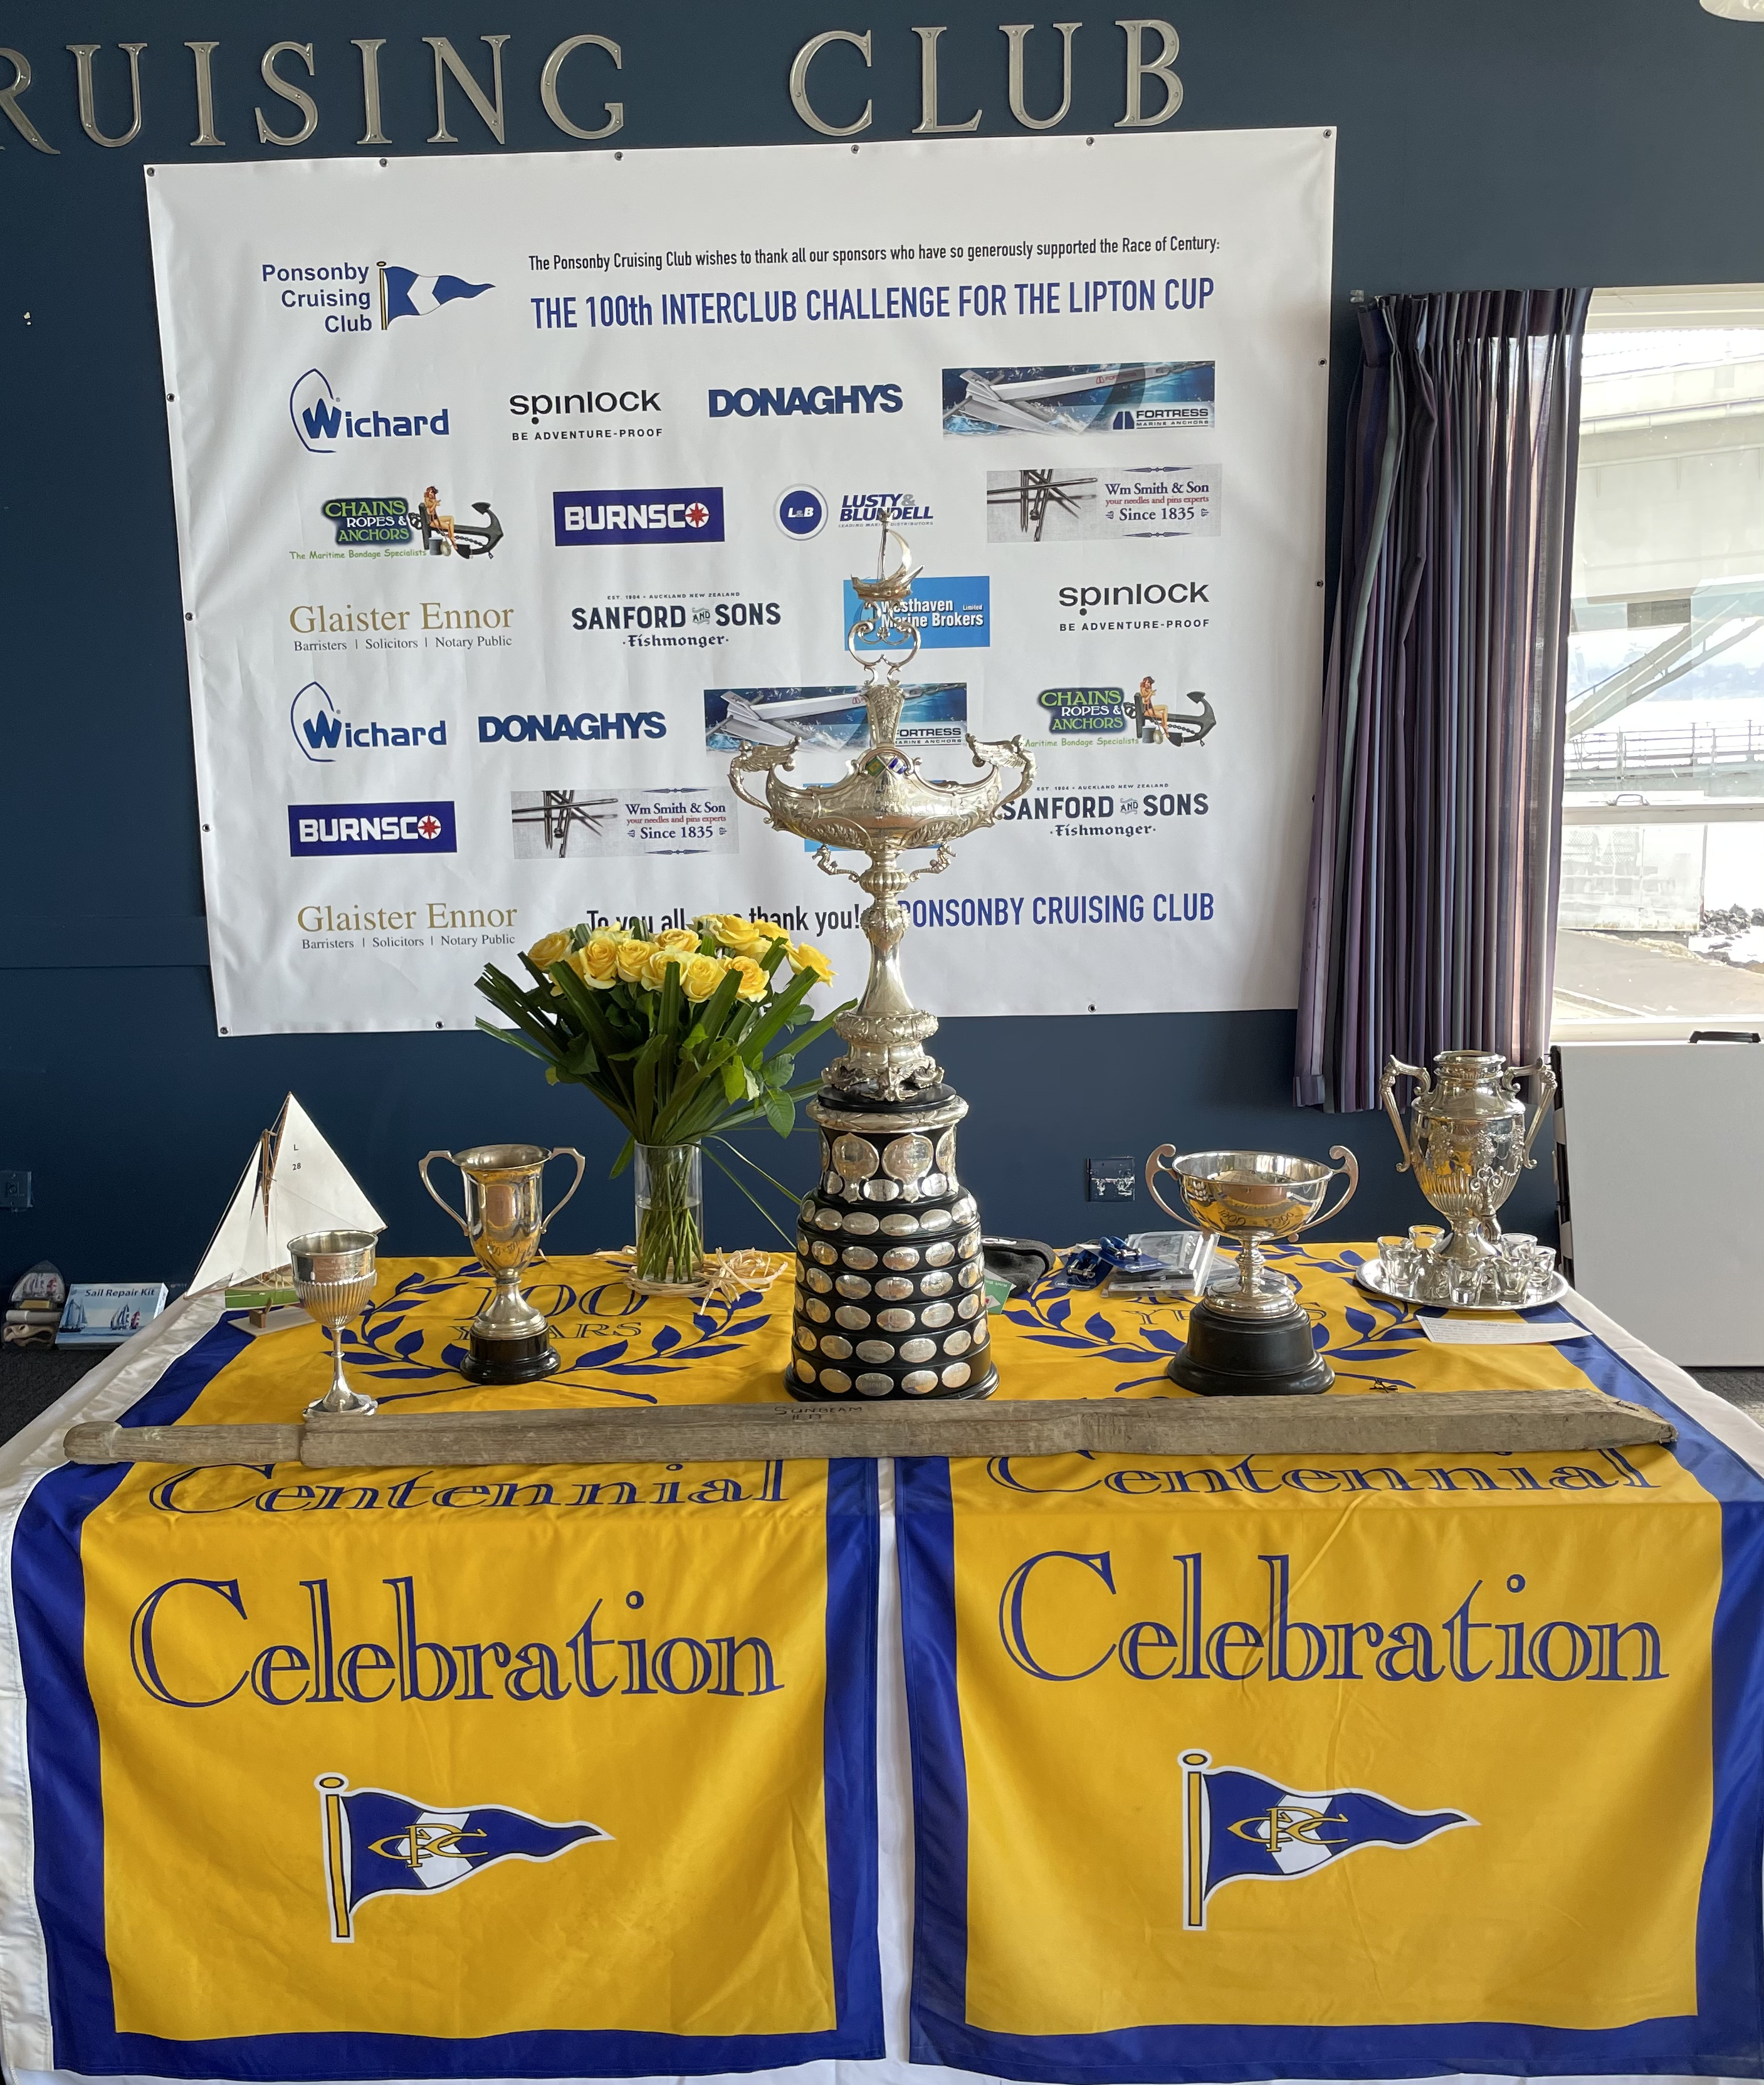
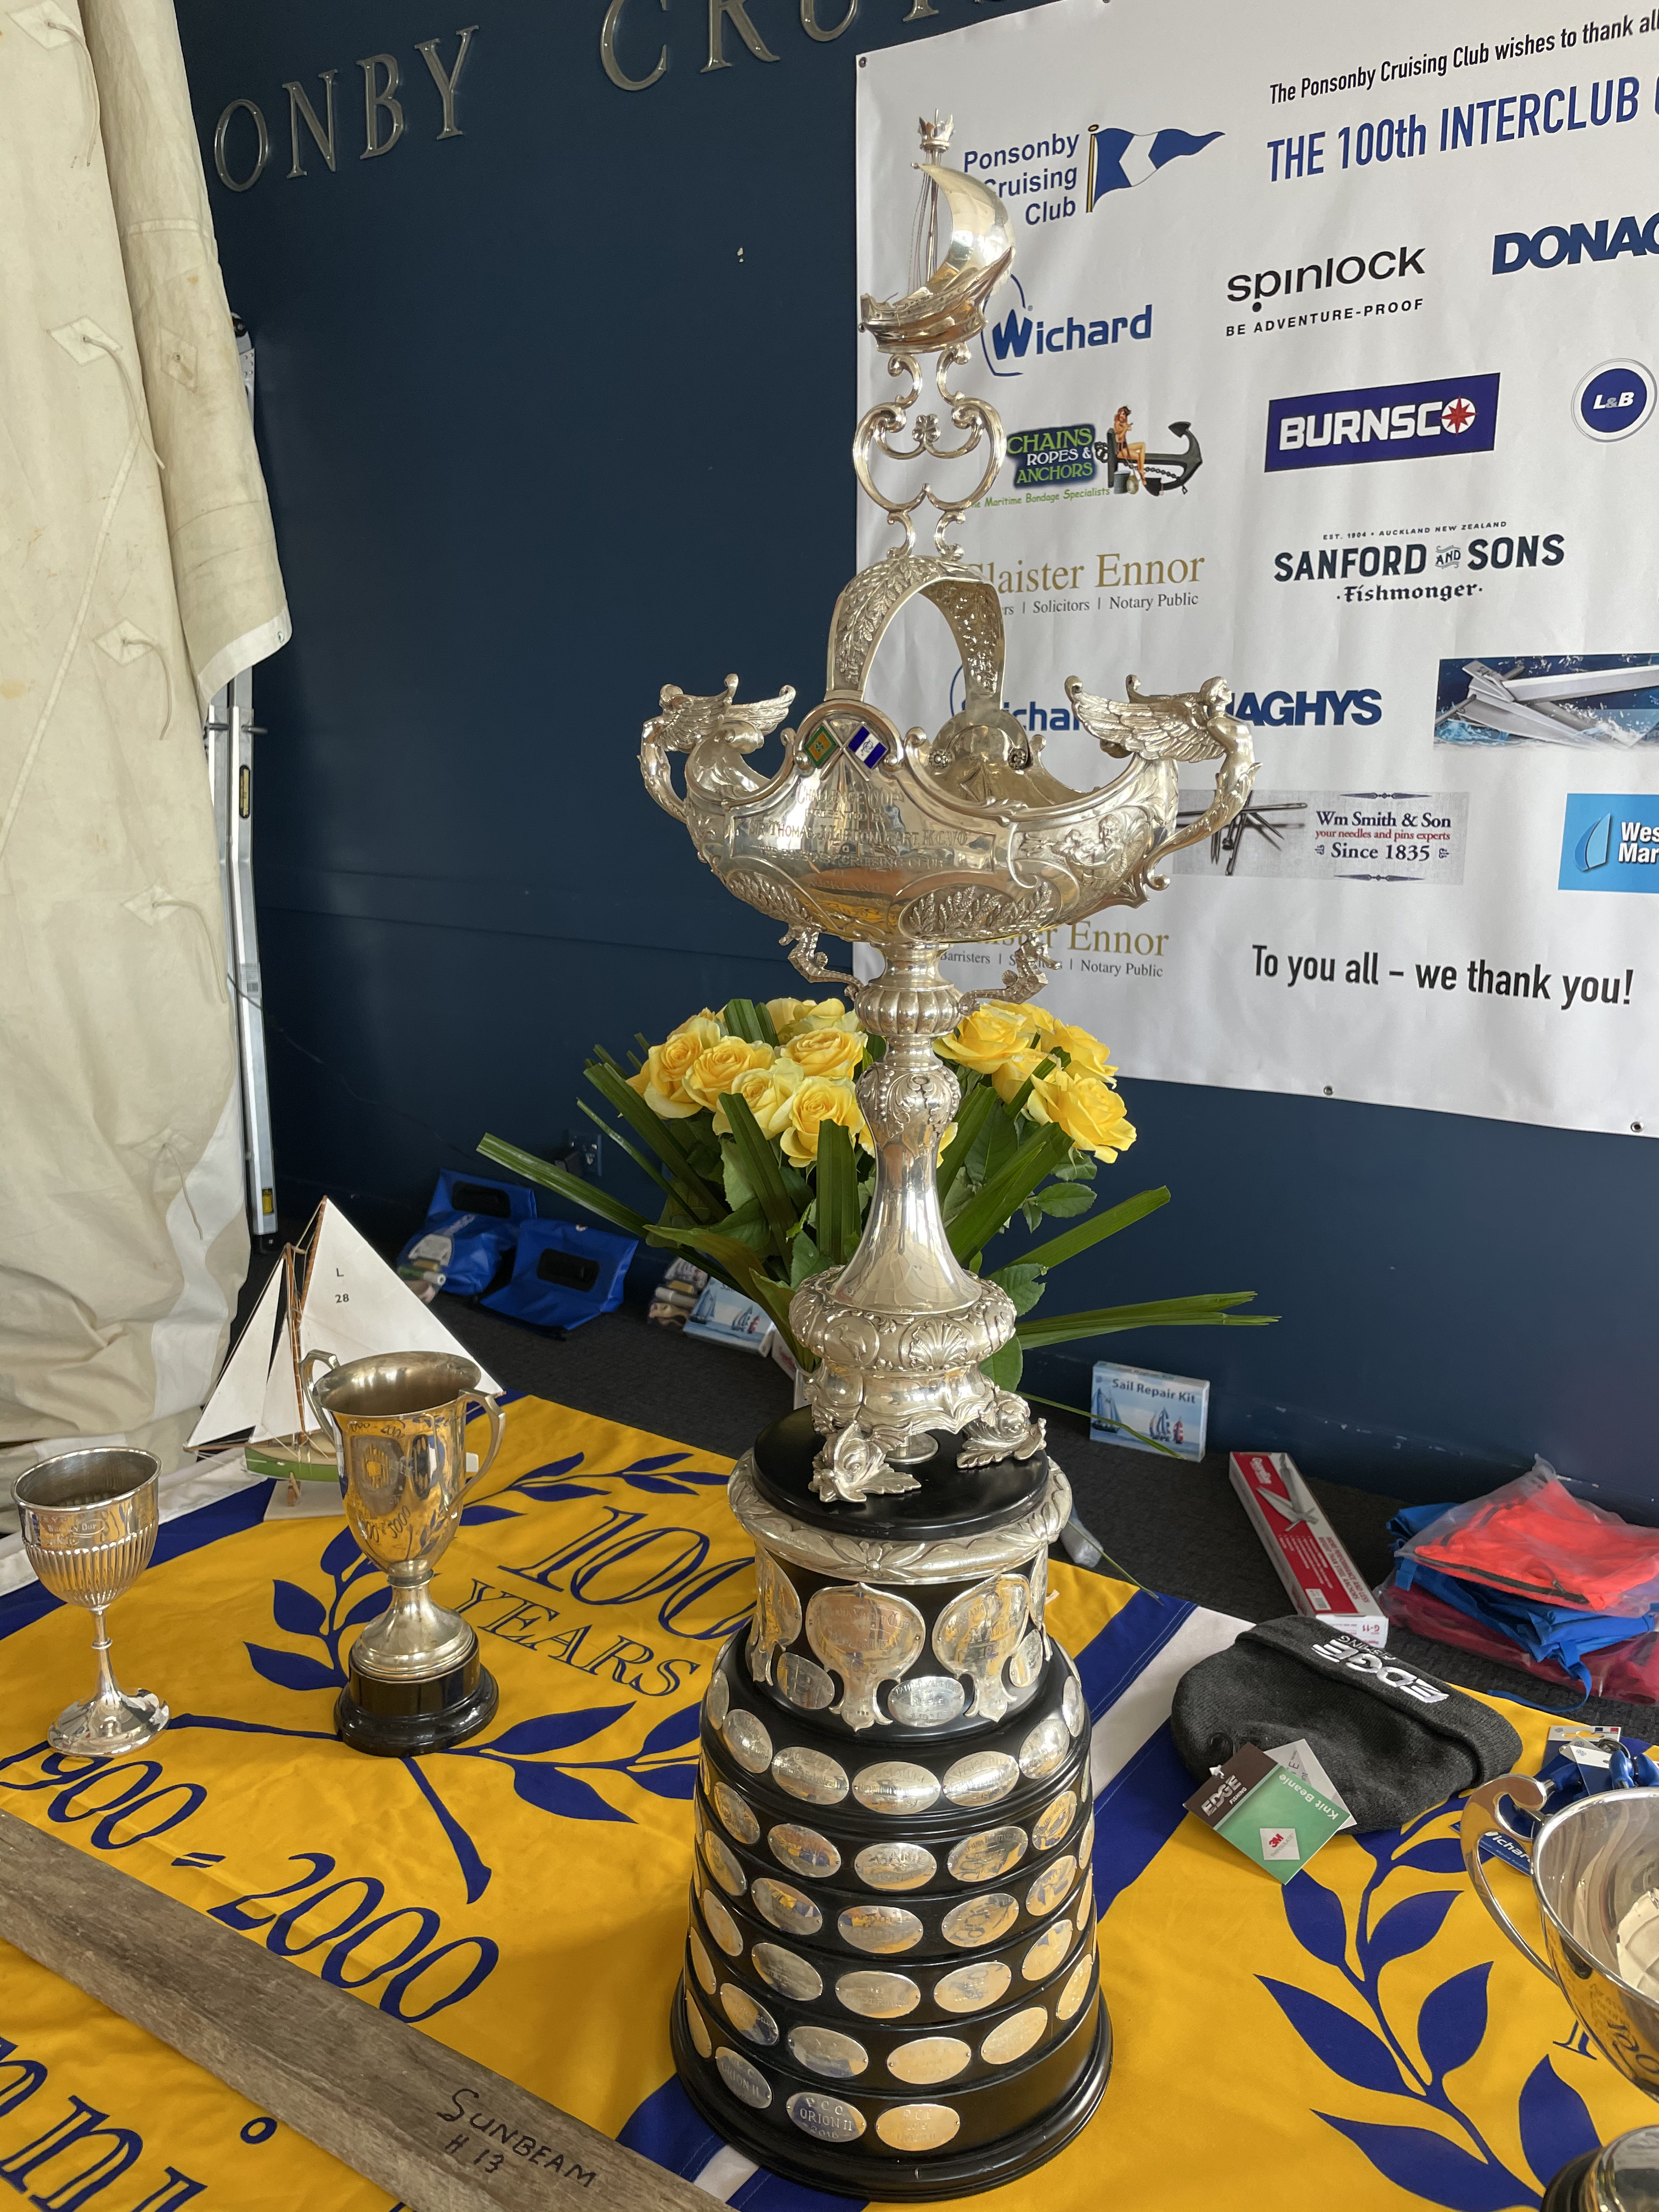
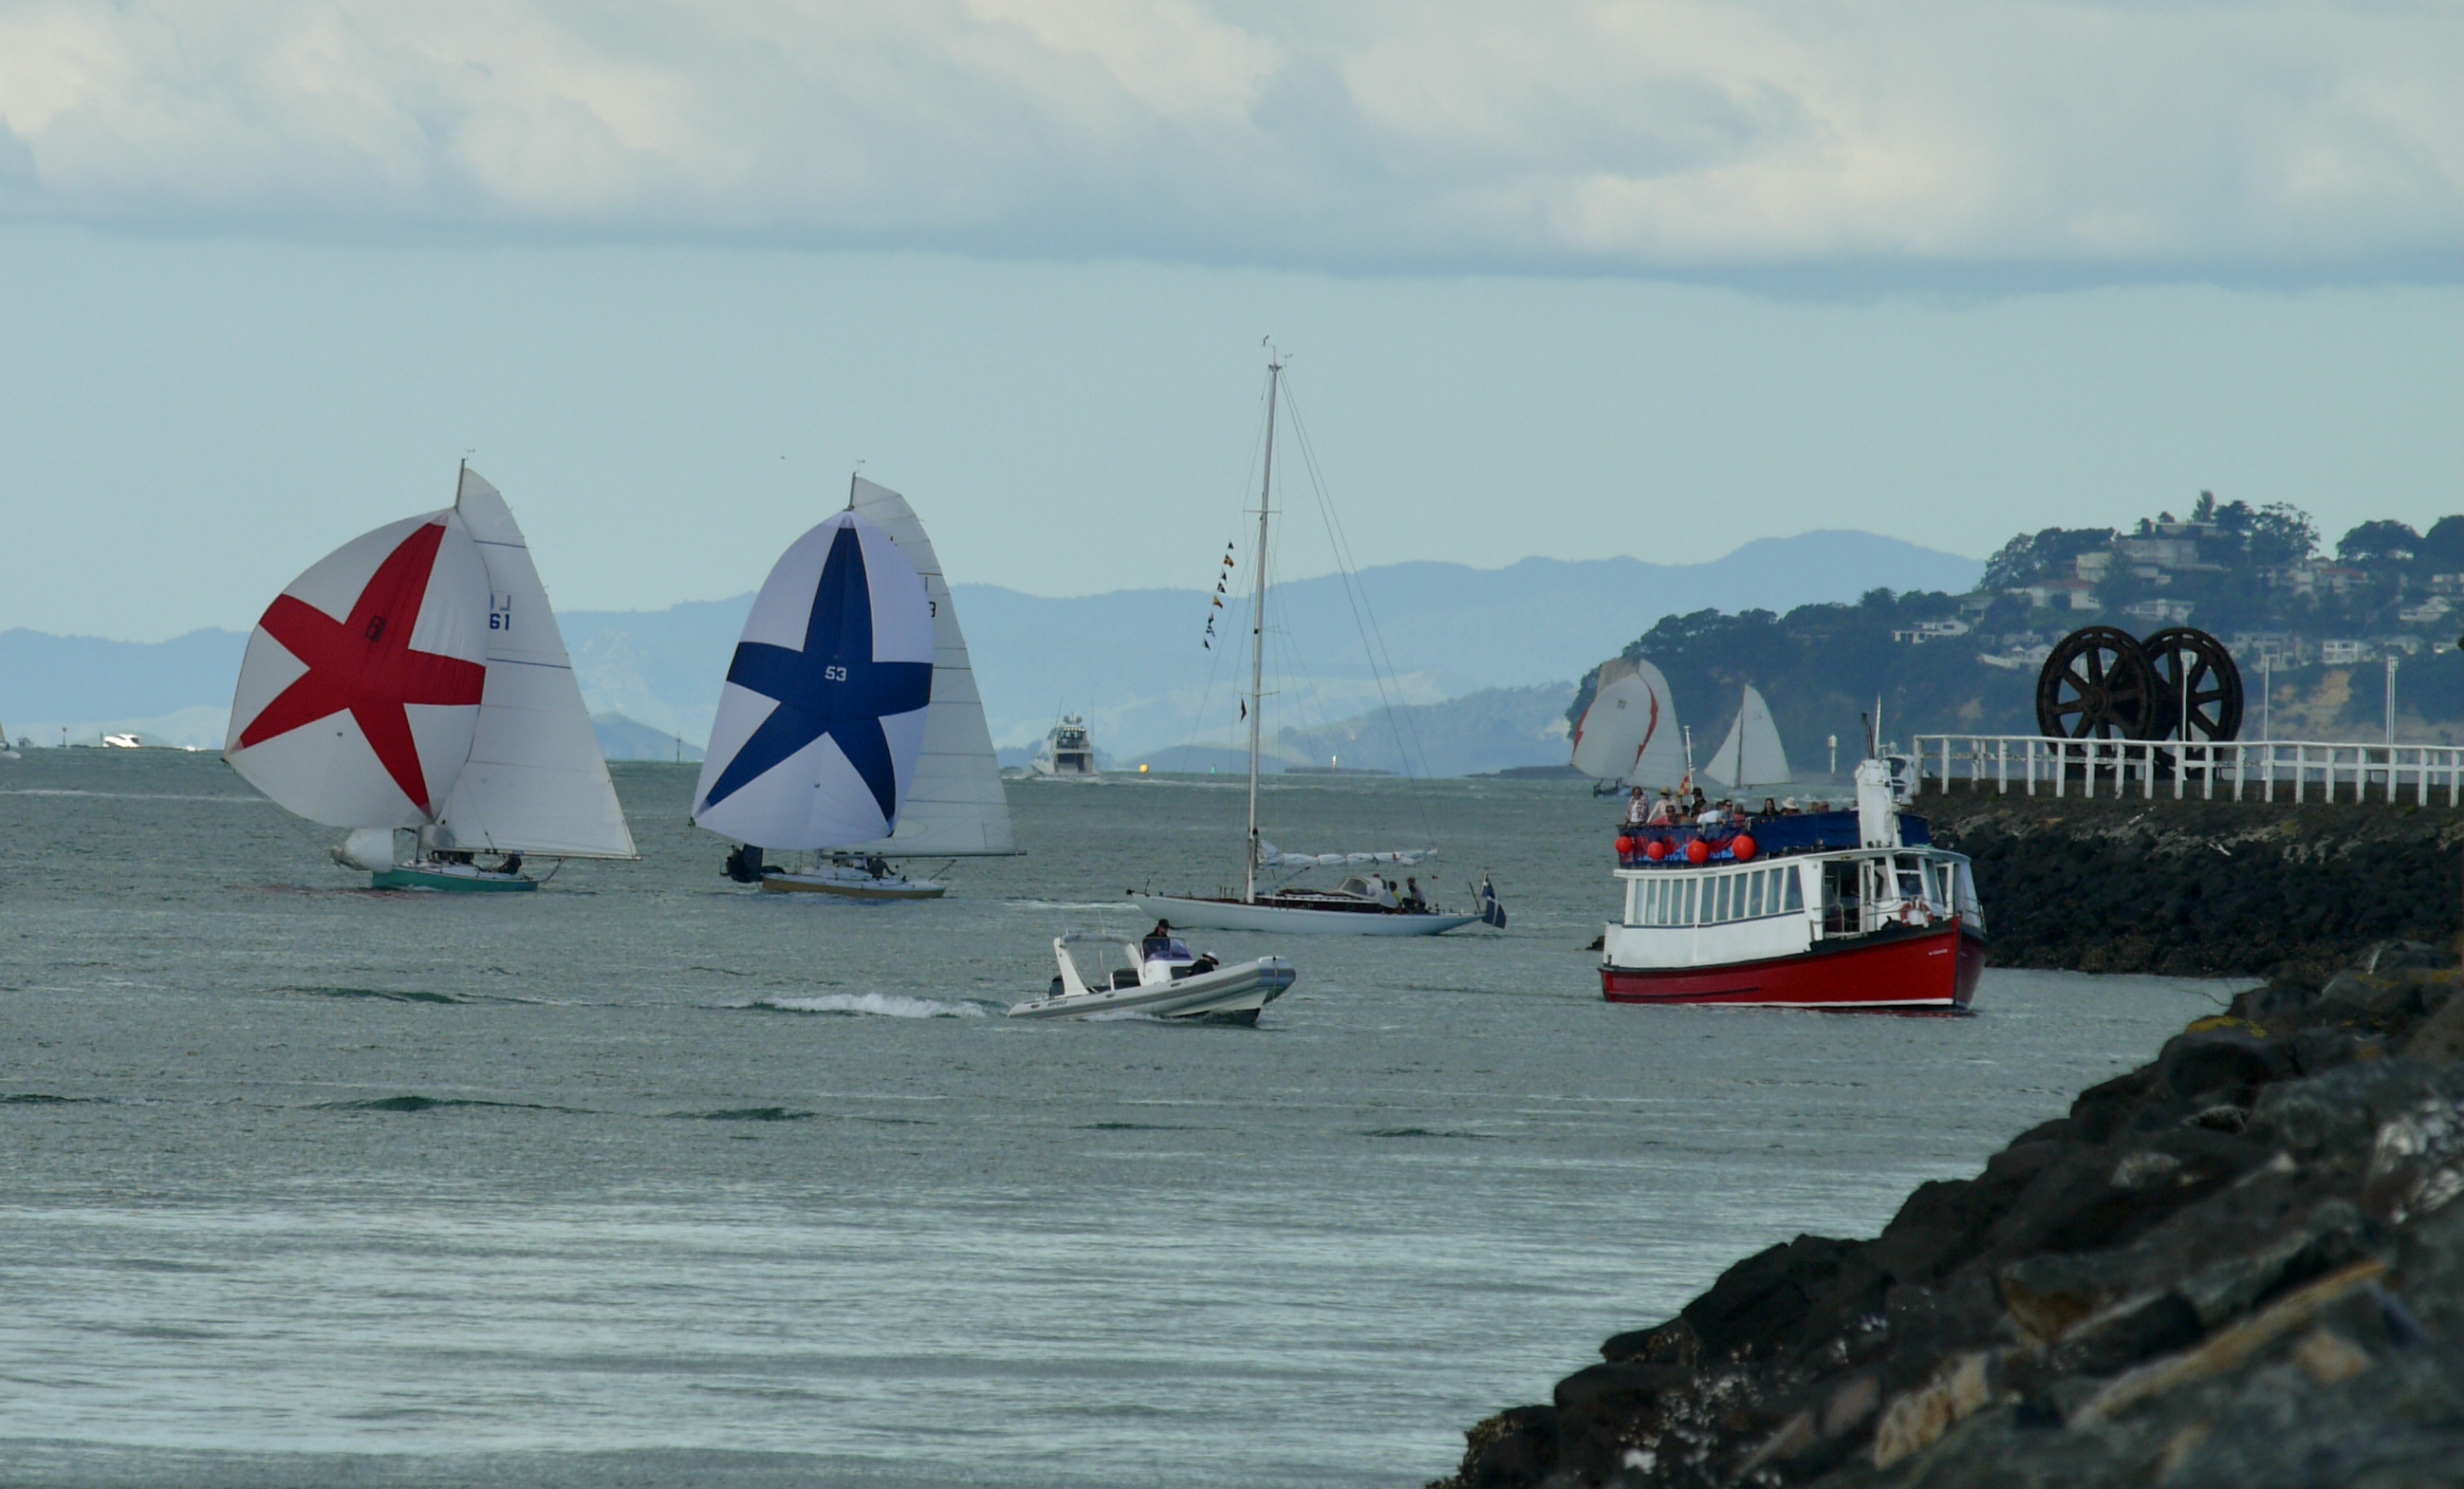
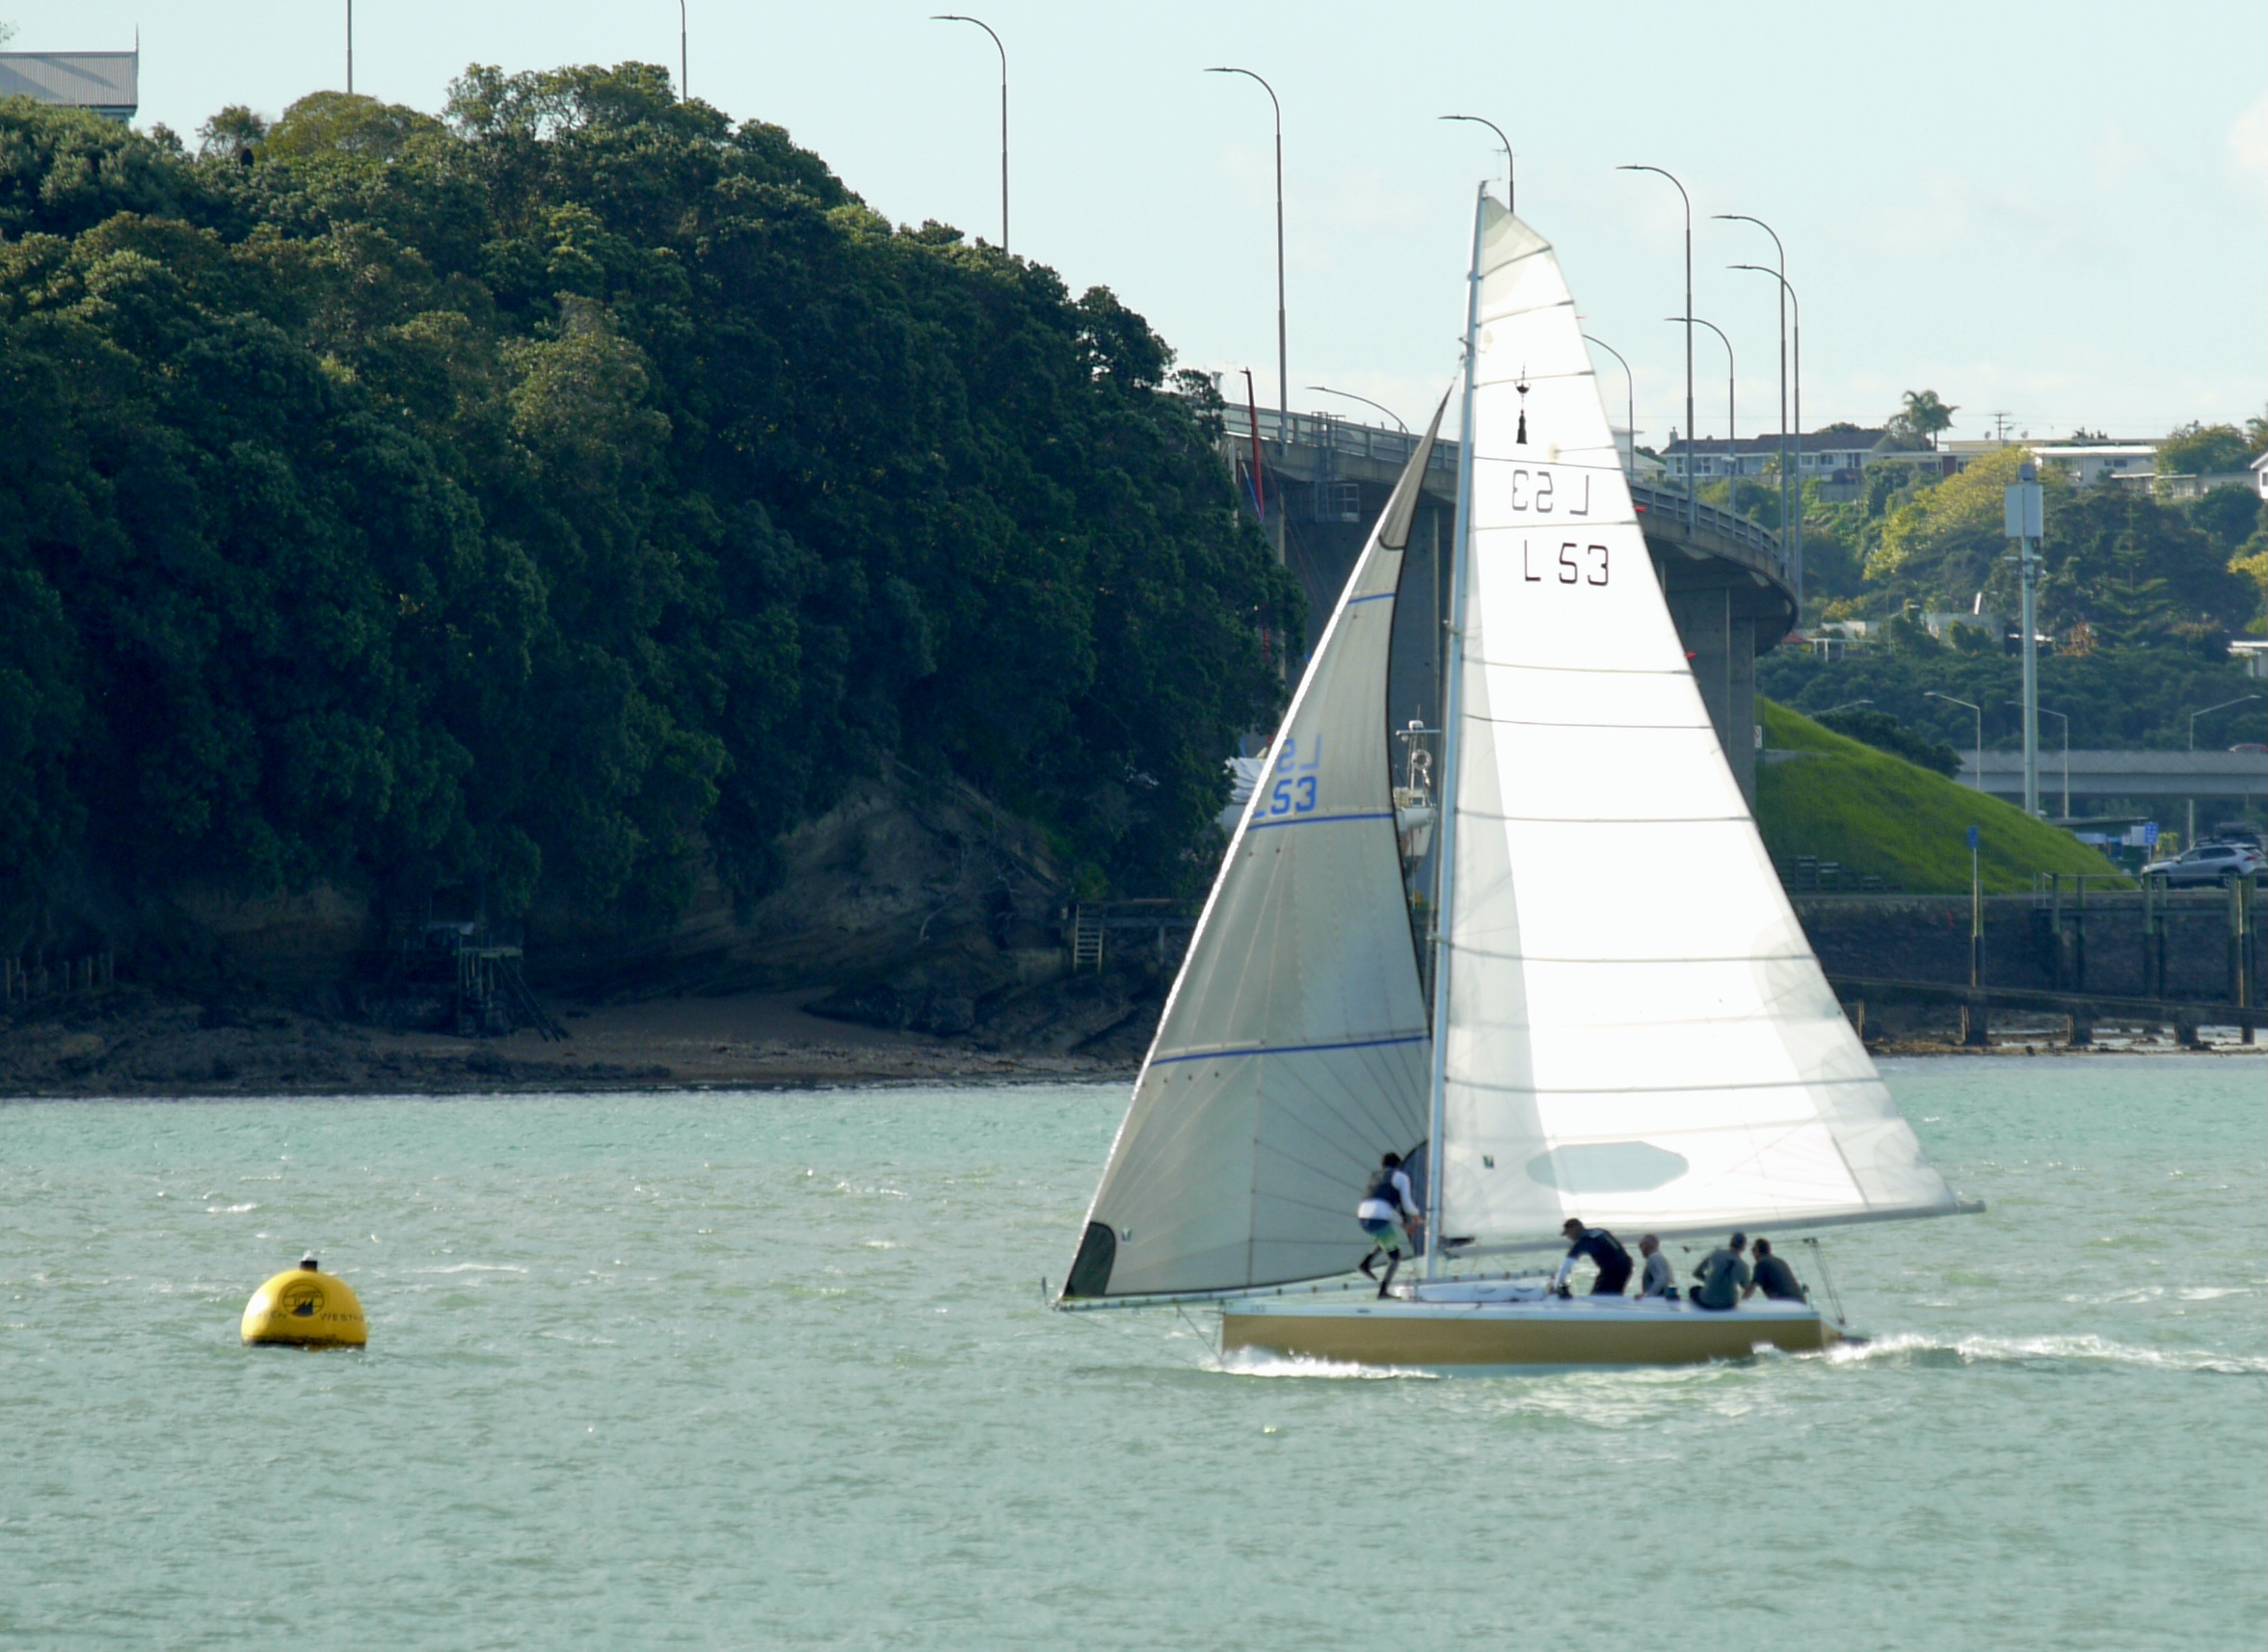
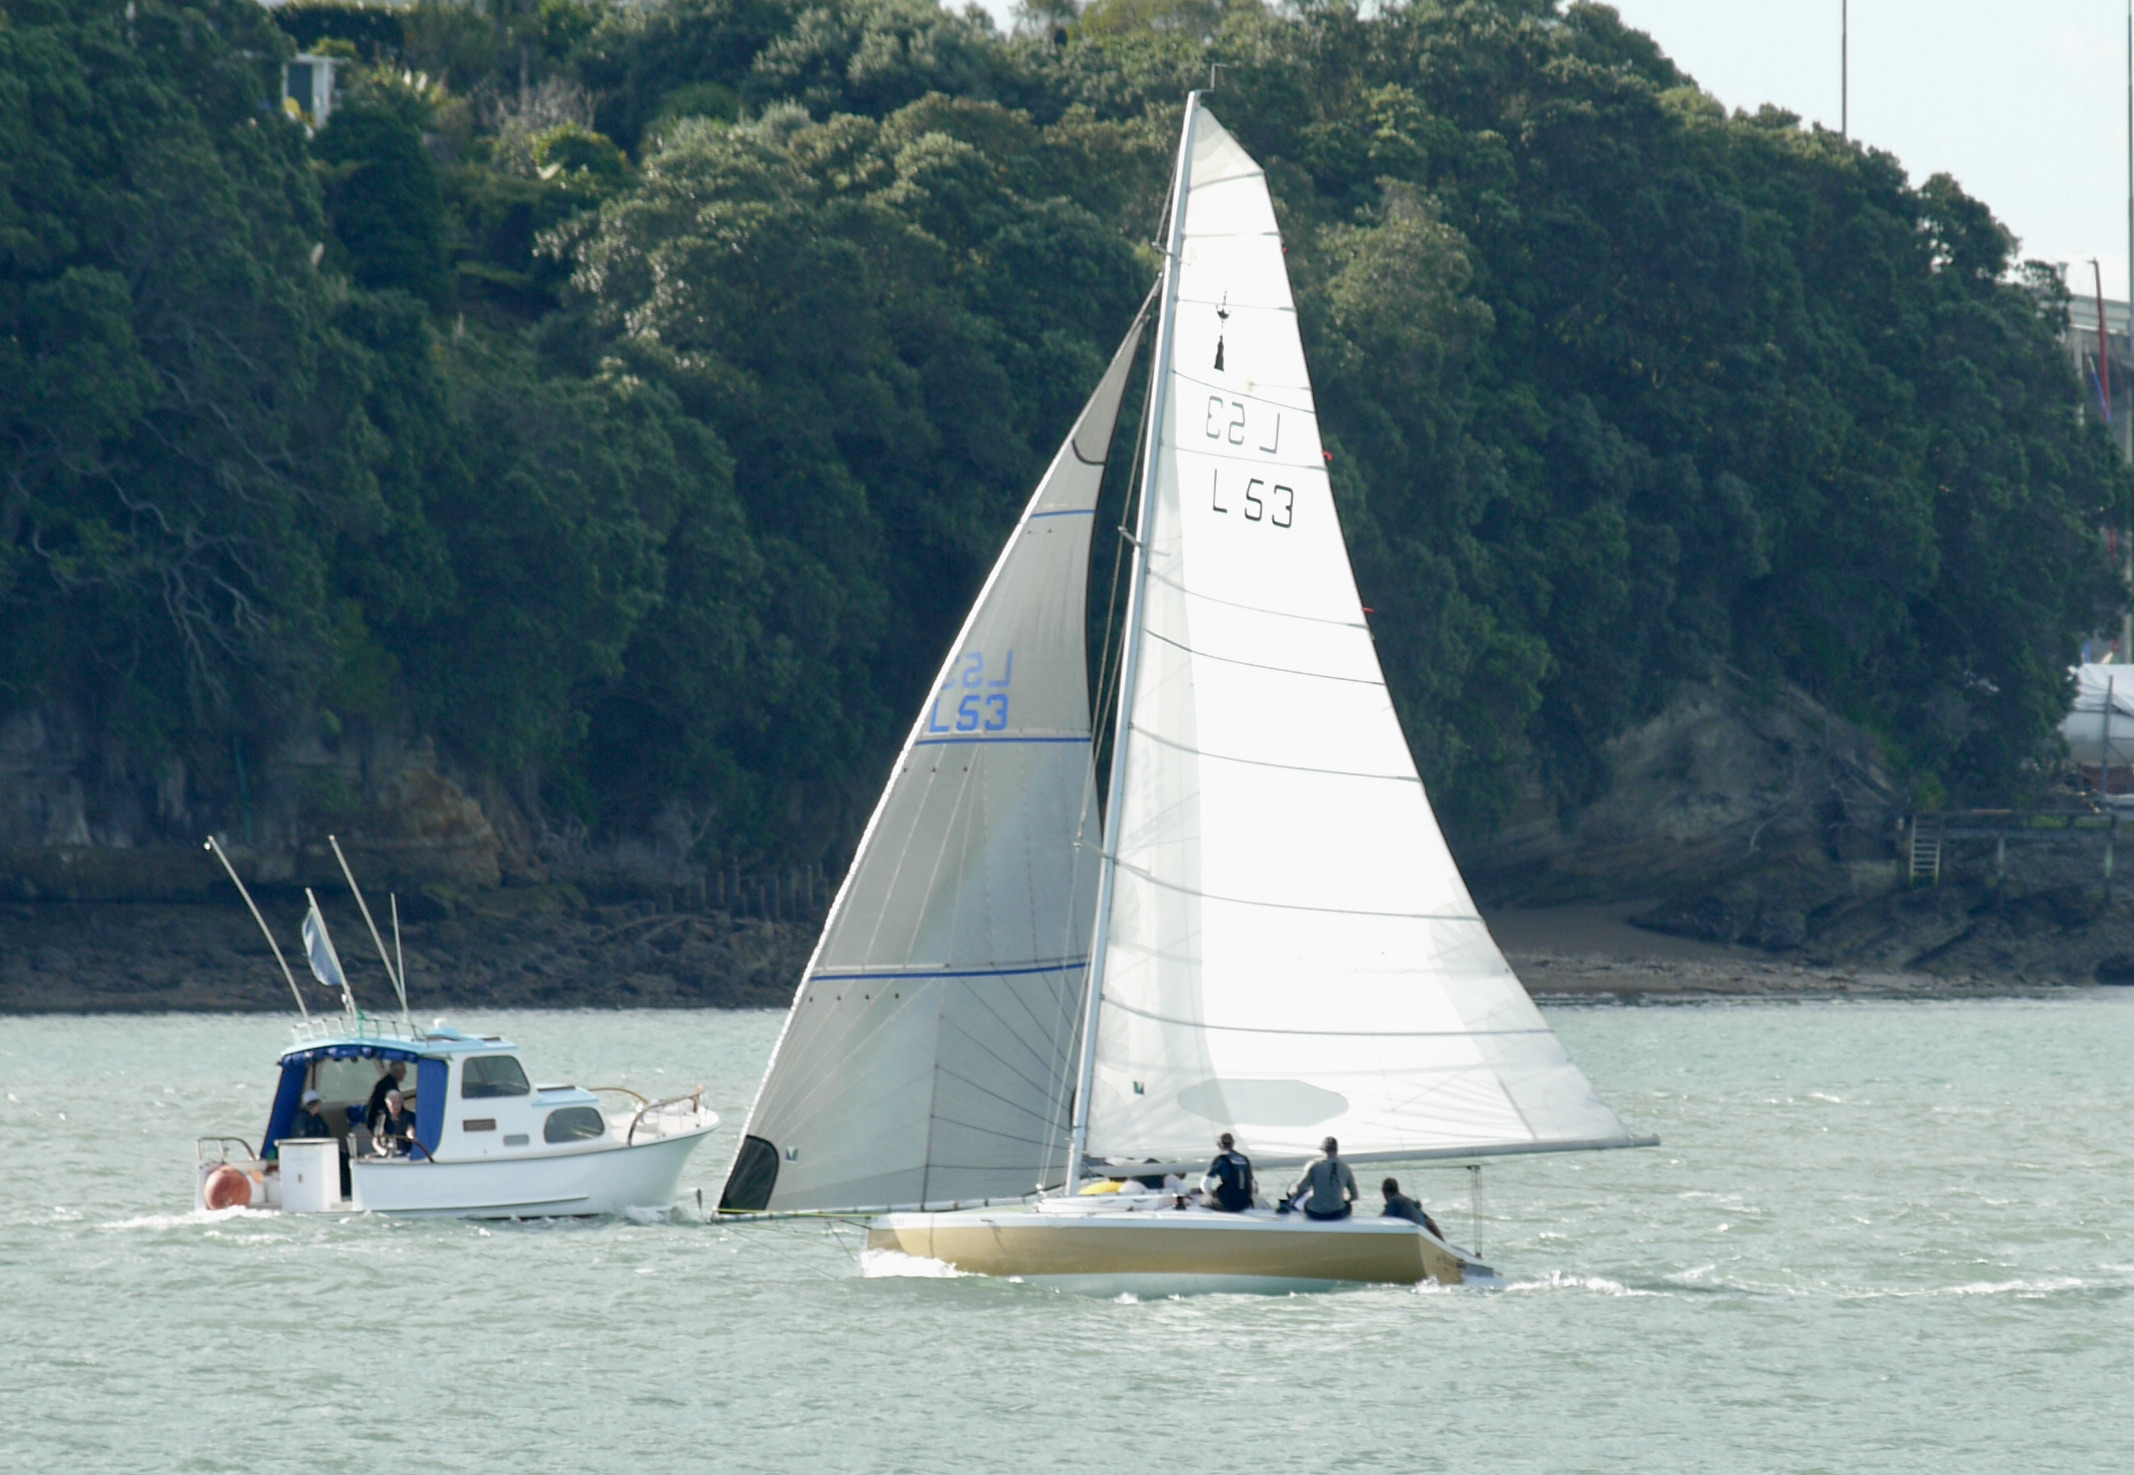
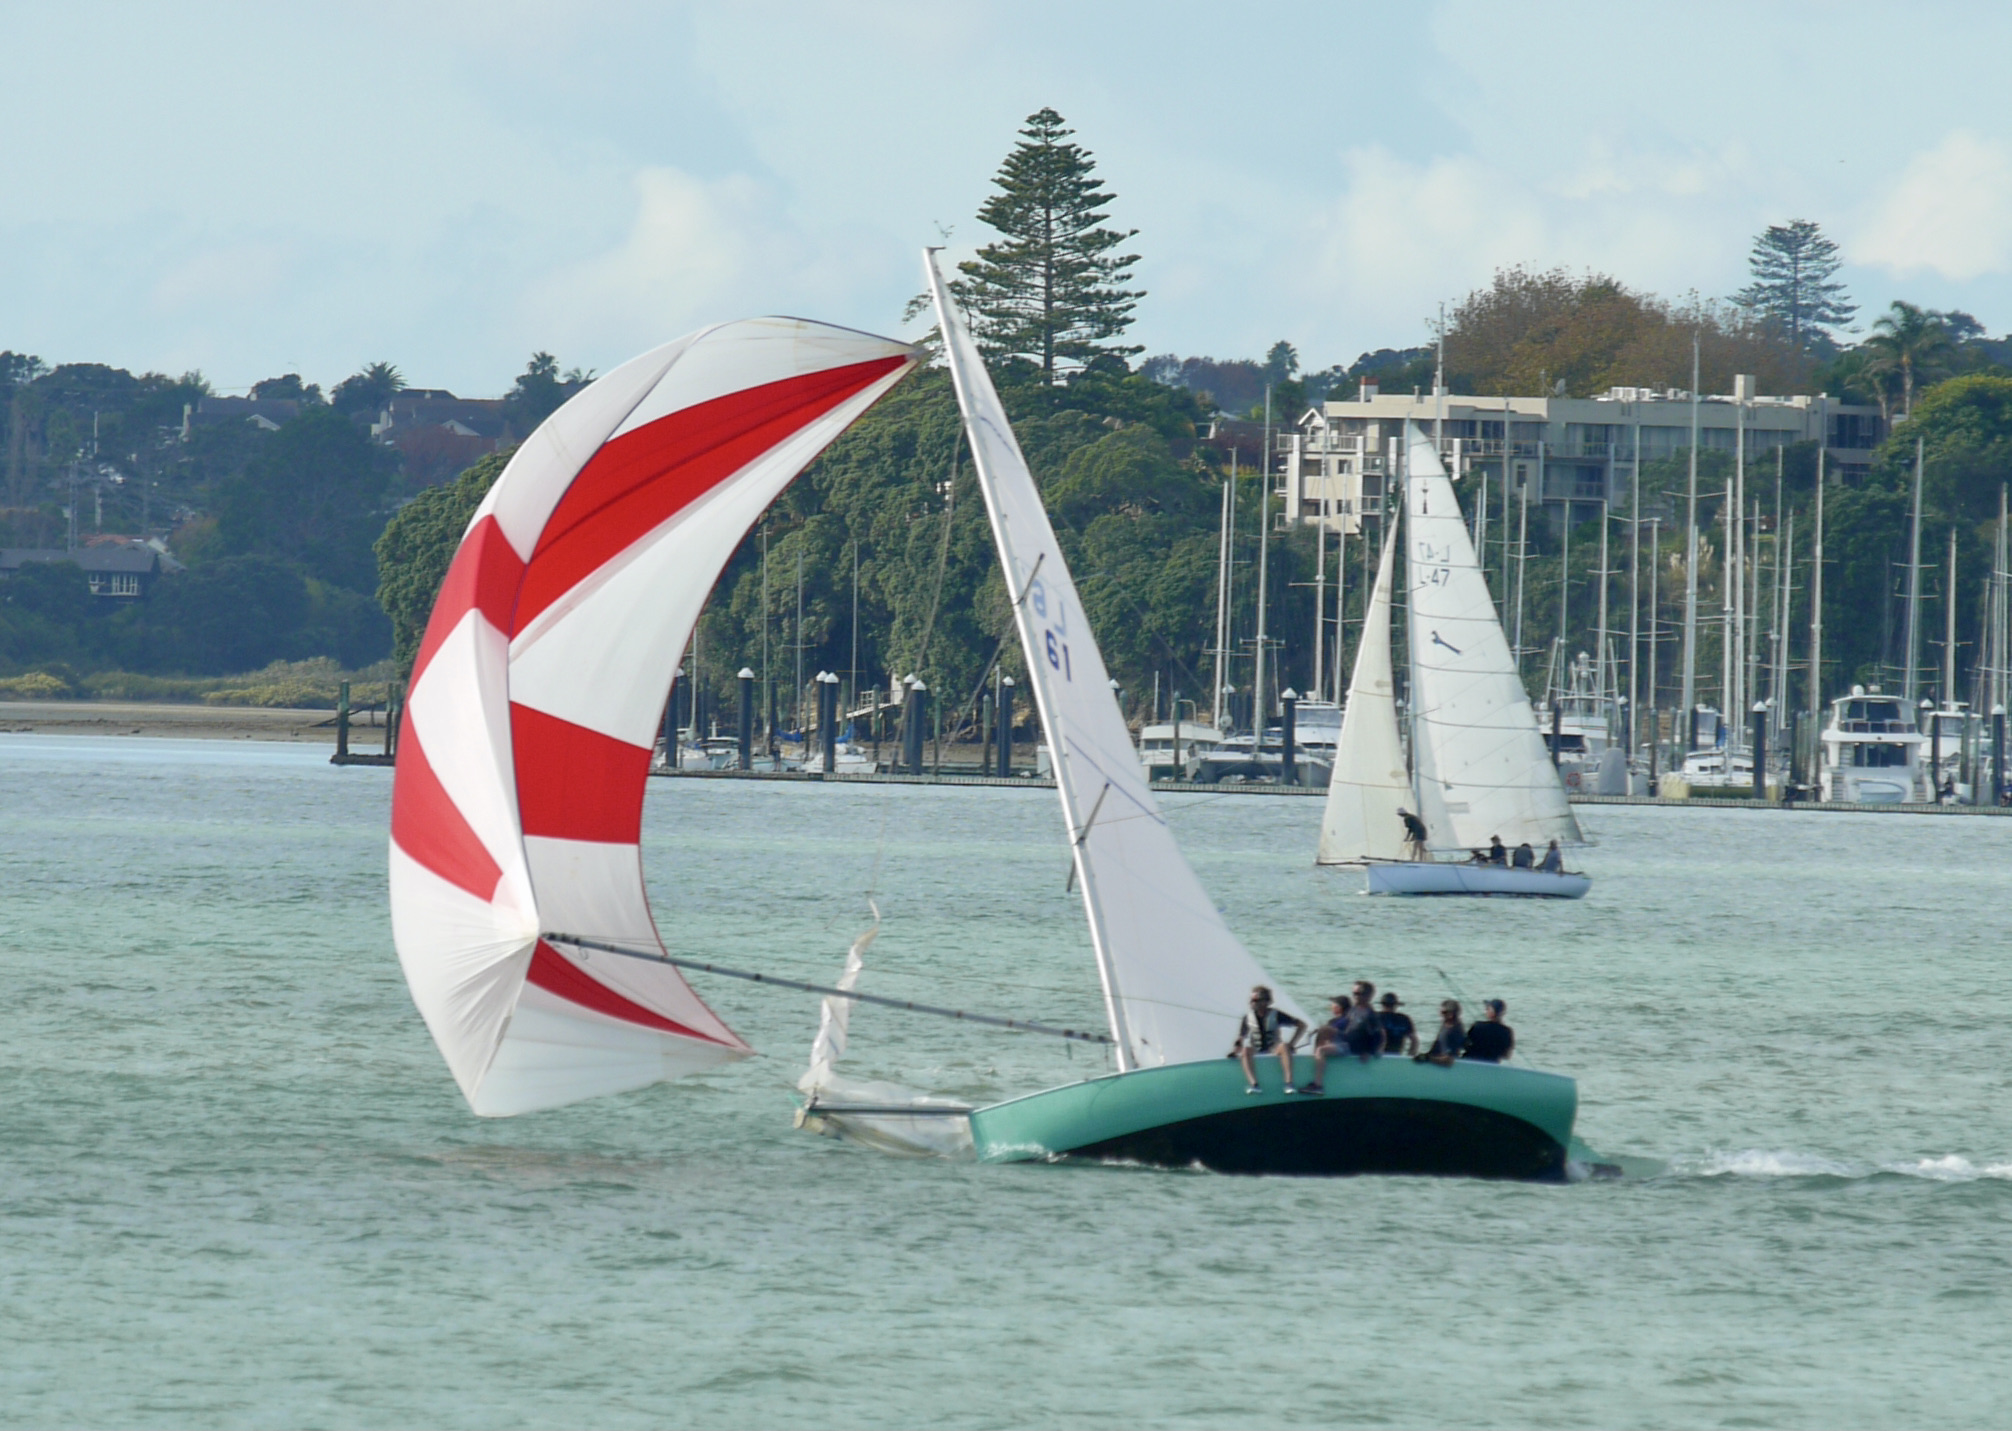
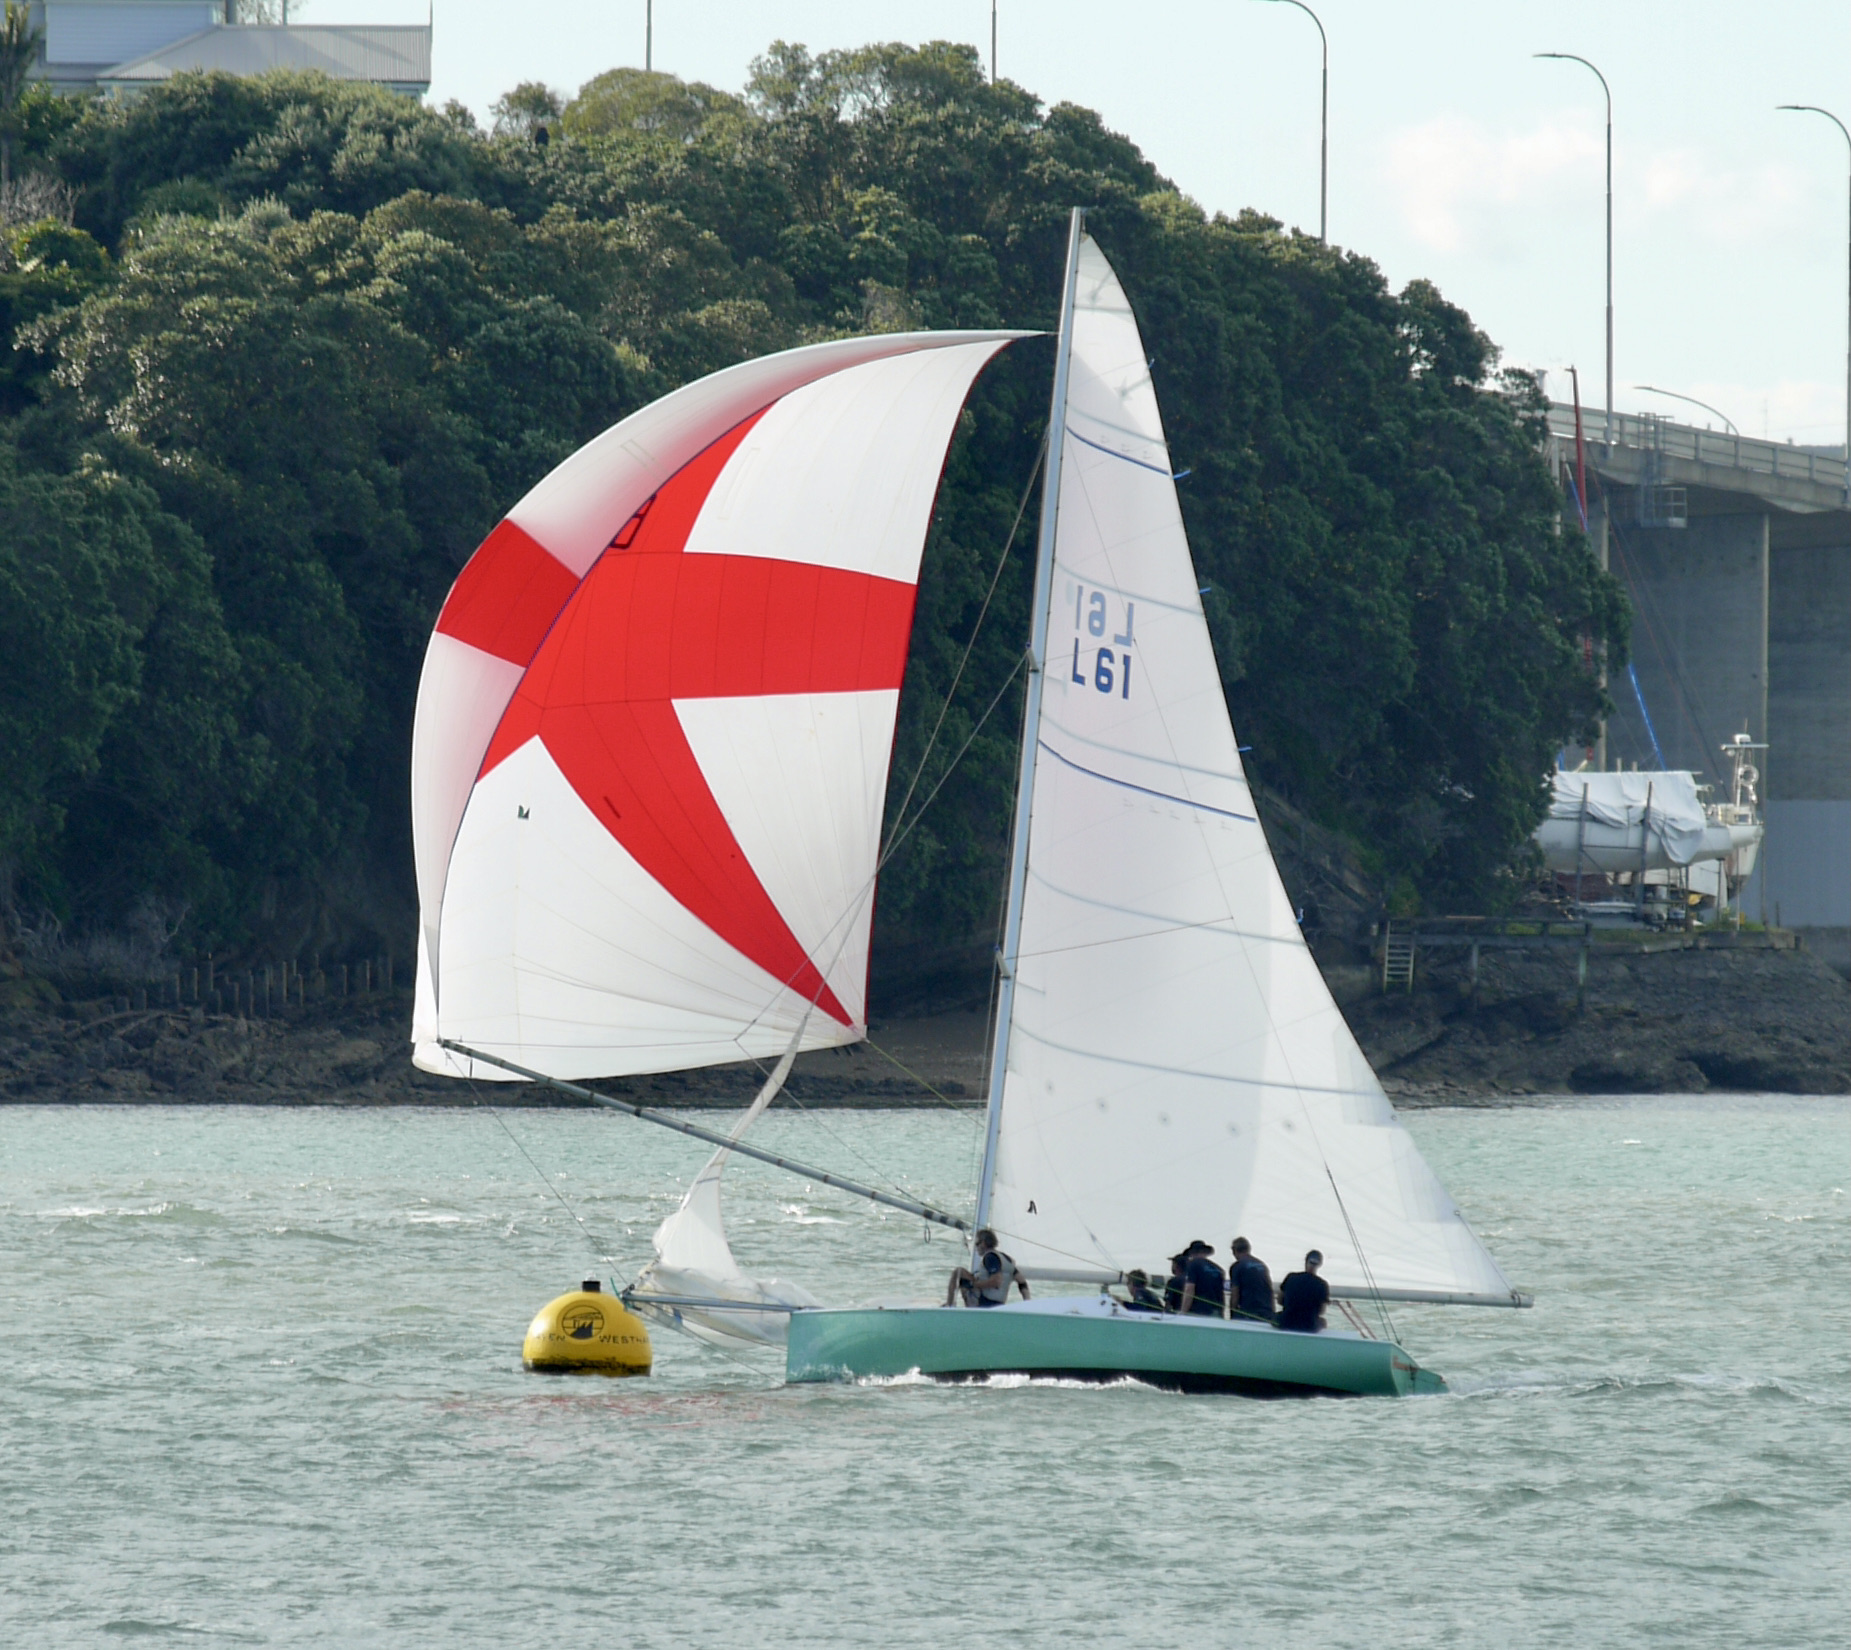
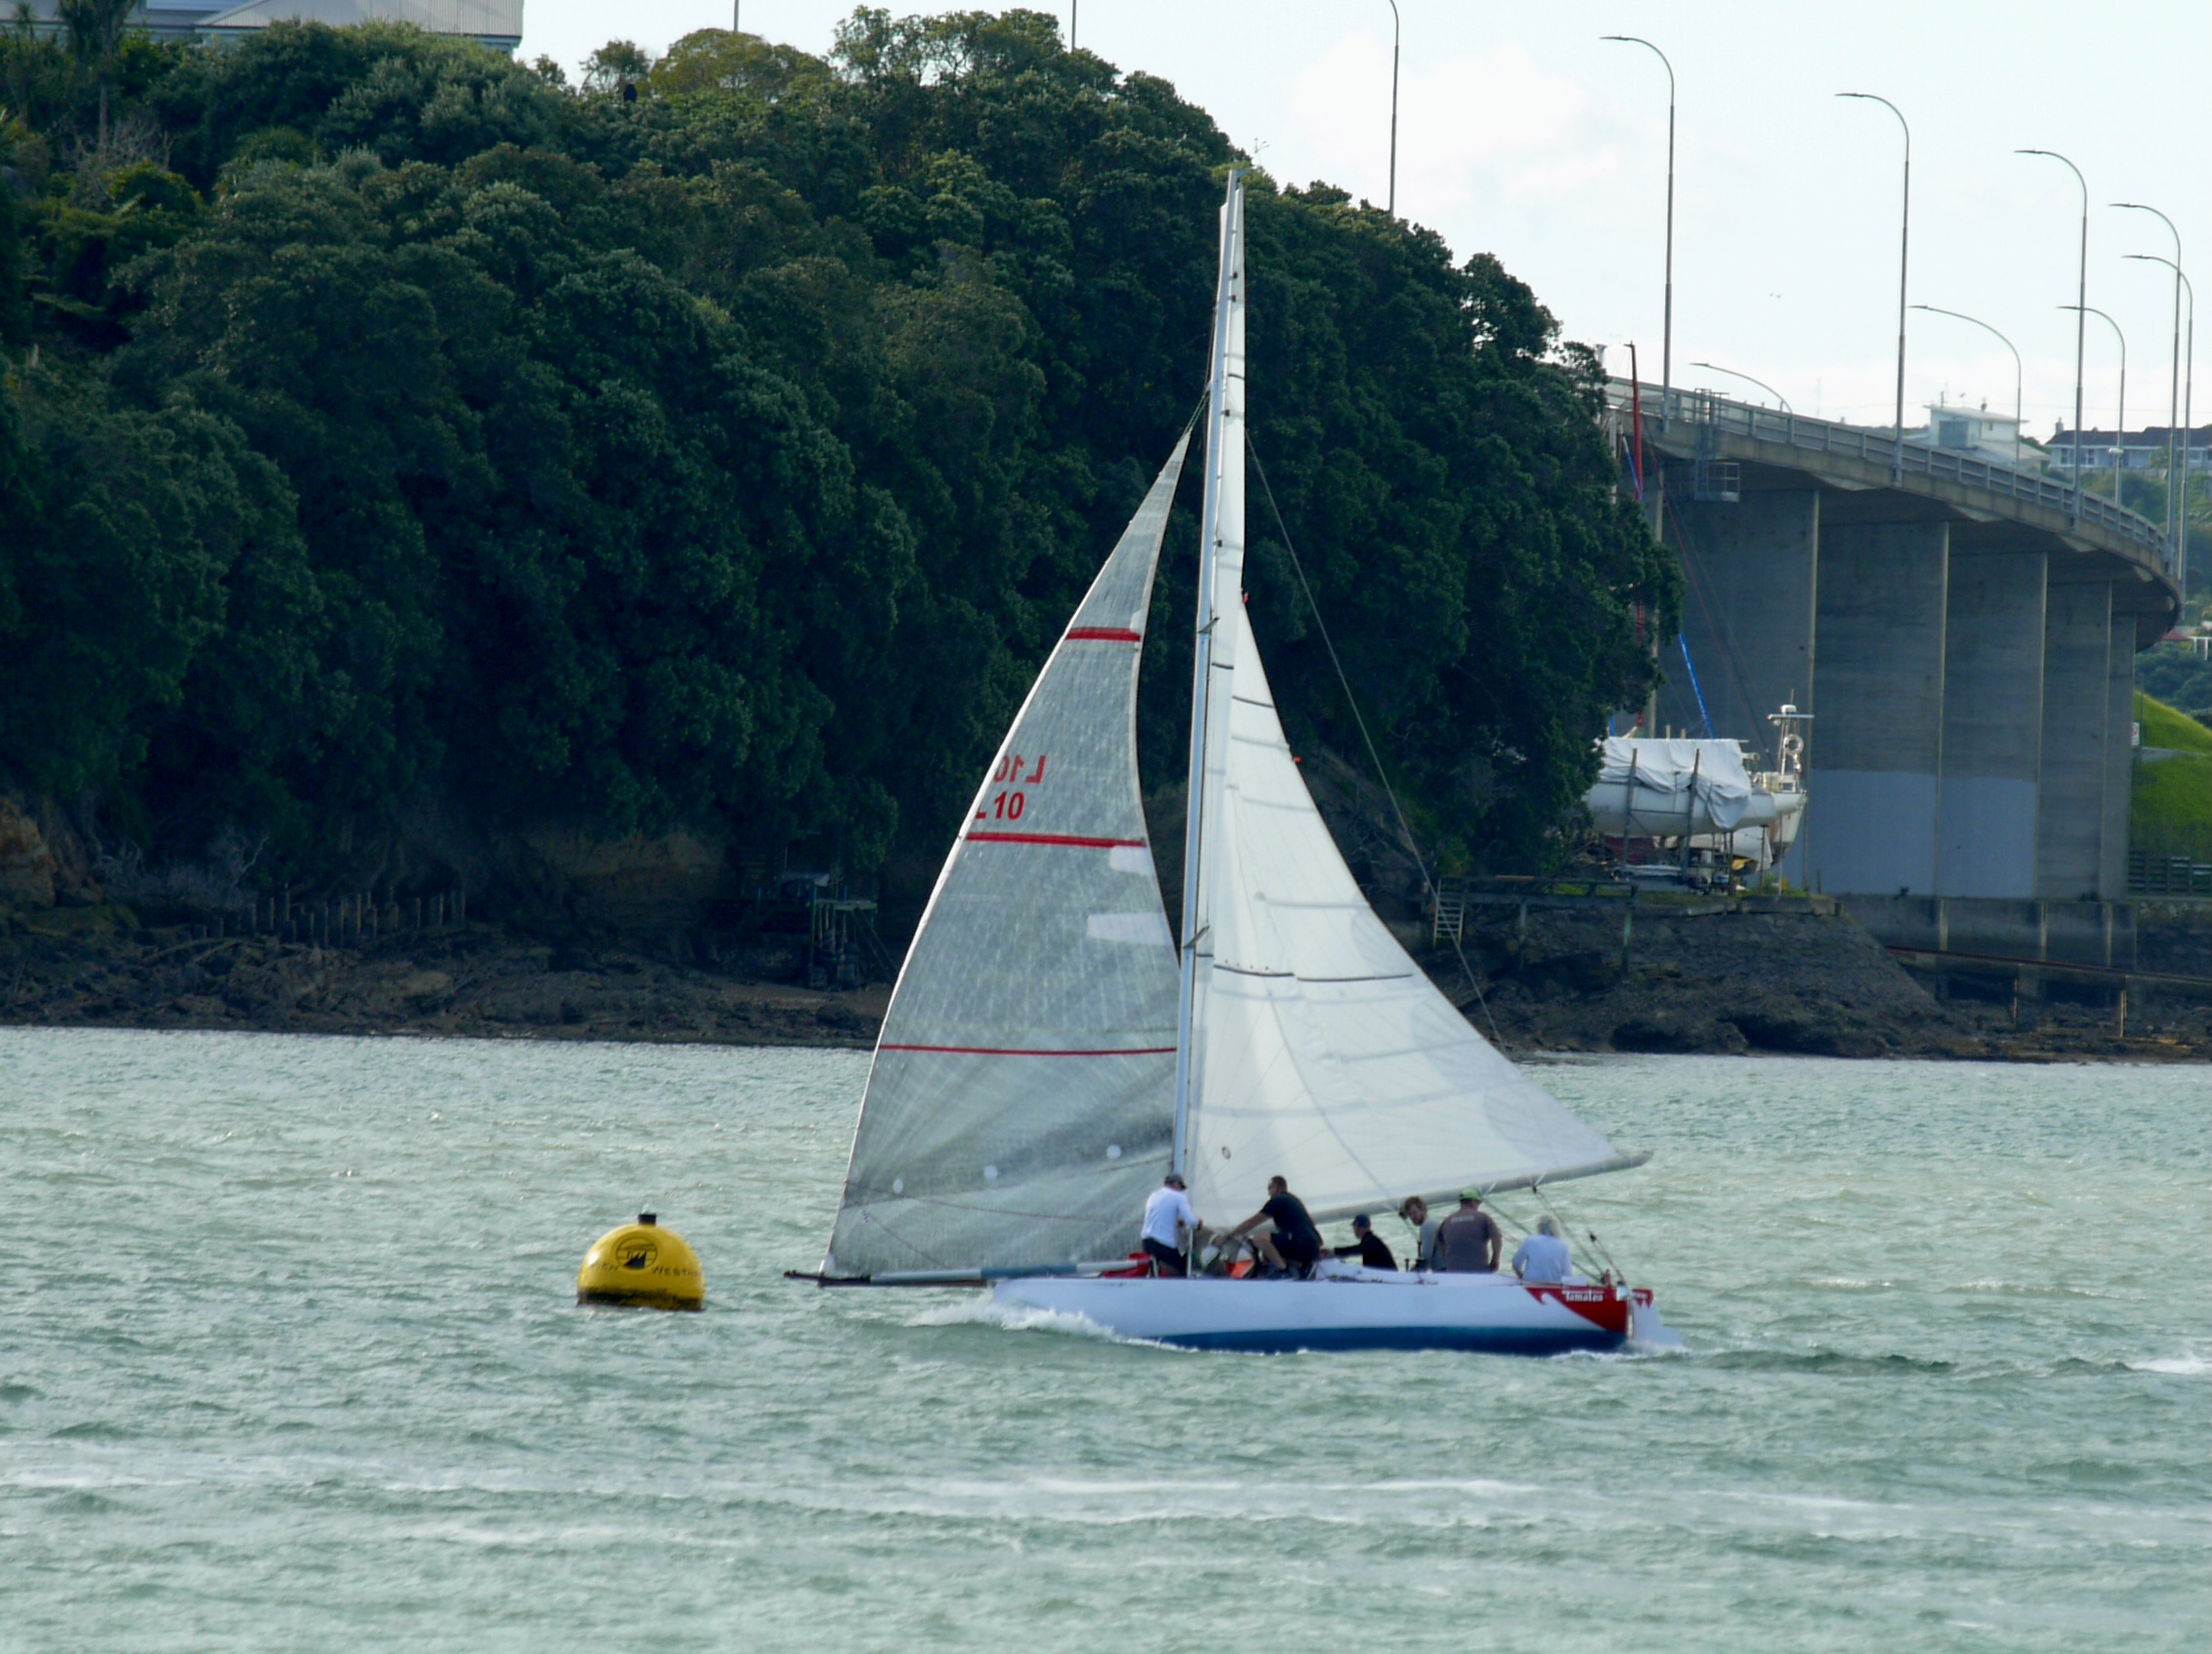
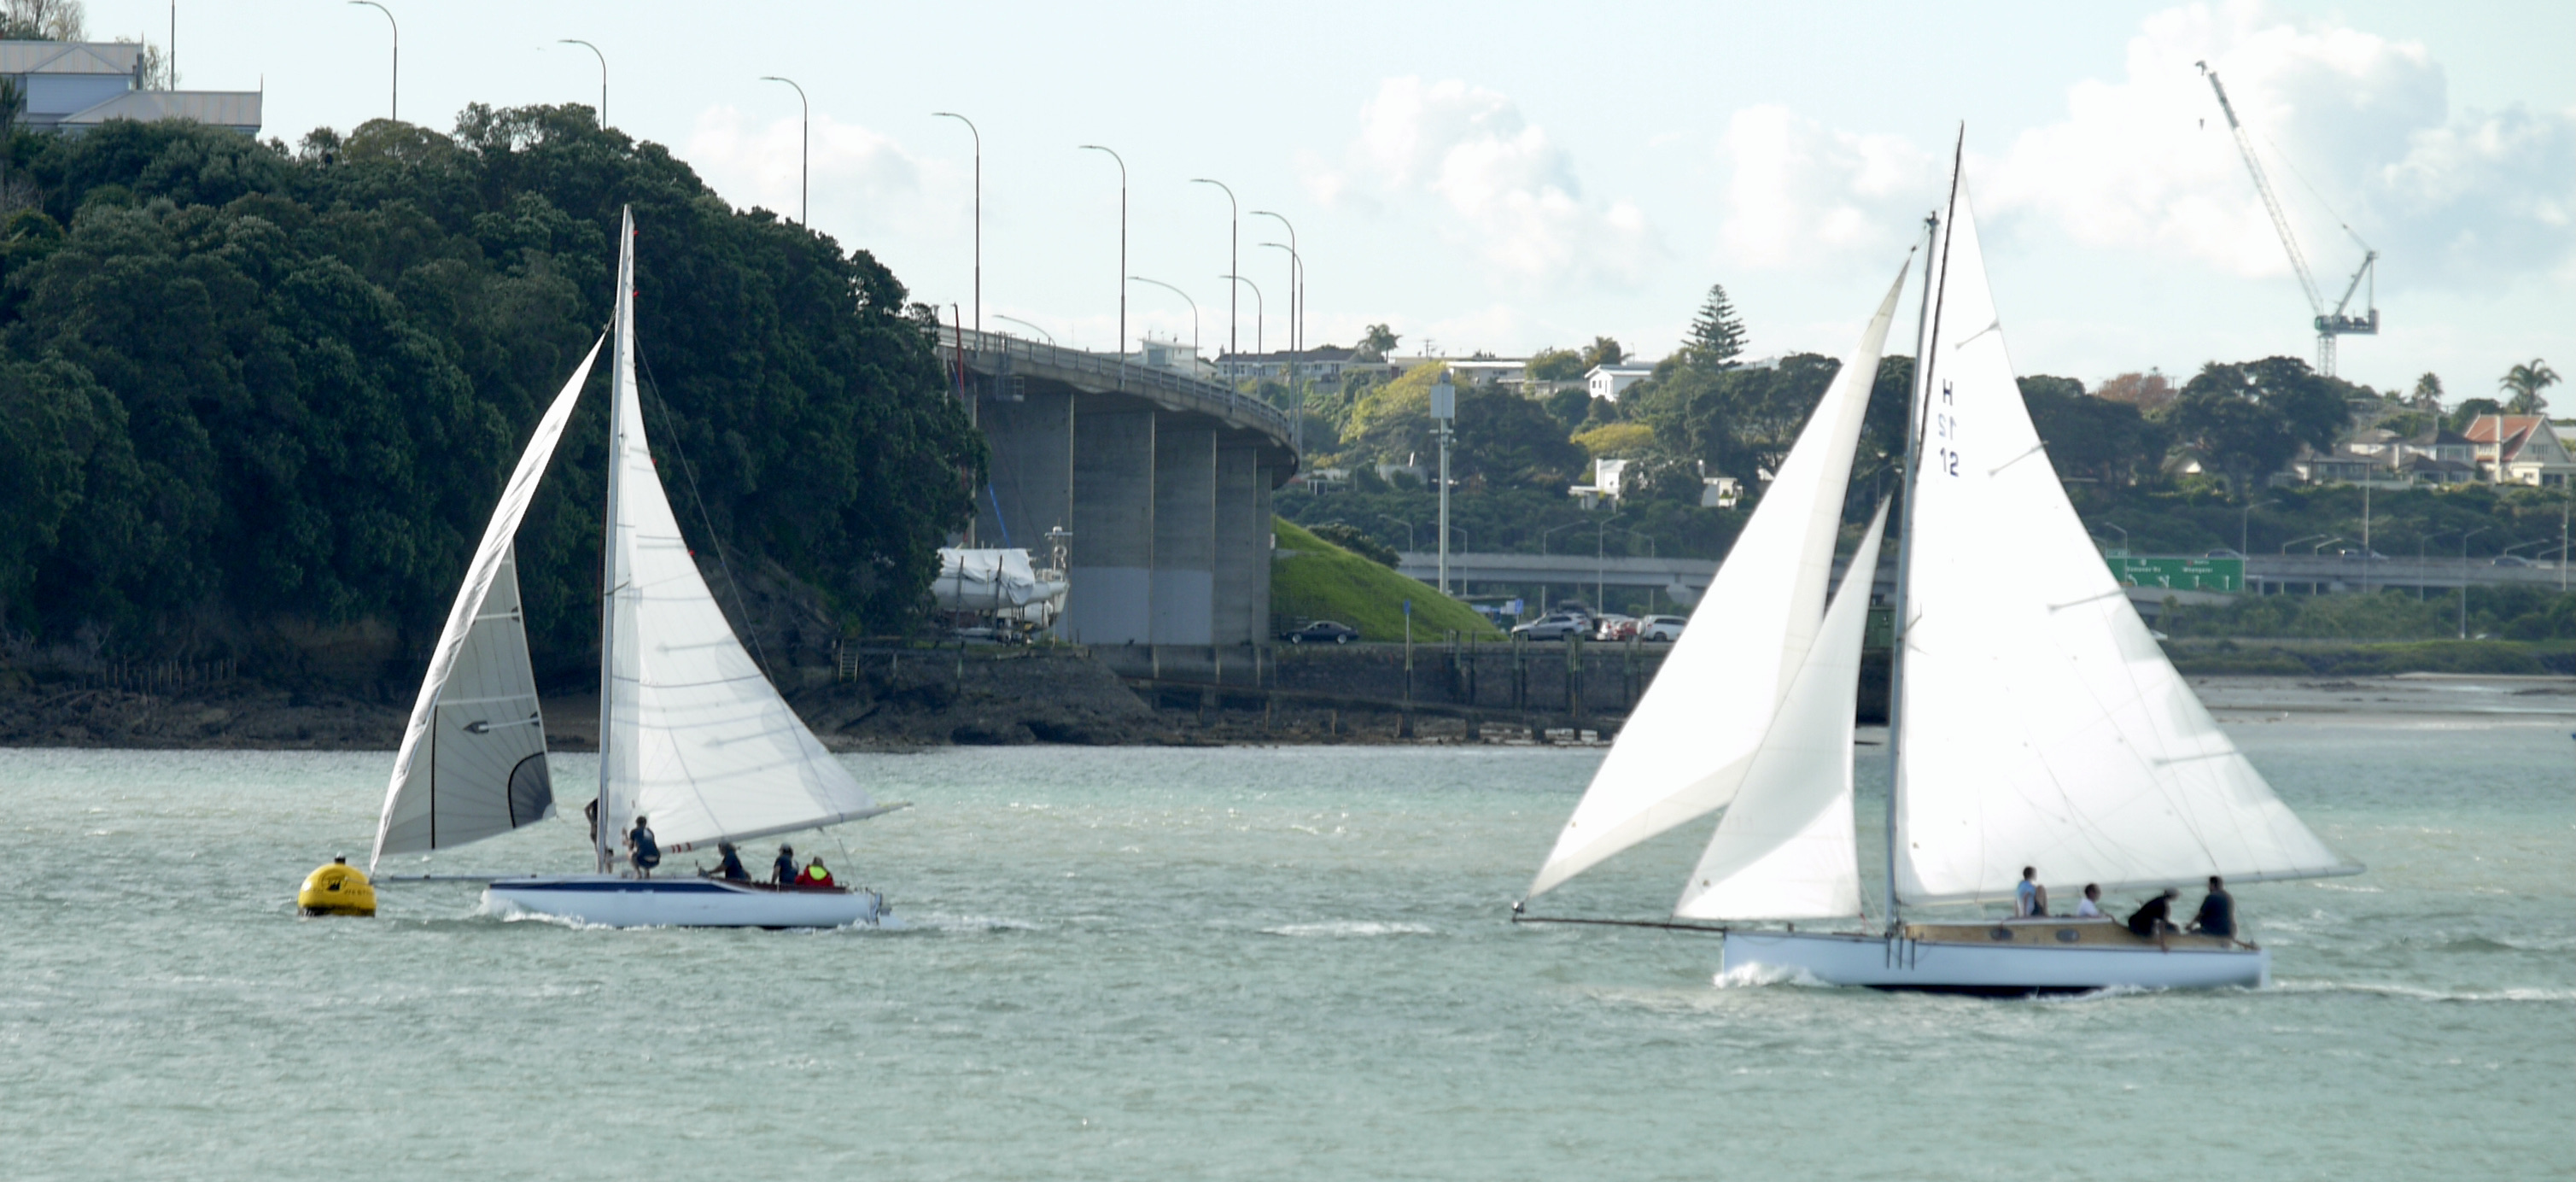
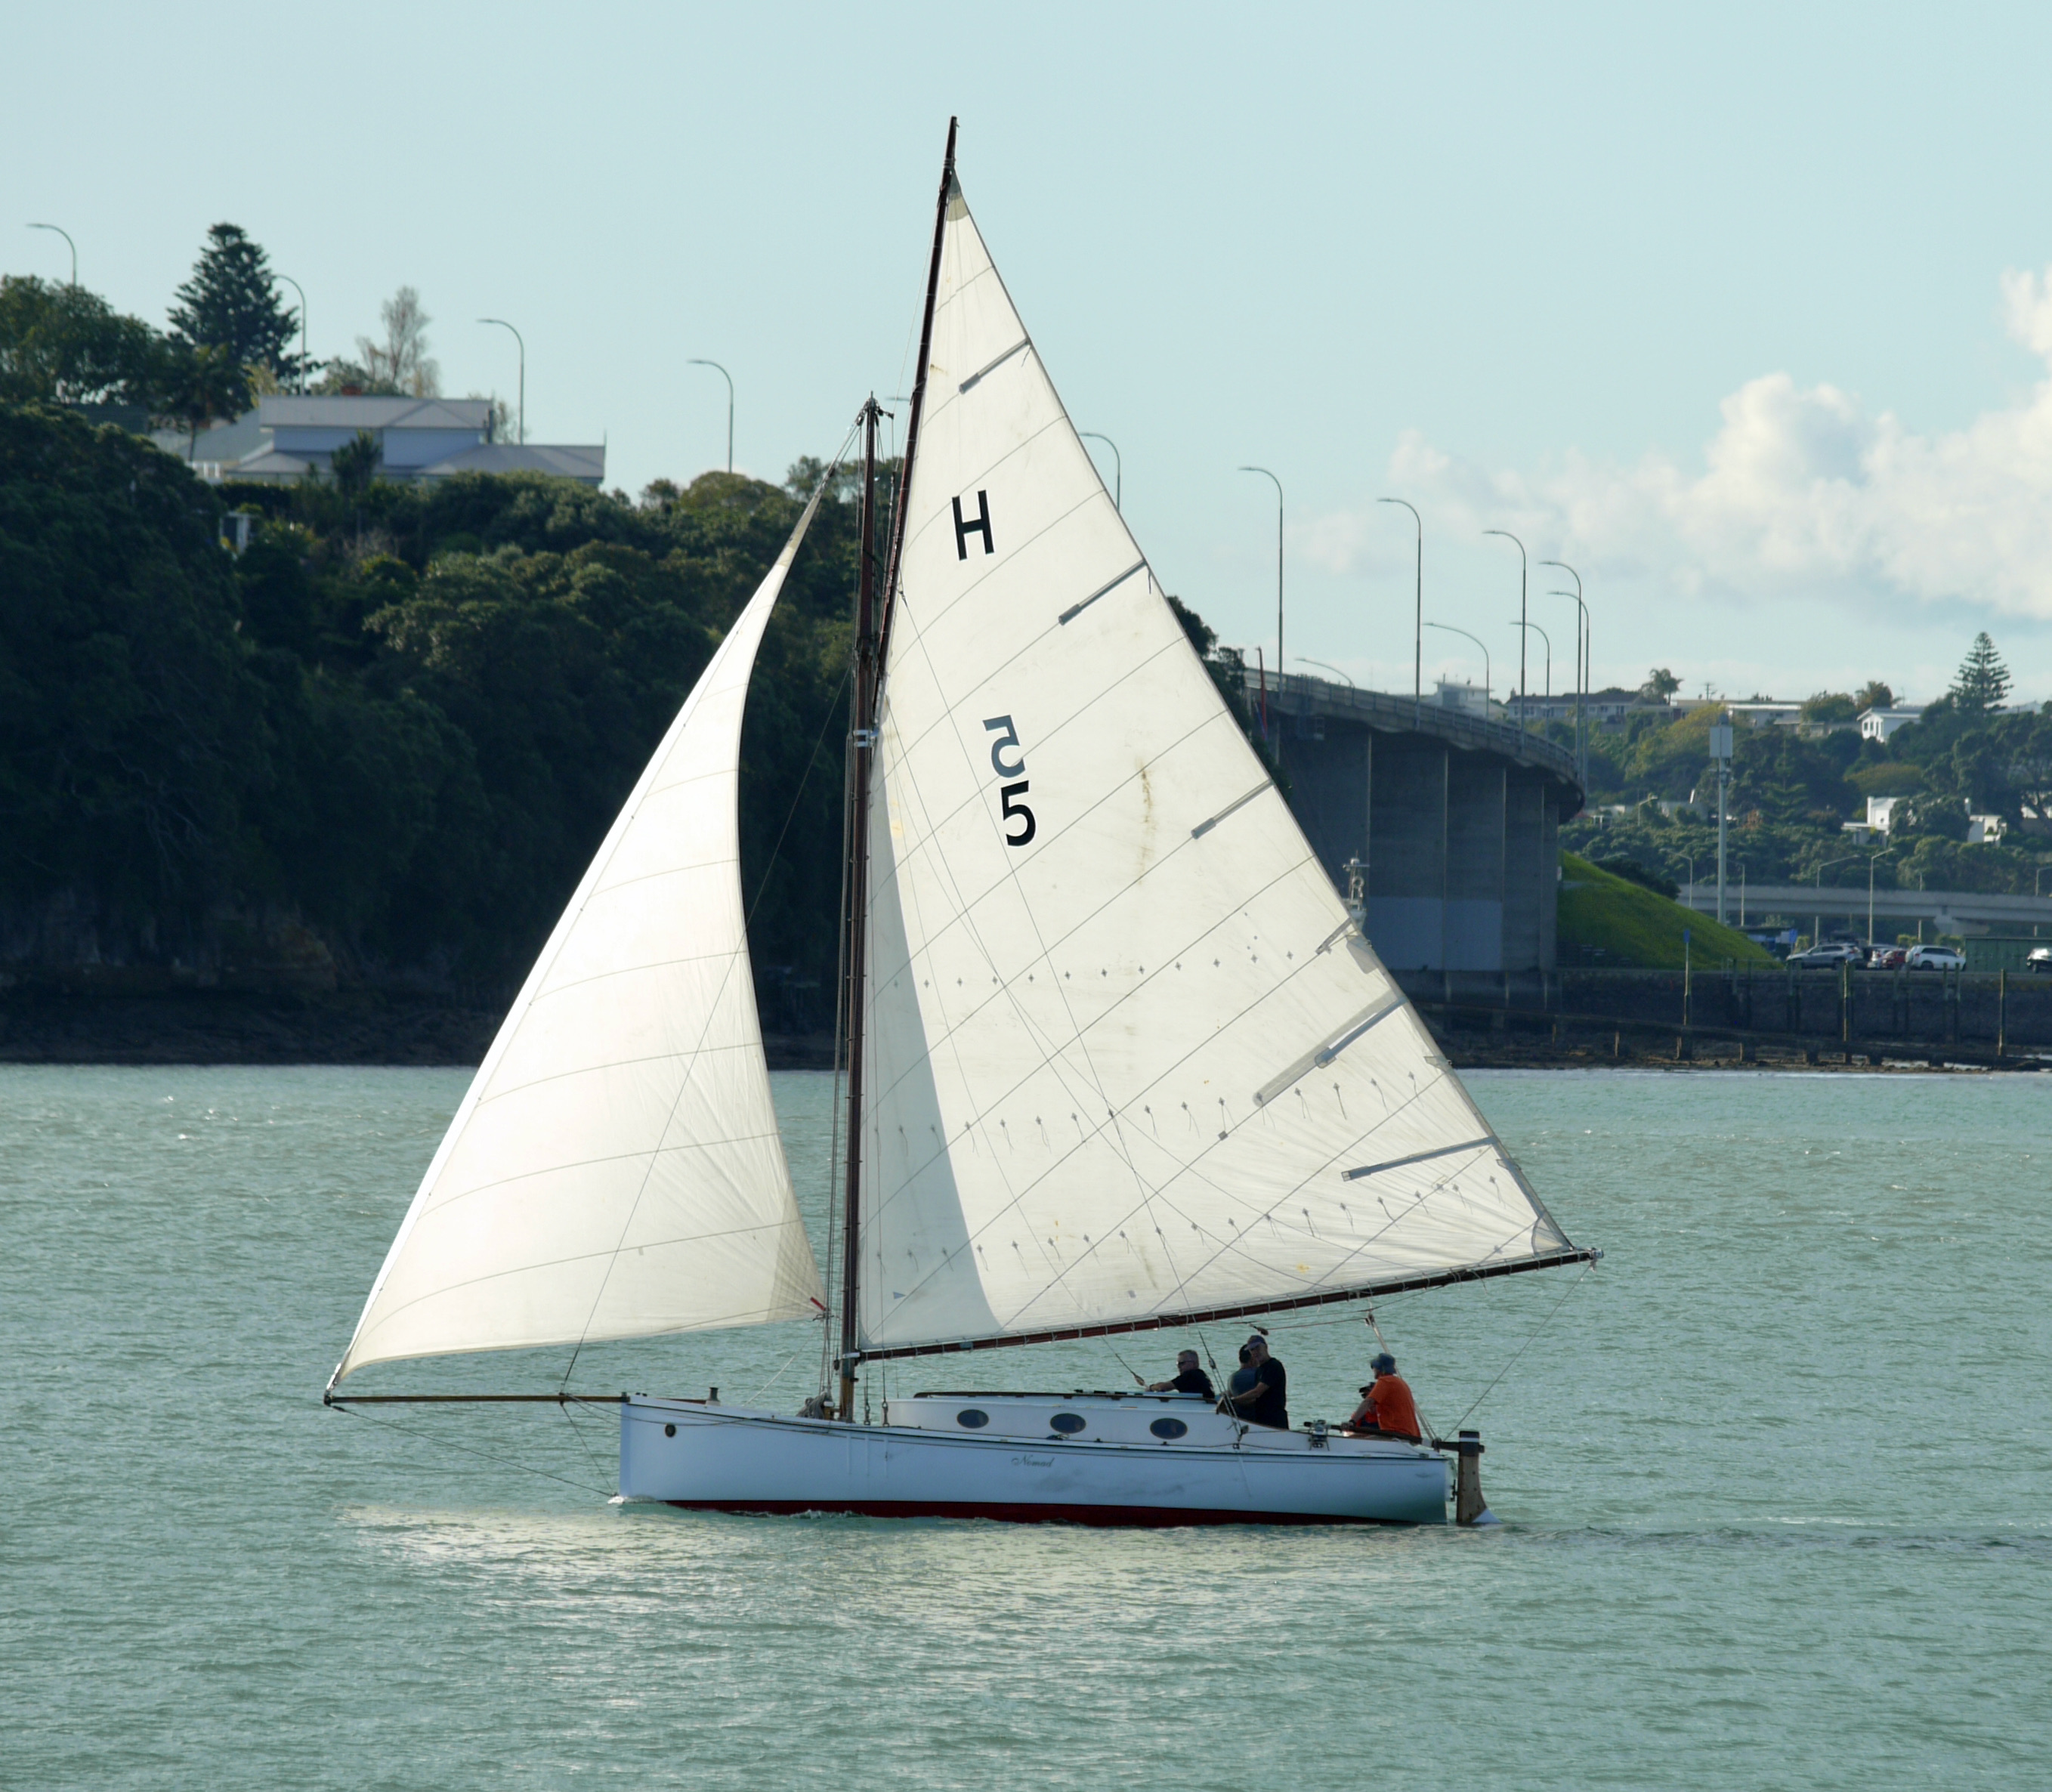
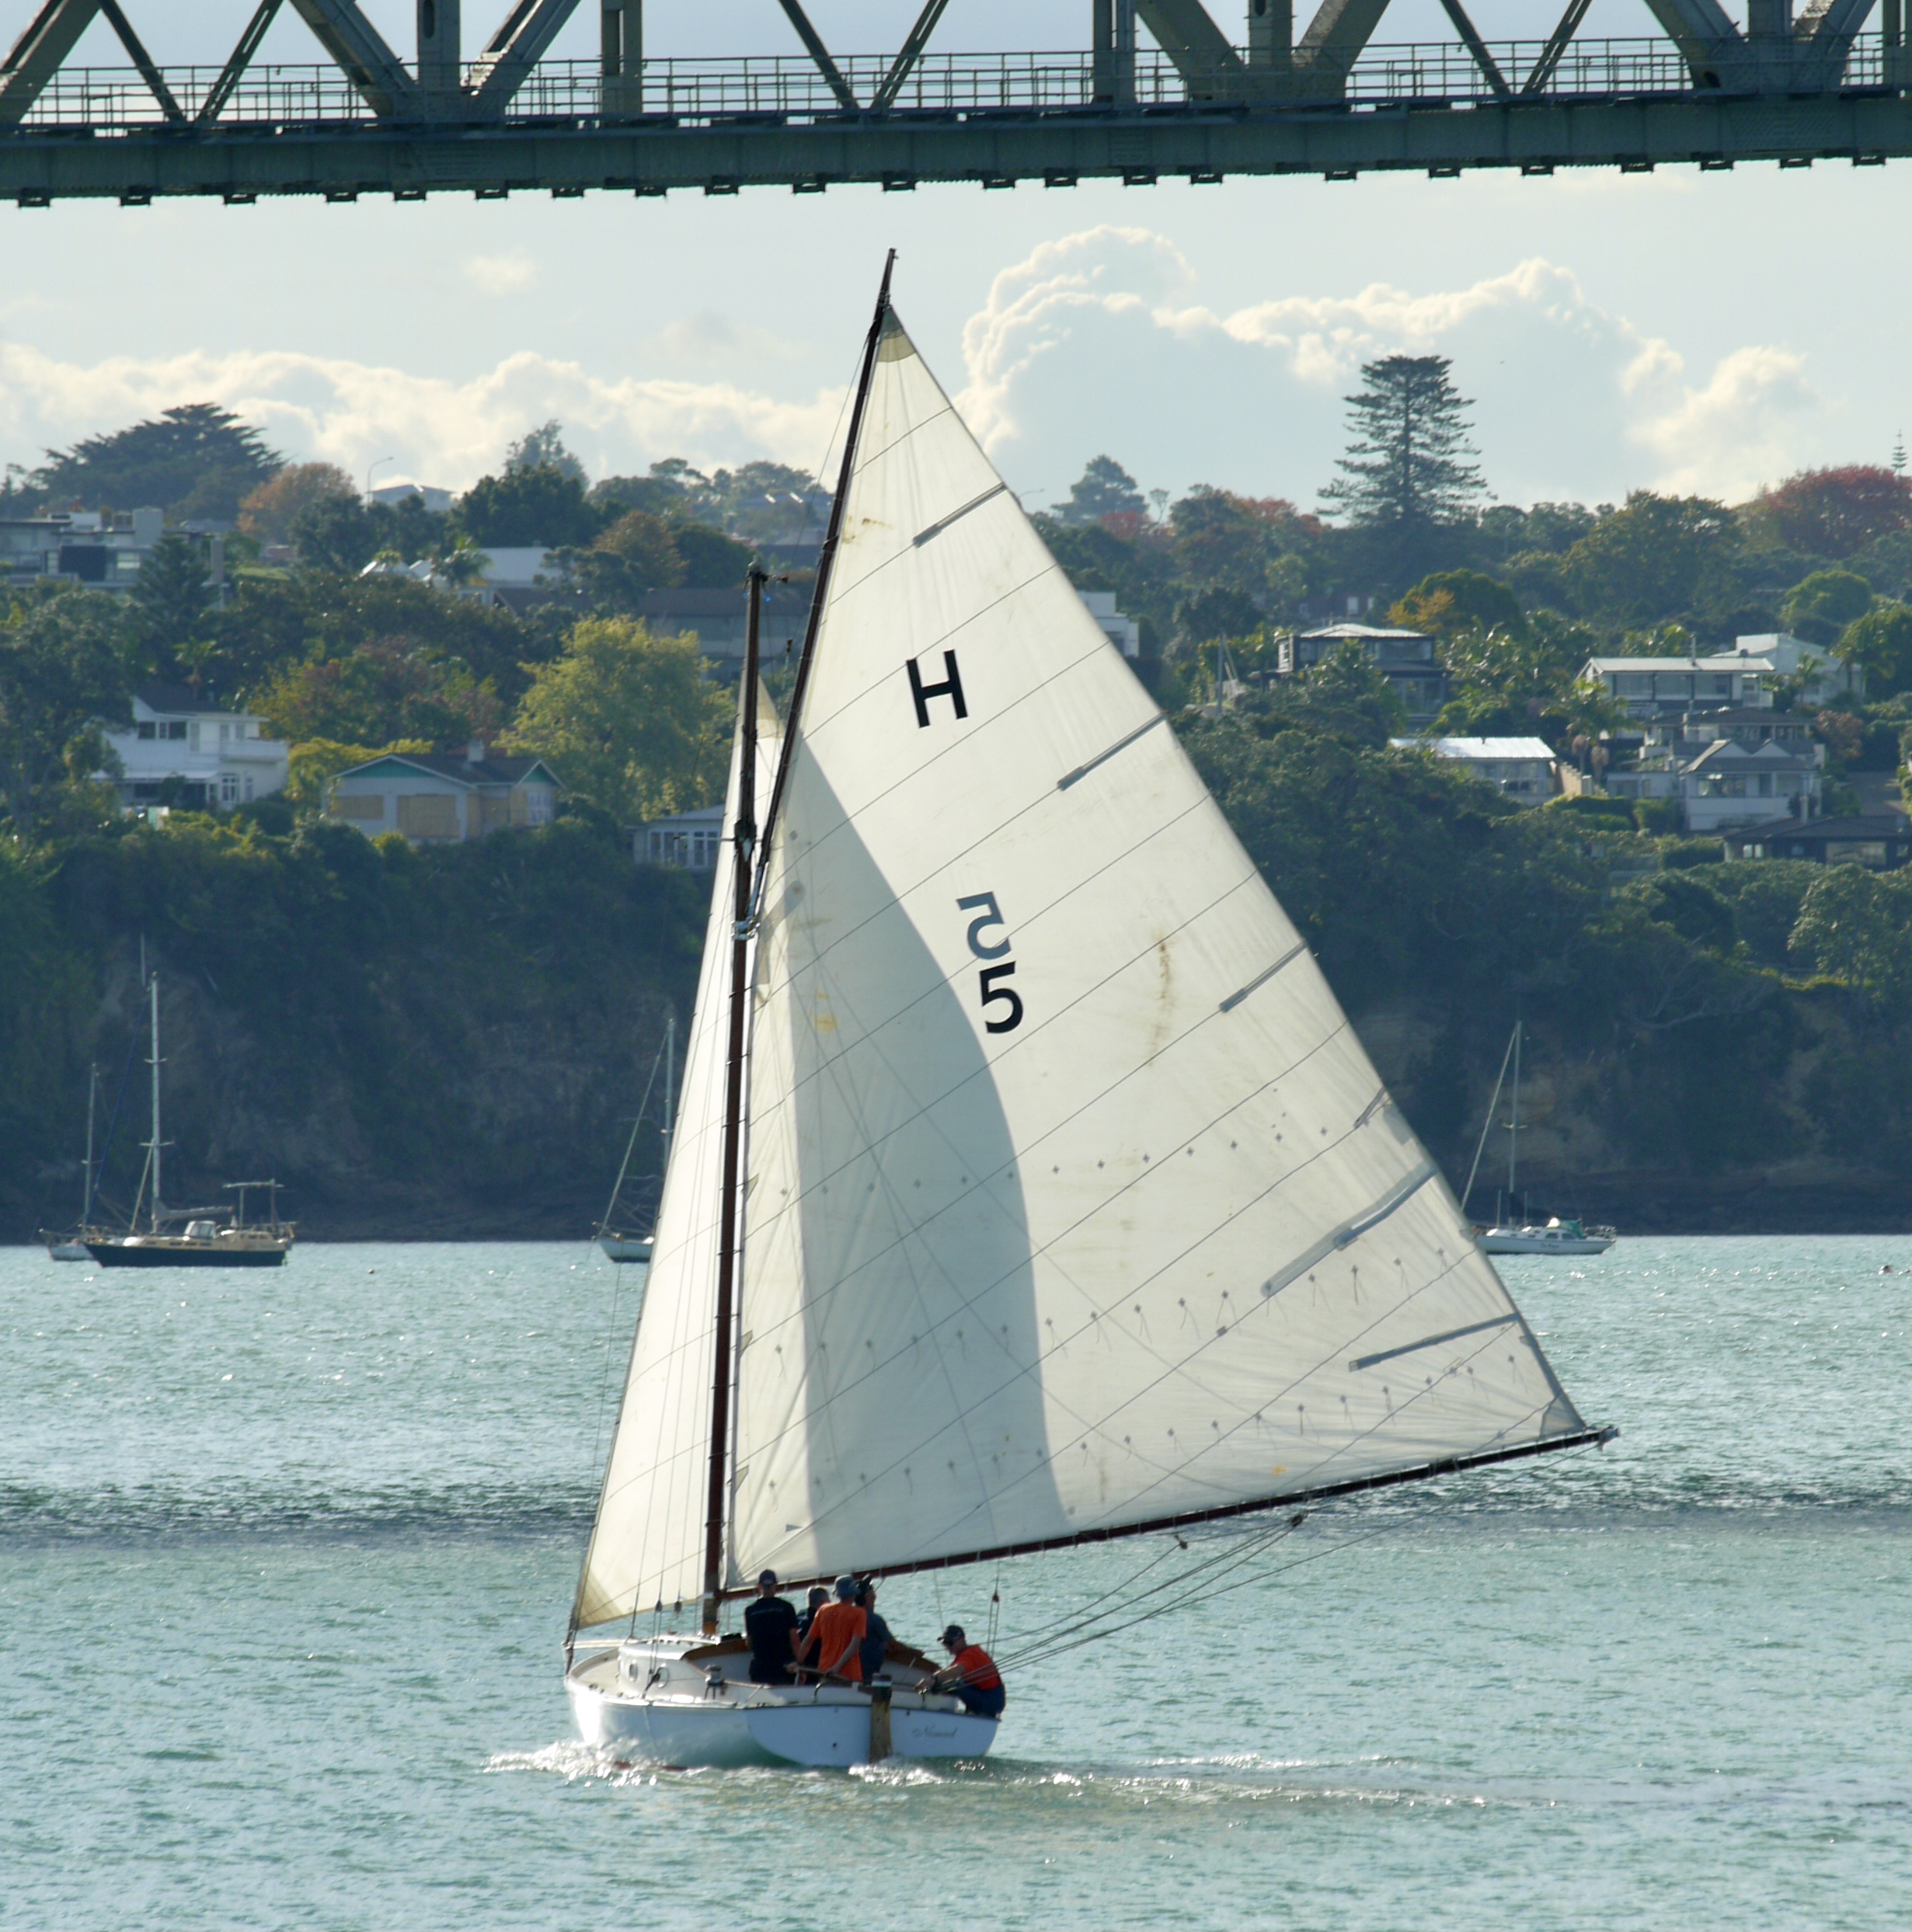
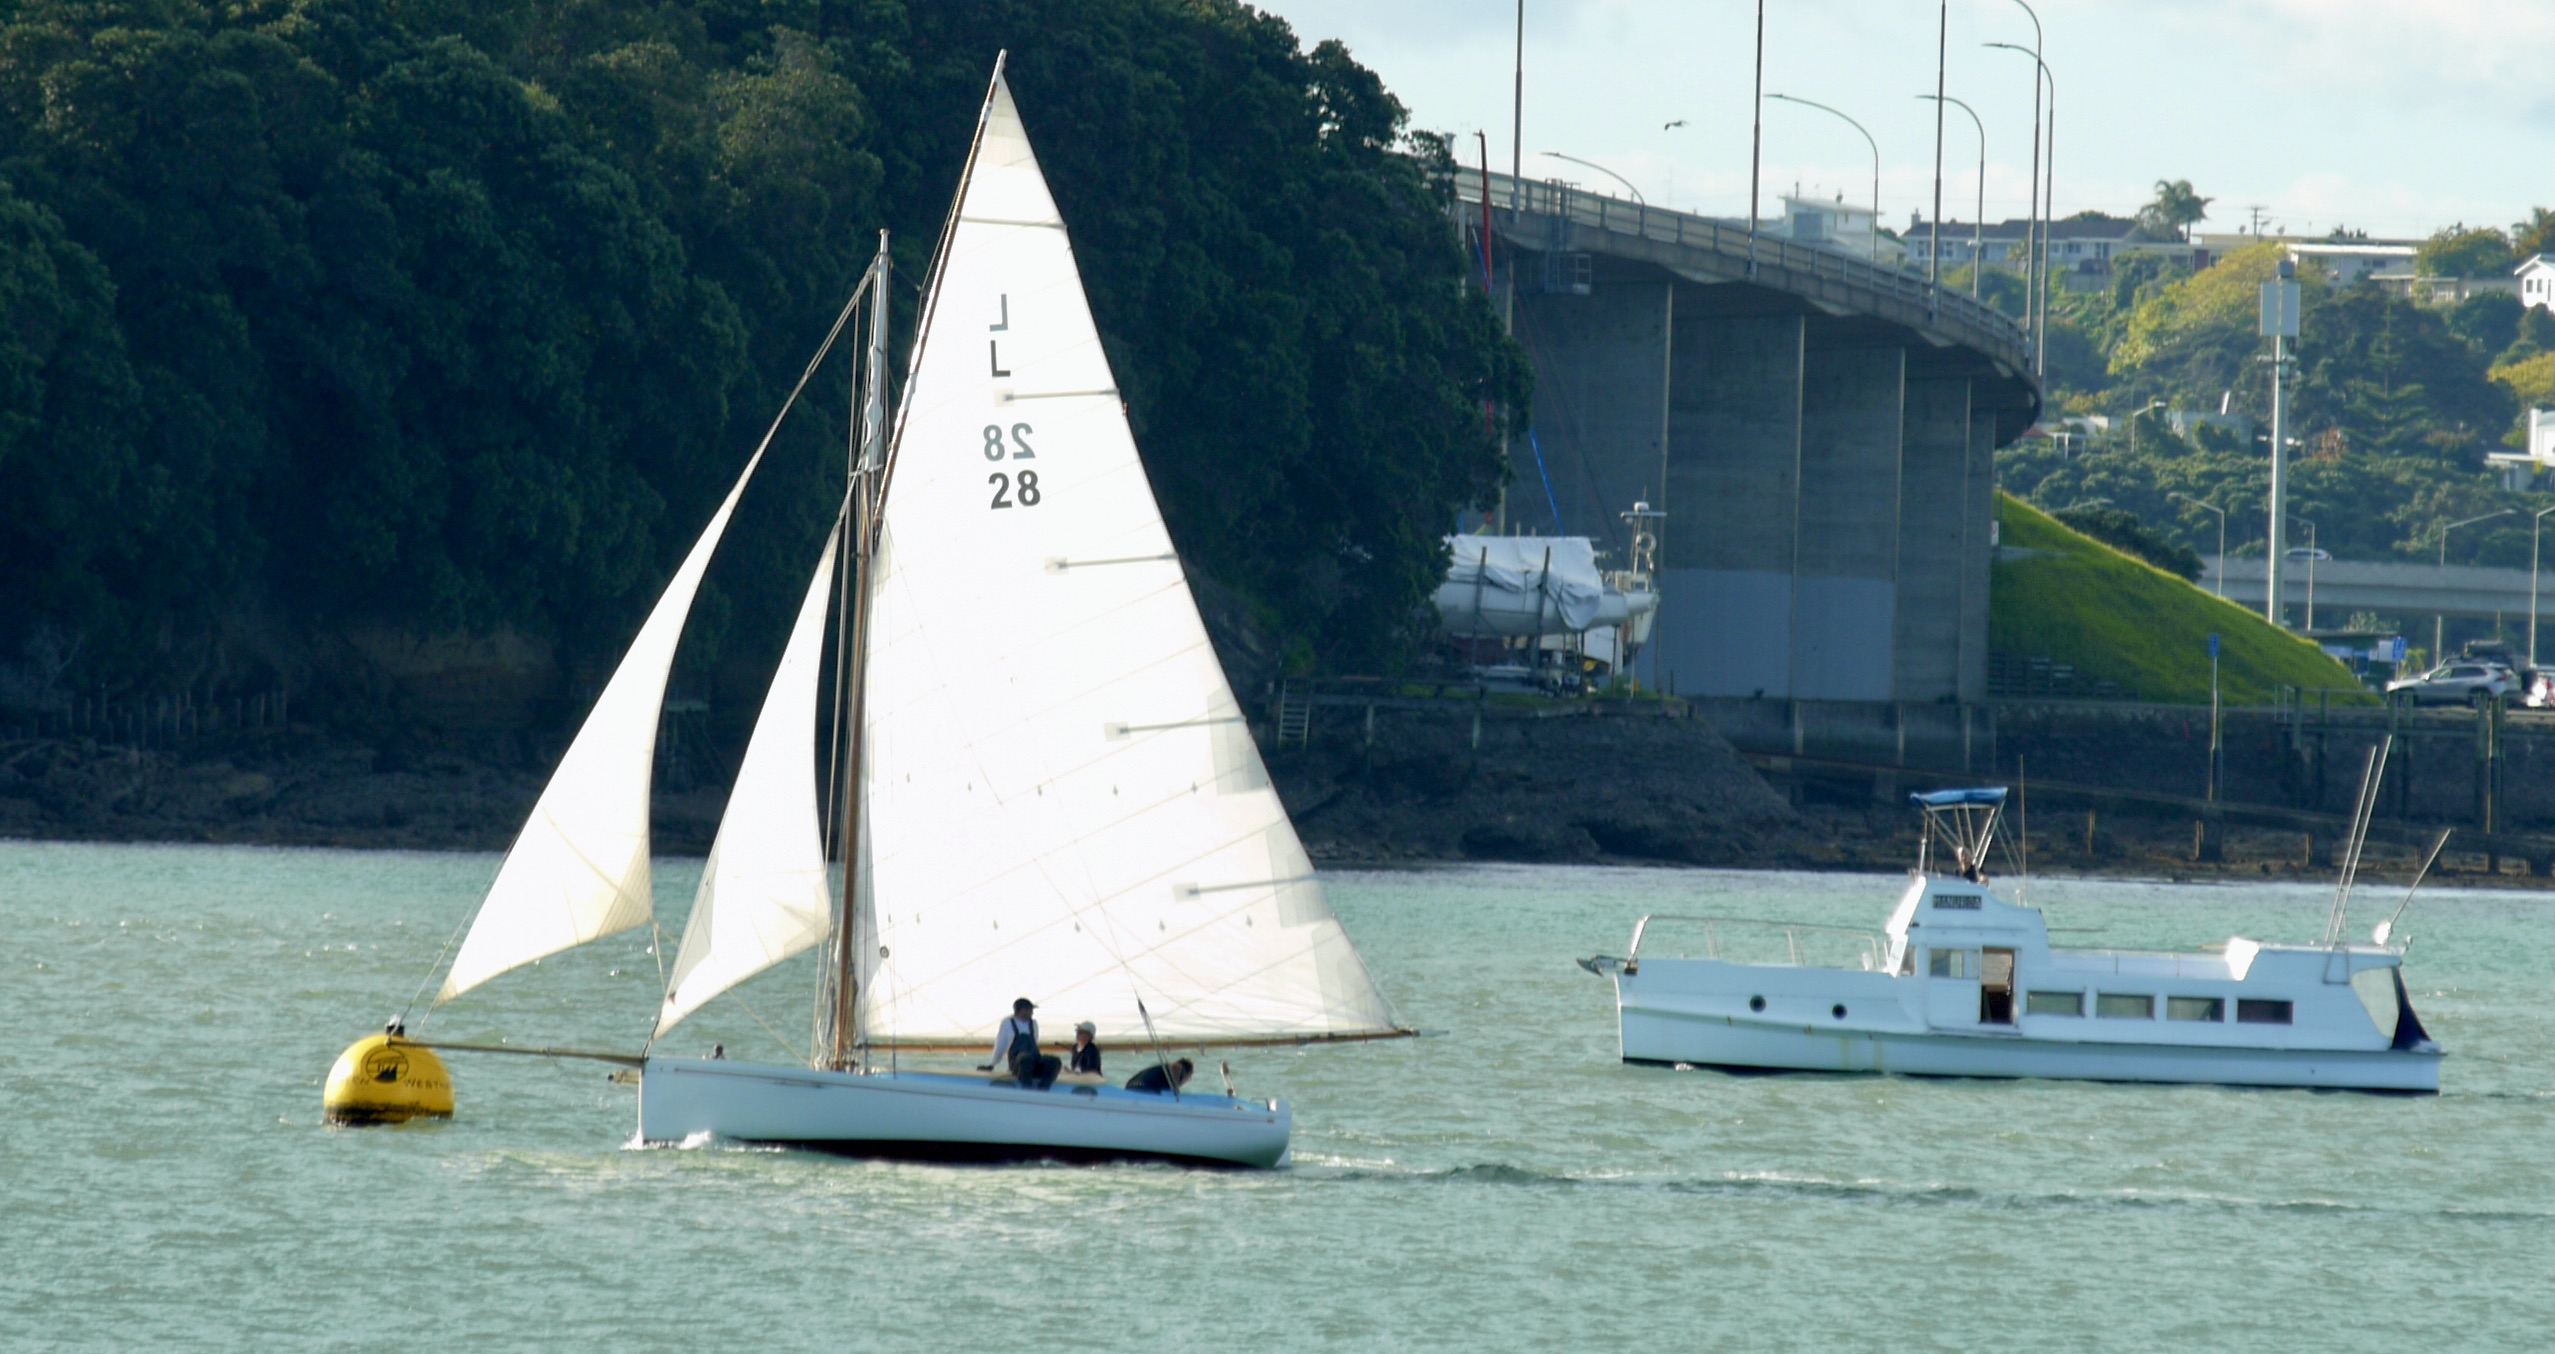
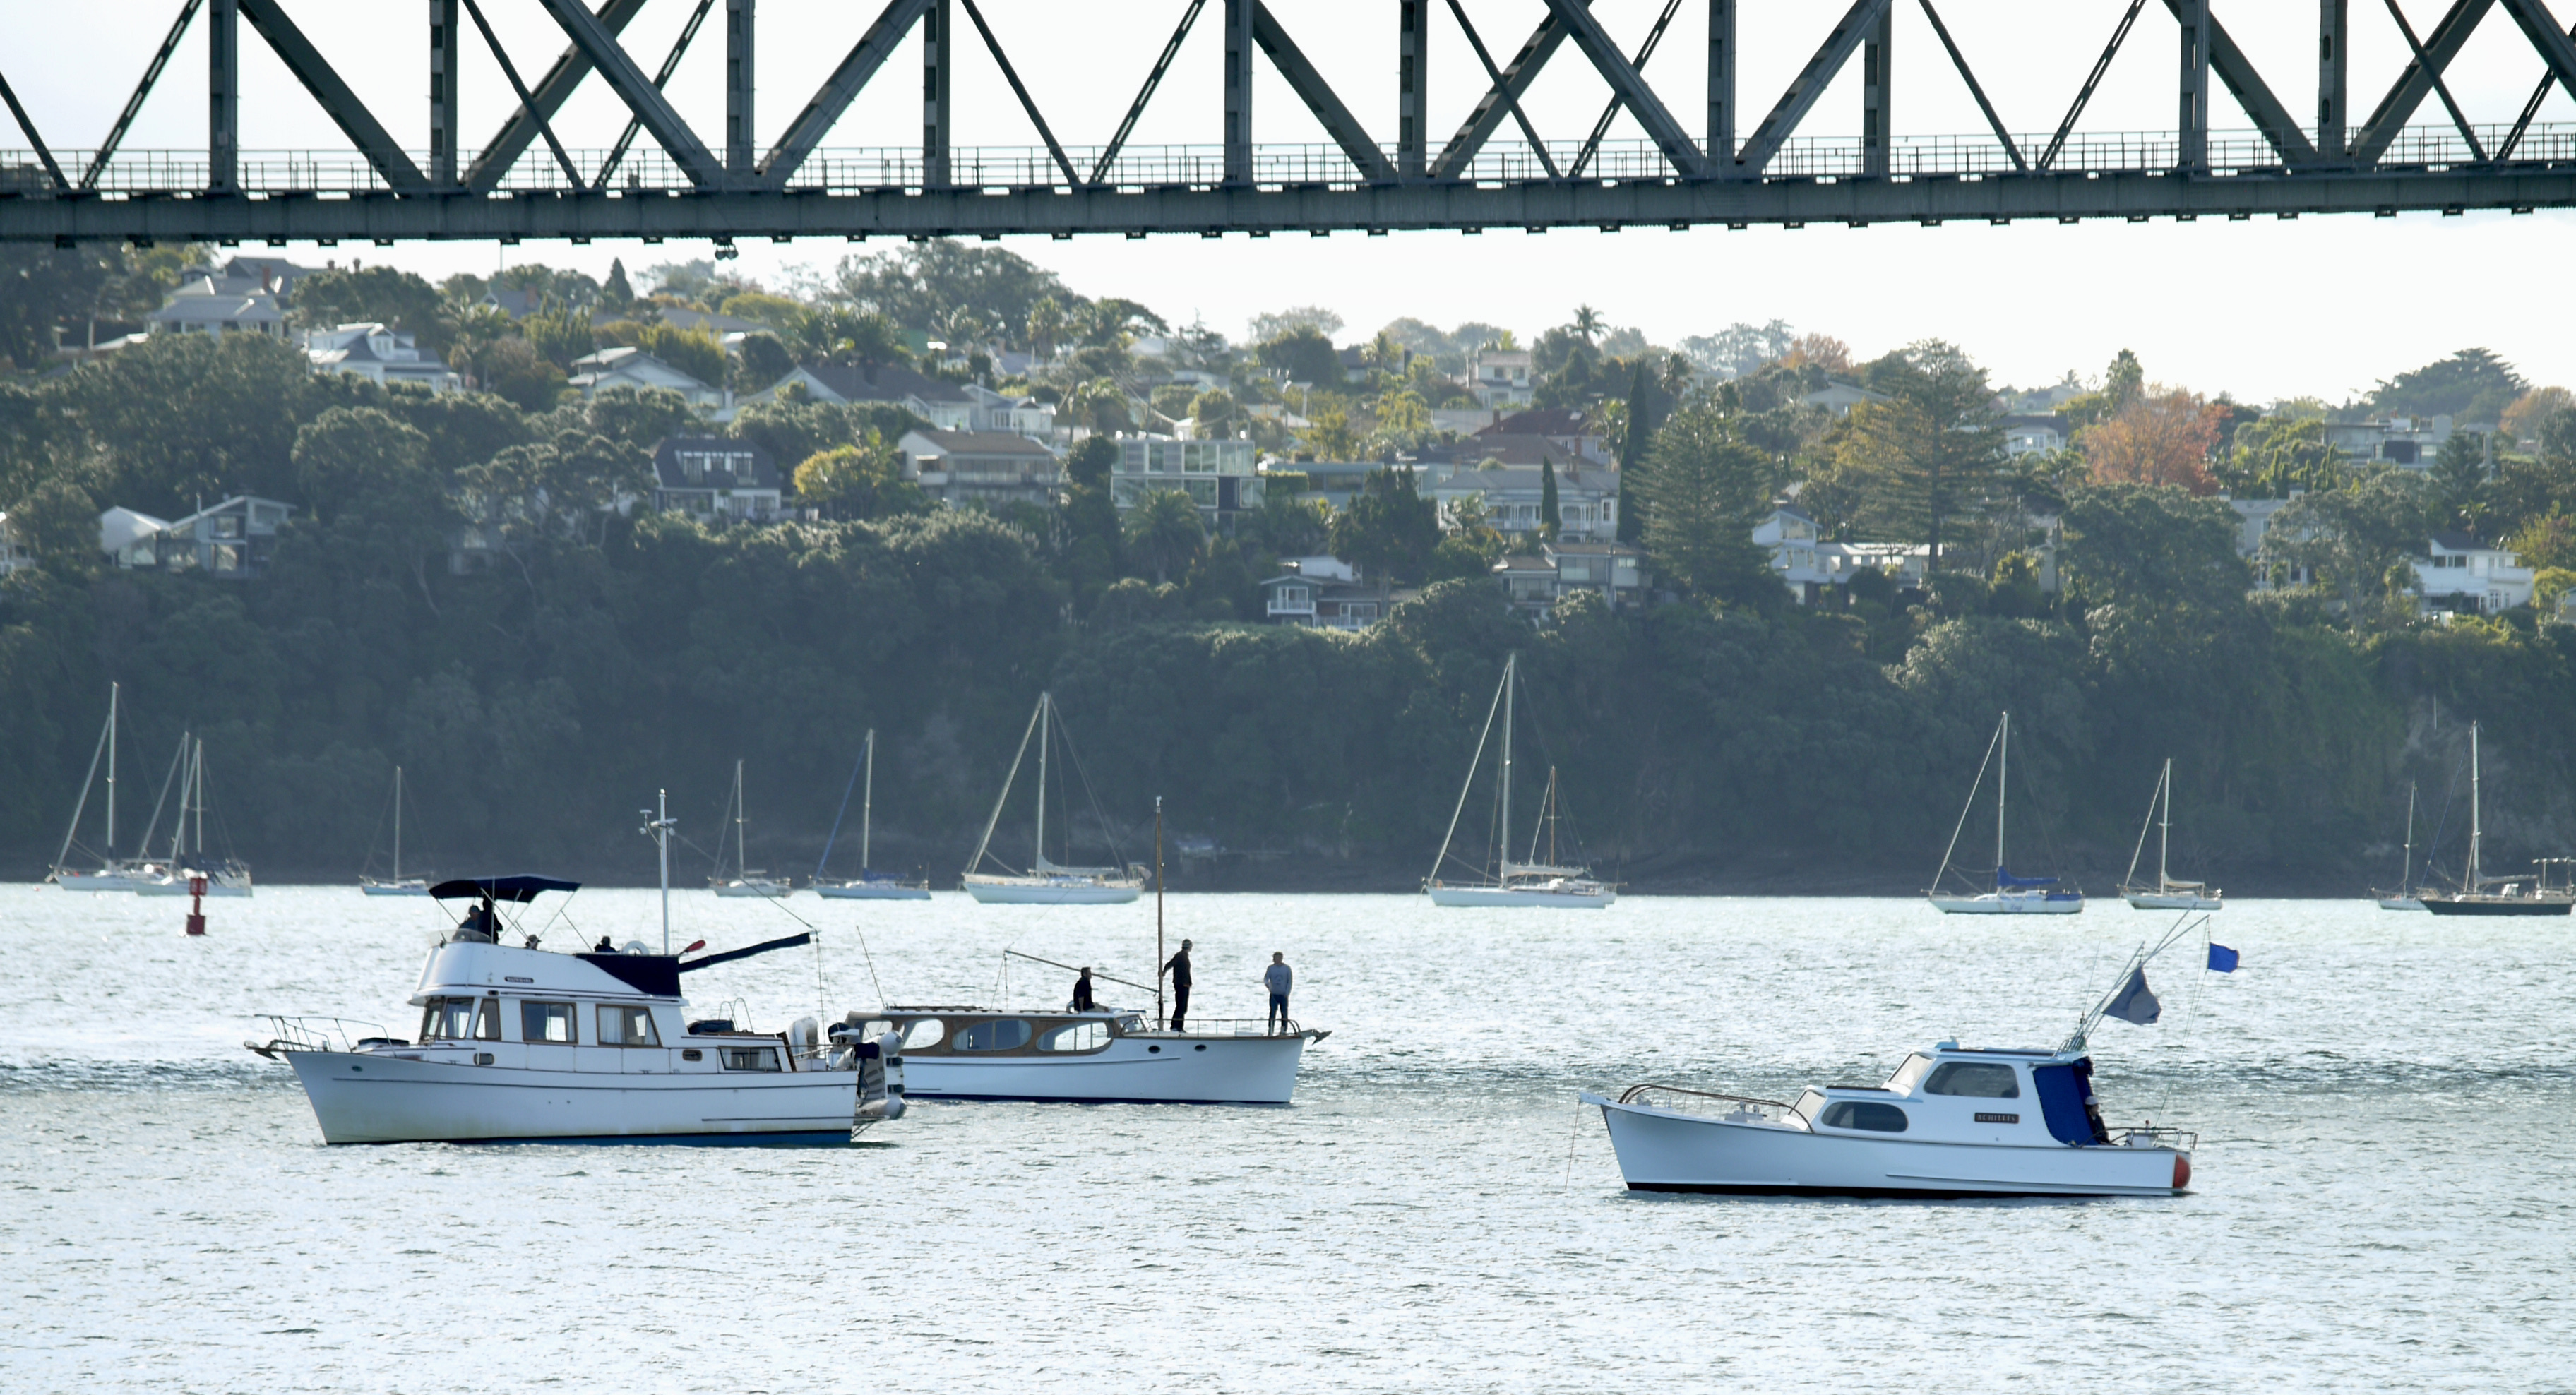
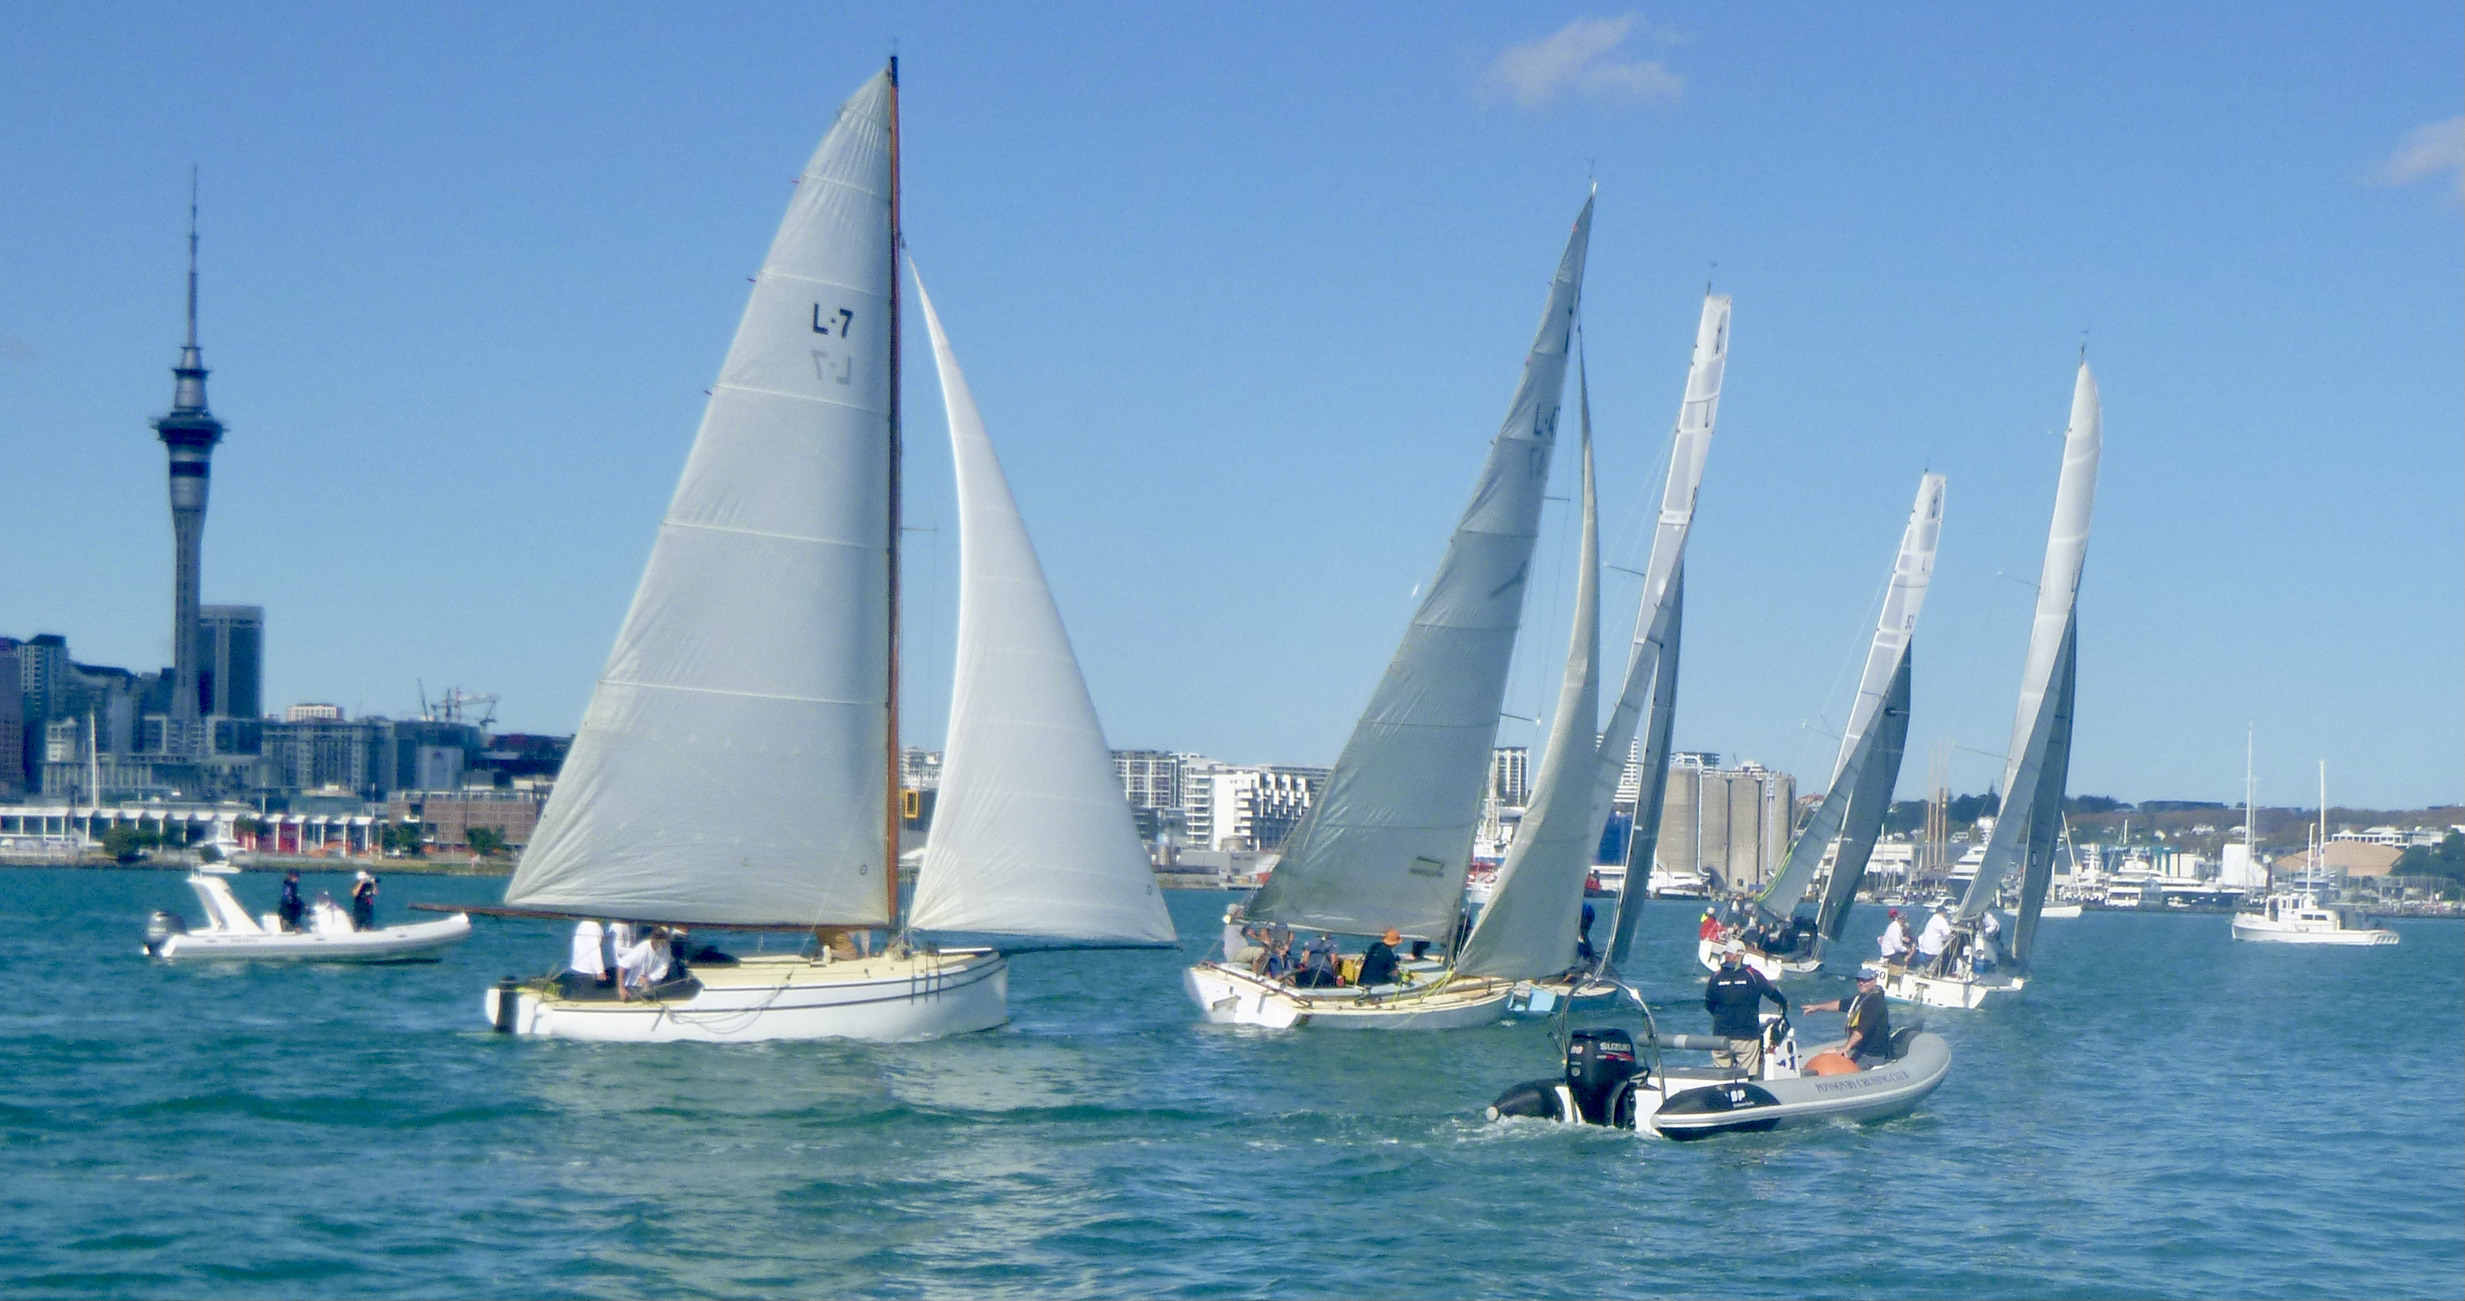
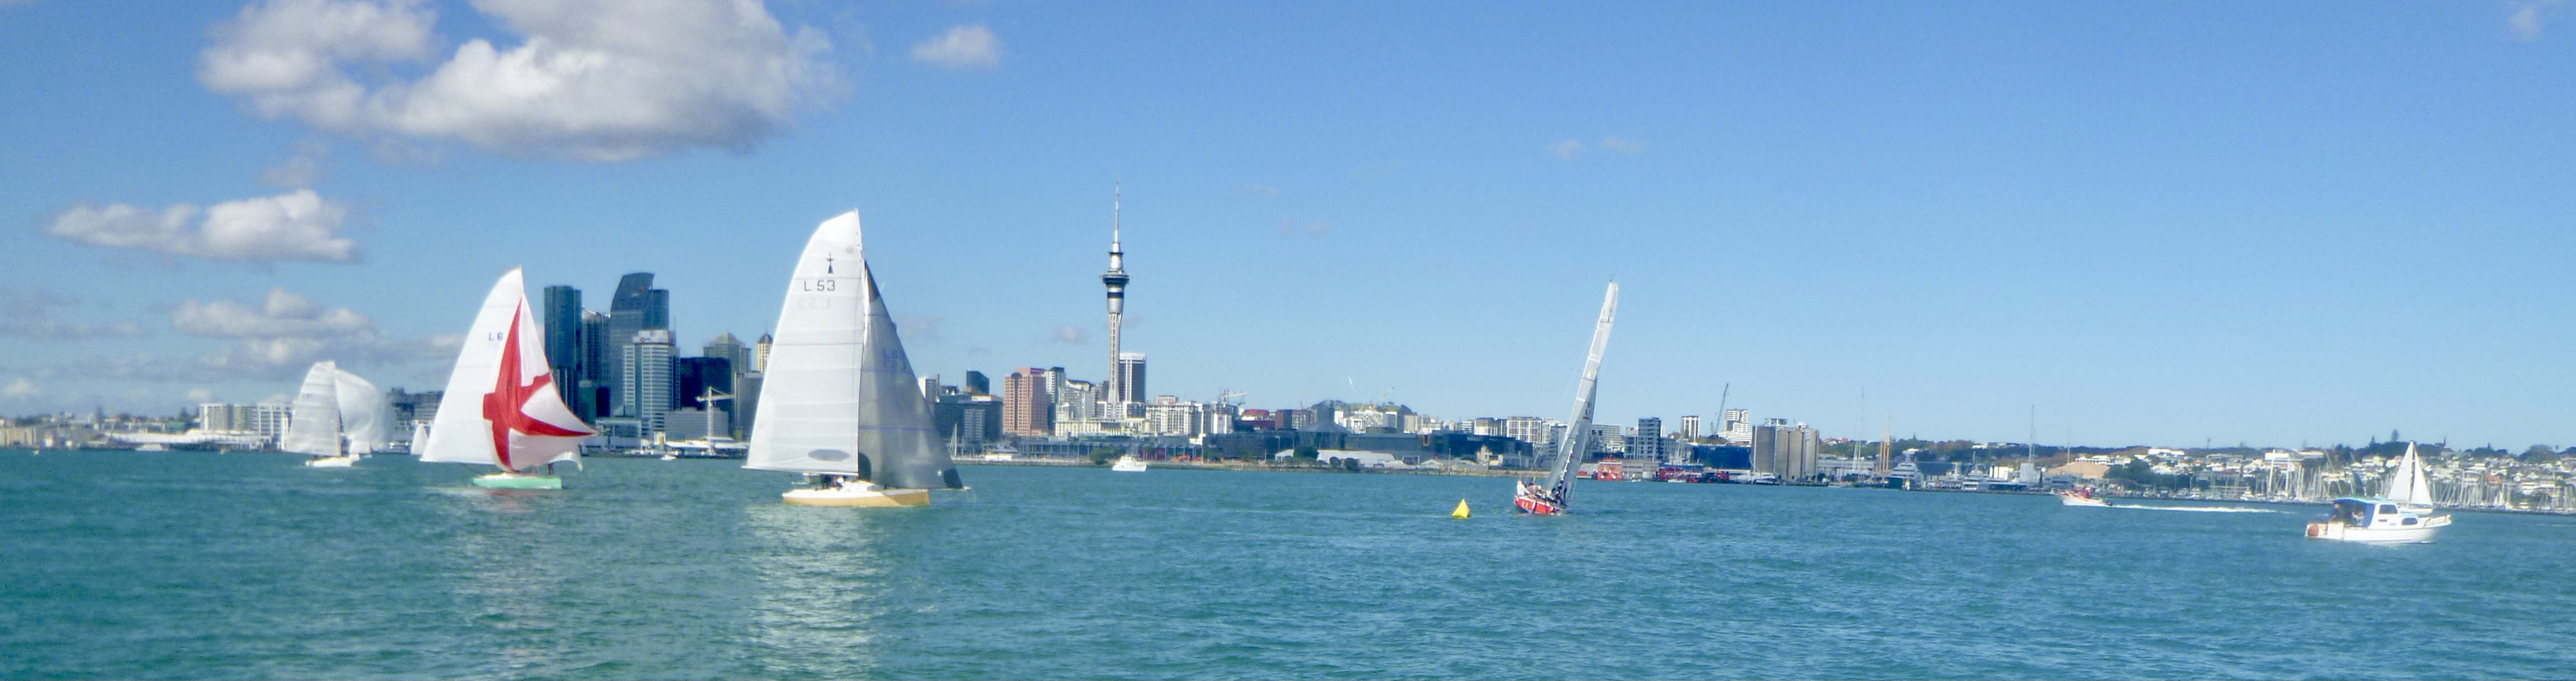
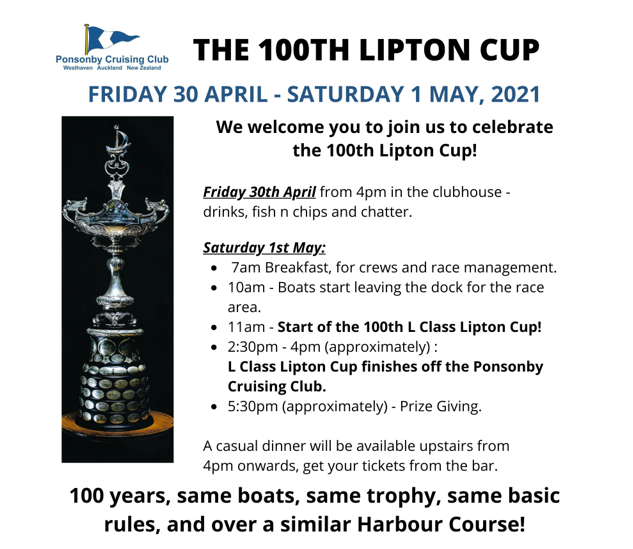
Following on from yesterdays teaser and results oops – I’m a launch person wont know an L Mullet boat from an H Mullet boat – no one died, its a new day, we move on.The winner of the actual Lipton Cup, hosted by the Ponsonby Cruising Club – L division (22’) was Orion, 2nd went to Limited Edition, with Tamerau 3rd.The H division winner was Corona. As of Sunday night there were no results posted on the PCC website – so at some stage soon 🙂 go there for details.
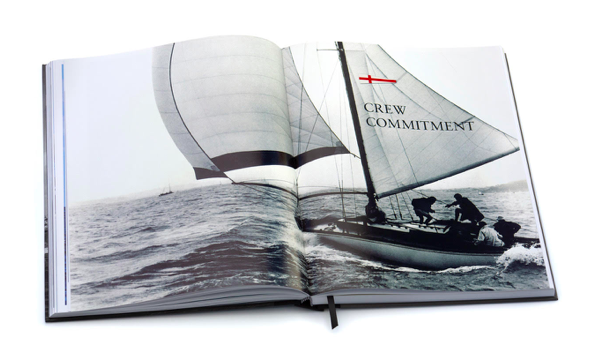
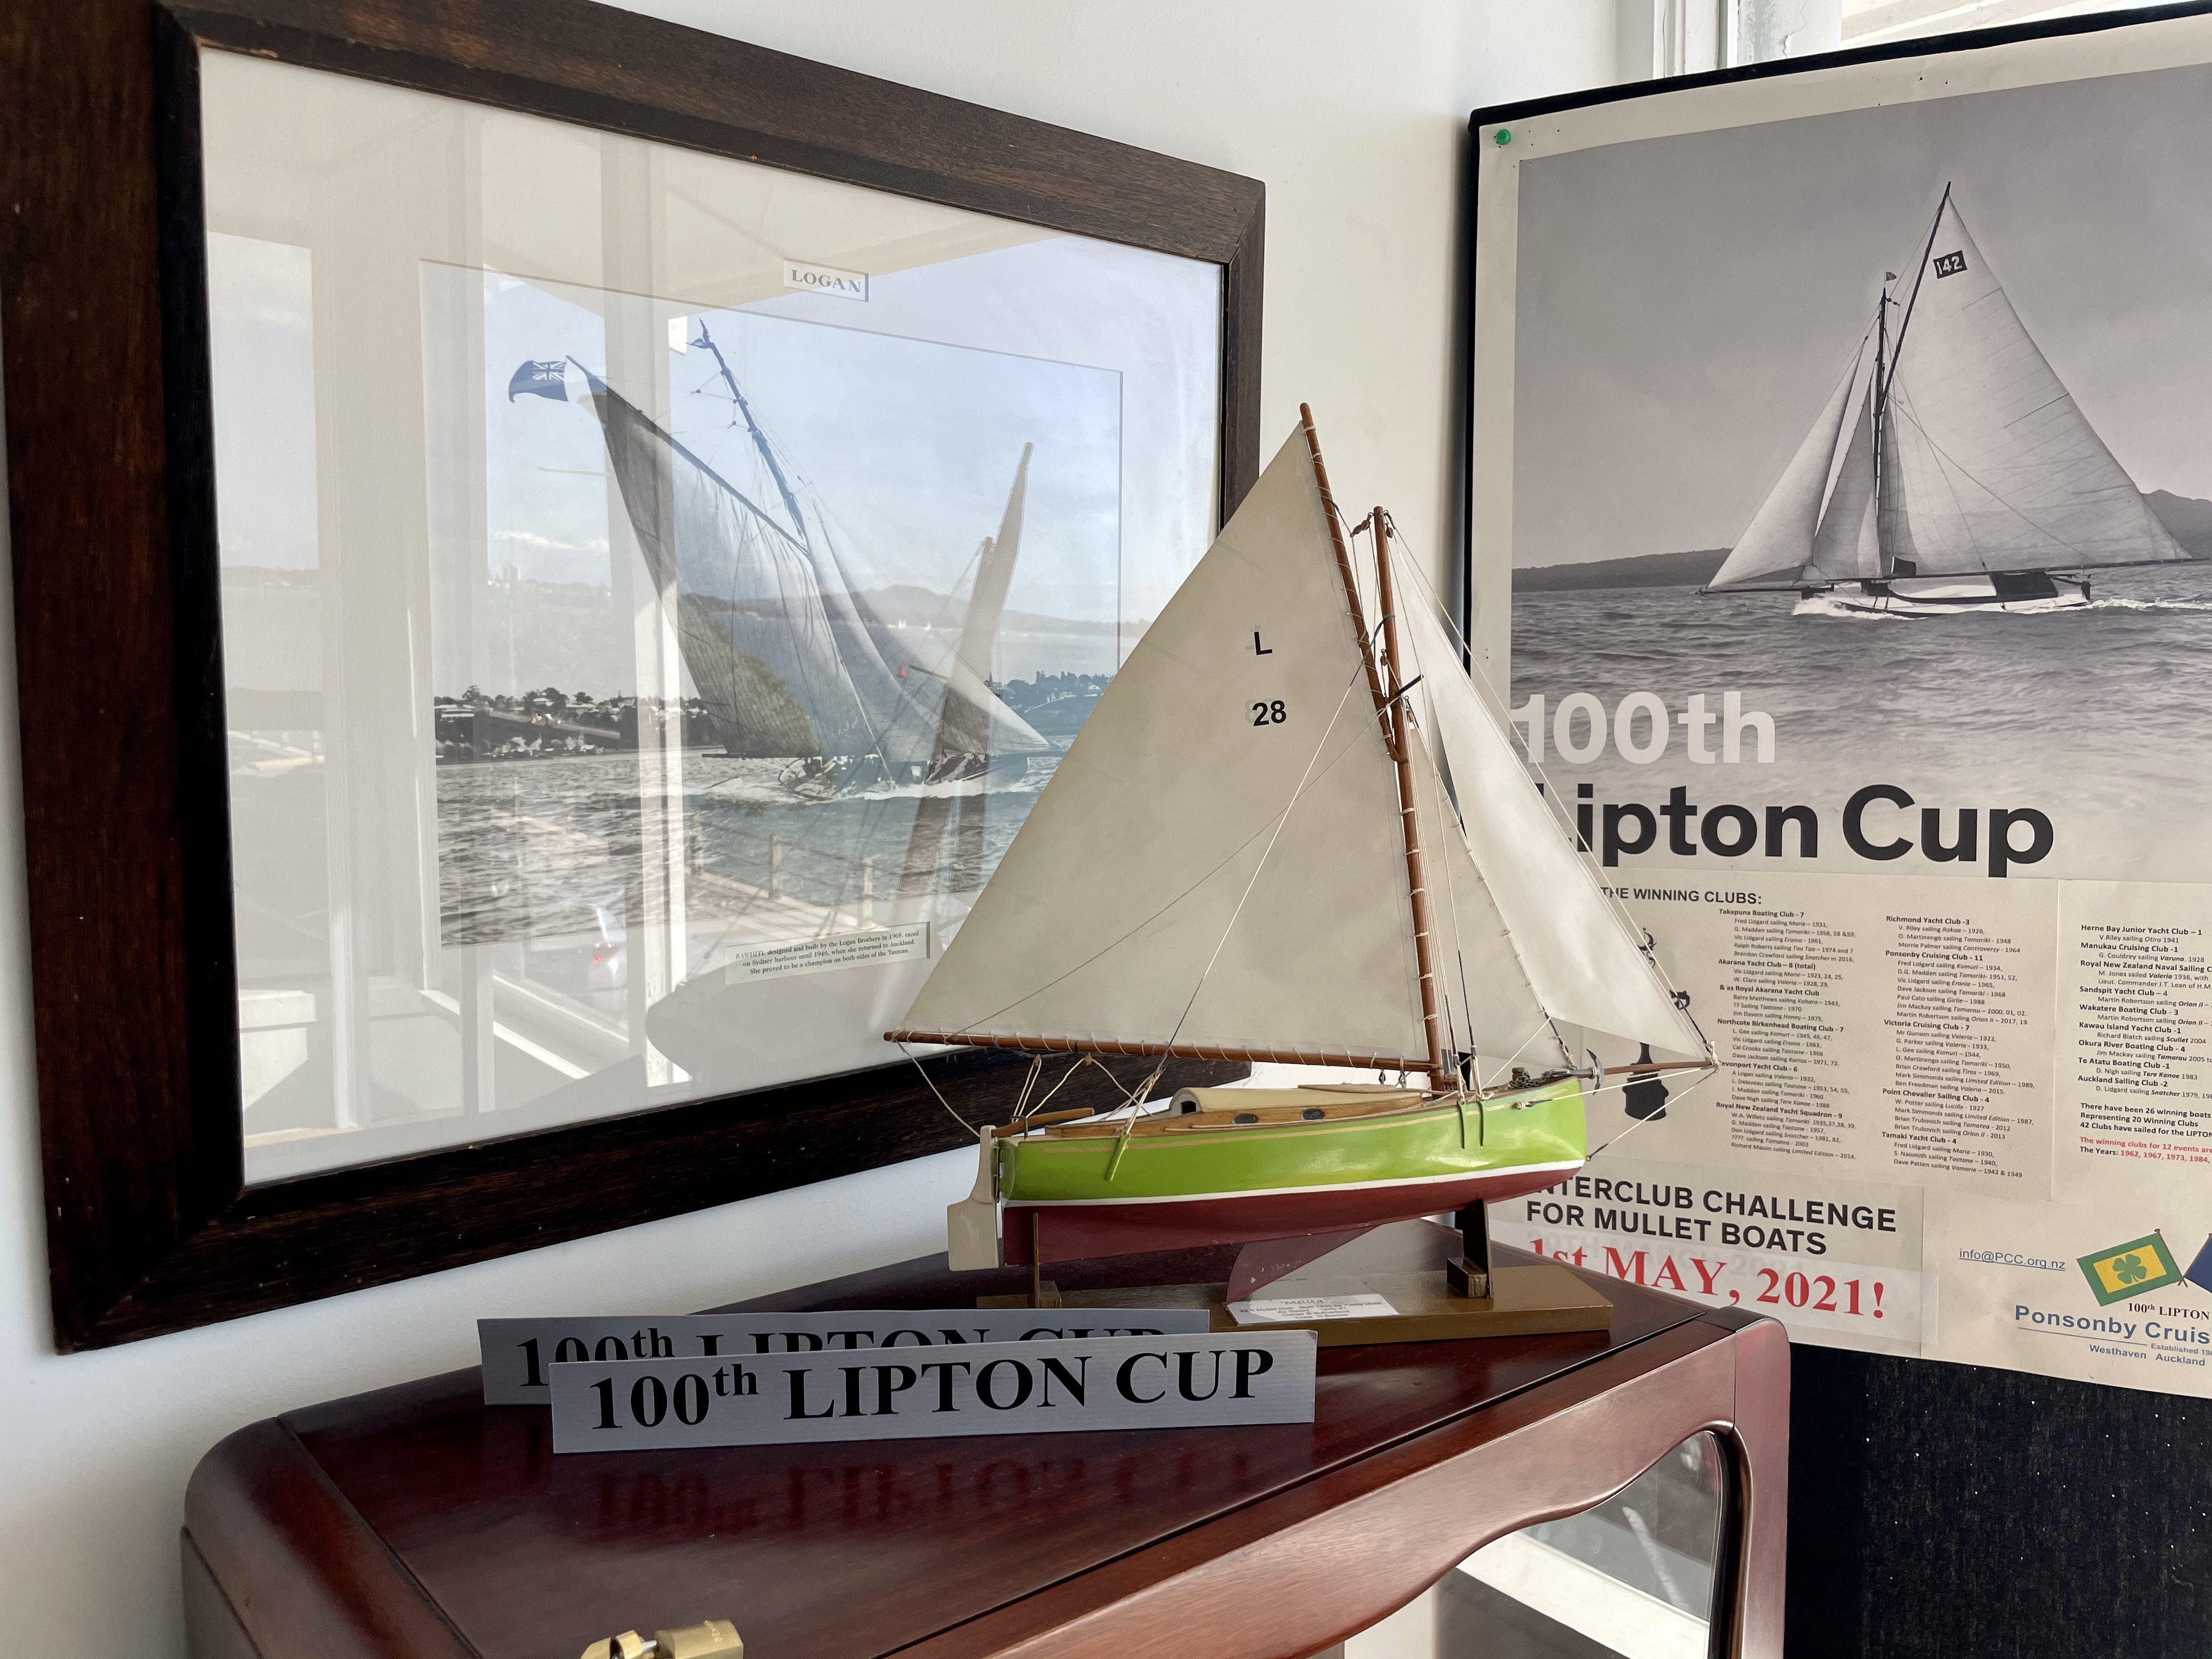
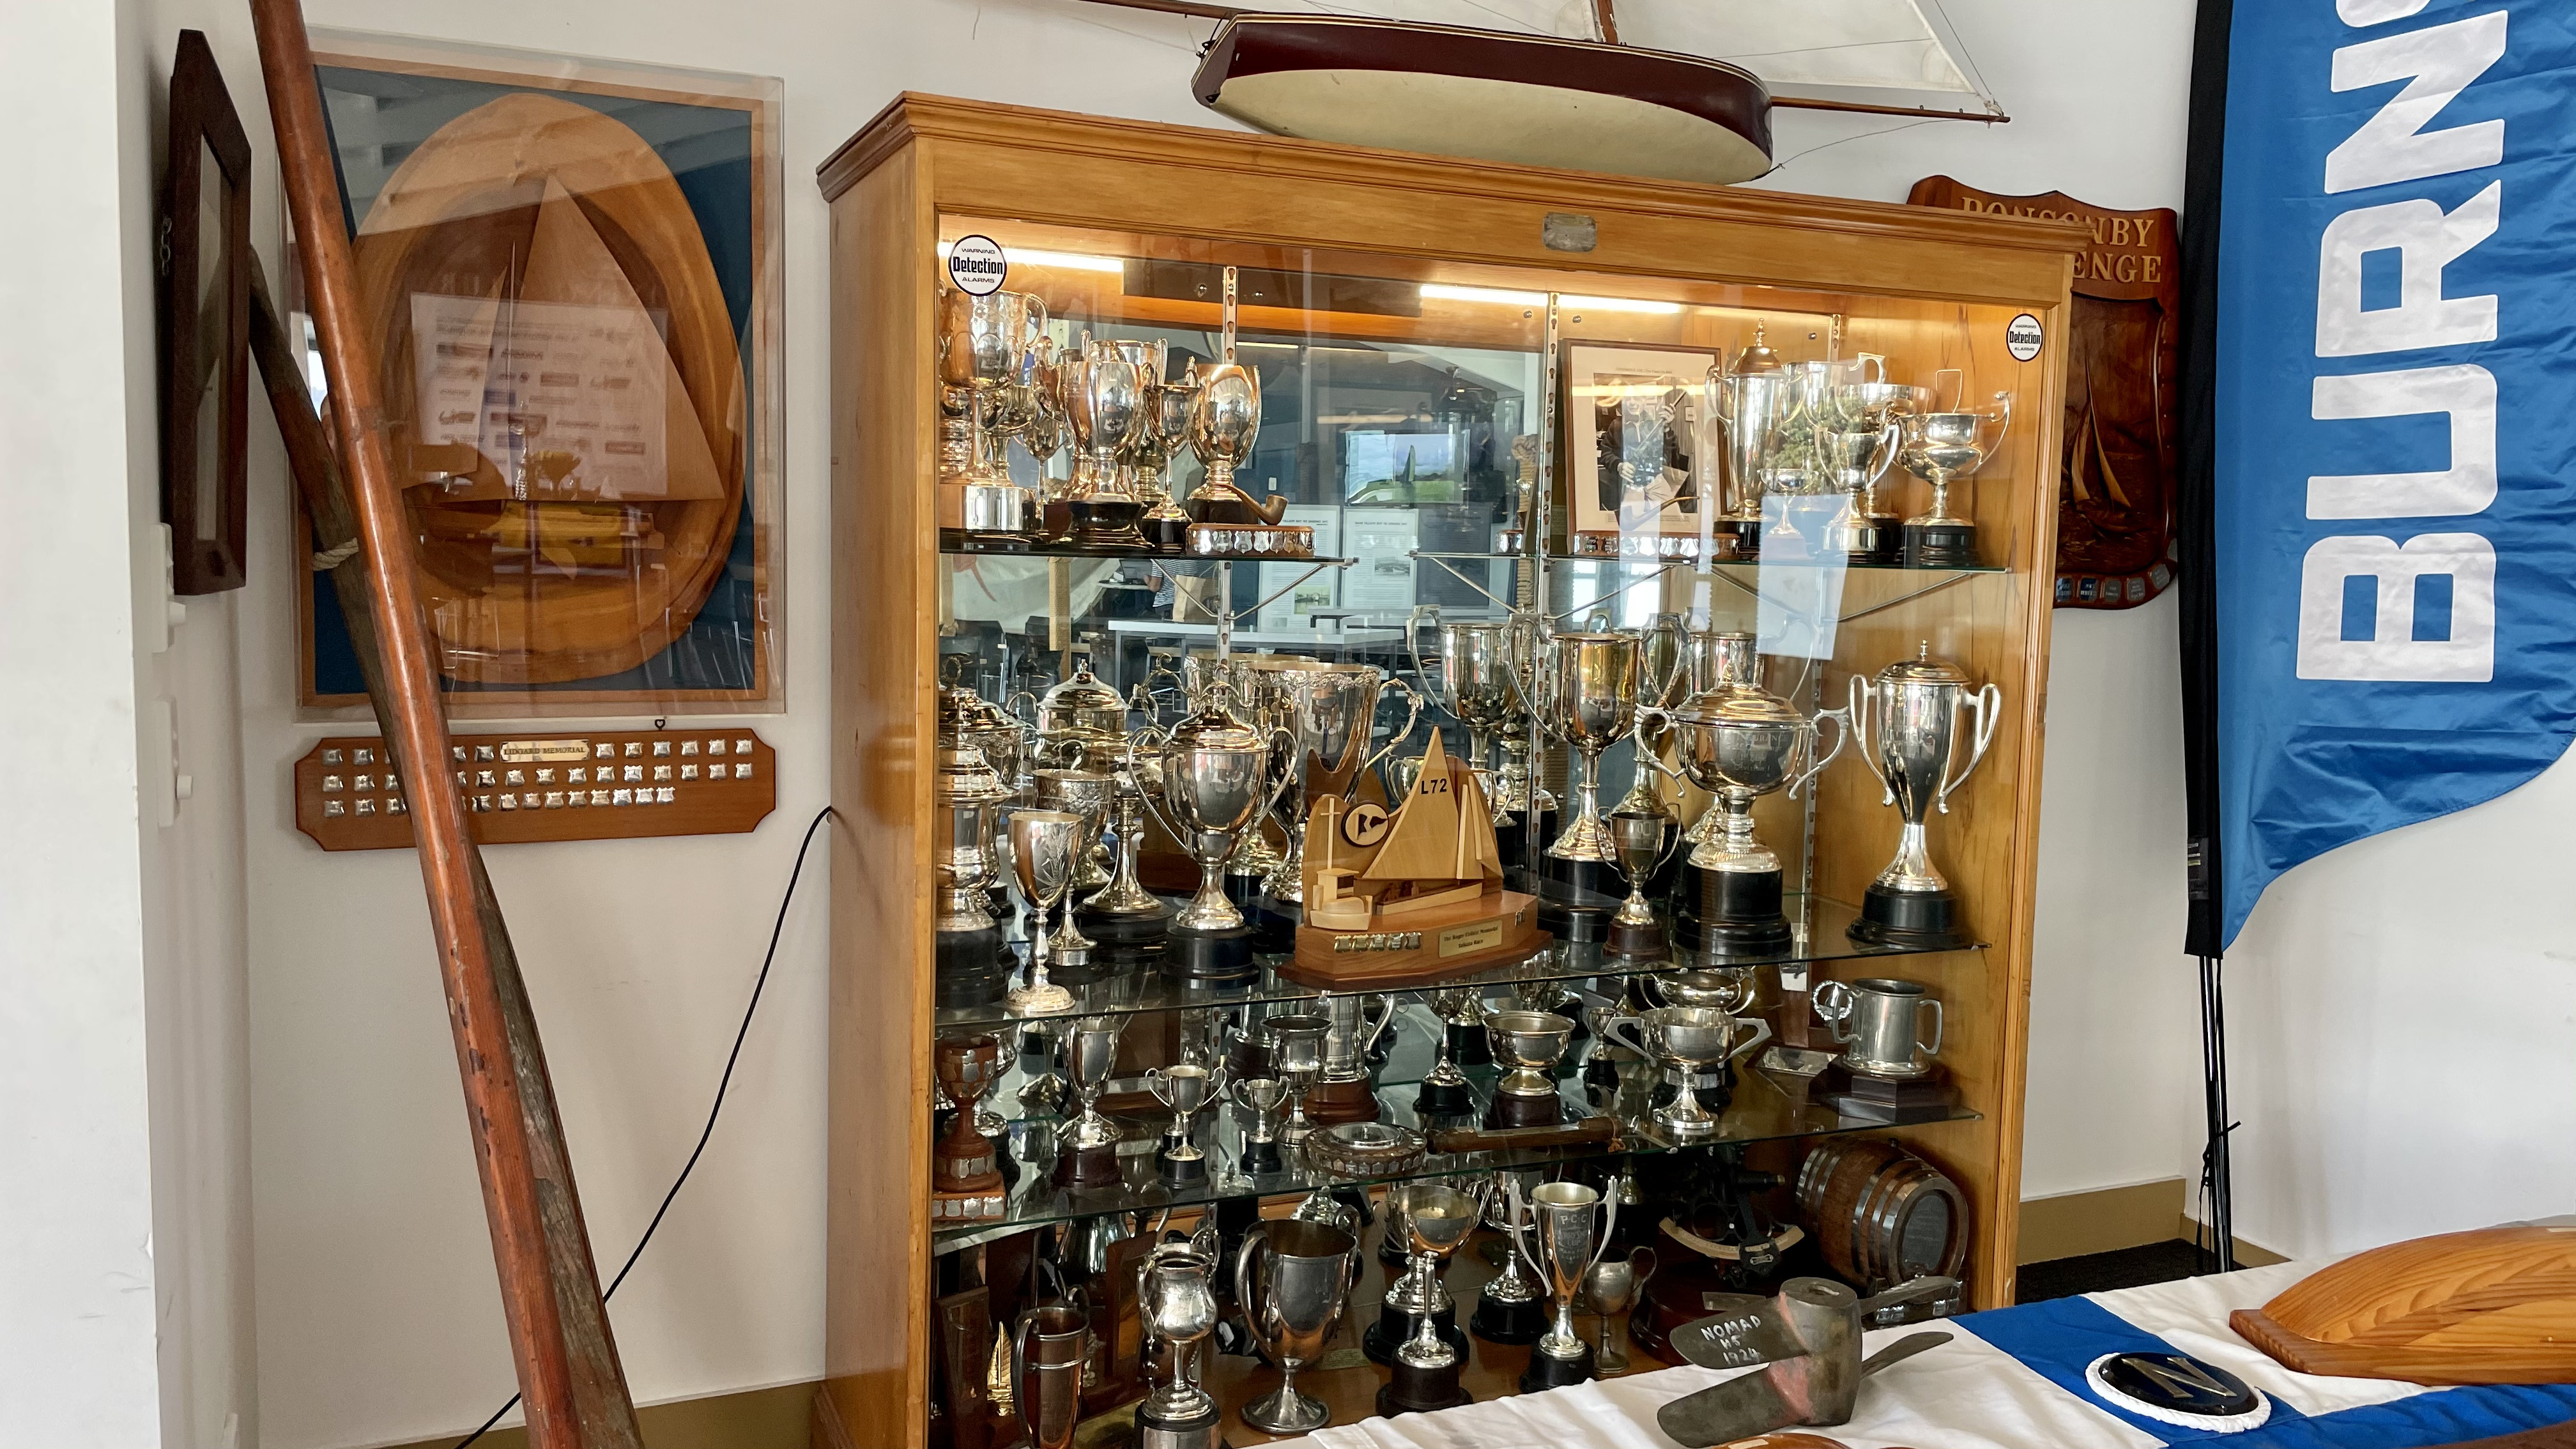
There are lots of tales around how the PCC obtained the magnificent trophy, which was crafted by the same jewellers as the Americas Cup – you can read more about the history of the cup here https://www.pcc.org.nz/history
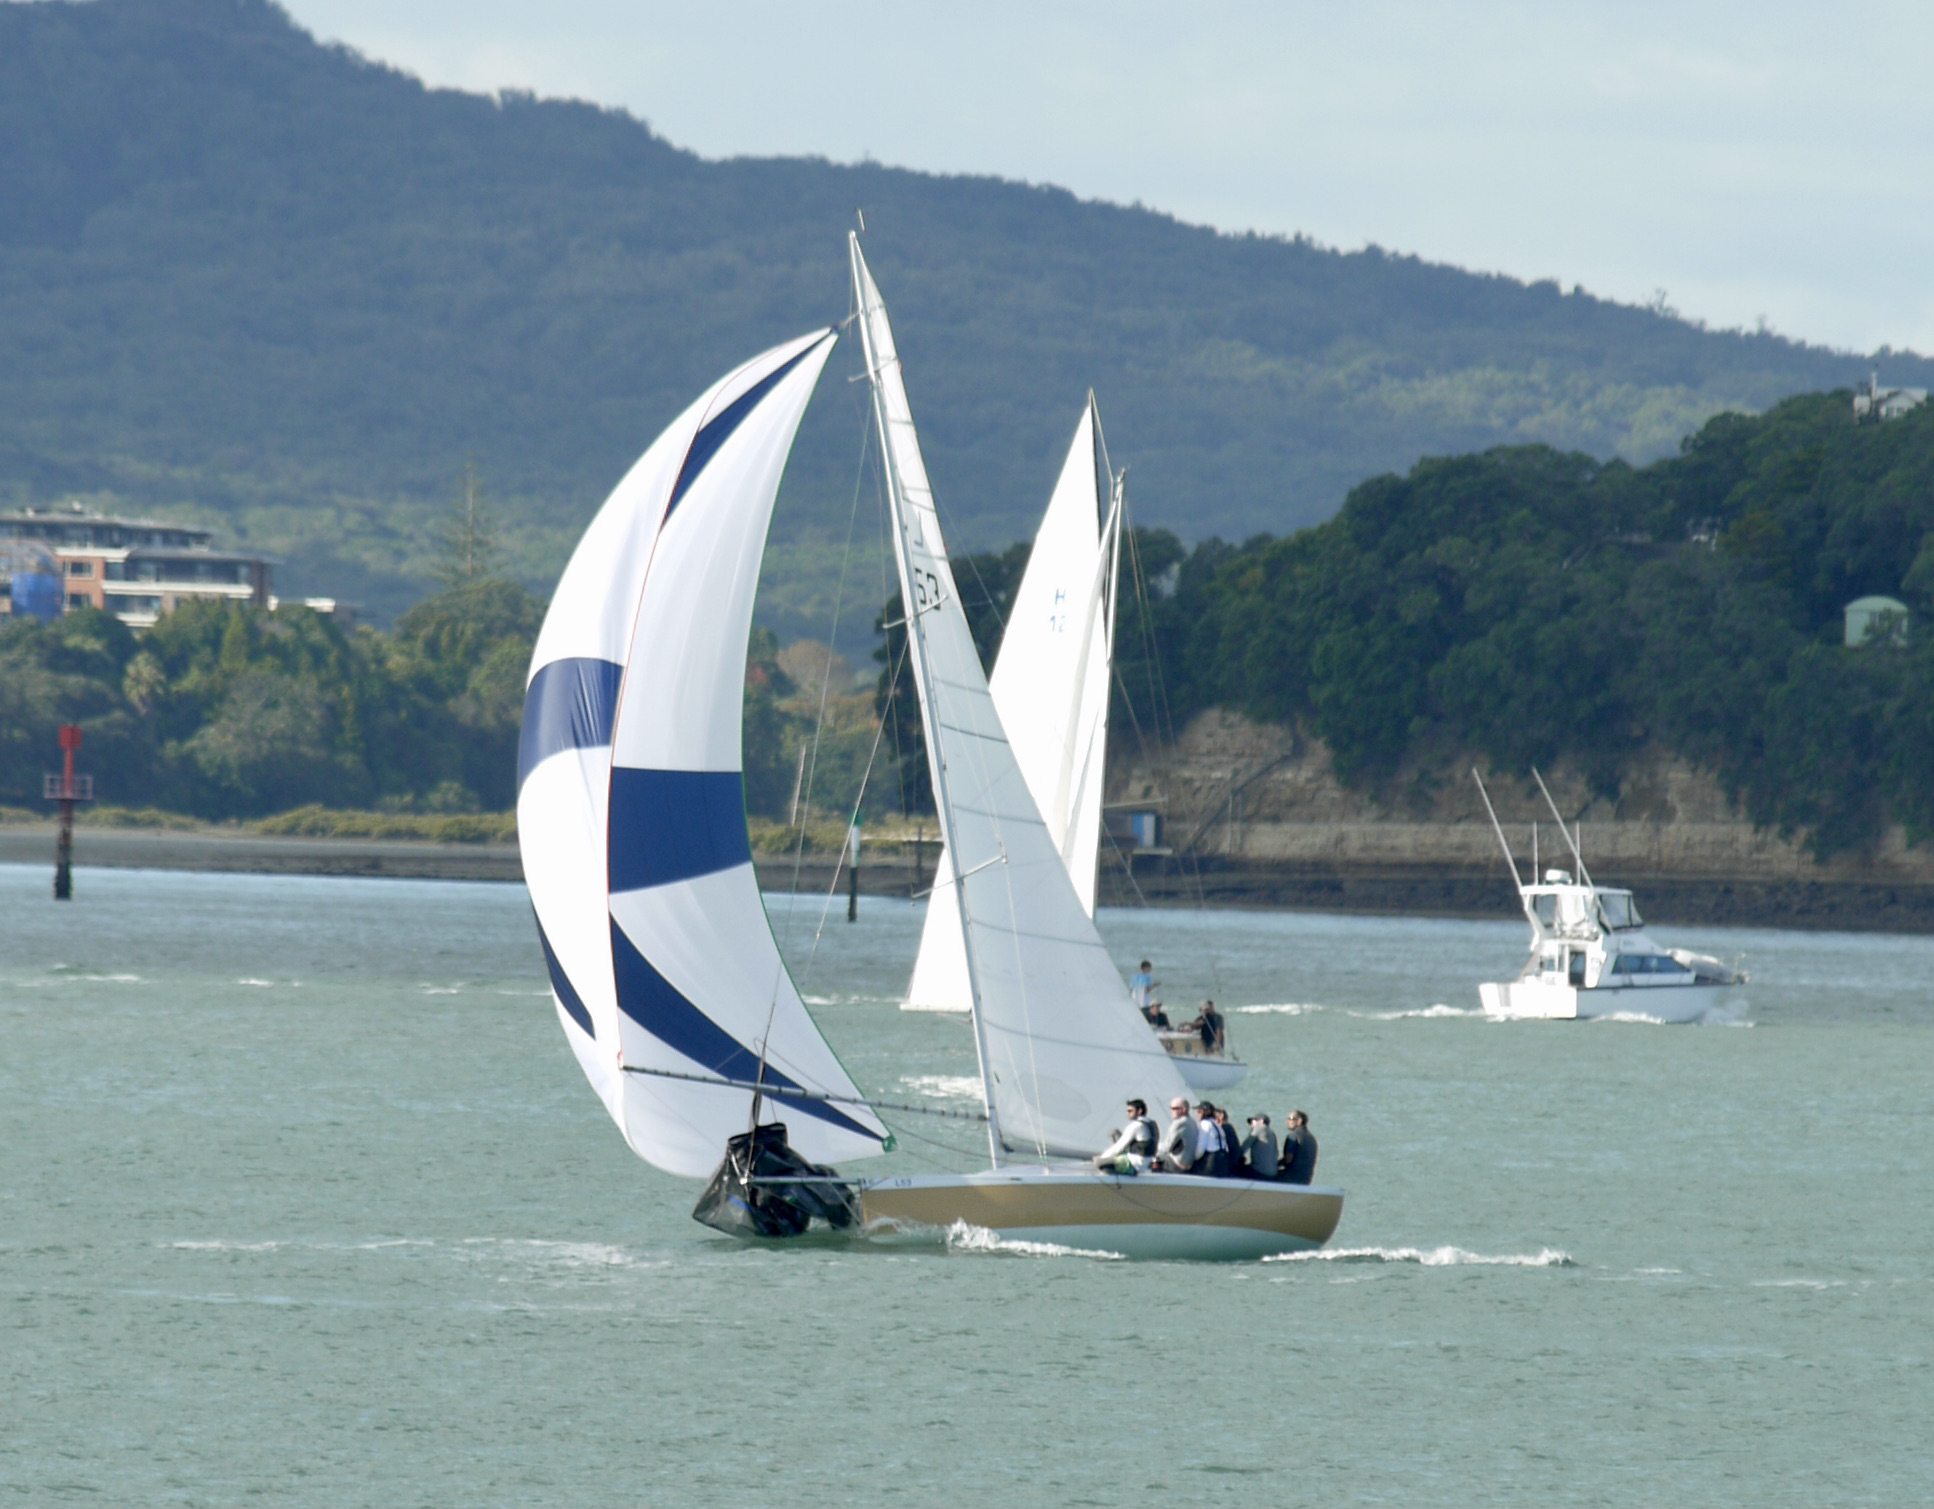
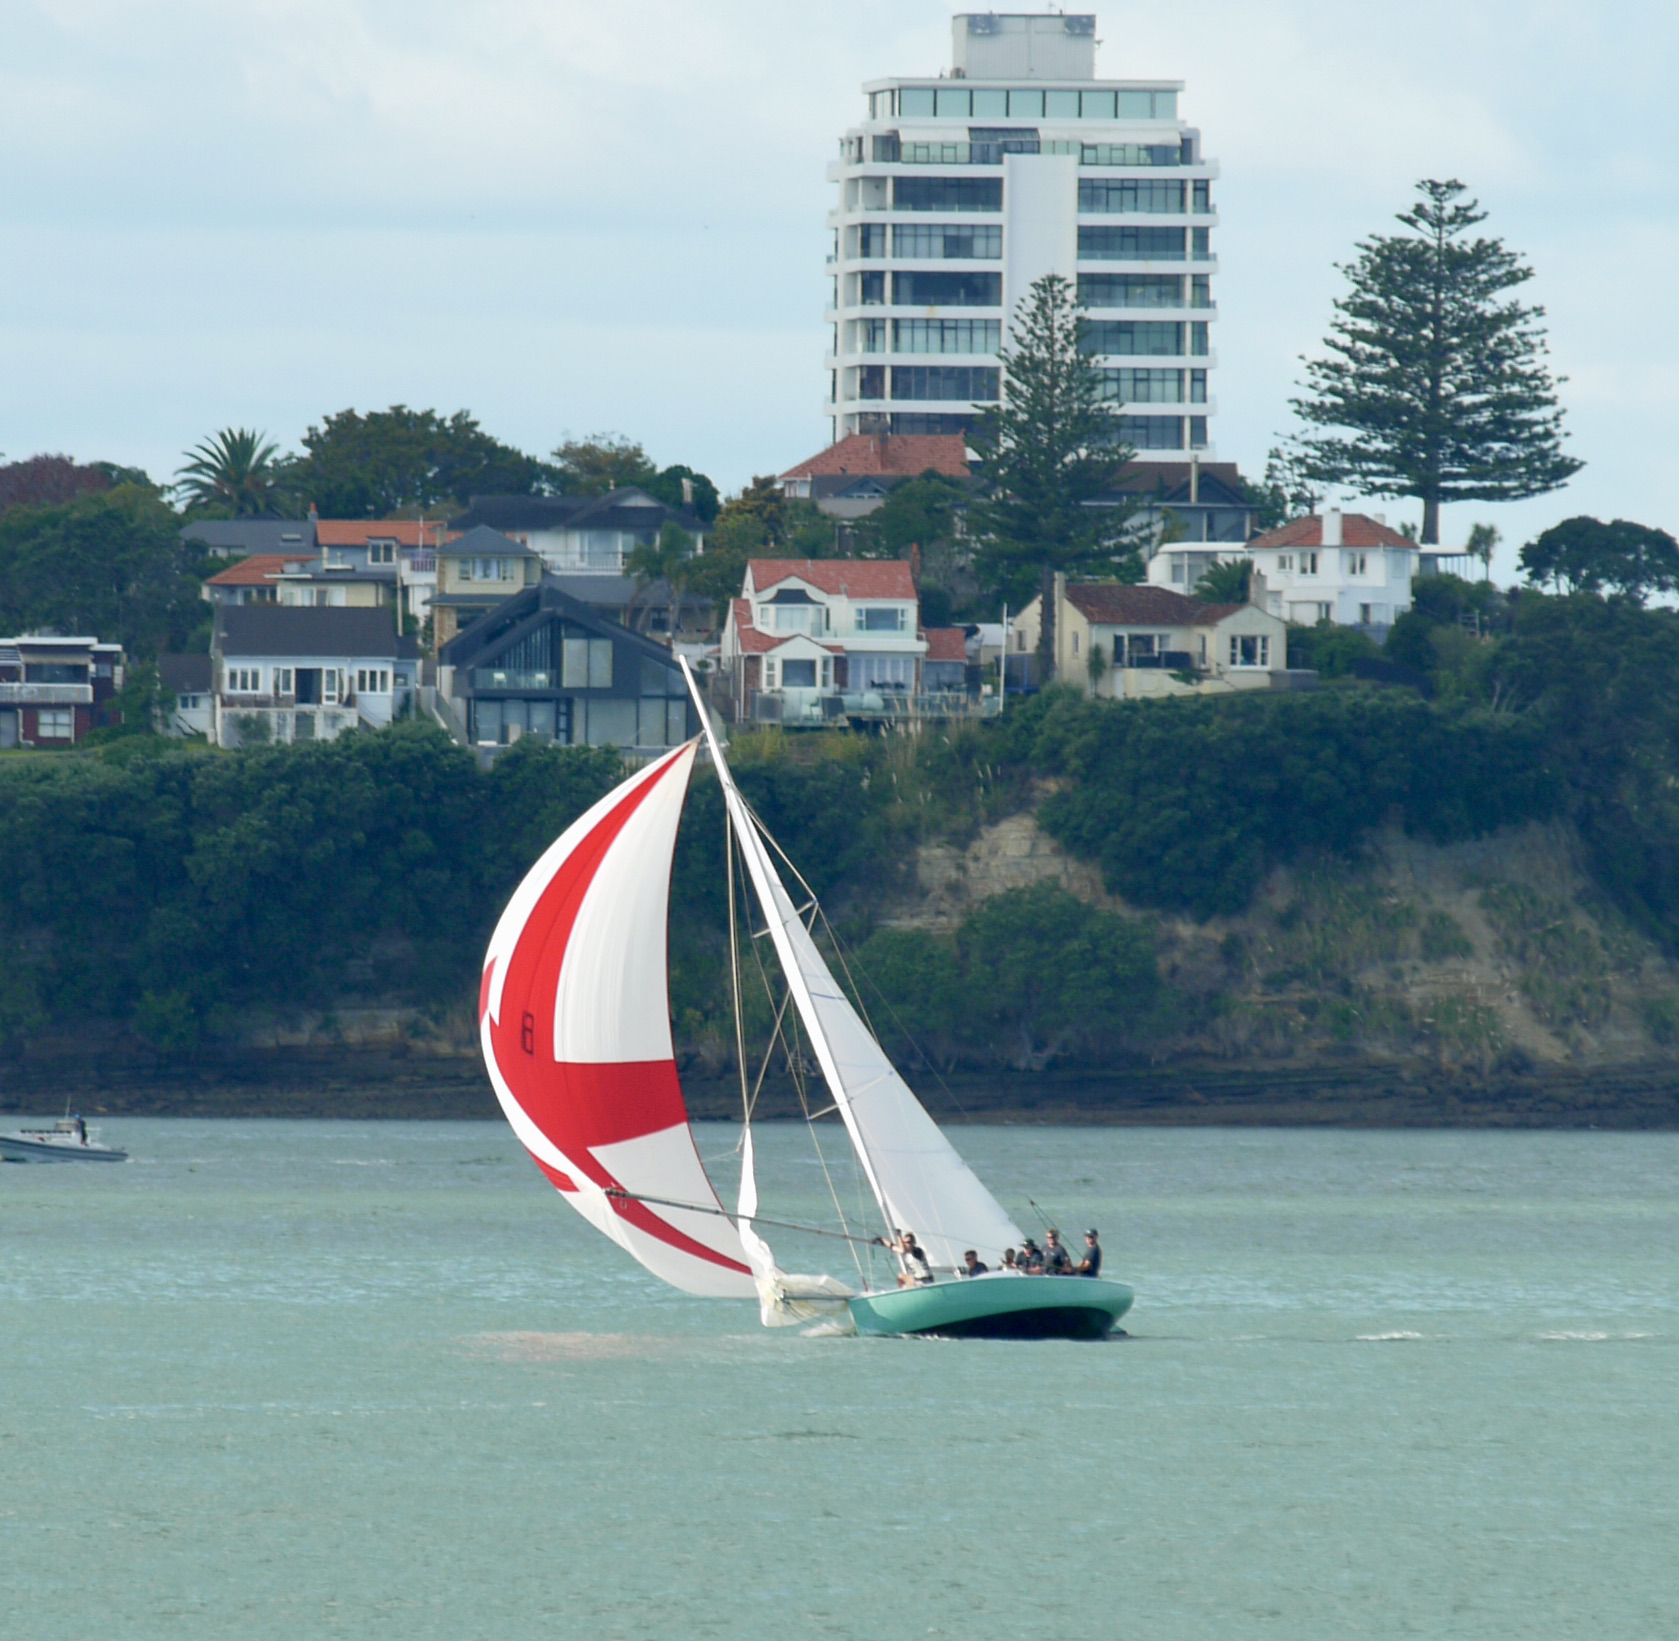
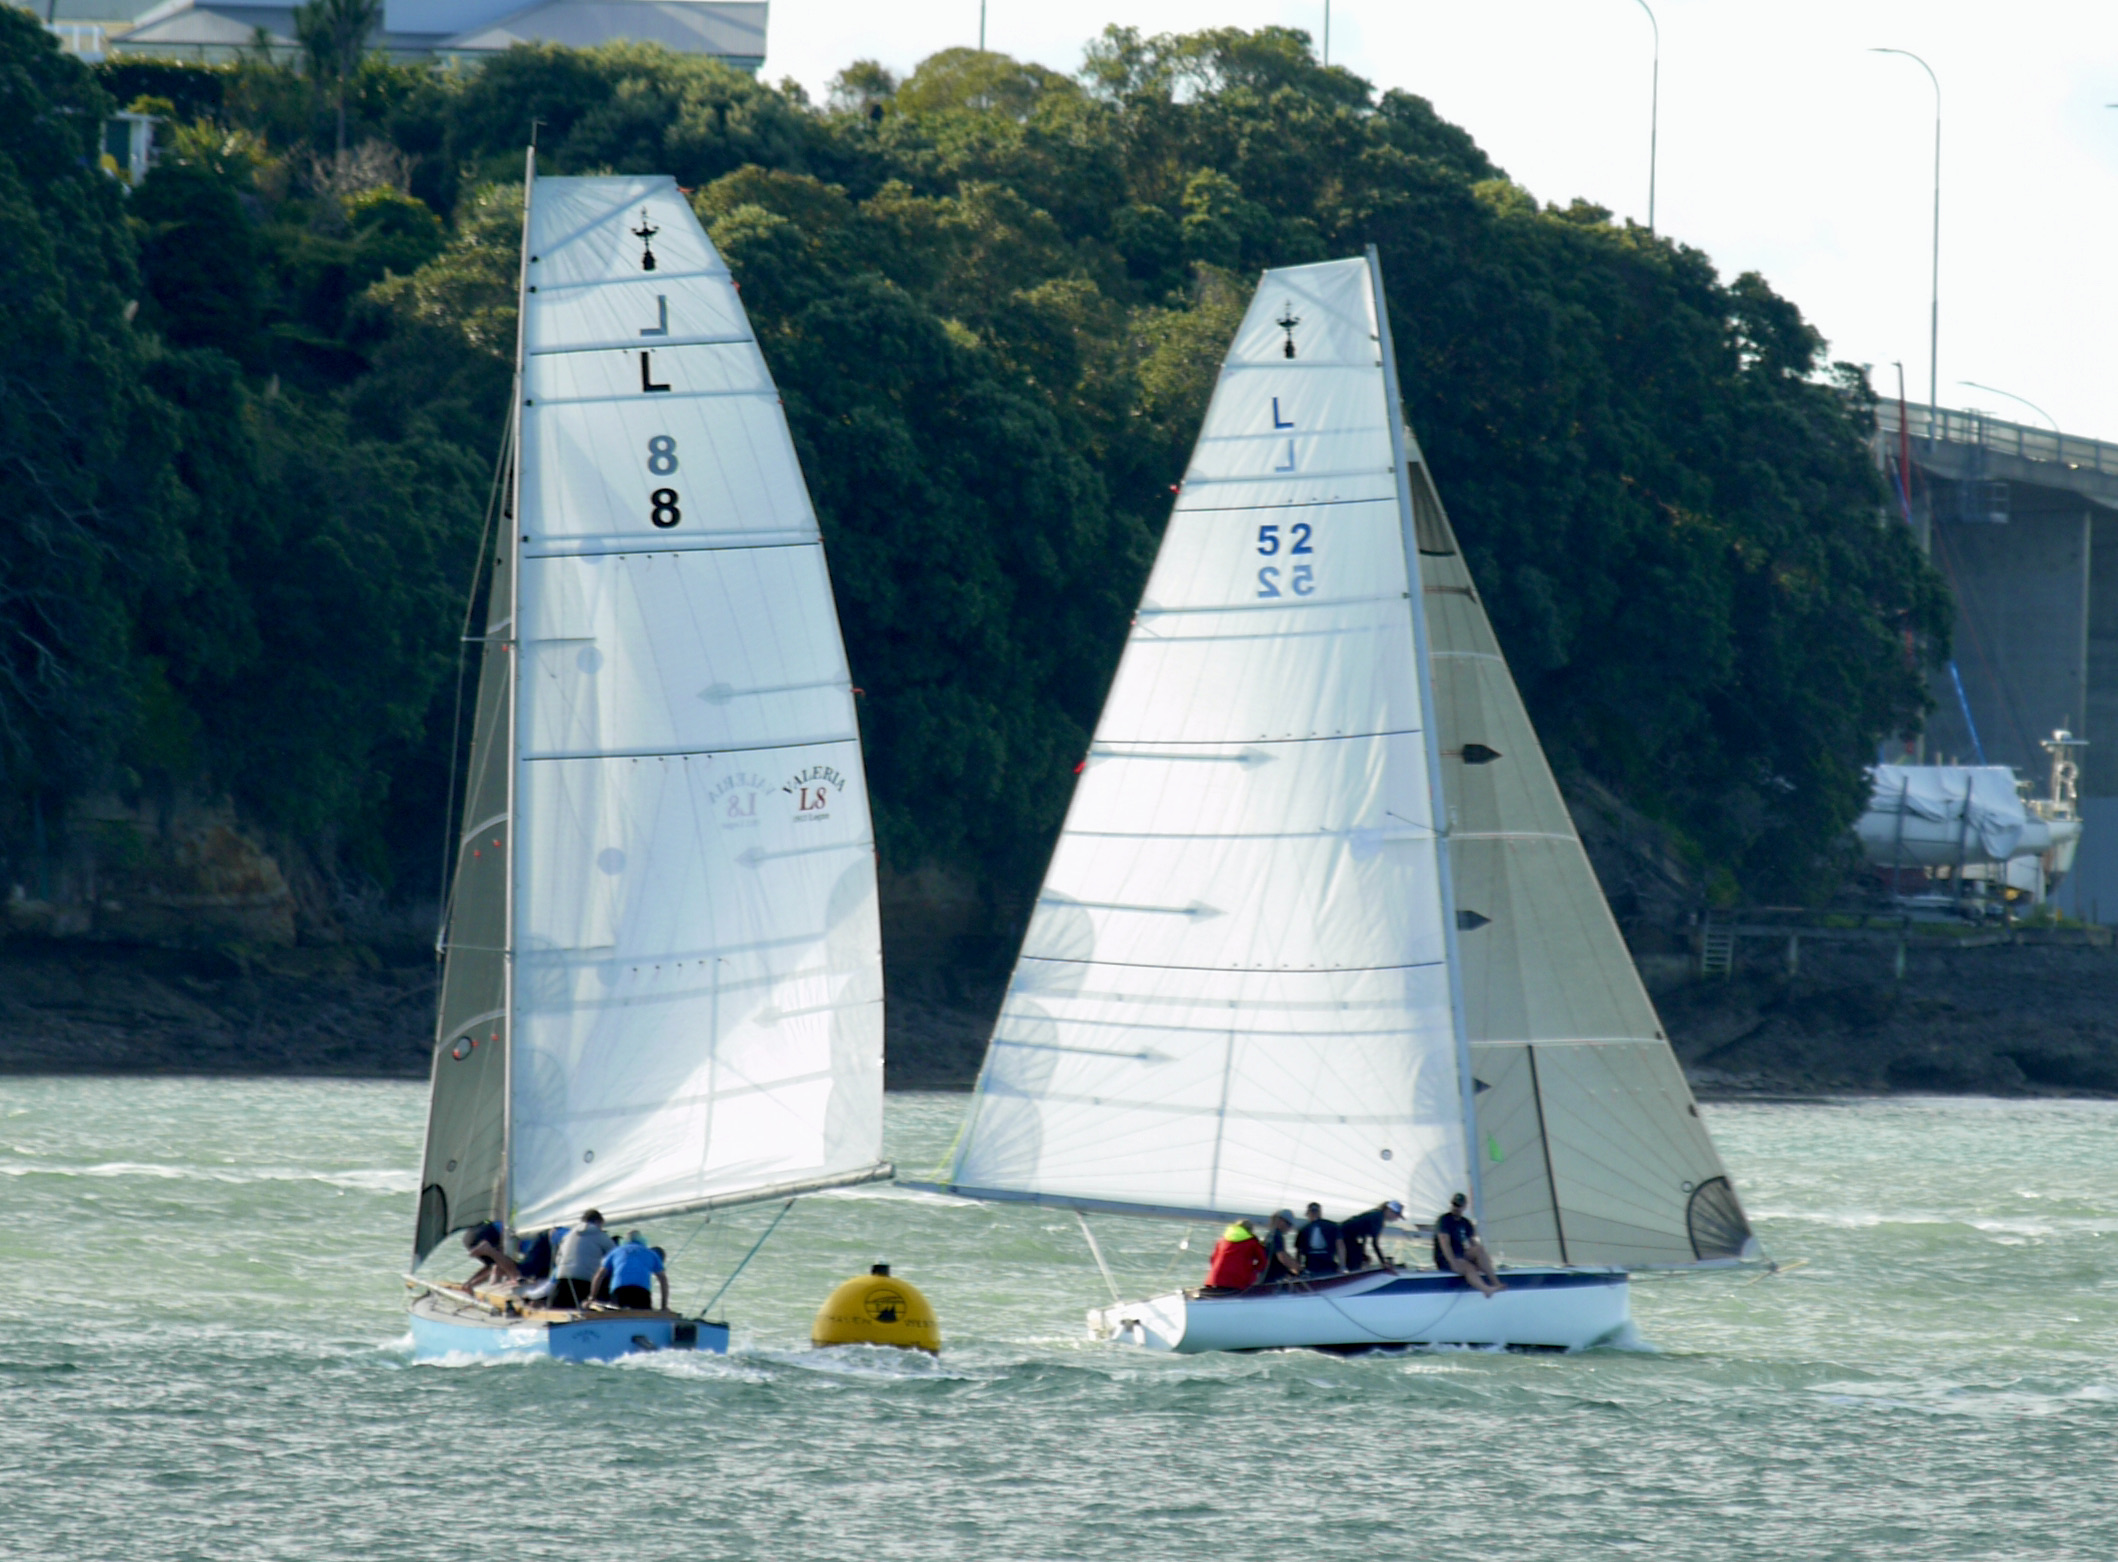
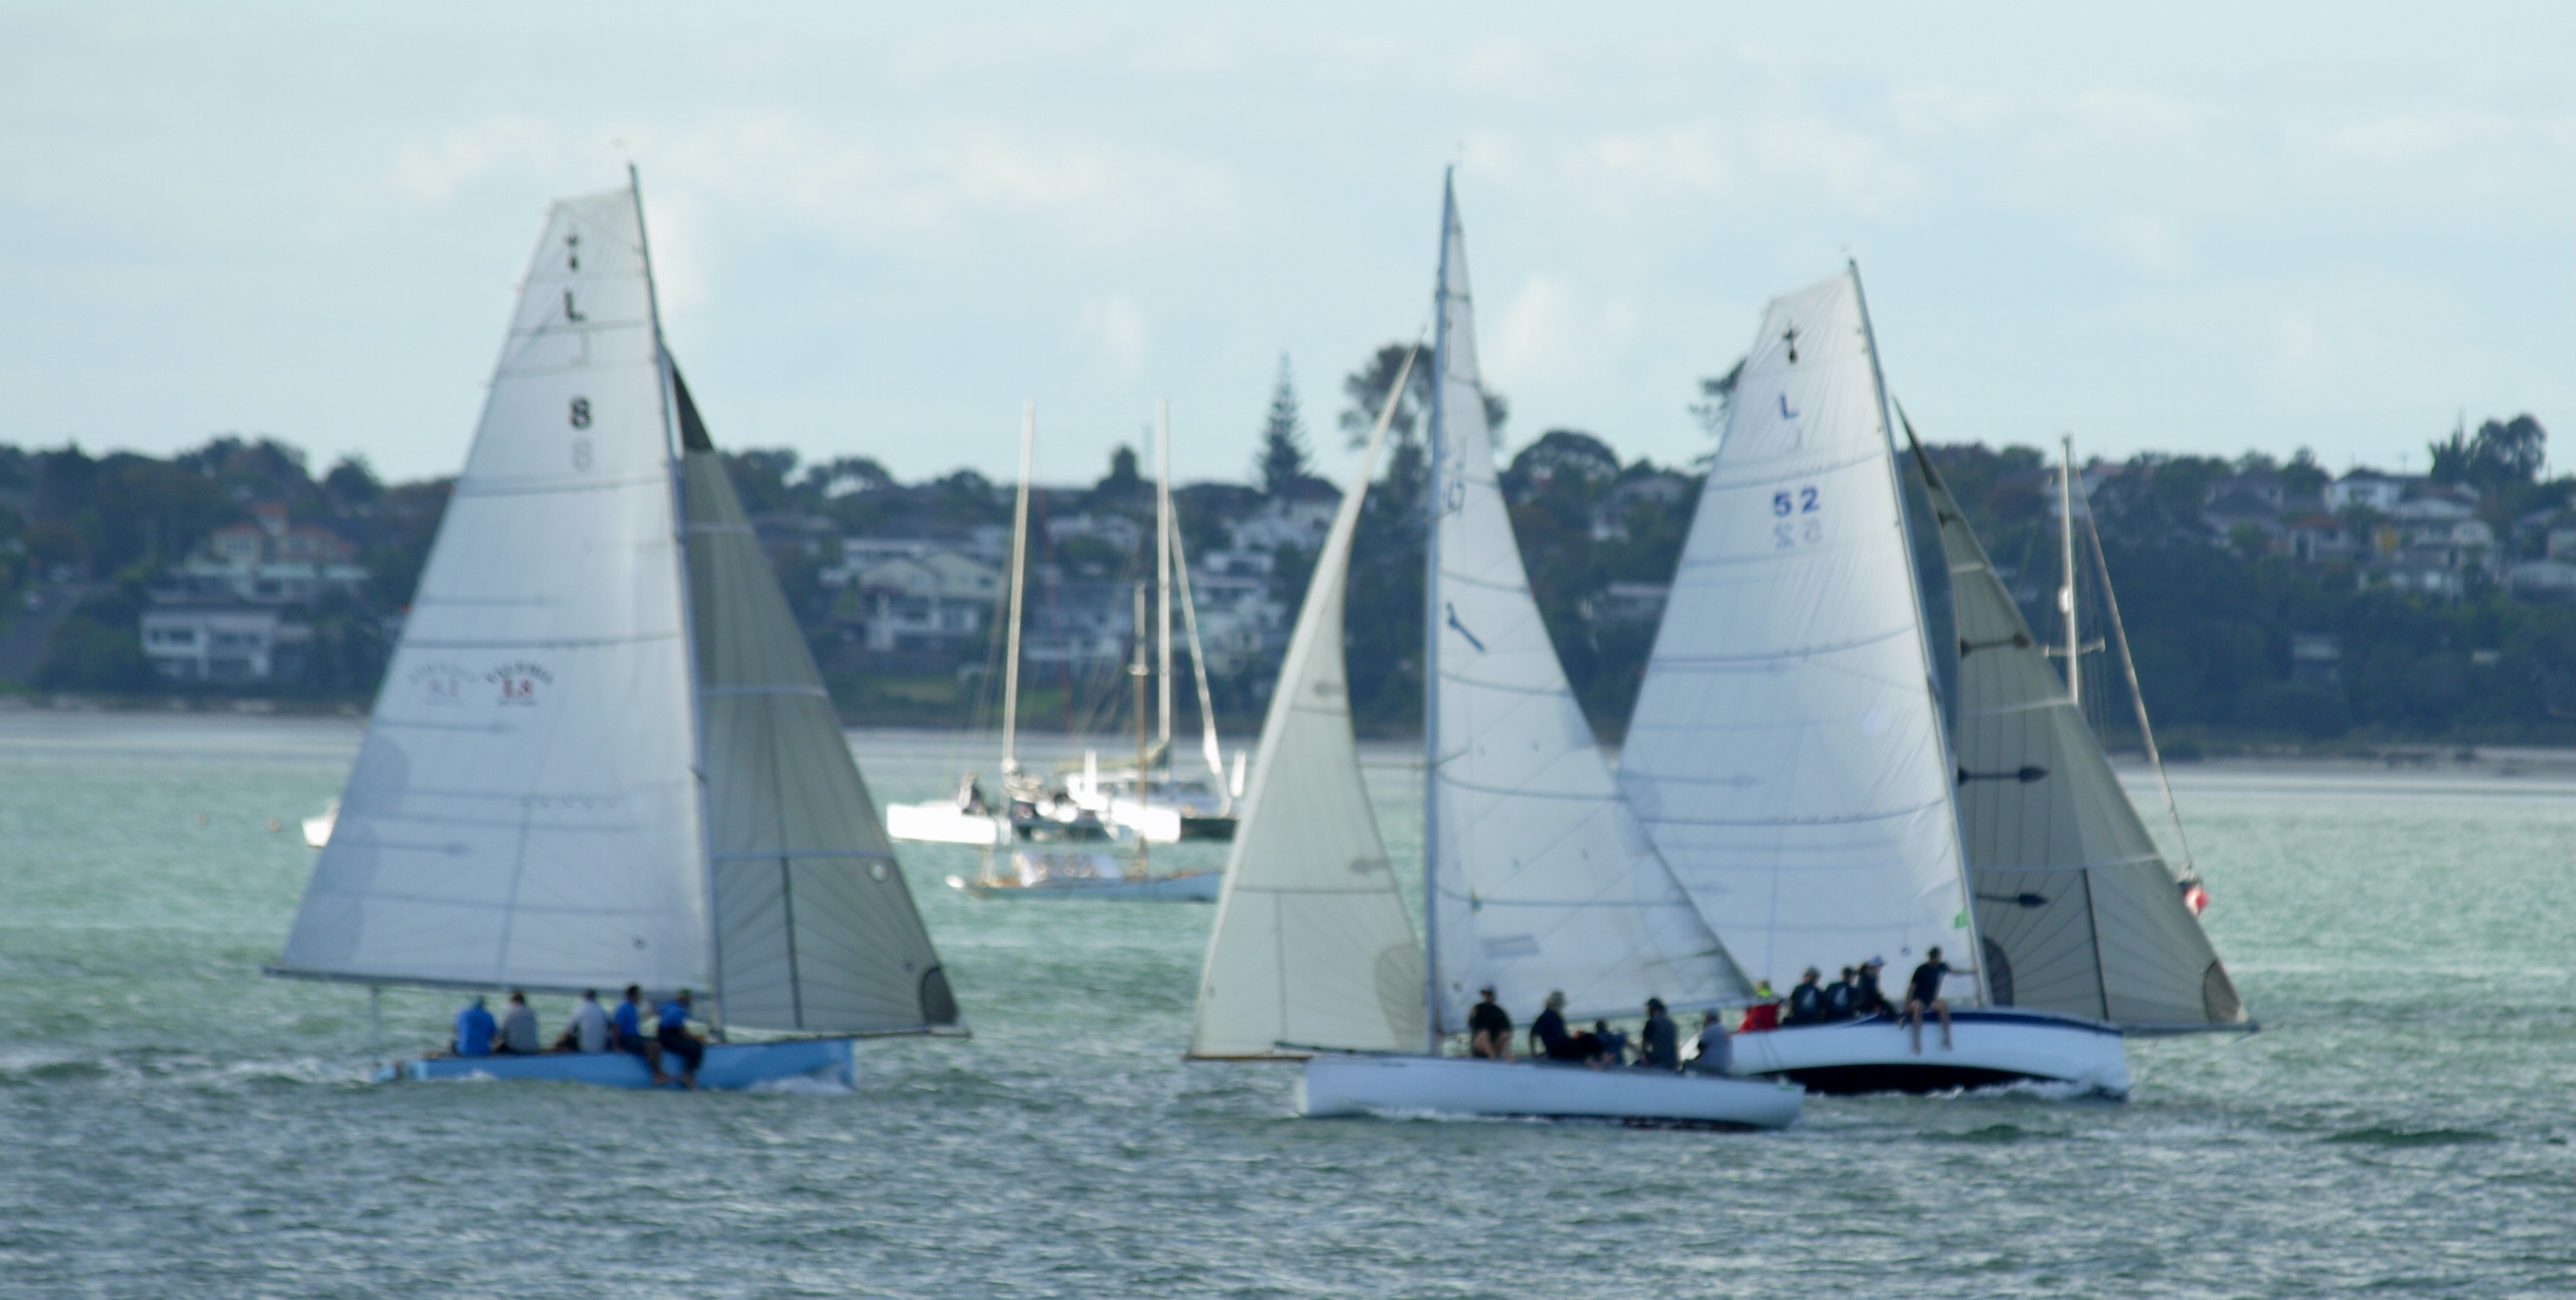
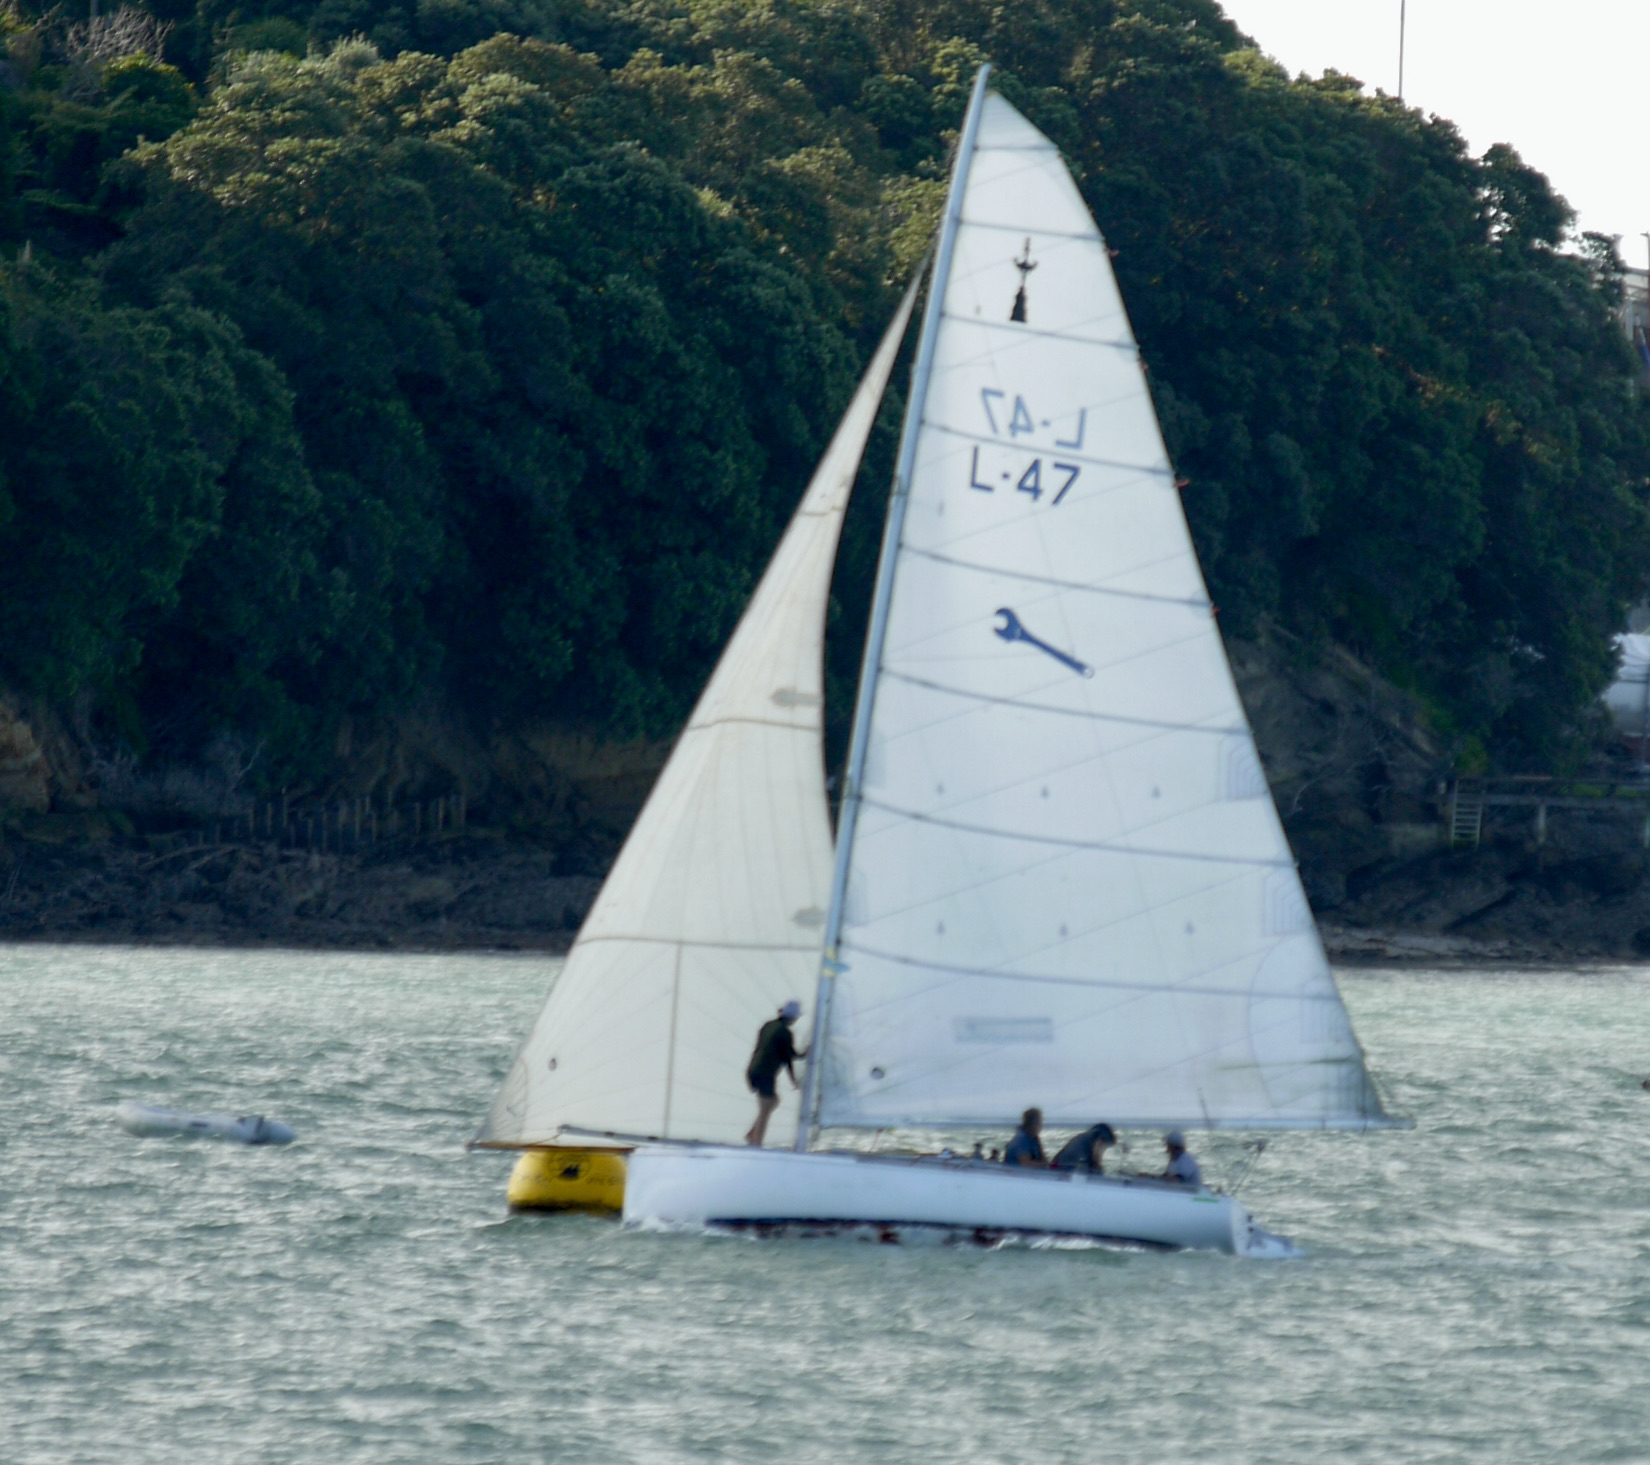
I was land based, using a long lens so some are a little fuzzy, but you get the vibe of the day. Sorry if your boats missing – drop me an email and I’ll check the photos, took lots, but some had other boats in the background etc. As always click on photos to enlarge.
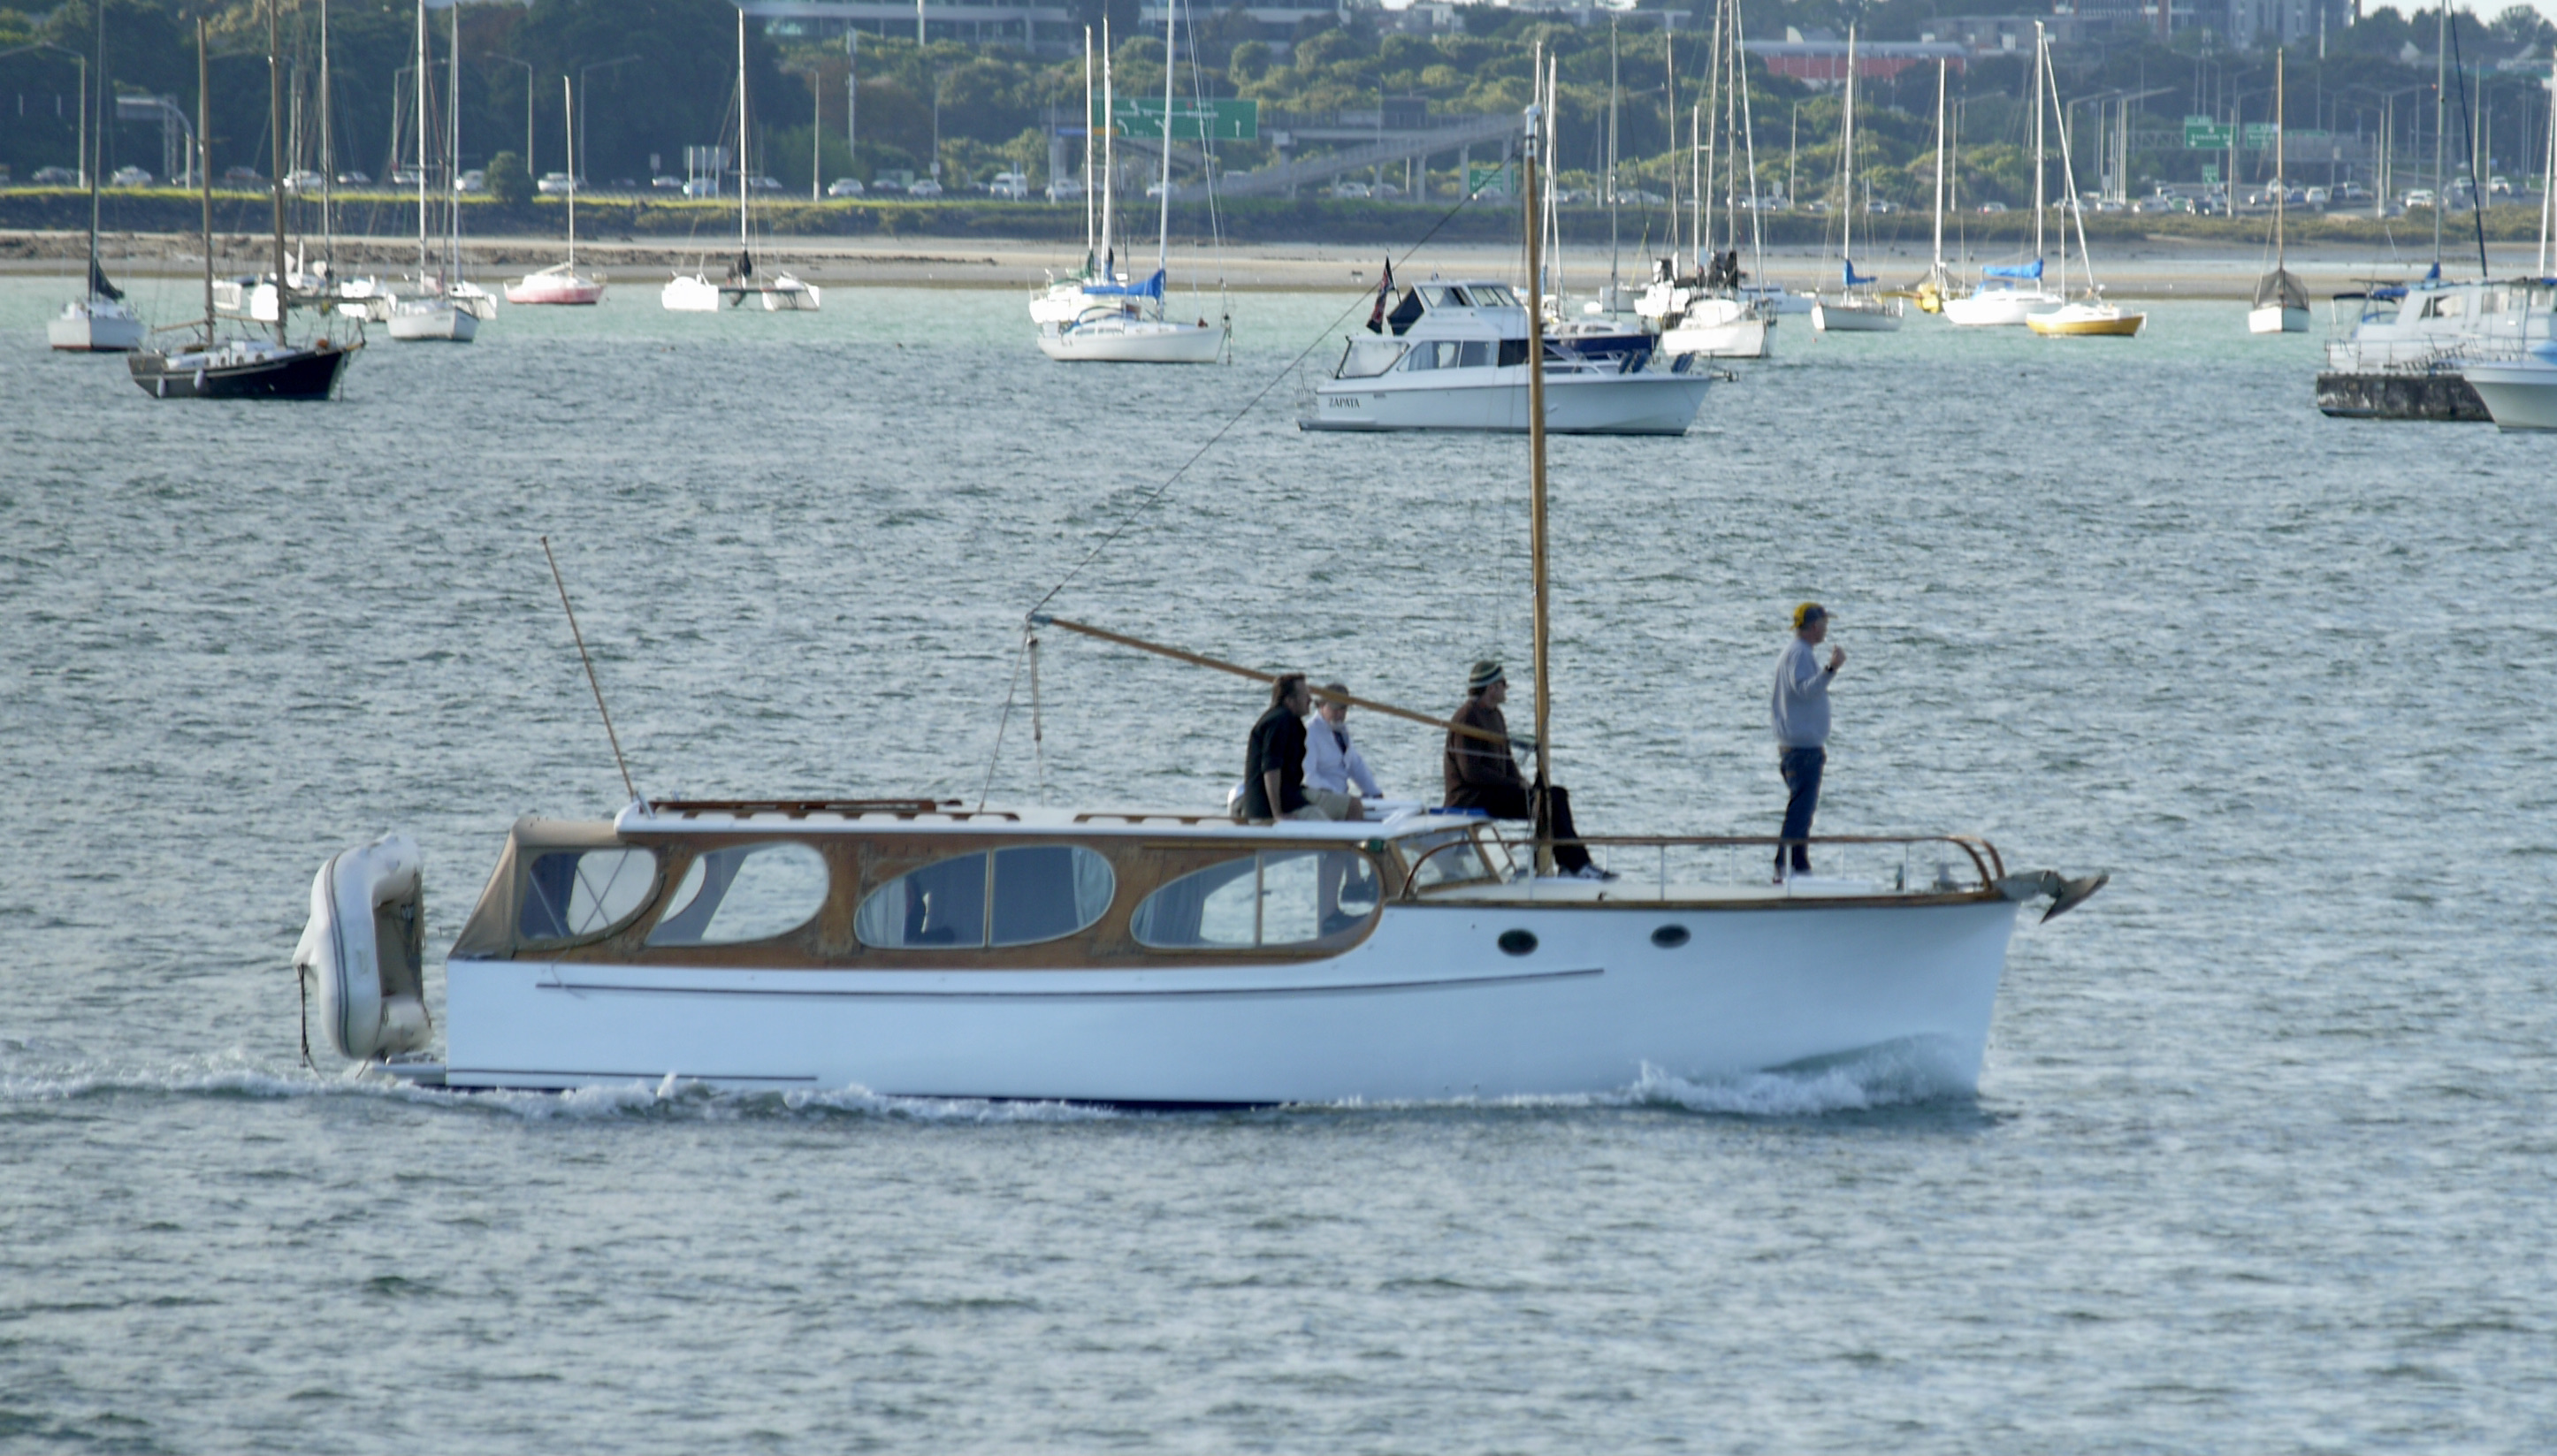
Good to see Geoff Bagnall floating around on his launch, must have escaped Gisborne for the weekend 😉 Photos below ex Don MacLeod
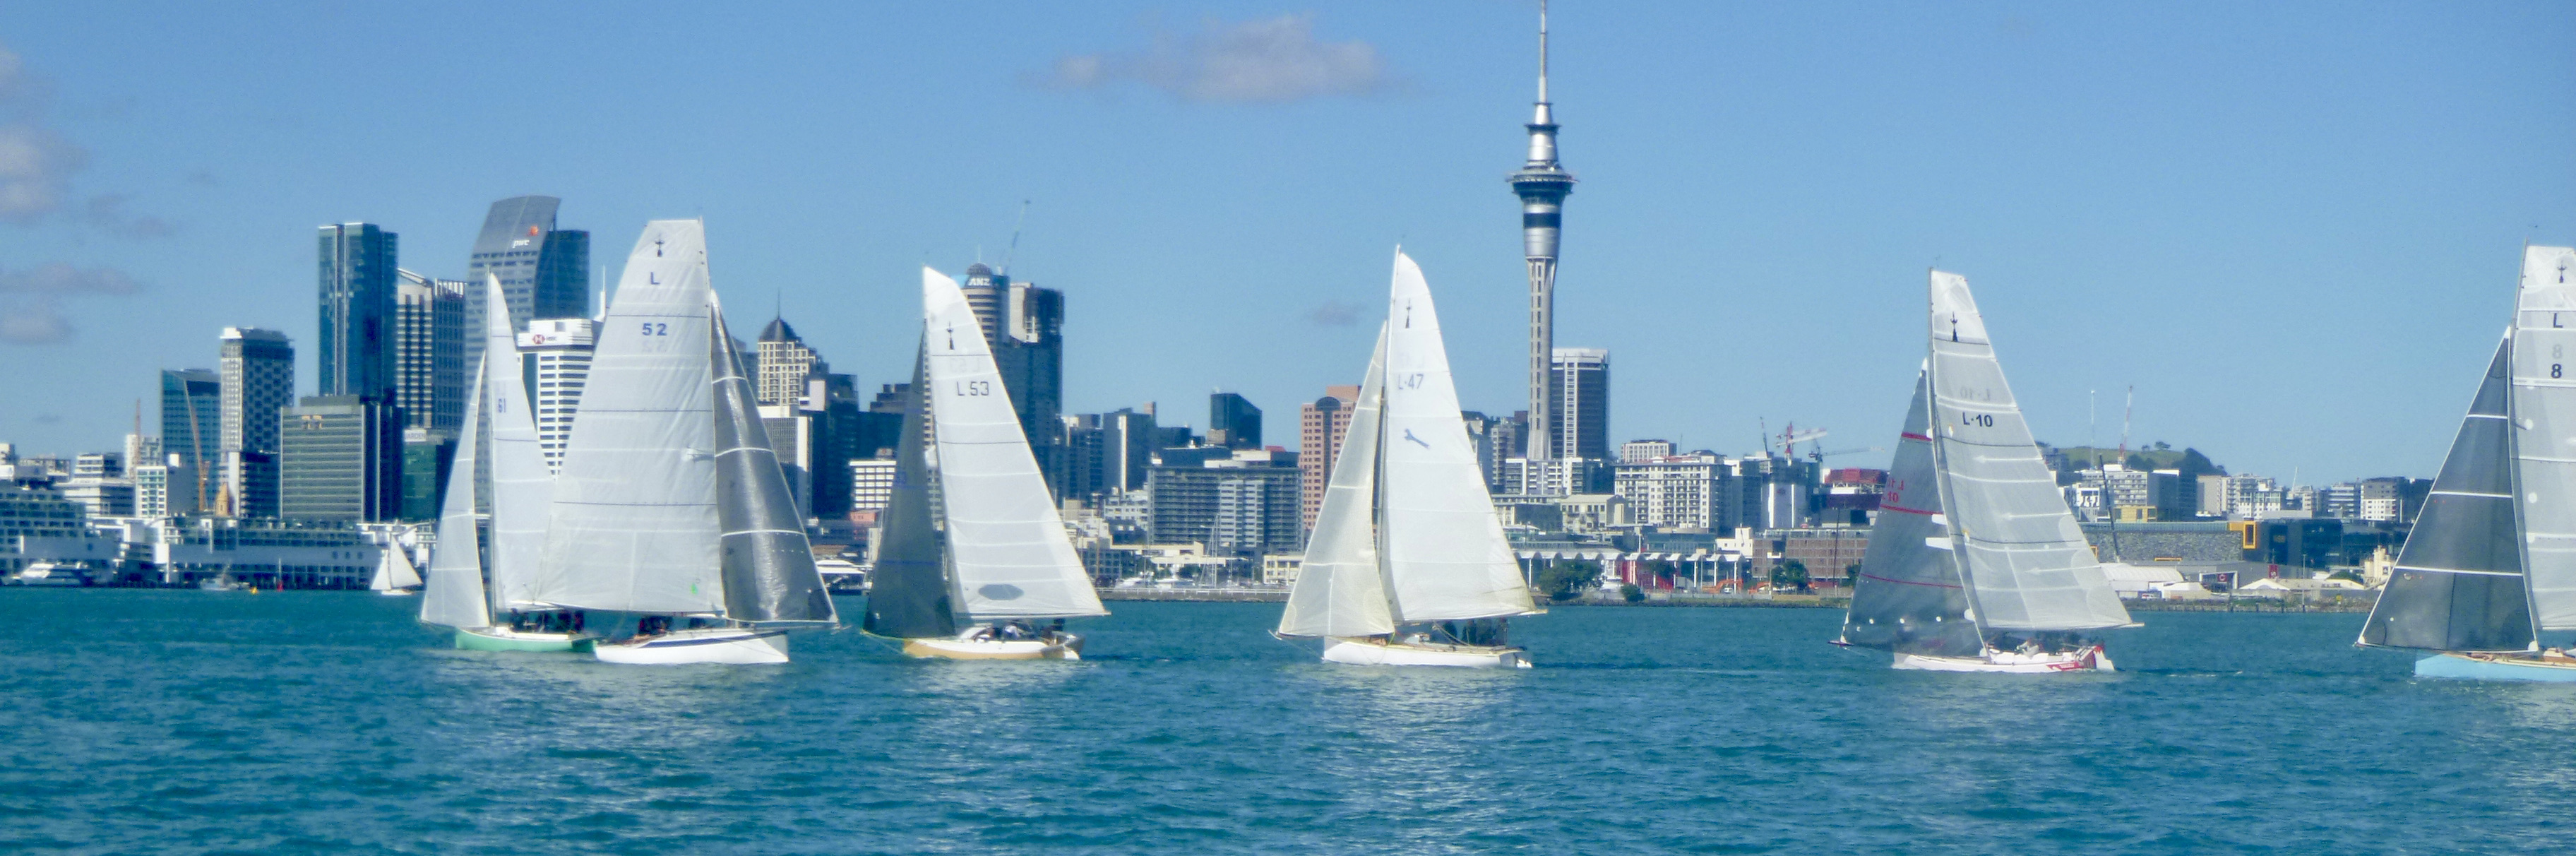
The Start Rounding The Second MarkFleet Leaders Second Mark – Tamatea > Orion > Tamerau > Limited Edition
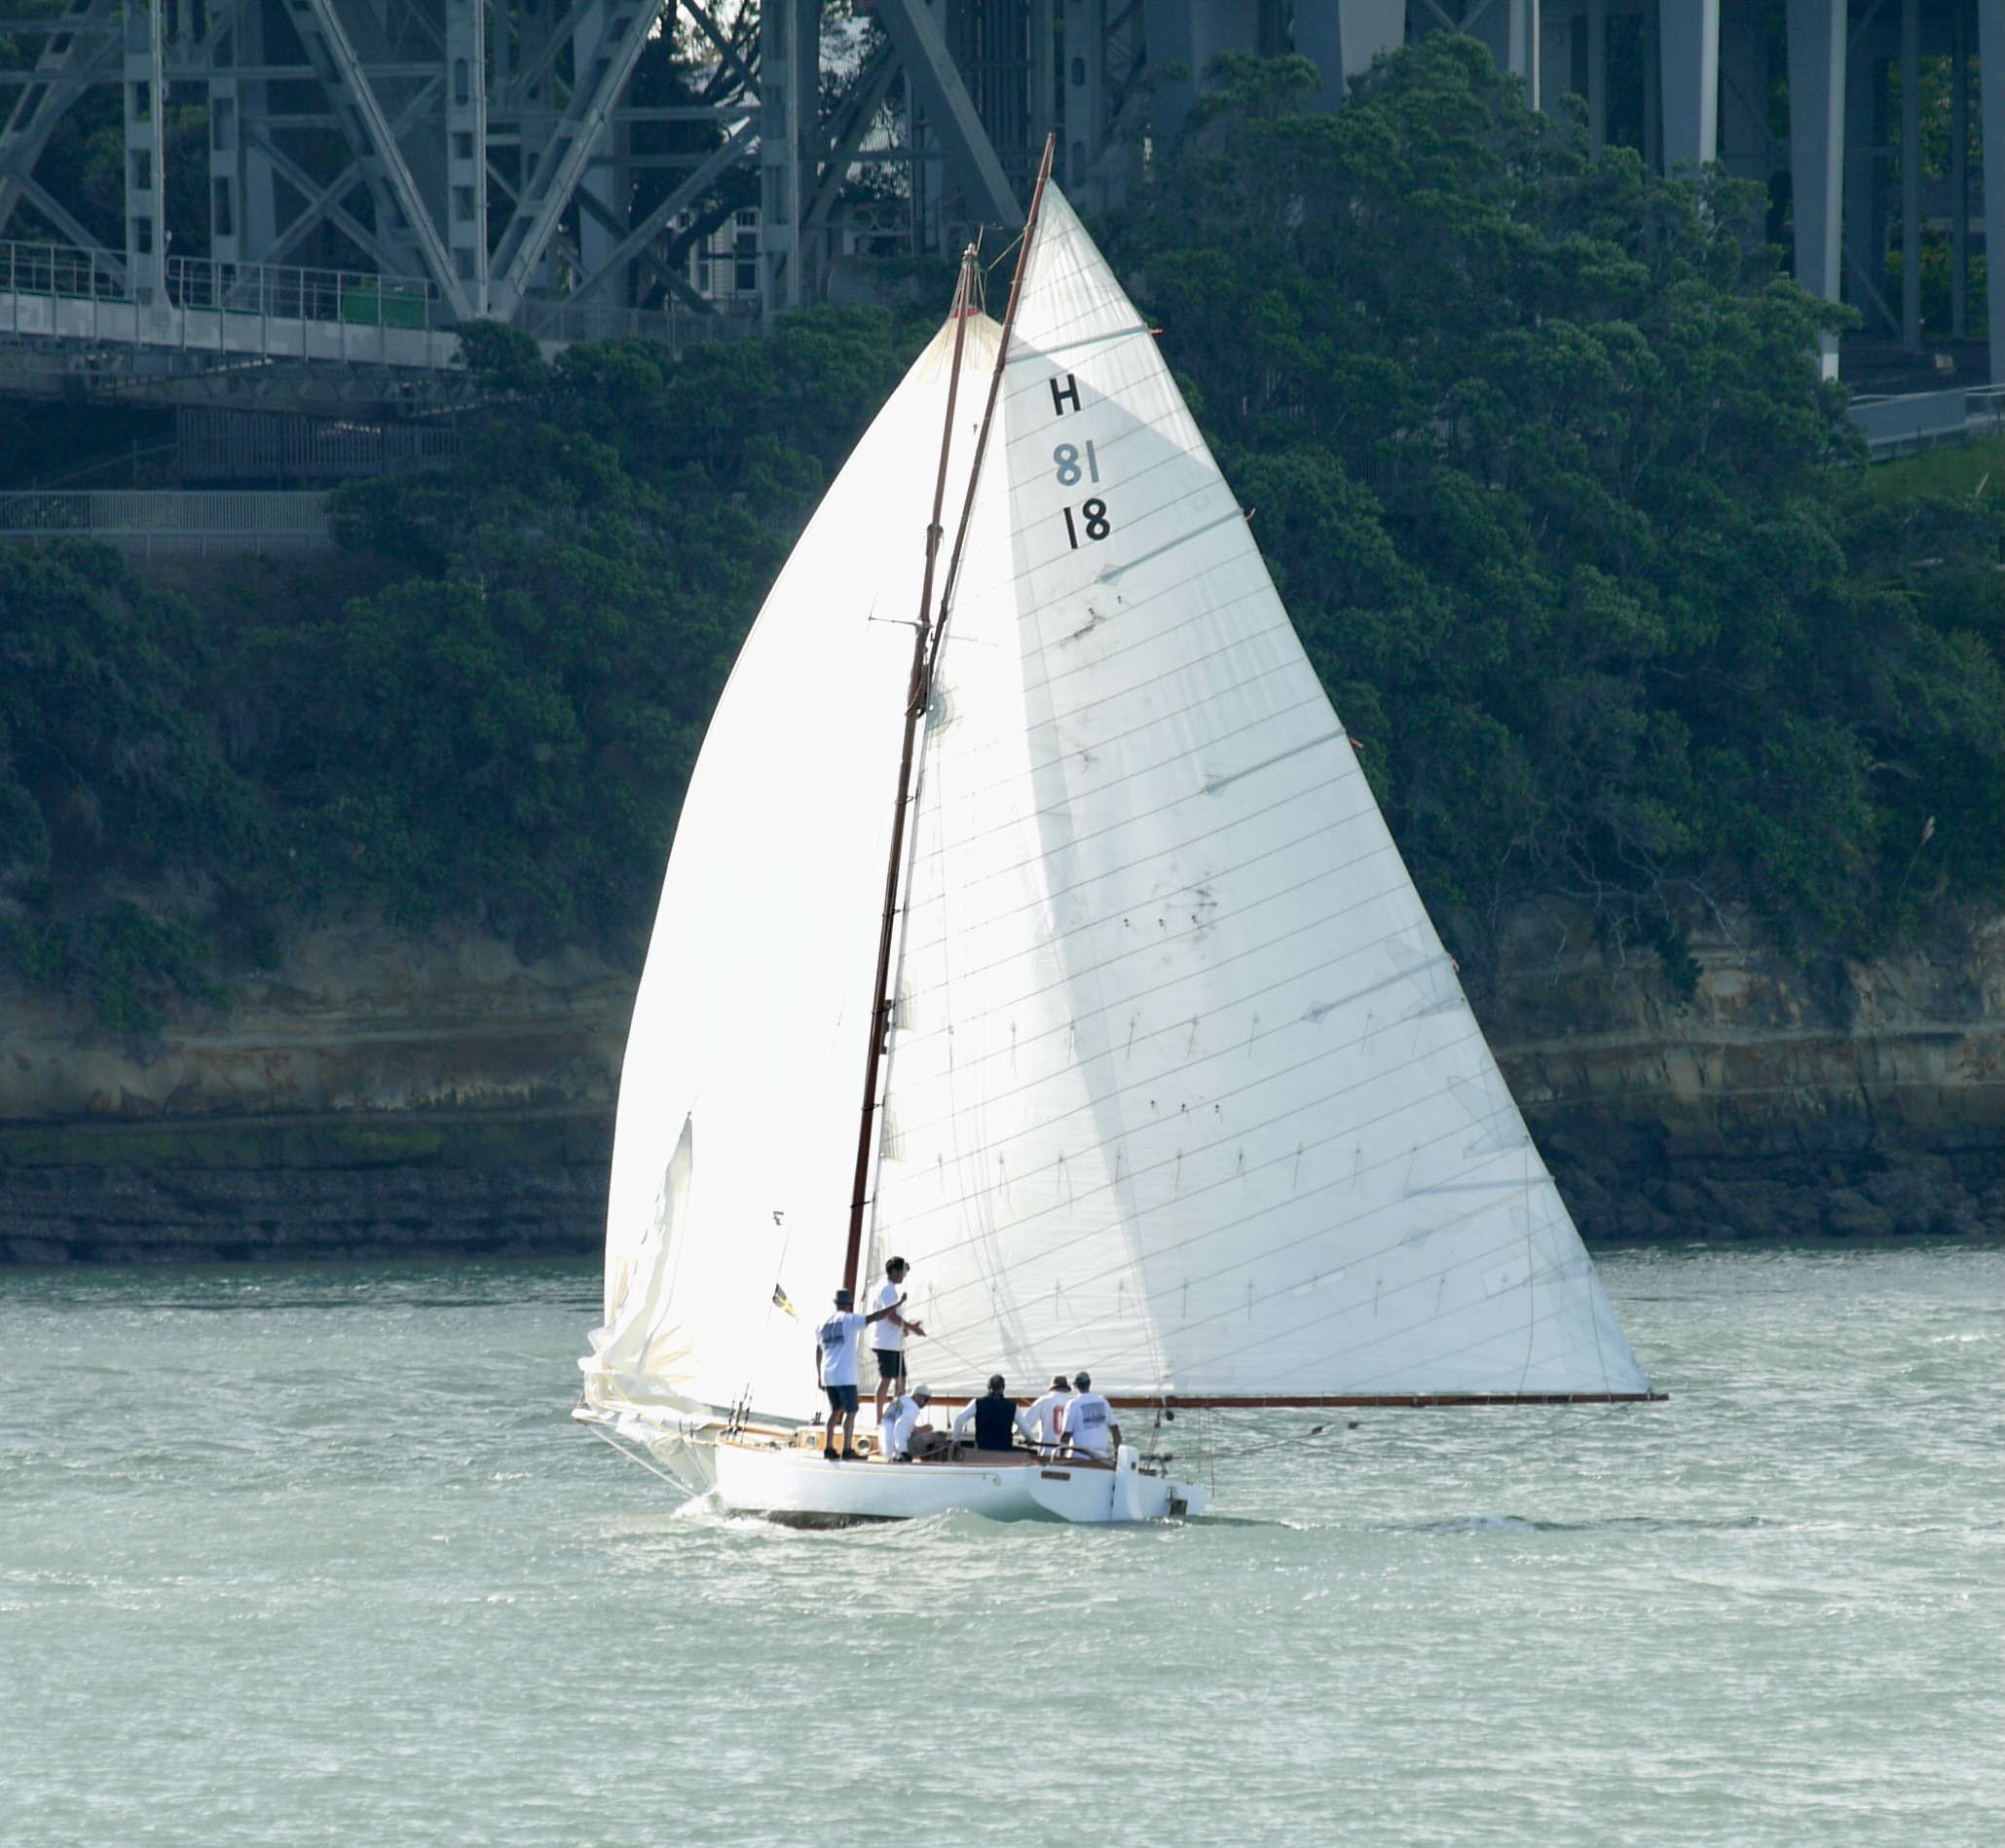
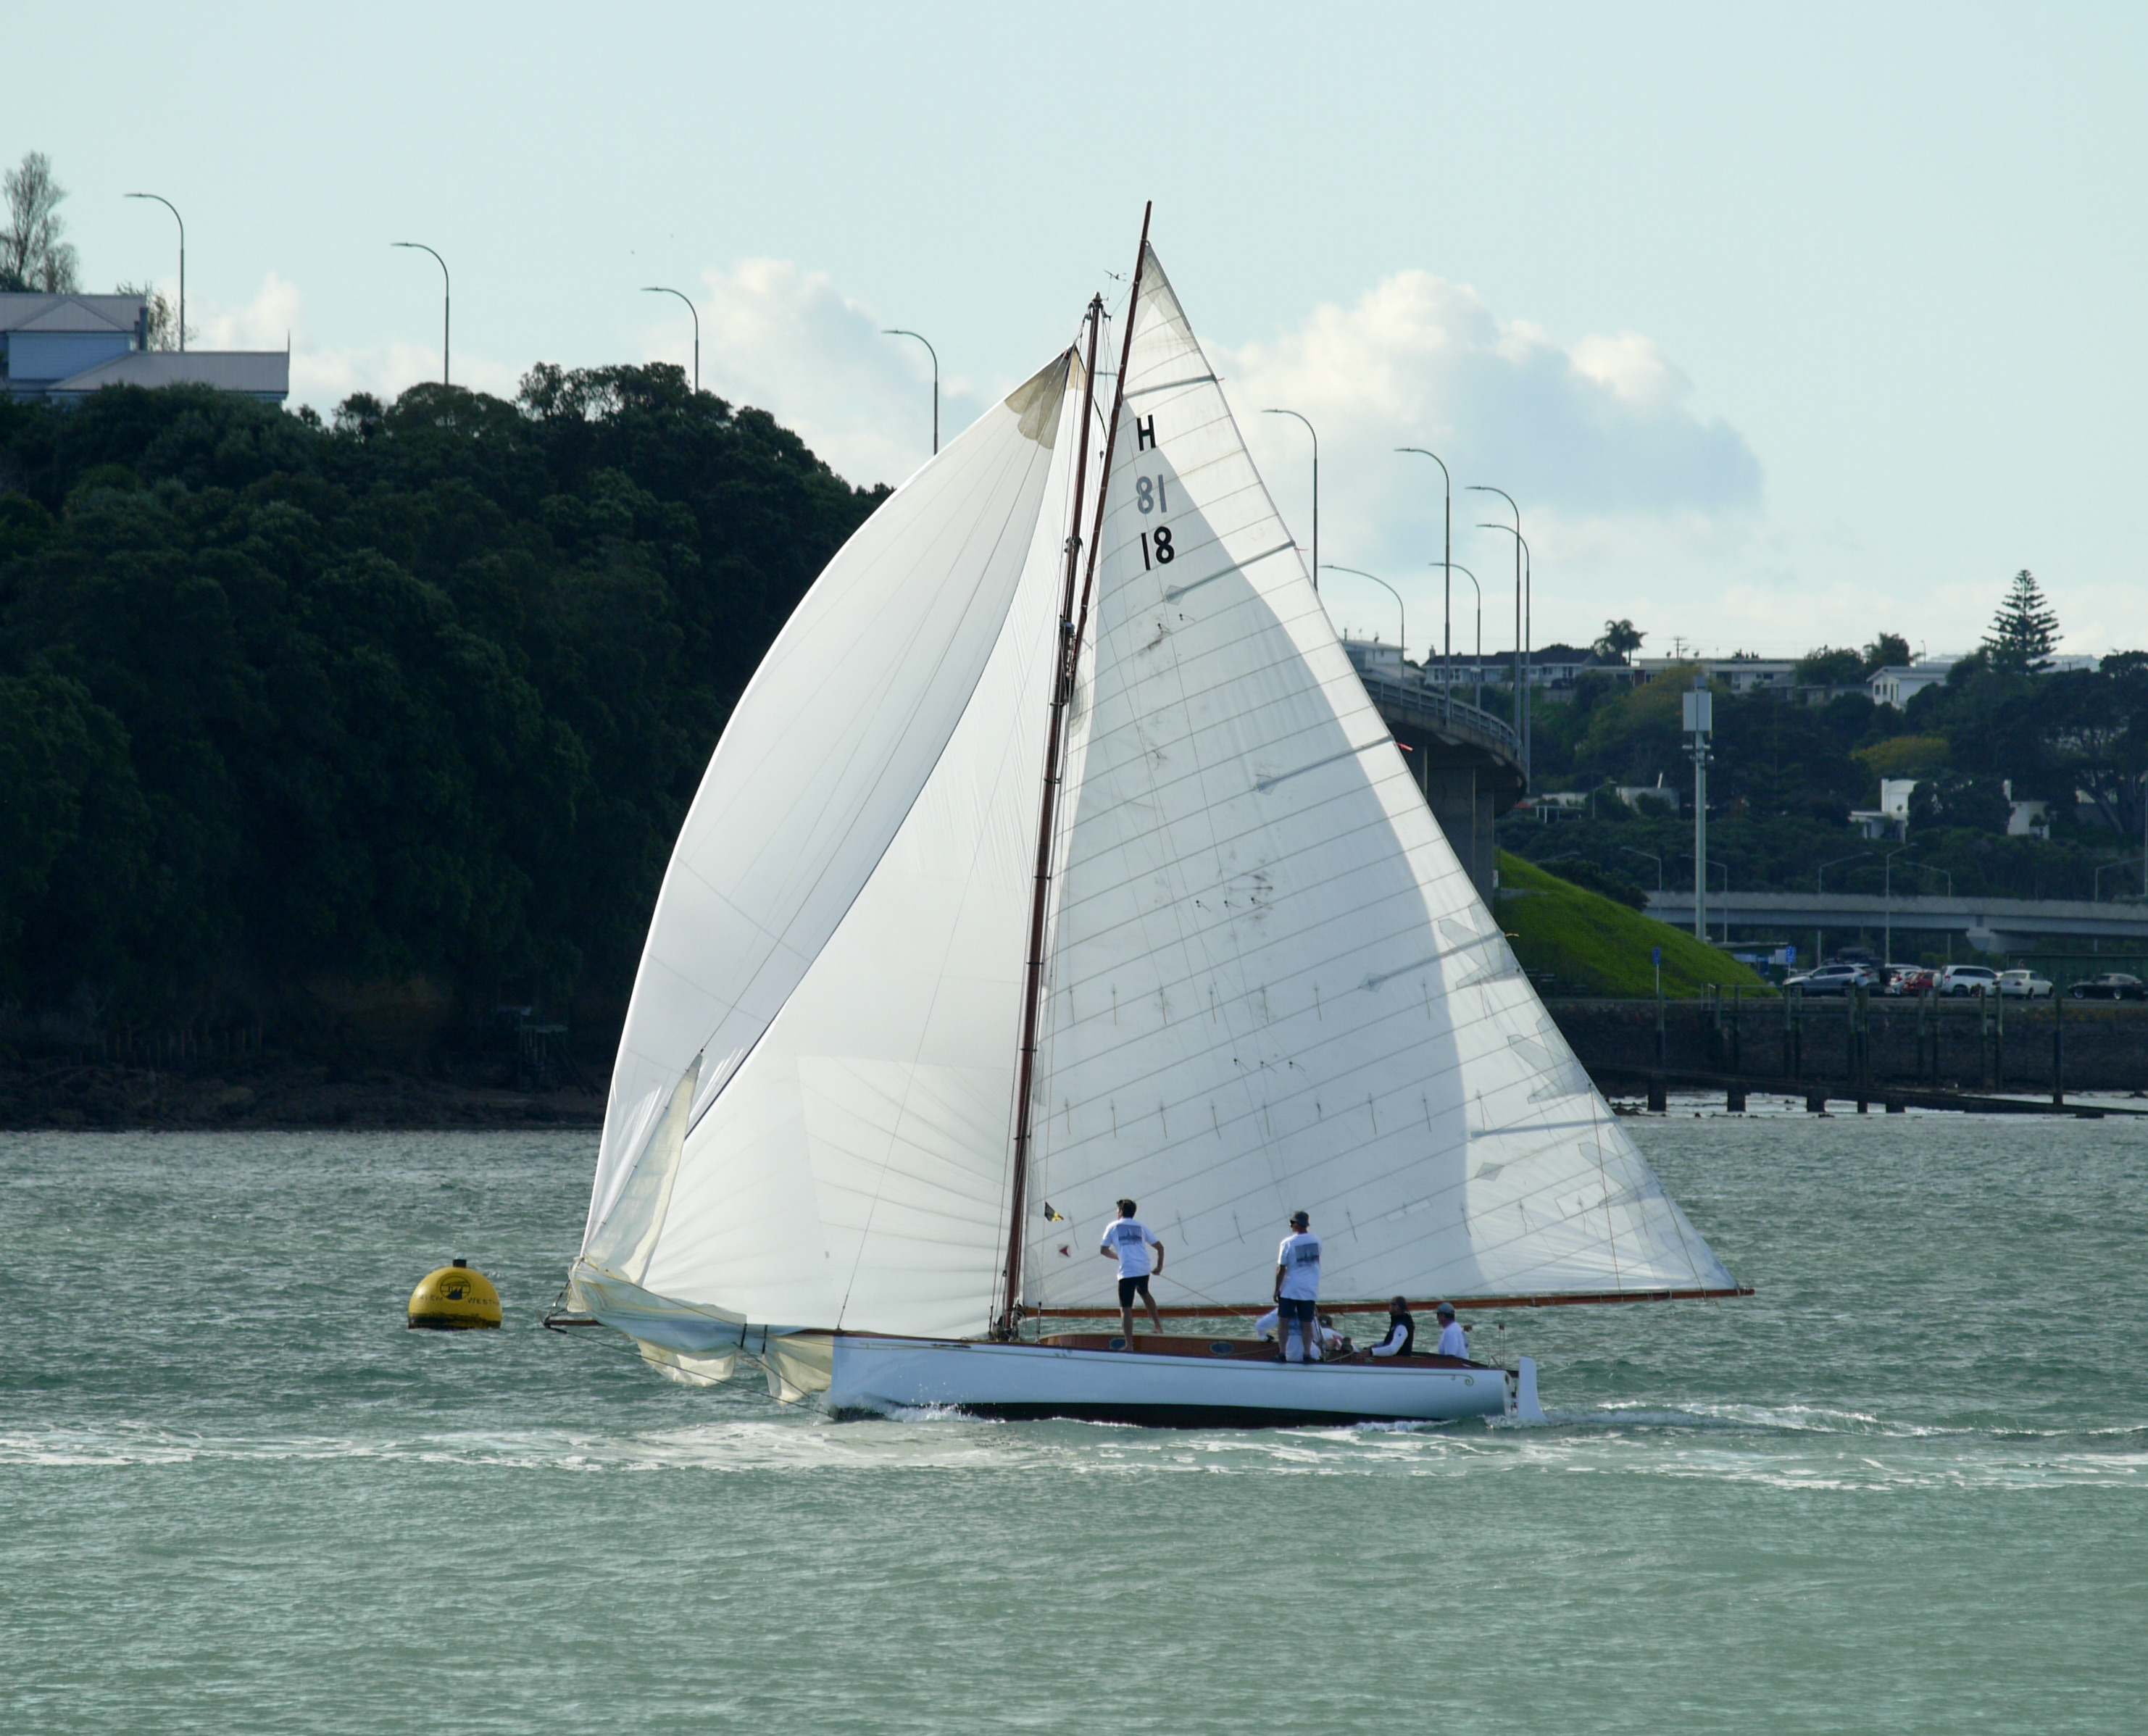
Today’s lead photo is of Corona H18, crossing the line – 1st – in yesterdays 100th Anniversary Lipton Cup race, proudly hosted by the Ponsonby Cruising Club. On Monday I’ll have more photos, a lot of editing to do first.
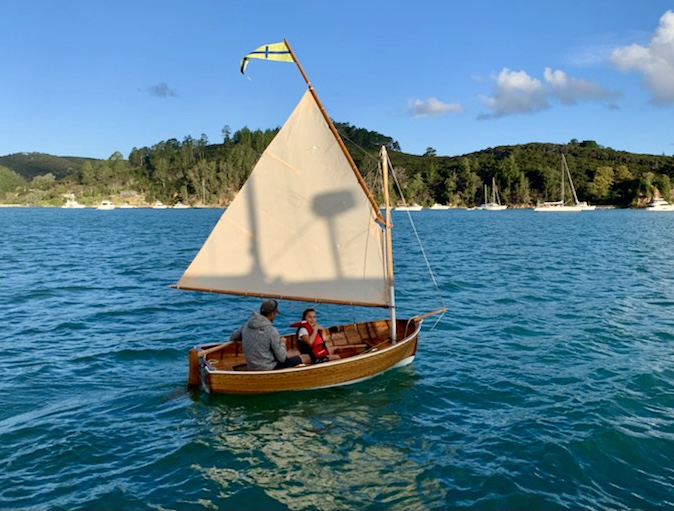
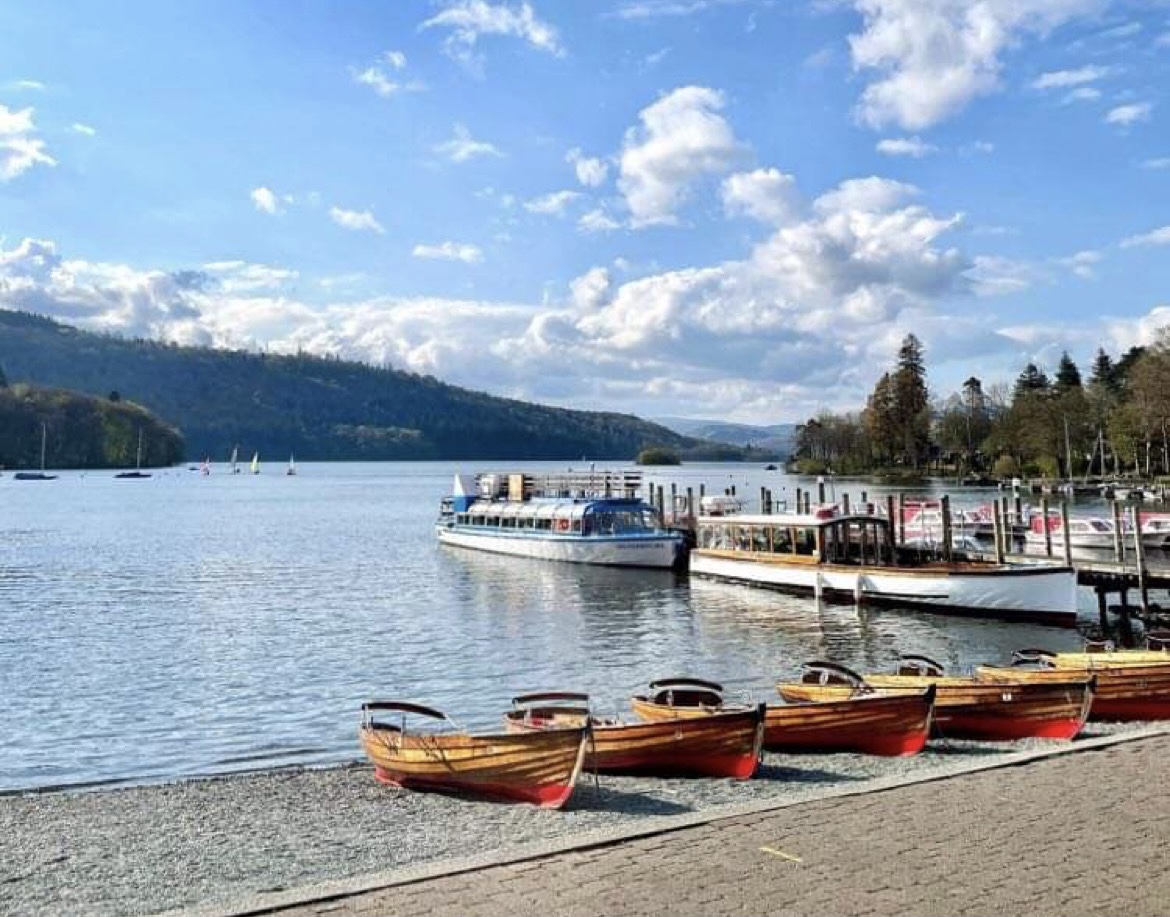
The first photo below was sent in by Barbara Cooke, taken last weekend at Kawau Island, late afternoon – father and daughter going for a sail – thats what life is all about, not messaging on the mobile. And the last photo is from across the world – youngest daughter and flatmates escaping London for a long weekend at the Lake District (Lake Windermere)
Early in the year while attending the Lake Rotoiti Classic & Wooden Boat Parade, I spotted and admired the magnificent fenders on the steam boat – Dancer. In a later conversation with her owner John, he told me he had made them and very generously offered to make me a pair for Raindance. I provided the rope and John crafted them. I meet up with John at the RNZYS during the week and we exchanged goods – WW merchandise and my famous tomato sauce for the fenders. John did comment that anyone who wants some the same is going to have to make them themselves J. Luckily John documented the process and took supporting photos – so woodys, whose brave enough to give it a go?
During the process I was reminded of a reason to pay your Classic Yacht Association subs – Fosters Chandlers offer a very attractive discount to CYA members – a nice saving when you are buying 23m of expensive rope.
I’ll let John talk you through the process. Remember click on photos to enlarge 😉
“The rope used is a synthetic that looks like an old style manila rope. It is available from Fosters, and probably other suppliers too. Note that I have given sizes here, they work with the rope Alan bought at Fosters, but are not necessarily going to work with other types. The diameter of the rope is 18mm, and Alan bought 23 metres. I halved that exactly, then made a bit of a guess as to what length of fender that would make, since the rope is slightly different to the size of my own. The problem being that you have to commit to the finished length at the very start. I settled on 600 mm which turned out to be exactly right. If necessary, extra rope can be added in, or excess can be cut off, but the first is a bit fiddly and the last is wasteful. You will also need a splicing fid, available from the same places that have the rope, and the means to cut and heat seal the end of the rope.
So, cut your length of 11.5 metres and fold it in half. Lash a small rope to the halfway point and attach it to some convenient item, in my case a door handle. Make a whipping around just below the loop at the top, and another one 600 mm (2 feet in old units) down. This can be seen in photo 1. The whipping will not show on the finished job, so I use ordinary white braided cord for this, about 2mm diameter.
Now, start to unlay the three strands at each end. Before you go more than an inch or two, make sure the end of each strand is well heat welded to itself, using a lighter or a candle. Try to make sure that there are no jagged edges to the heat welded ends as they can be hard on your hands and on the rope itself, tending to make it go furry as you pull the ends through the loops as you work. You will see in Photo one that all six stands have been unlaid up to the lower whipping.
Now, we really want to start with the fender the other way up, so add a temporary loop of small cord through between the two sides of the rope just above the lower whipping, and use this to attach to your convenient door handle. I haven’t shown this in the photos. Now you have six strands of unlaid rope with the two ropes for the core emerging below them in the middle. Your task now is to tie a whole lot of crown knots. Now, the process I will describe suits me as a right handed person. If you are left handed, you will probably find it easier to reverse everything, and this will make no practical difference to the finished result.
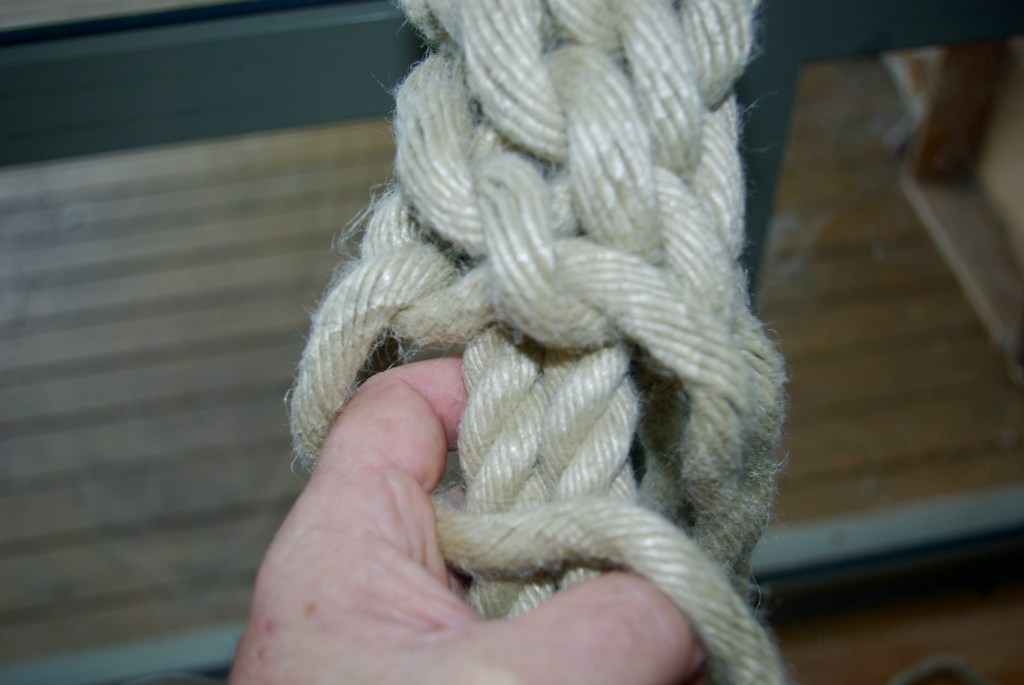
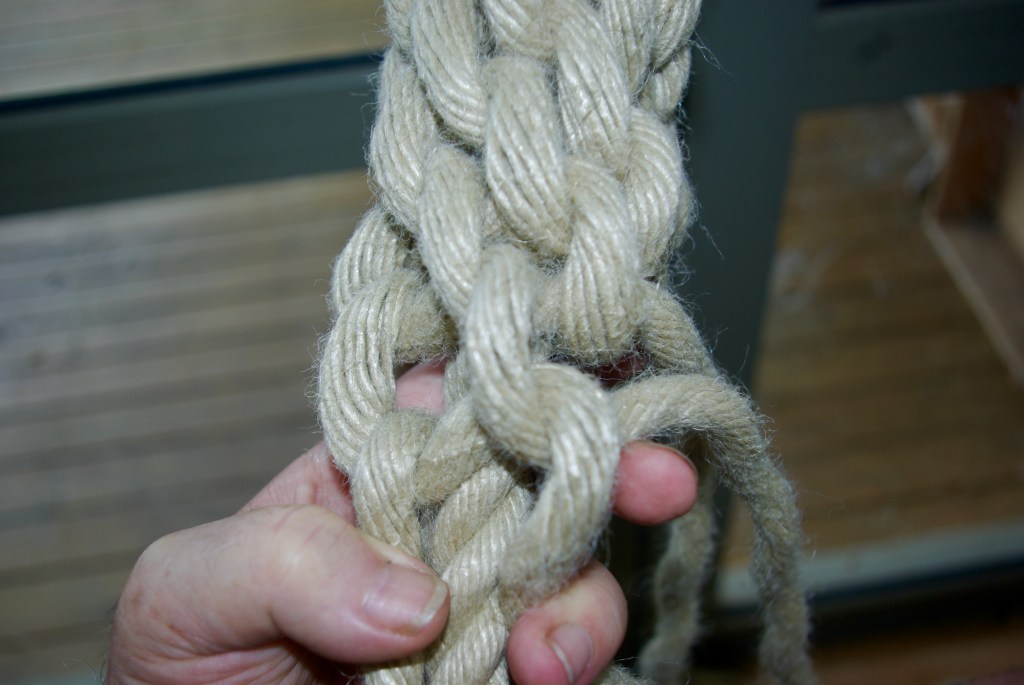
So, we take the first strand making it run downwards and to the right, putting the index finger of our left hand into the loop this makes. (Photo 3) Taking the next strand to the right, we put this over the top of the first strand where it is running horizontally to the right, and then bring it underneath and to the right. (Photo 4) This is repeated all the way around (photo 5) until we come to the sixth strand, which after it has gone under the fifth strand and then to the right, gets passed up through the loop that your index finger is hopefully still holding. (Photo 6 and 7) Once you have pulled all the slack through, you should have a nice crown knot. All you have to do is repeat this process about 35 times, give or take, and you will have done the first layer.
It is quite probable that you will make mistakes. One common one is to find that you have omitted one of the strands from the knot. Another possible one is to go through the first loop in the wrong direction. The best way to fix mistakes is to undo the knots all the way back to the mistake, even if it is quite a way back.
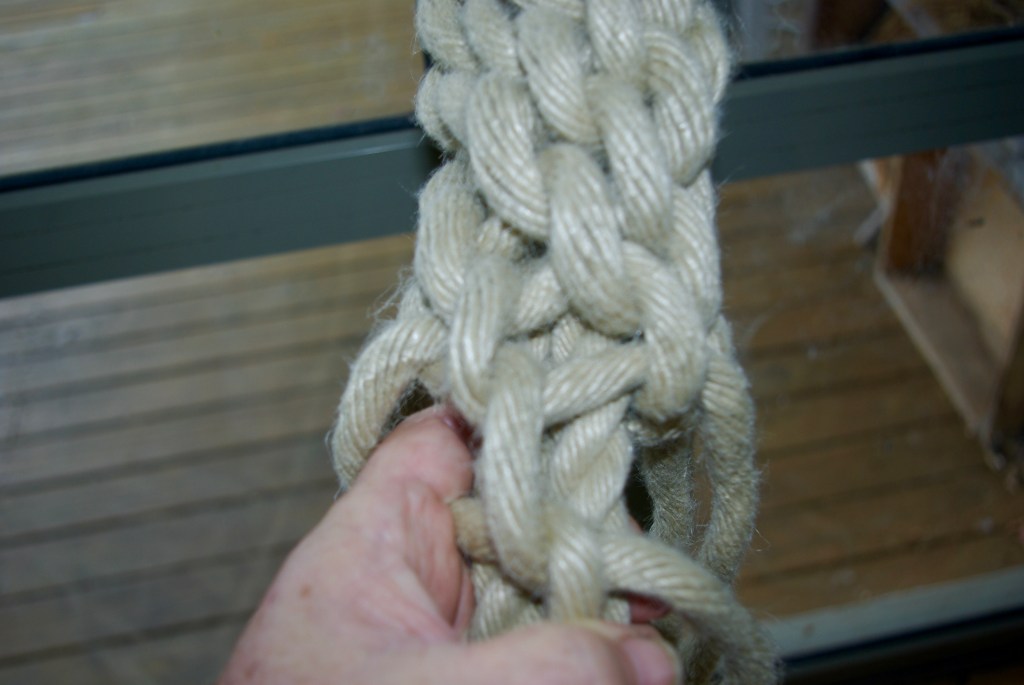
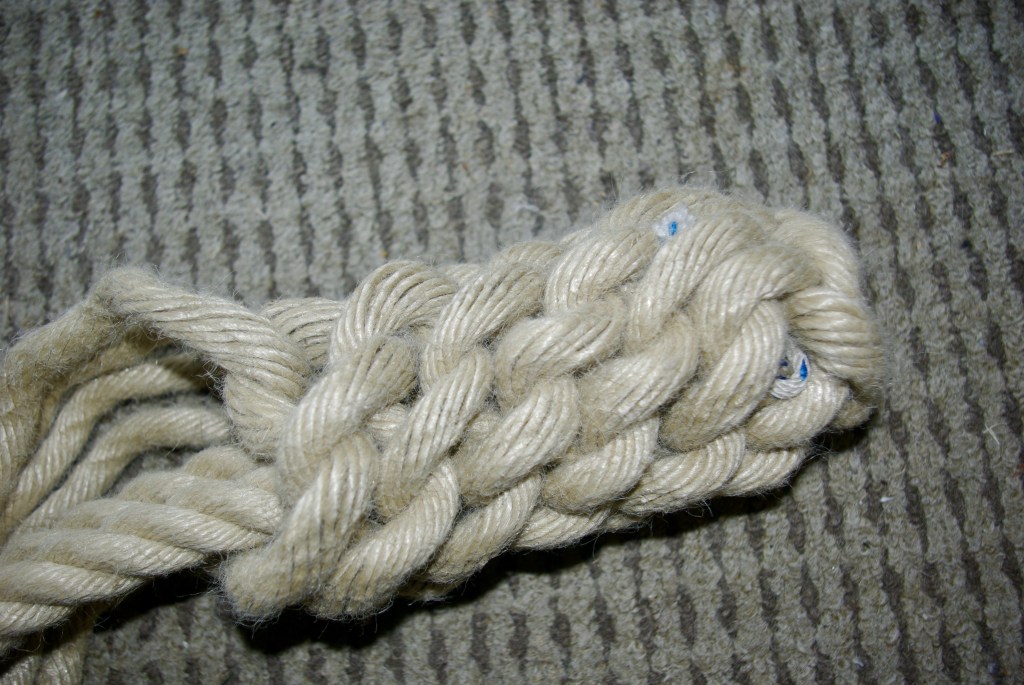
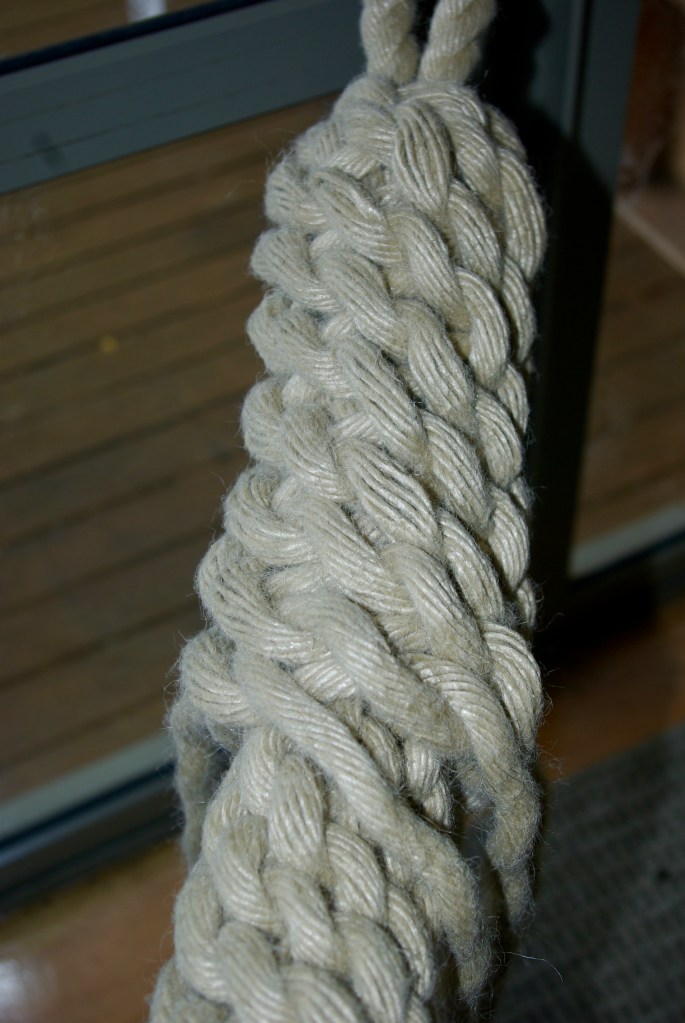
Every so often you should work some of the slack out of the worked part of the fender. Go to a point near the start and see if you can get a bit of slack in one of the strands. Work out where that strand next emerges further down, it will go under two strands before it does. (Photo 8) Work the slack down to there, then do the same at the next point where it emerges. Repeat until you reach the last knots, then choose another strand at random near the top and do the same again. Once you have done this to 3 or 4 of the strands it should all start to sit nicely. Photo 9 shows the first layer partly worked. When you reach the eye that you made at the start, make sure that your last crown knot will be enough to cover the whipping when it is all nicely tightened up. Then suspend from your door handle by the eye end and start working crown knots over the top of the existing layer. Photo 10 shows the second layer partly worked. This will be much the same as before, except that your hand with the index finger that is holding the loop will have further to reach. This layer is also more inclined to be a bit loose, especially as you reach the end. It will help here if you have made sure the first layer is tightened up reasonably well before you put the second layer on top. Photo 11 shows the last few knots being a bit unruly.
Now, hopefully when you reach the very end, each strand will be no longer than about the length of the fender. In order to make a tidy finish, we want to weave these ends under the existing work. This has two good effects, it tightens up the work, and it makes good use of the ends to add bulk to the fender. This is where your splicing fid will come in handy. Photo 12 shows the fid inserted under two strands ready to thread the loose end through. If you look at a finished fender, you will see that it has the appearance of having twisted pairs of strands spiraling around it, with short horizontal strands between them. The idea is to use the fid to work each strand under those horizontal strands, following up between the spirals, until the strand you are hiding runs out. The previously heat sealed end can then be worked under so it does not show. Photo 13 shows the appearance of the twists we are trying to hide the end of the strand between.
Now the size of rope and length specified above will make a fender about 100mm diameter by about 600 mm long. (4 inches by 2 feet for traditionalists.) Phot 14 shows a finished fender with a standard soccer ball for comparison. This is a good size for a boat maybe 10 to 15 metres long. If you want to make some a bit smaller, perhaps for a nice Whitehall rowing dinghy or similar, you can in theory scale all the sizes given and get a similar fender of a scaled length. So for instance if we halve the rope diameter to 9mm, and halve the length to 5.75 metres, we should get a fender 50mm diameter by 300mm long, or two inches by 1 foot. However I cannot guarantee that this will work for you, so you should regard the first one you make as a trial. This brings us to what to do if things are not working out for you at the end. If you find you don’t have enough length of strand left to finish the second layer and weave the ends in, the best way to salvage the job is to undo it all and move the lower whipping up by a small amount, then redo the whole thing as a slightly shorter fender. You could instead in theory add in some extra strand by using the fid to weave in the last few inches of the old strand, then adding in a new piece in the same way that you hope will be sufficient to finish the job.
Conversely, if the strands are too long as you reach the last knot, you have the choice of:
* weaving them in until you reach the top end, and then cutting off the excess.
*Figuring out how to weave in the excess coming back the other way after you reach the top.
I mentioned earlier that the crown knot can be tied either left hand or right hand. If you are really a tiger for punishment, you could try making a fender where each crown knot is the reverse of the previous. This will give a different appearance to the end result, but may also affect the amount of rope needed, and will certainly make the job much harder. I find that once I am going well, my hands get in the habit of doing the right thing, but I suspect that reversing the knot each time would lead to confusion.”
Photo 1 Starting point
Photo 2 Crown knot seen from end
Photo 3 Starting a knot
Photo 4 Put the next strand over the top then under to the right
Photo 5 Repeat with each strand
Photo 6 The last strand will go through where the index finger is.
Photo 7 put a loop through then pull through the rest of the strand
Photo 8 Working out the slack
Photo 9 Working the first layer
Photo 10 Working the second layer
Photo 11 Reaching the end
Photo 12 Using the fid to thread in the excess length
Photo 13 Note the twists each side of the fid
Photo 14 The finished article with a soccer ball for scale.