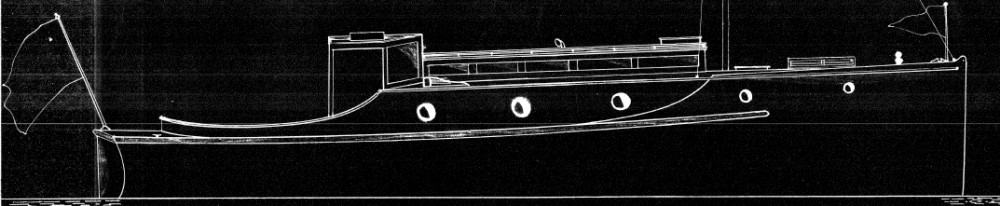
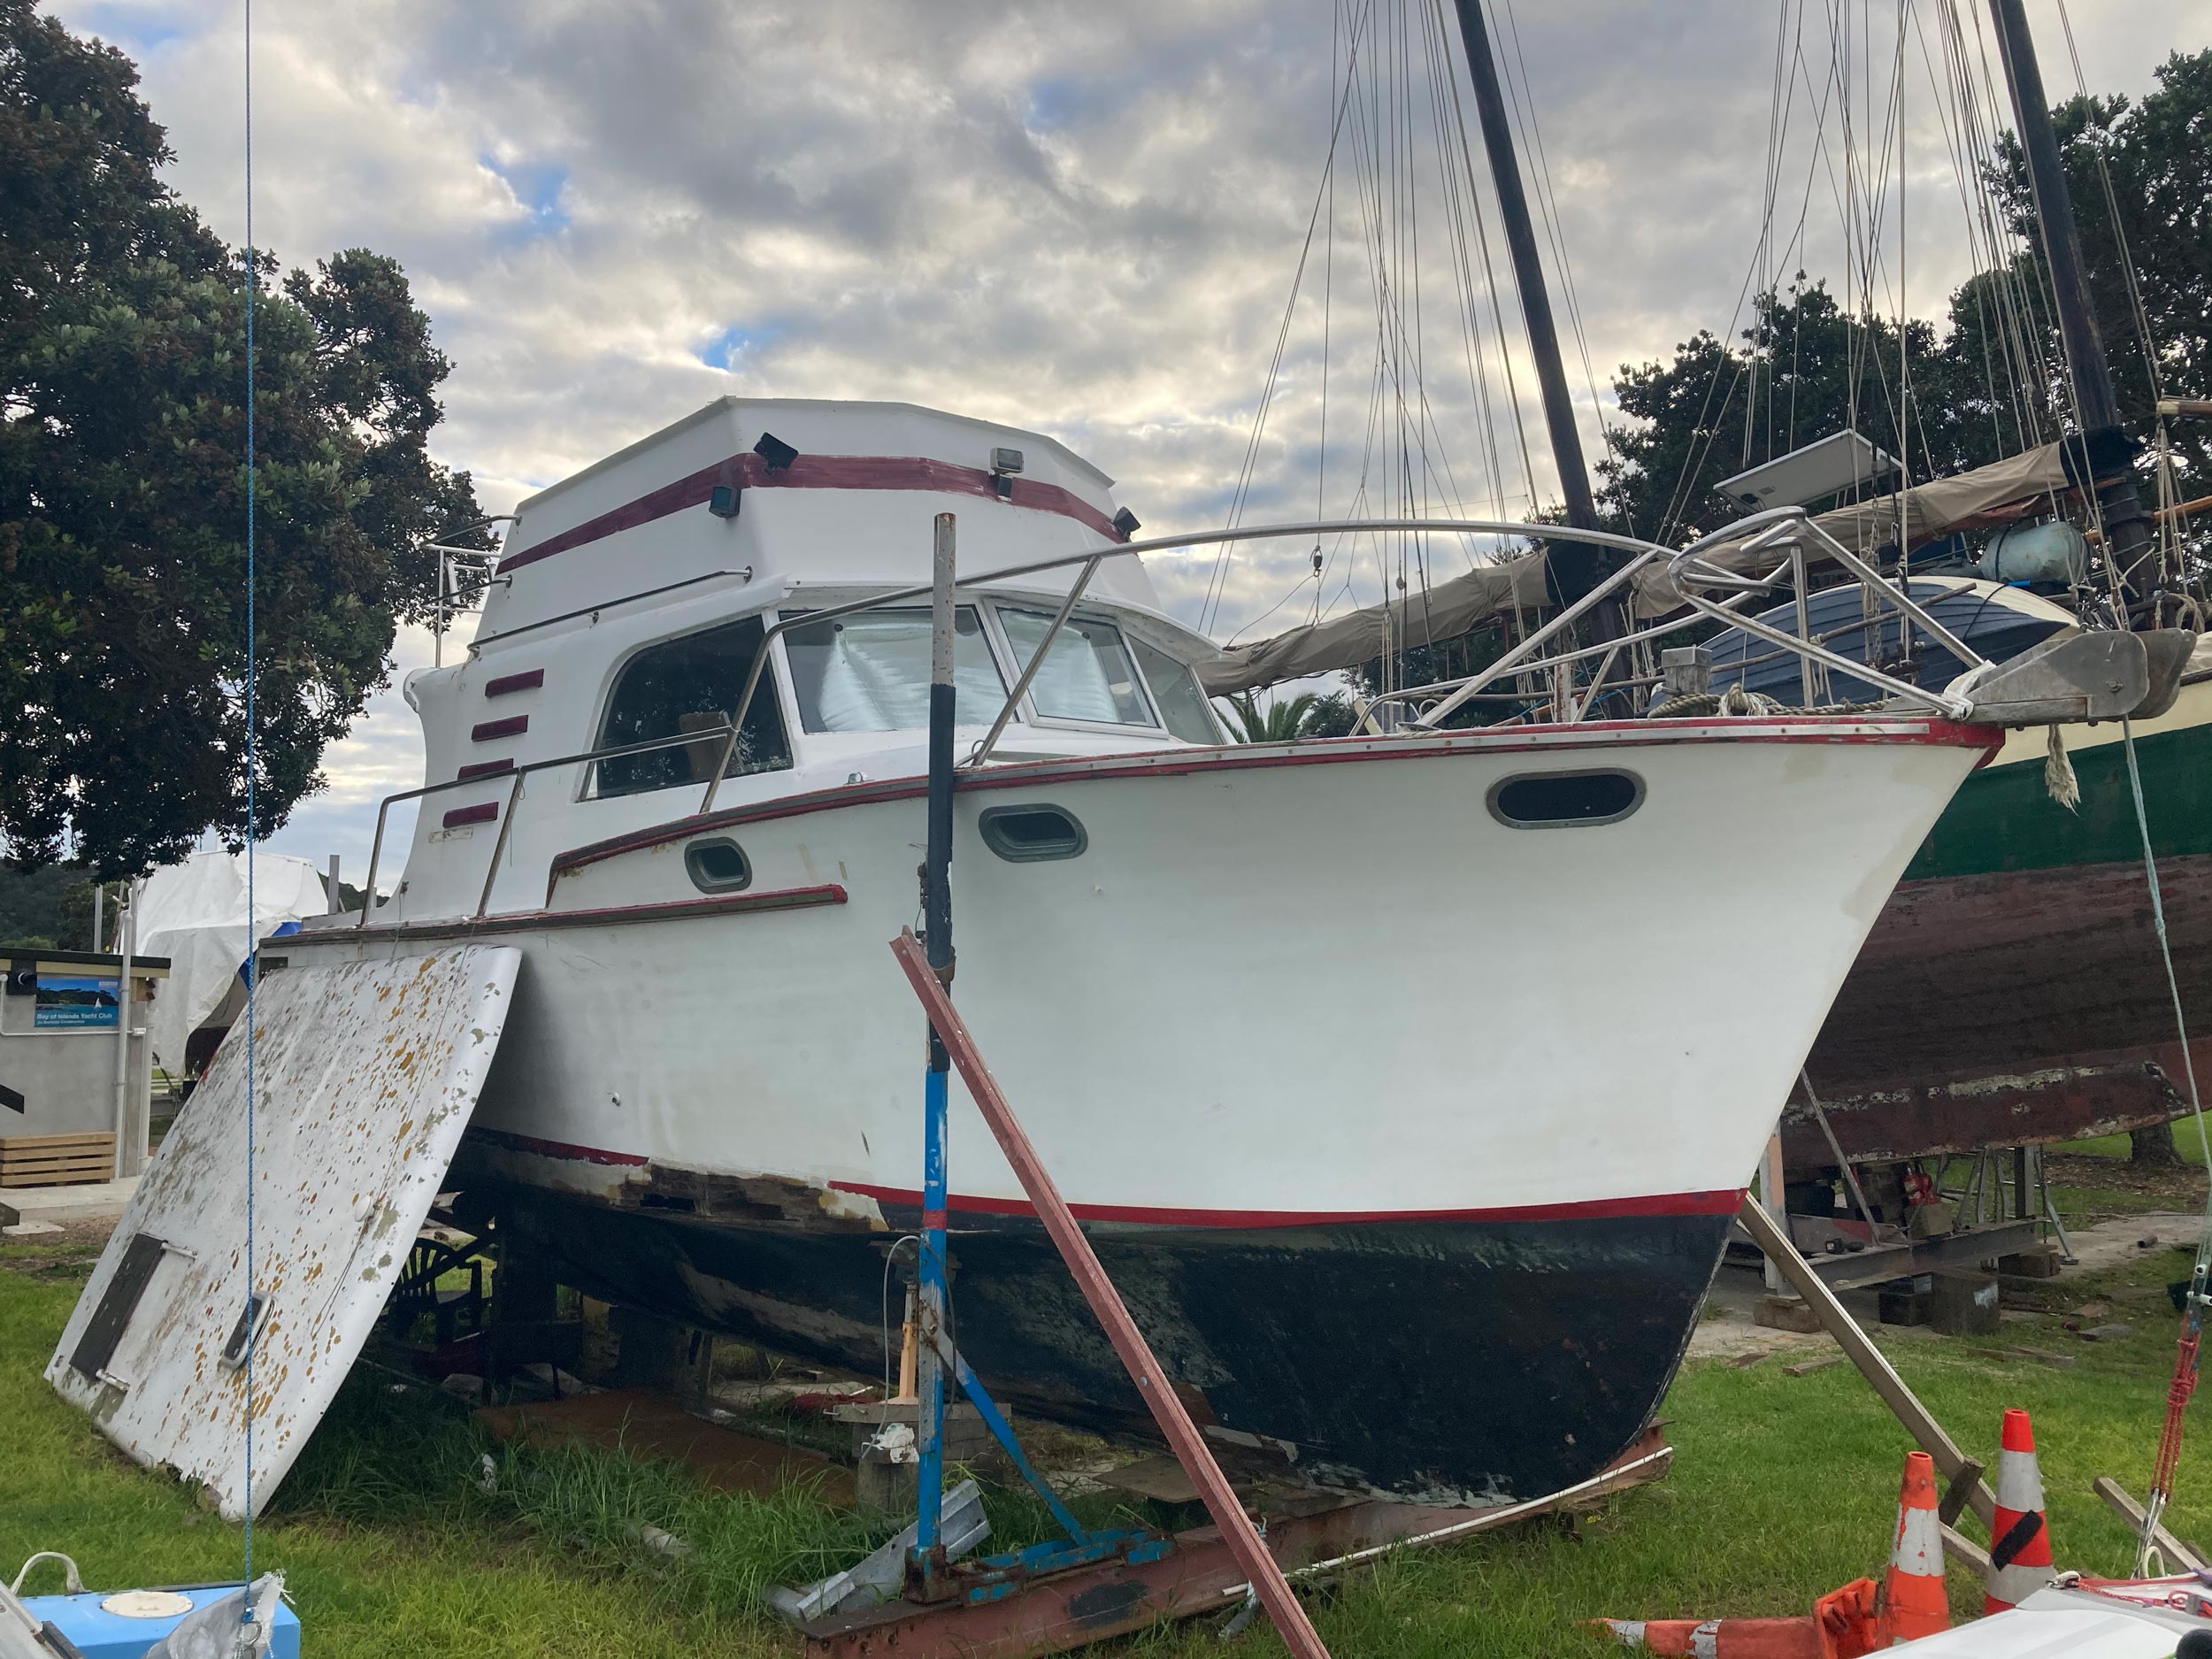
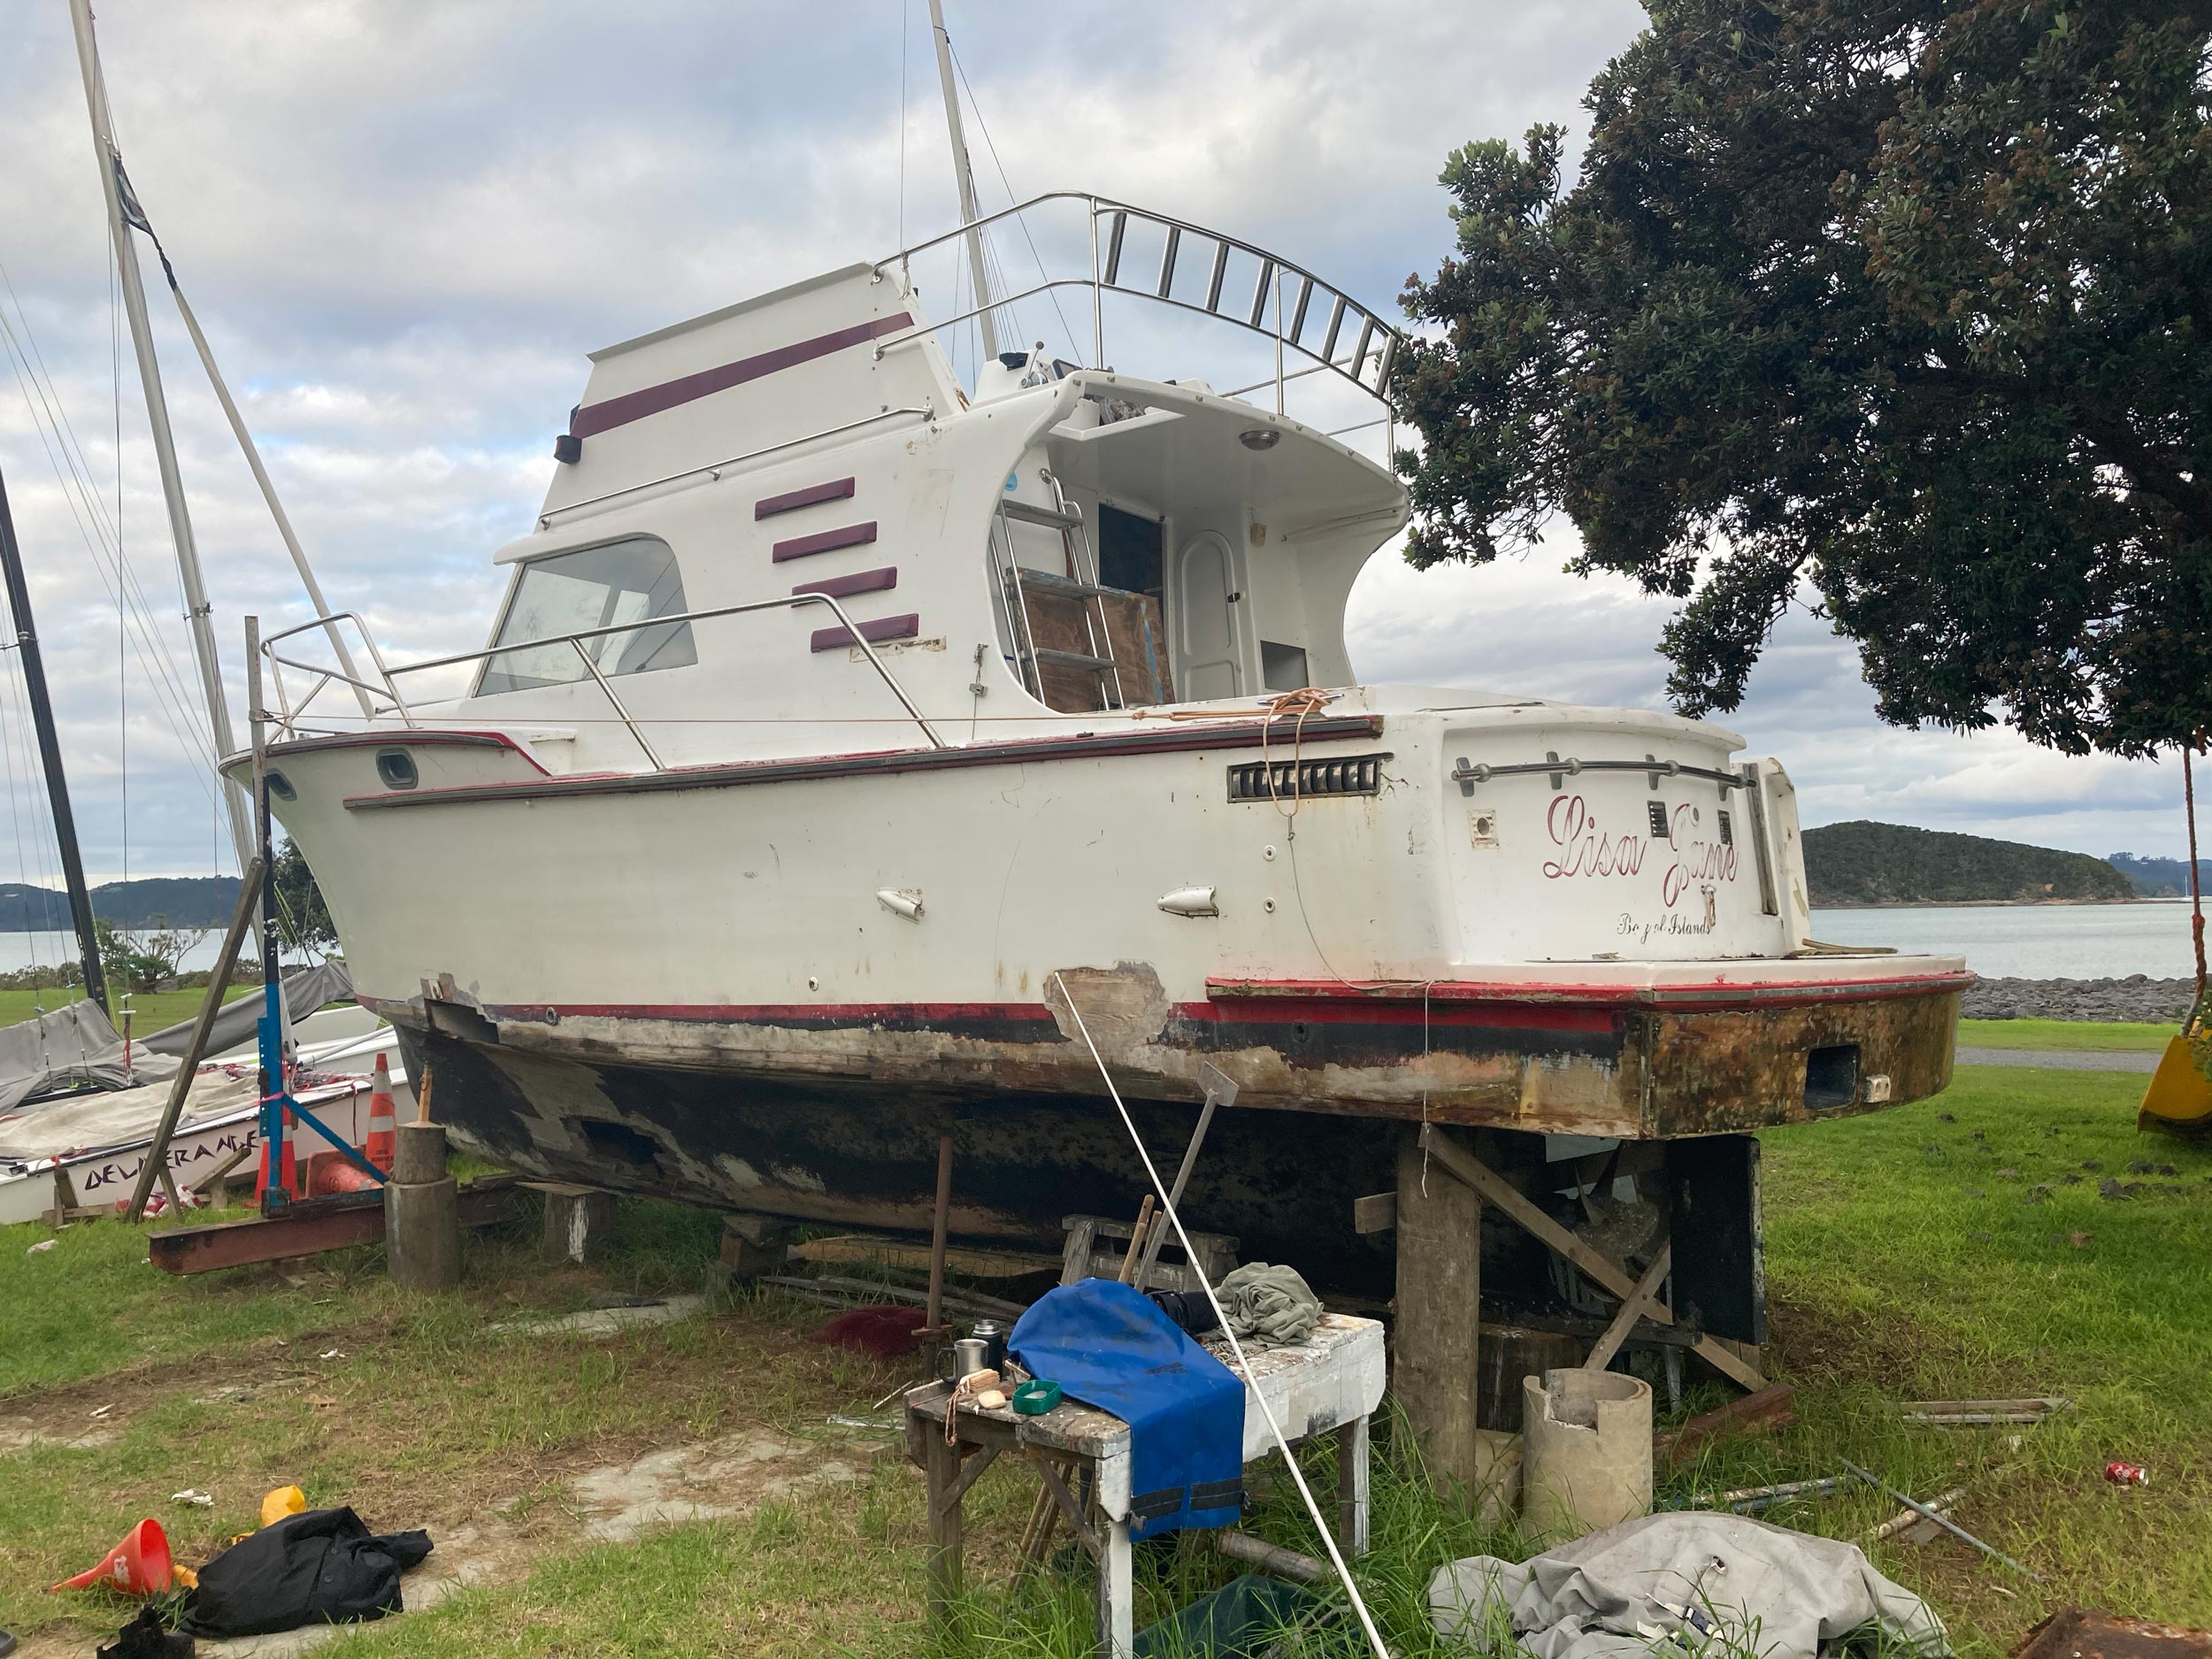
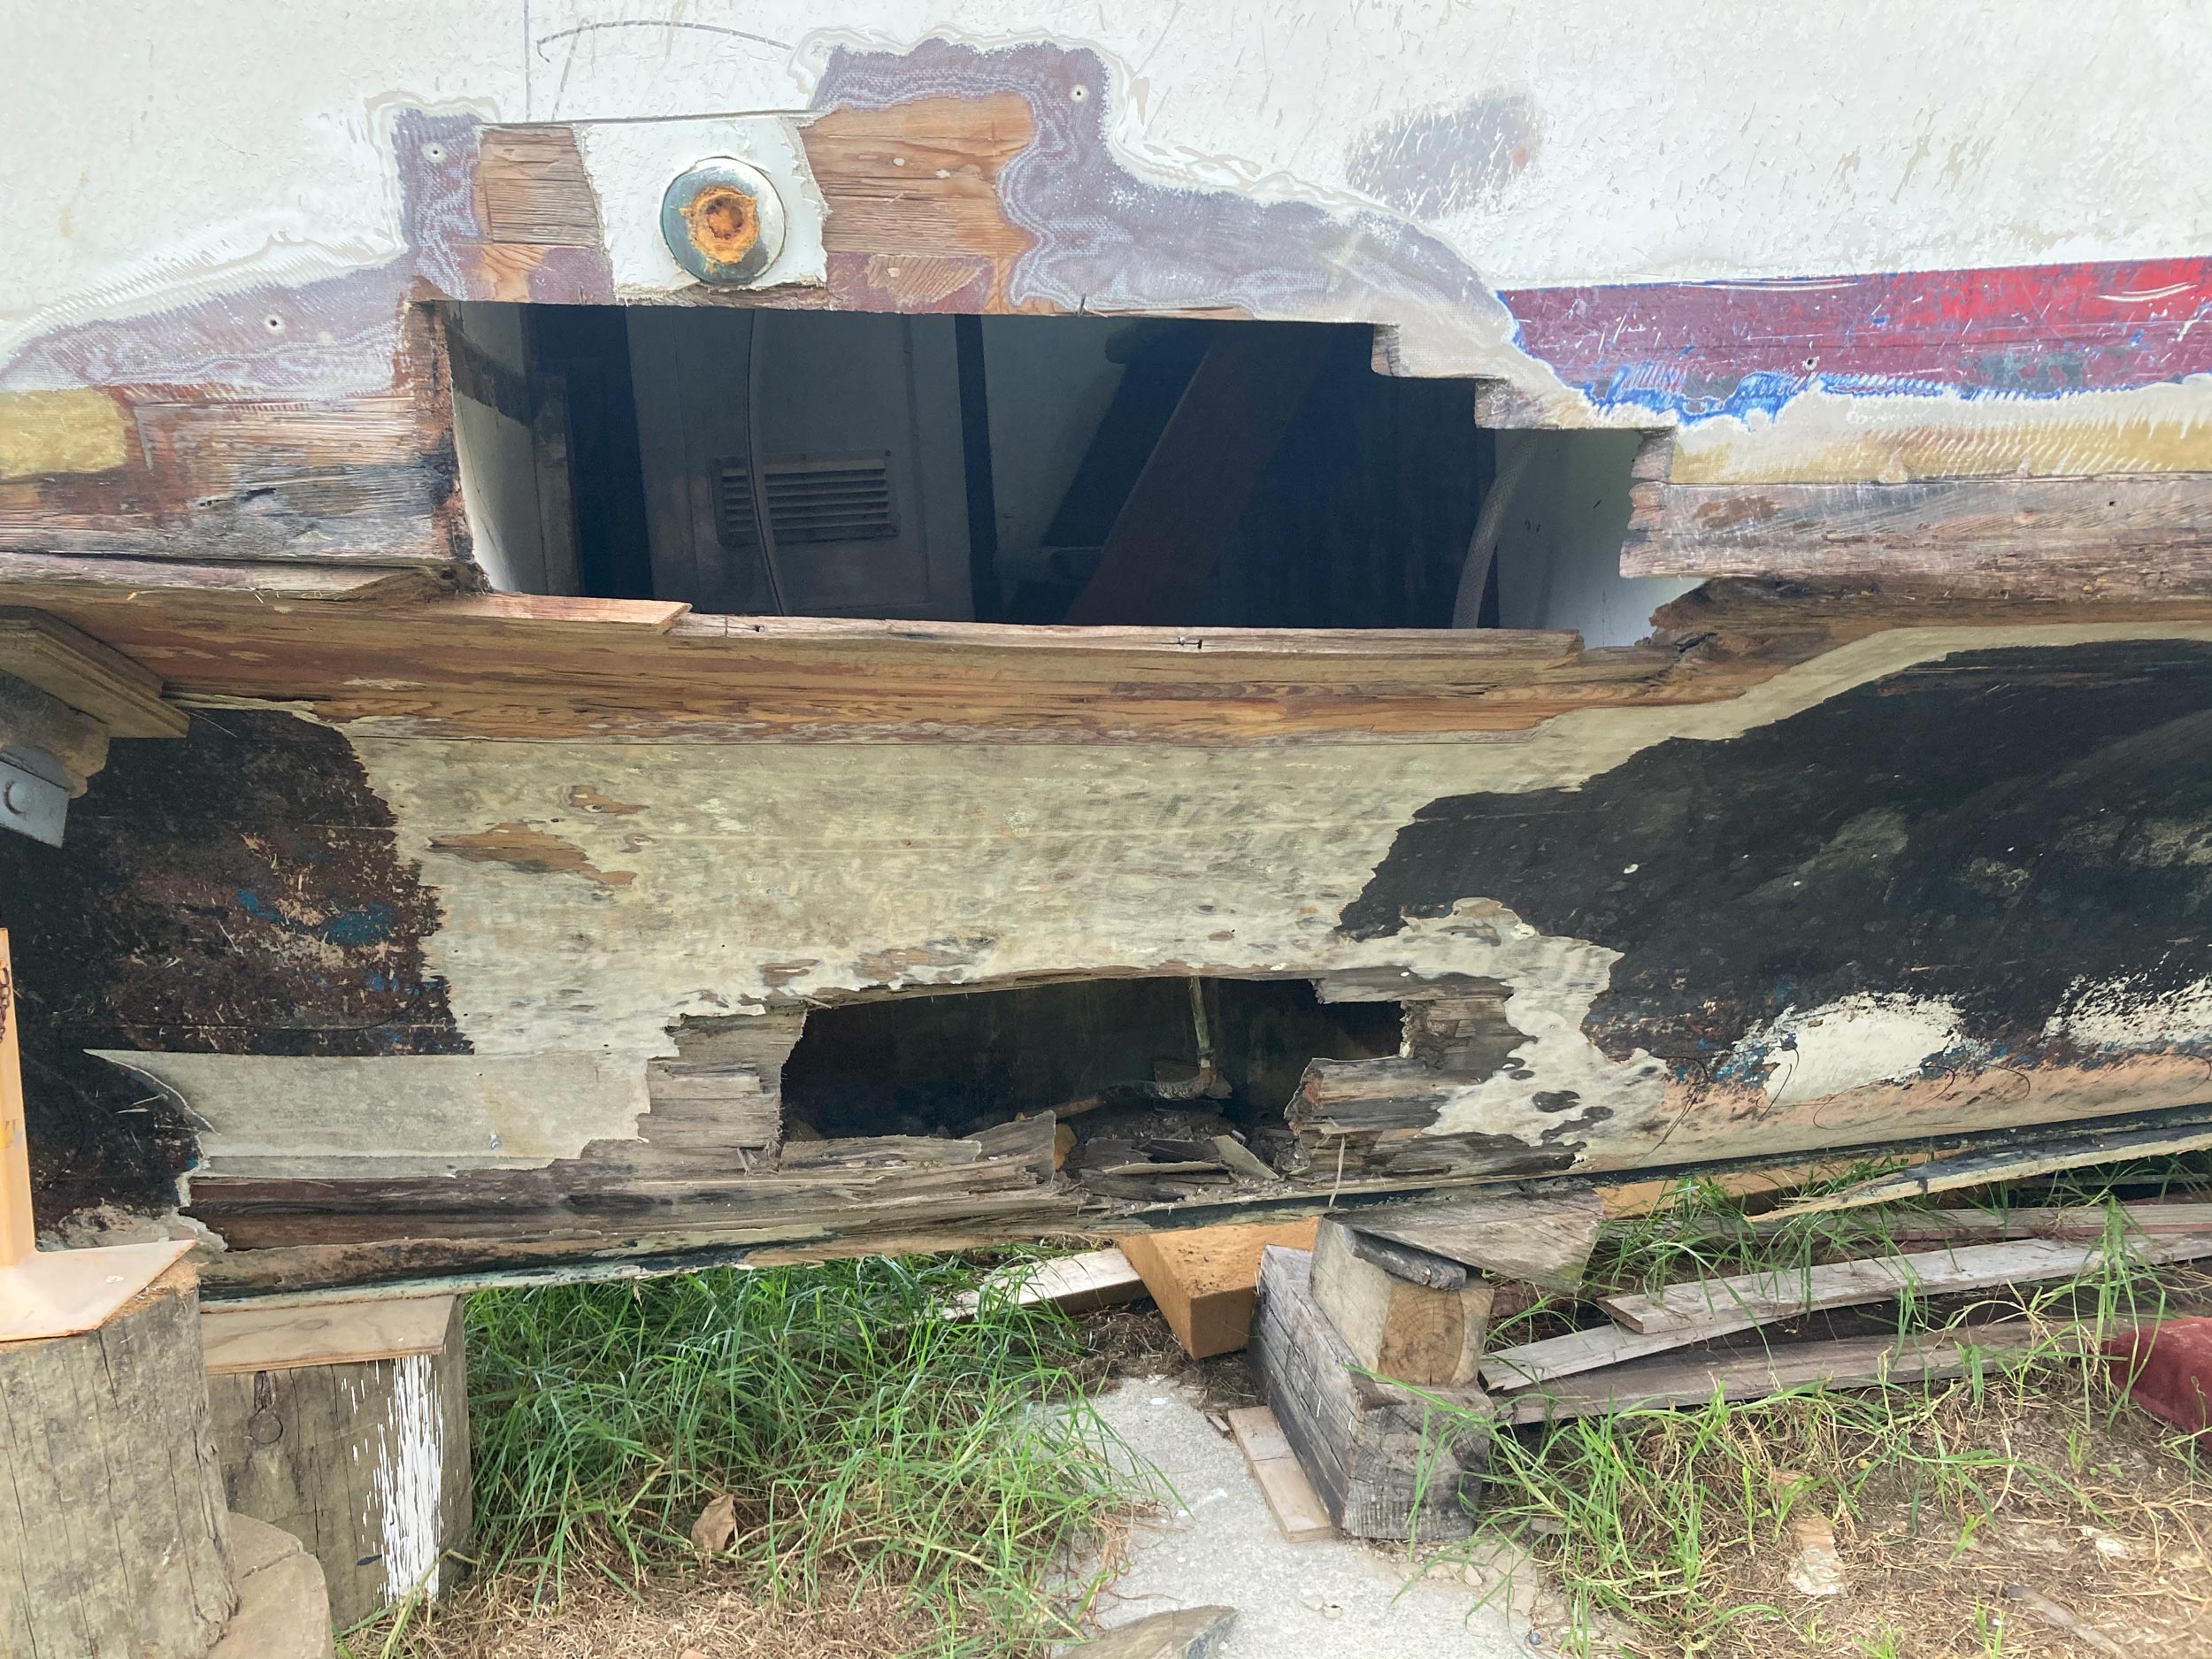
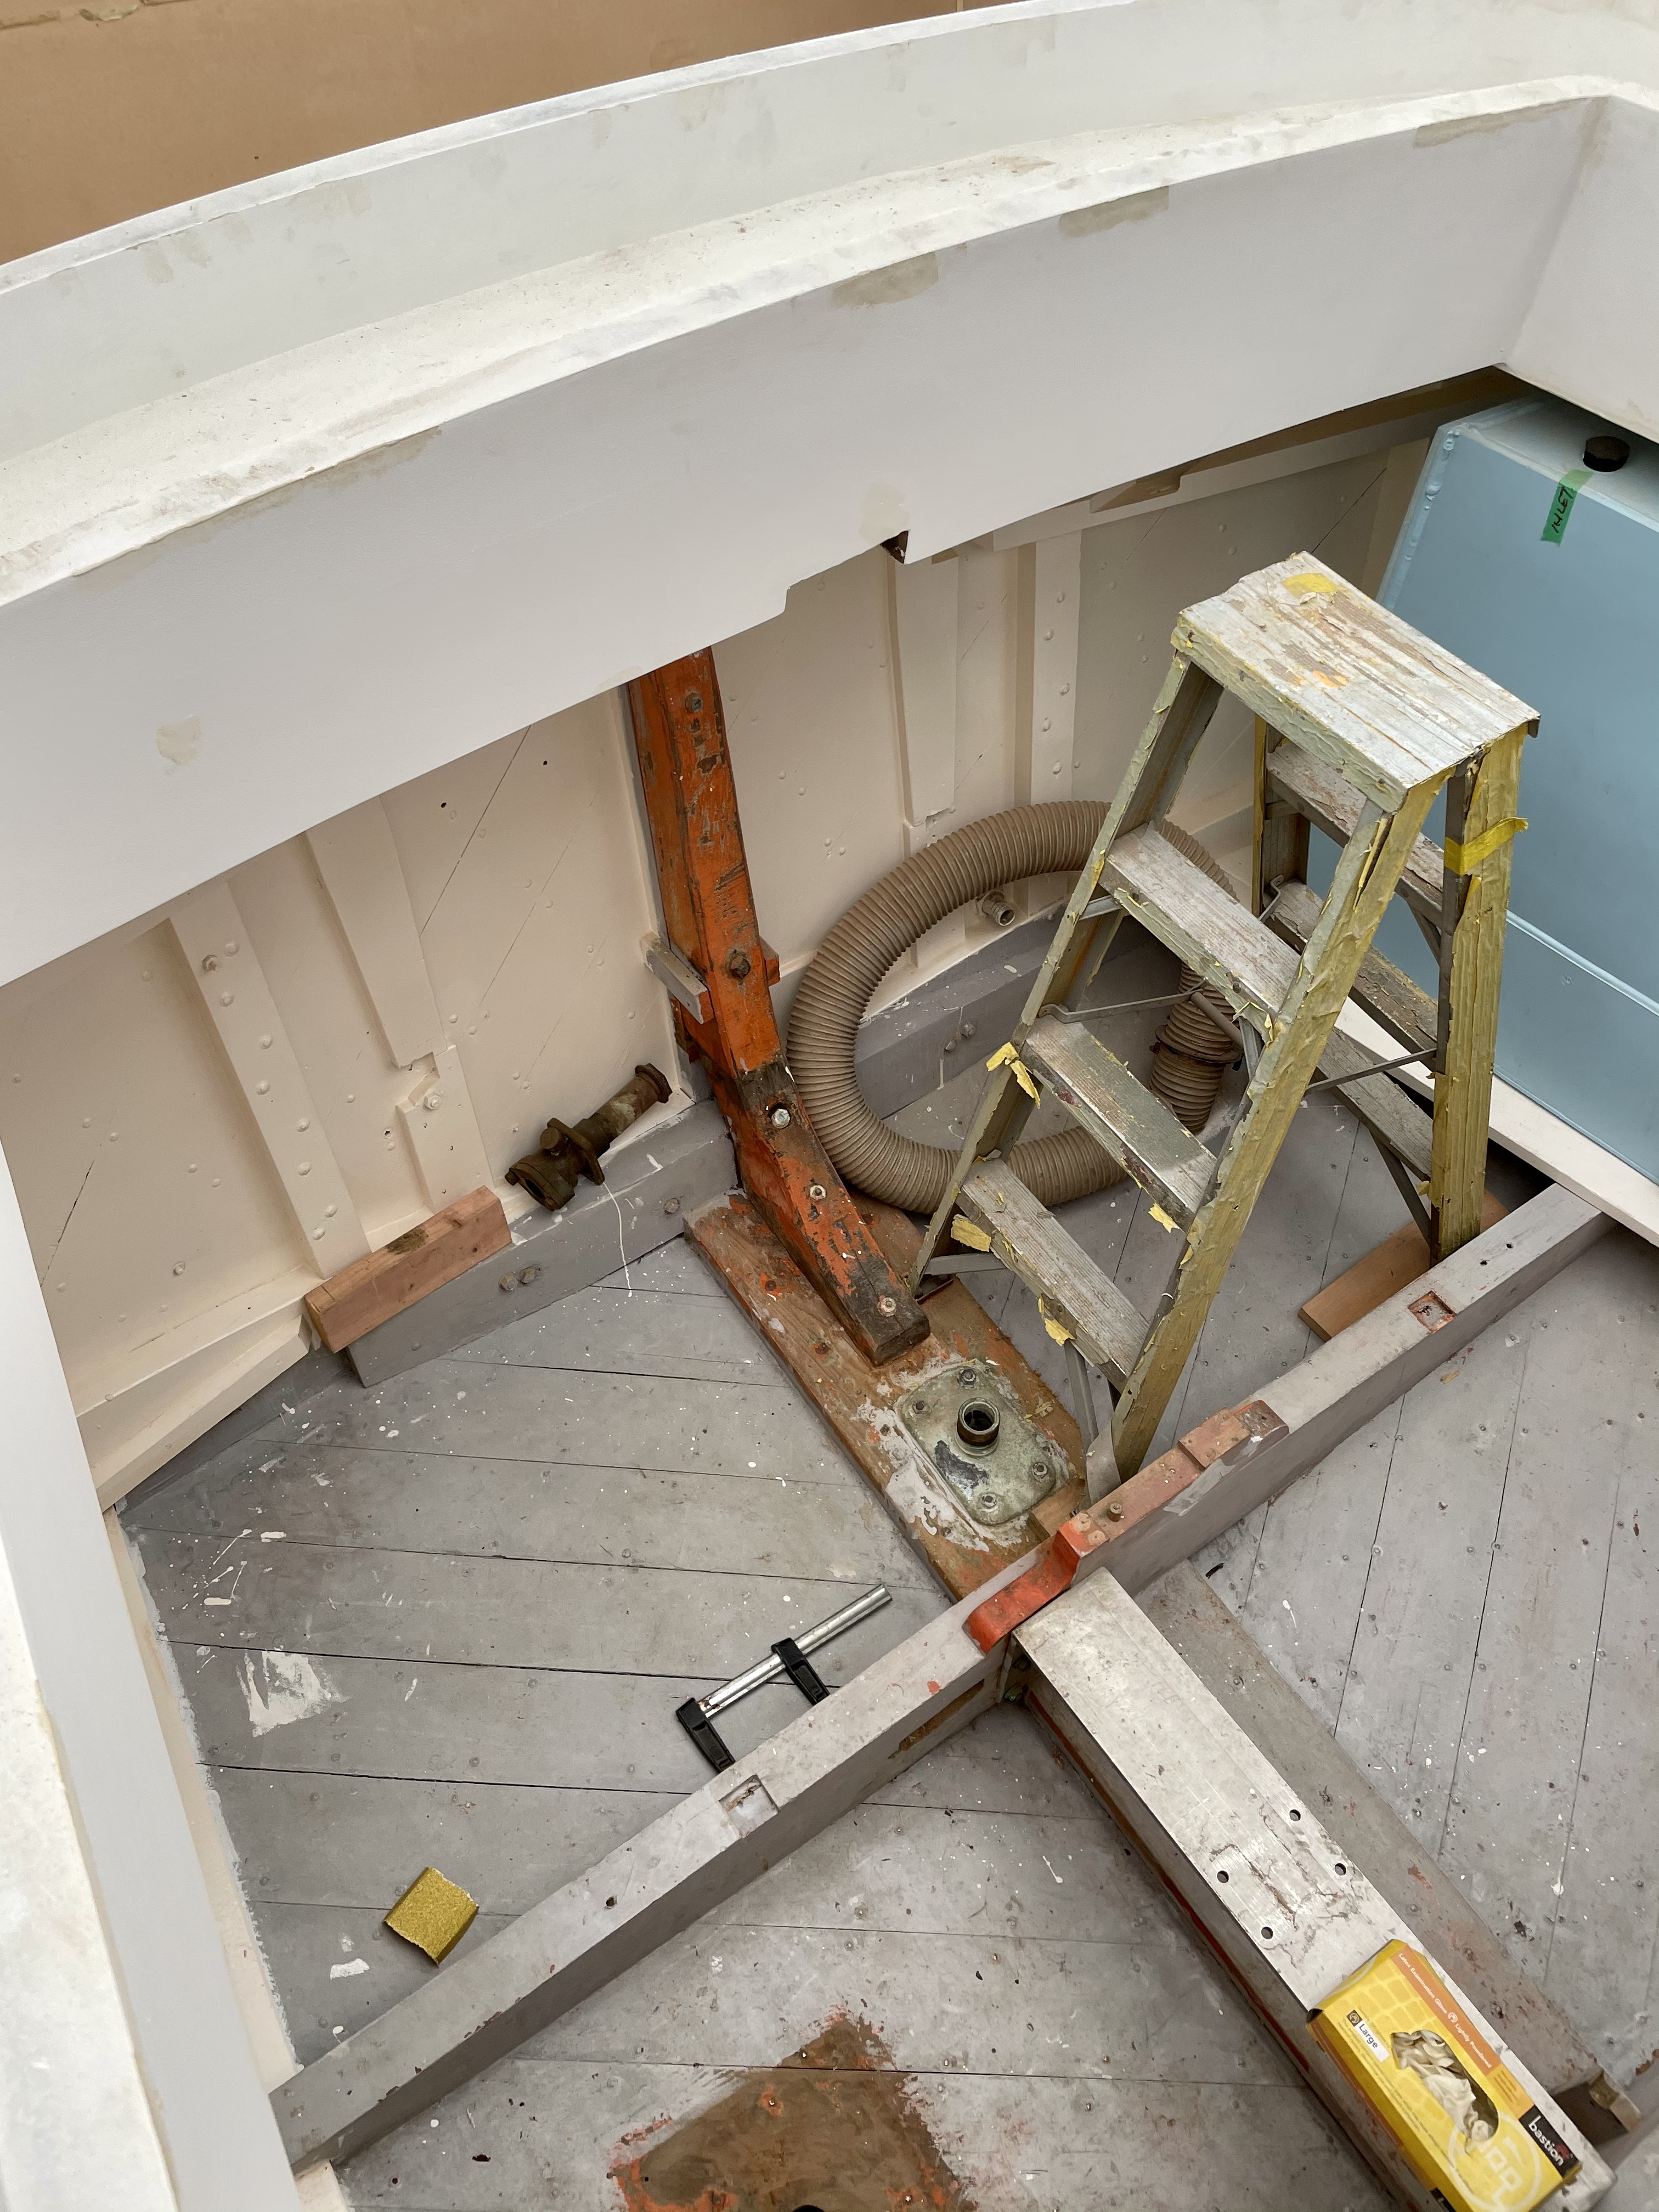
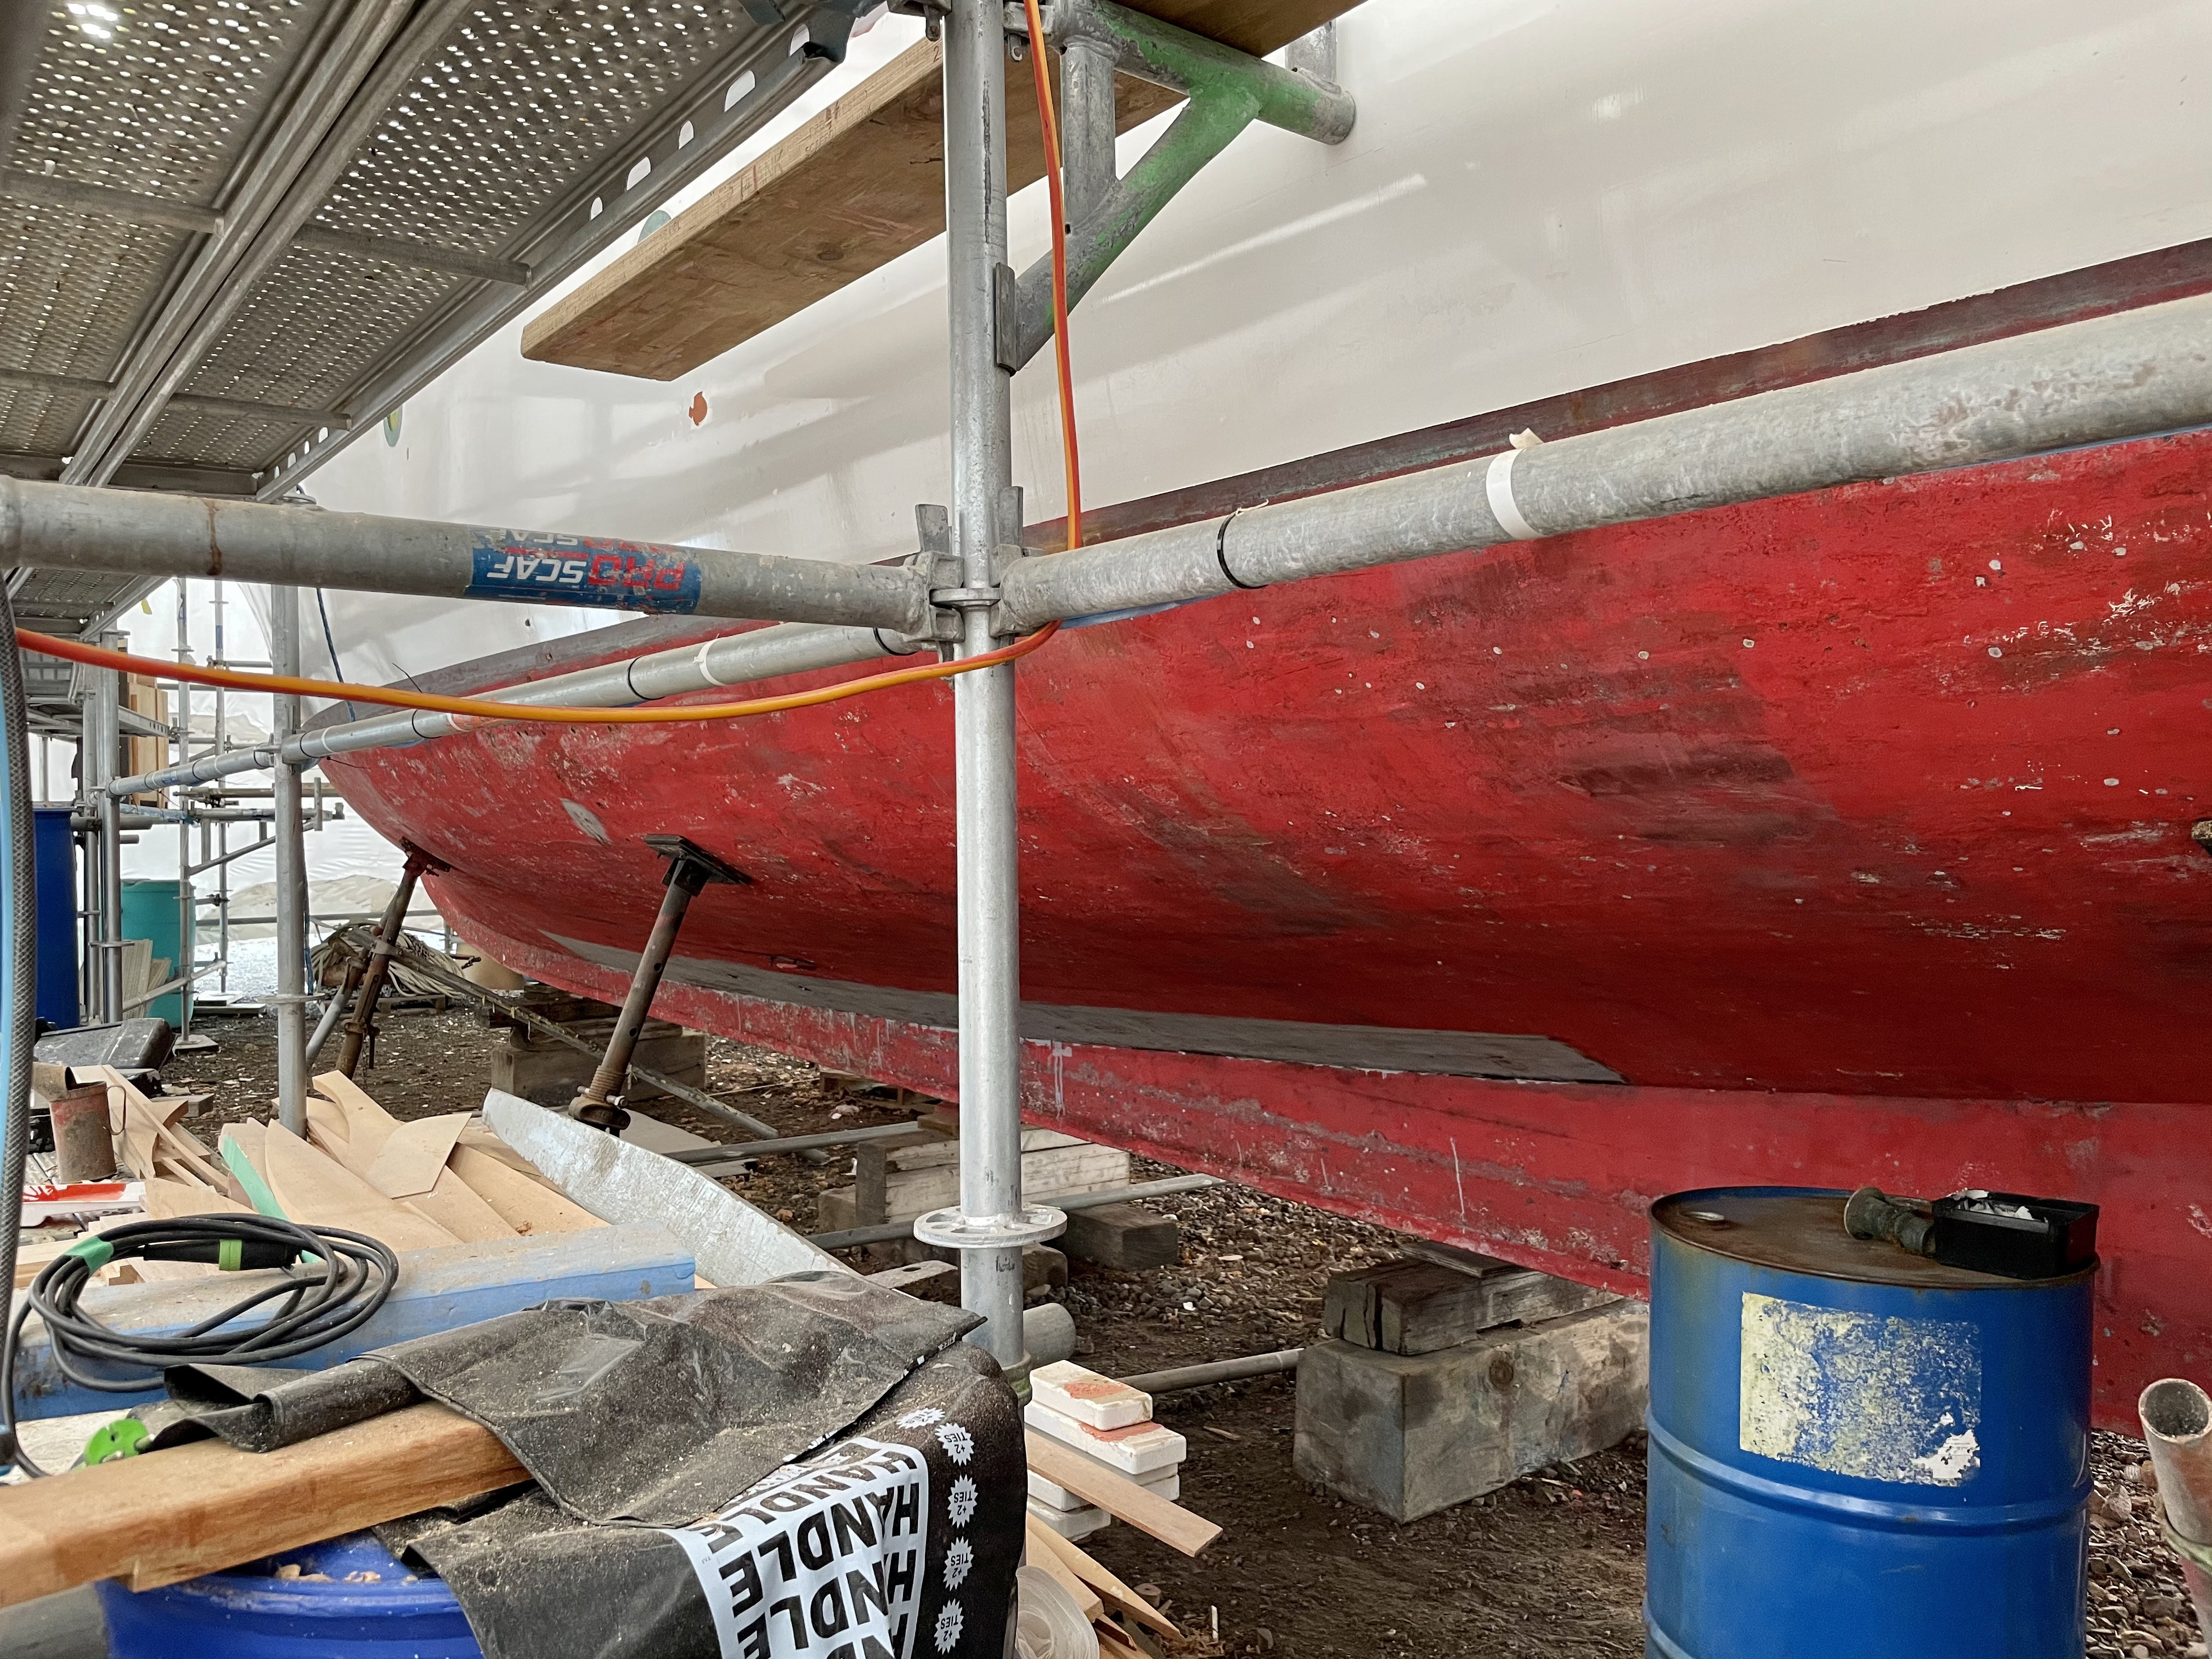
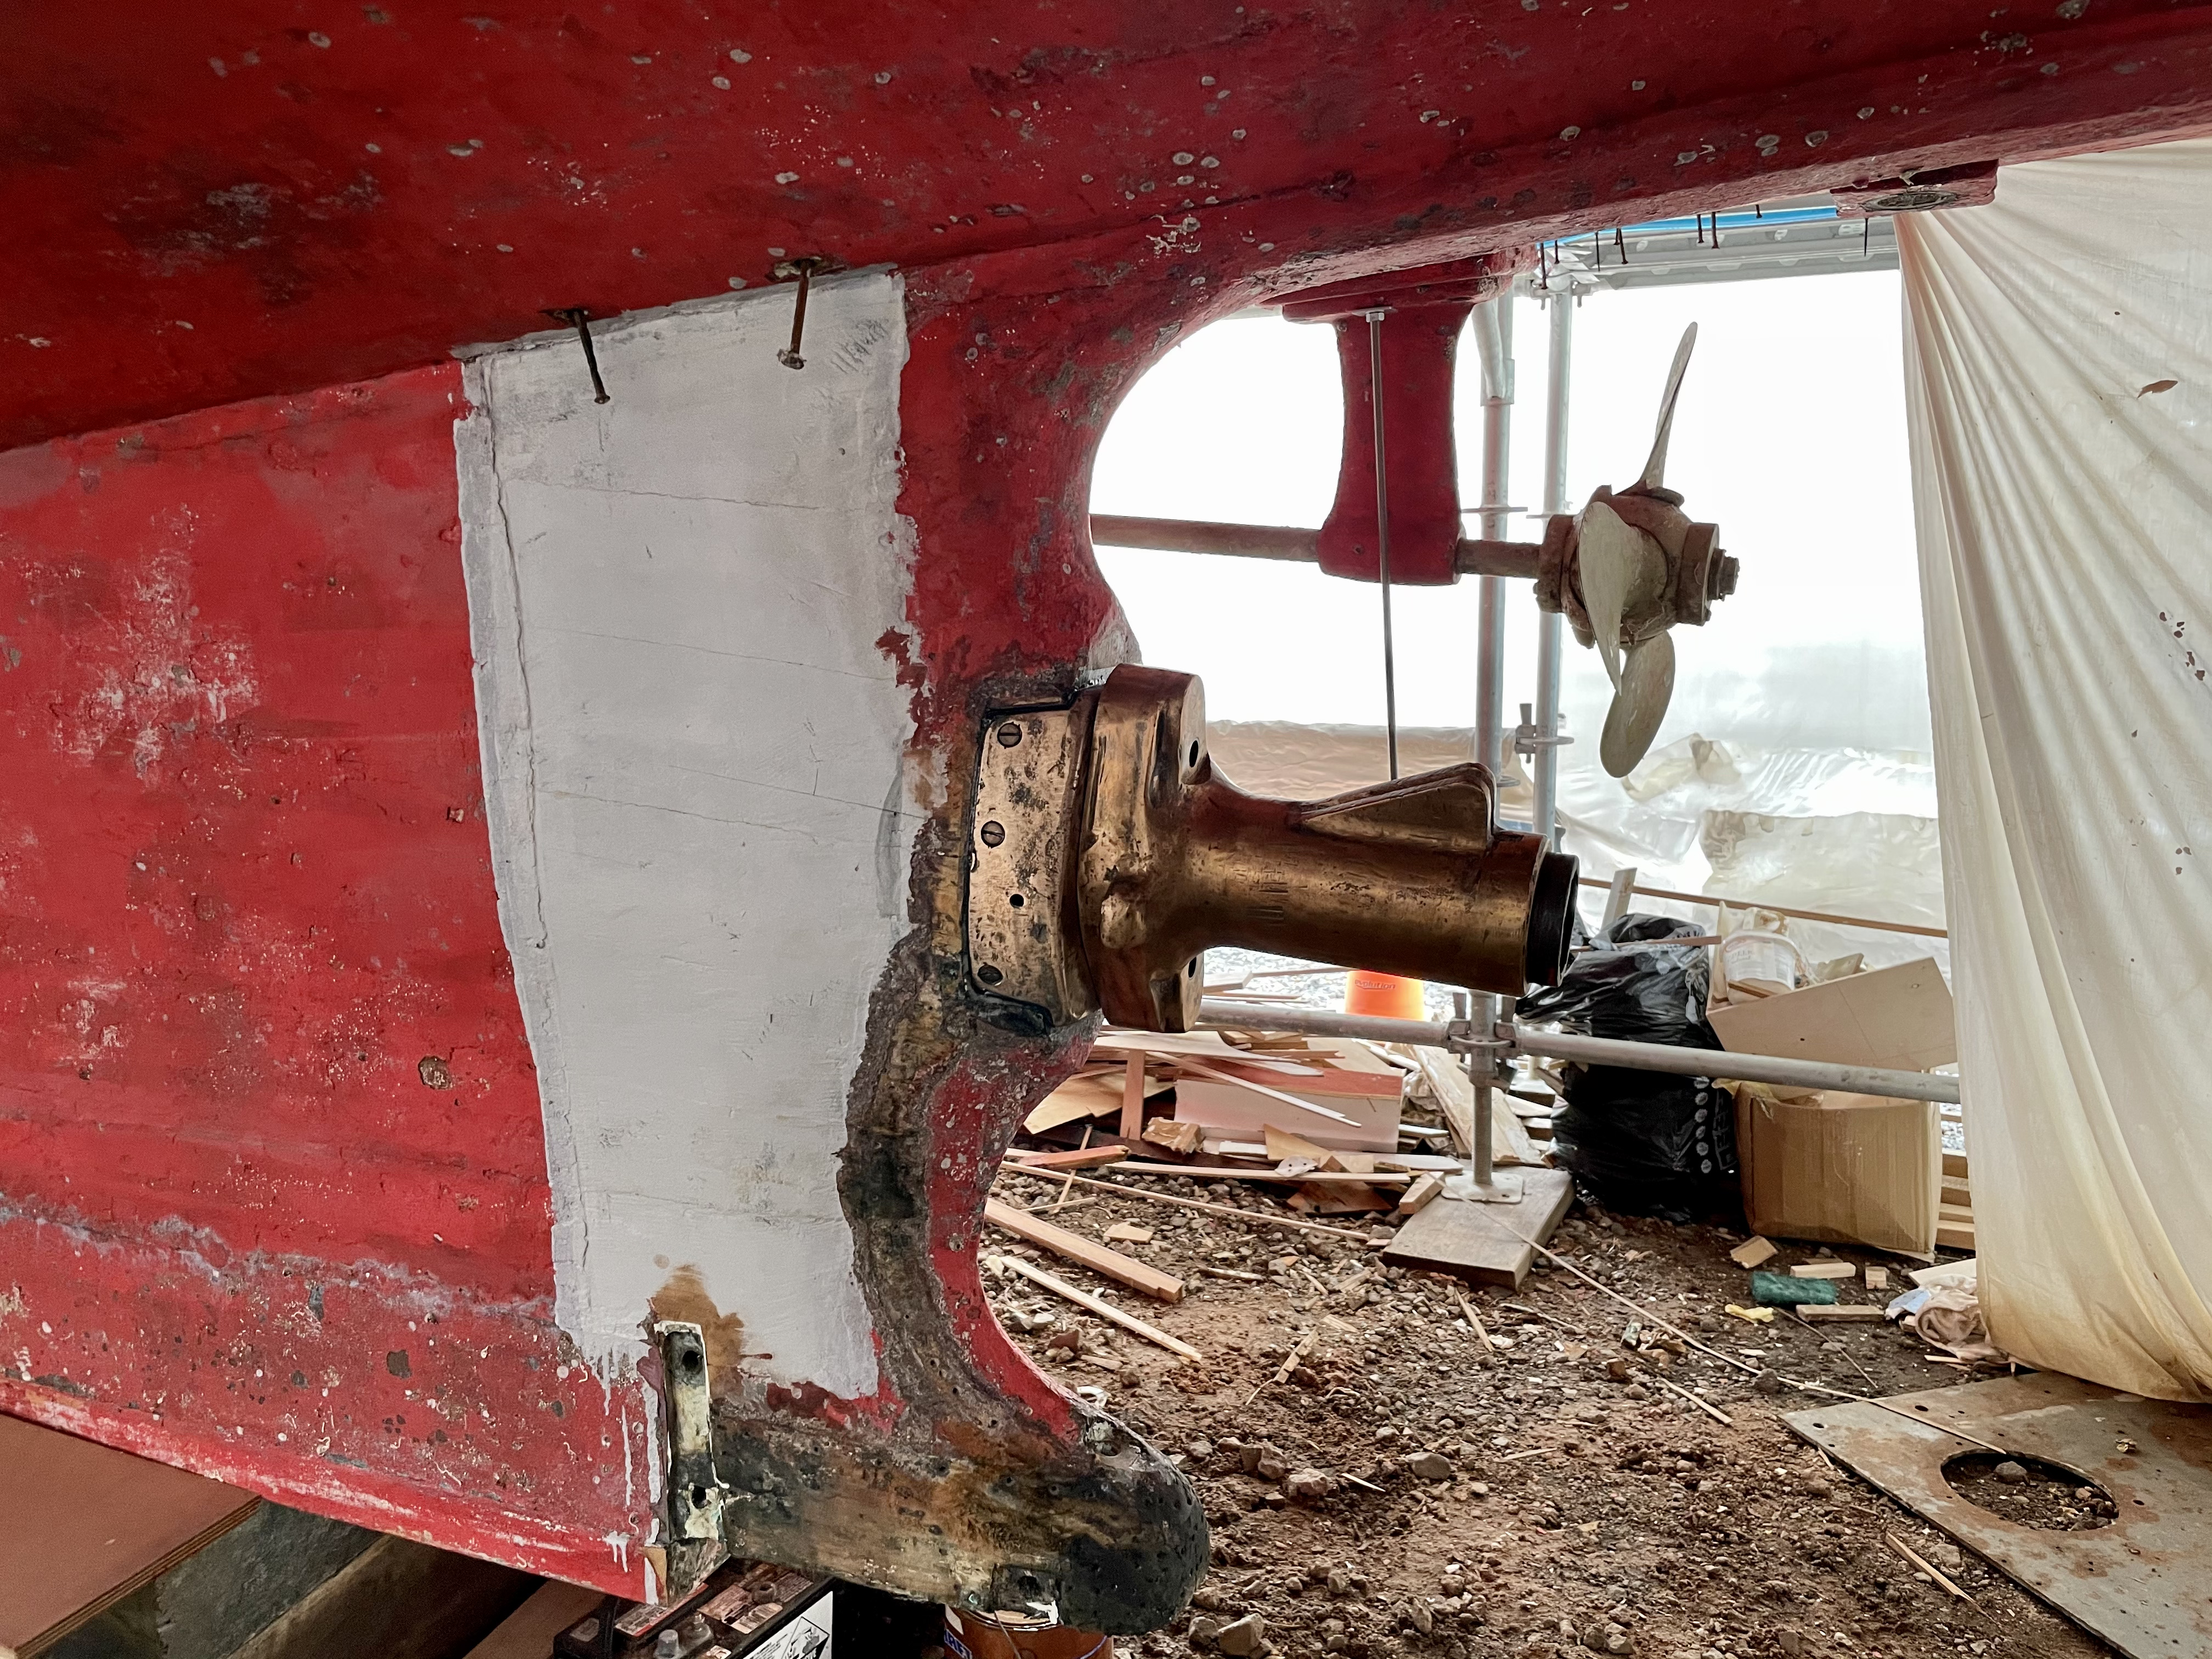
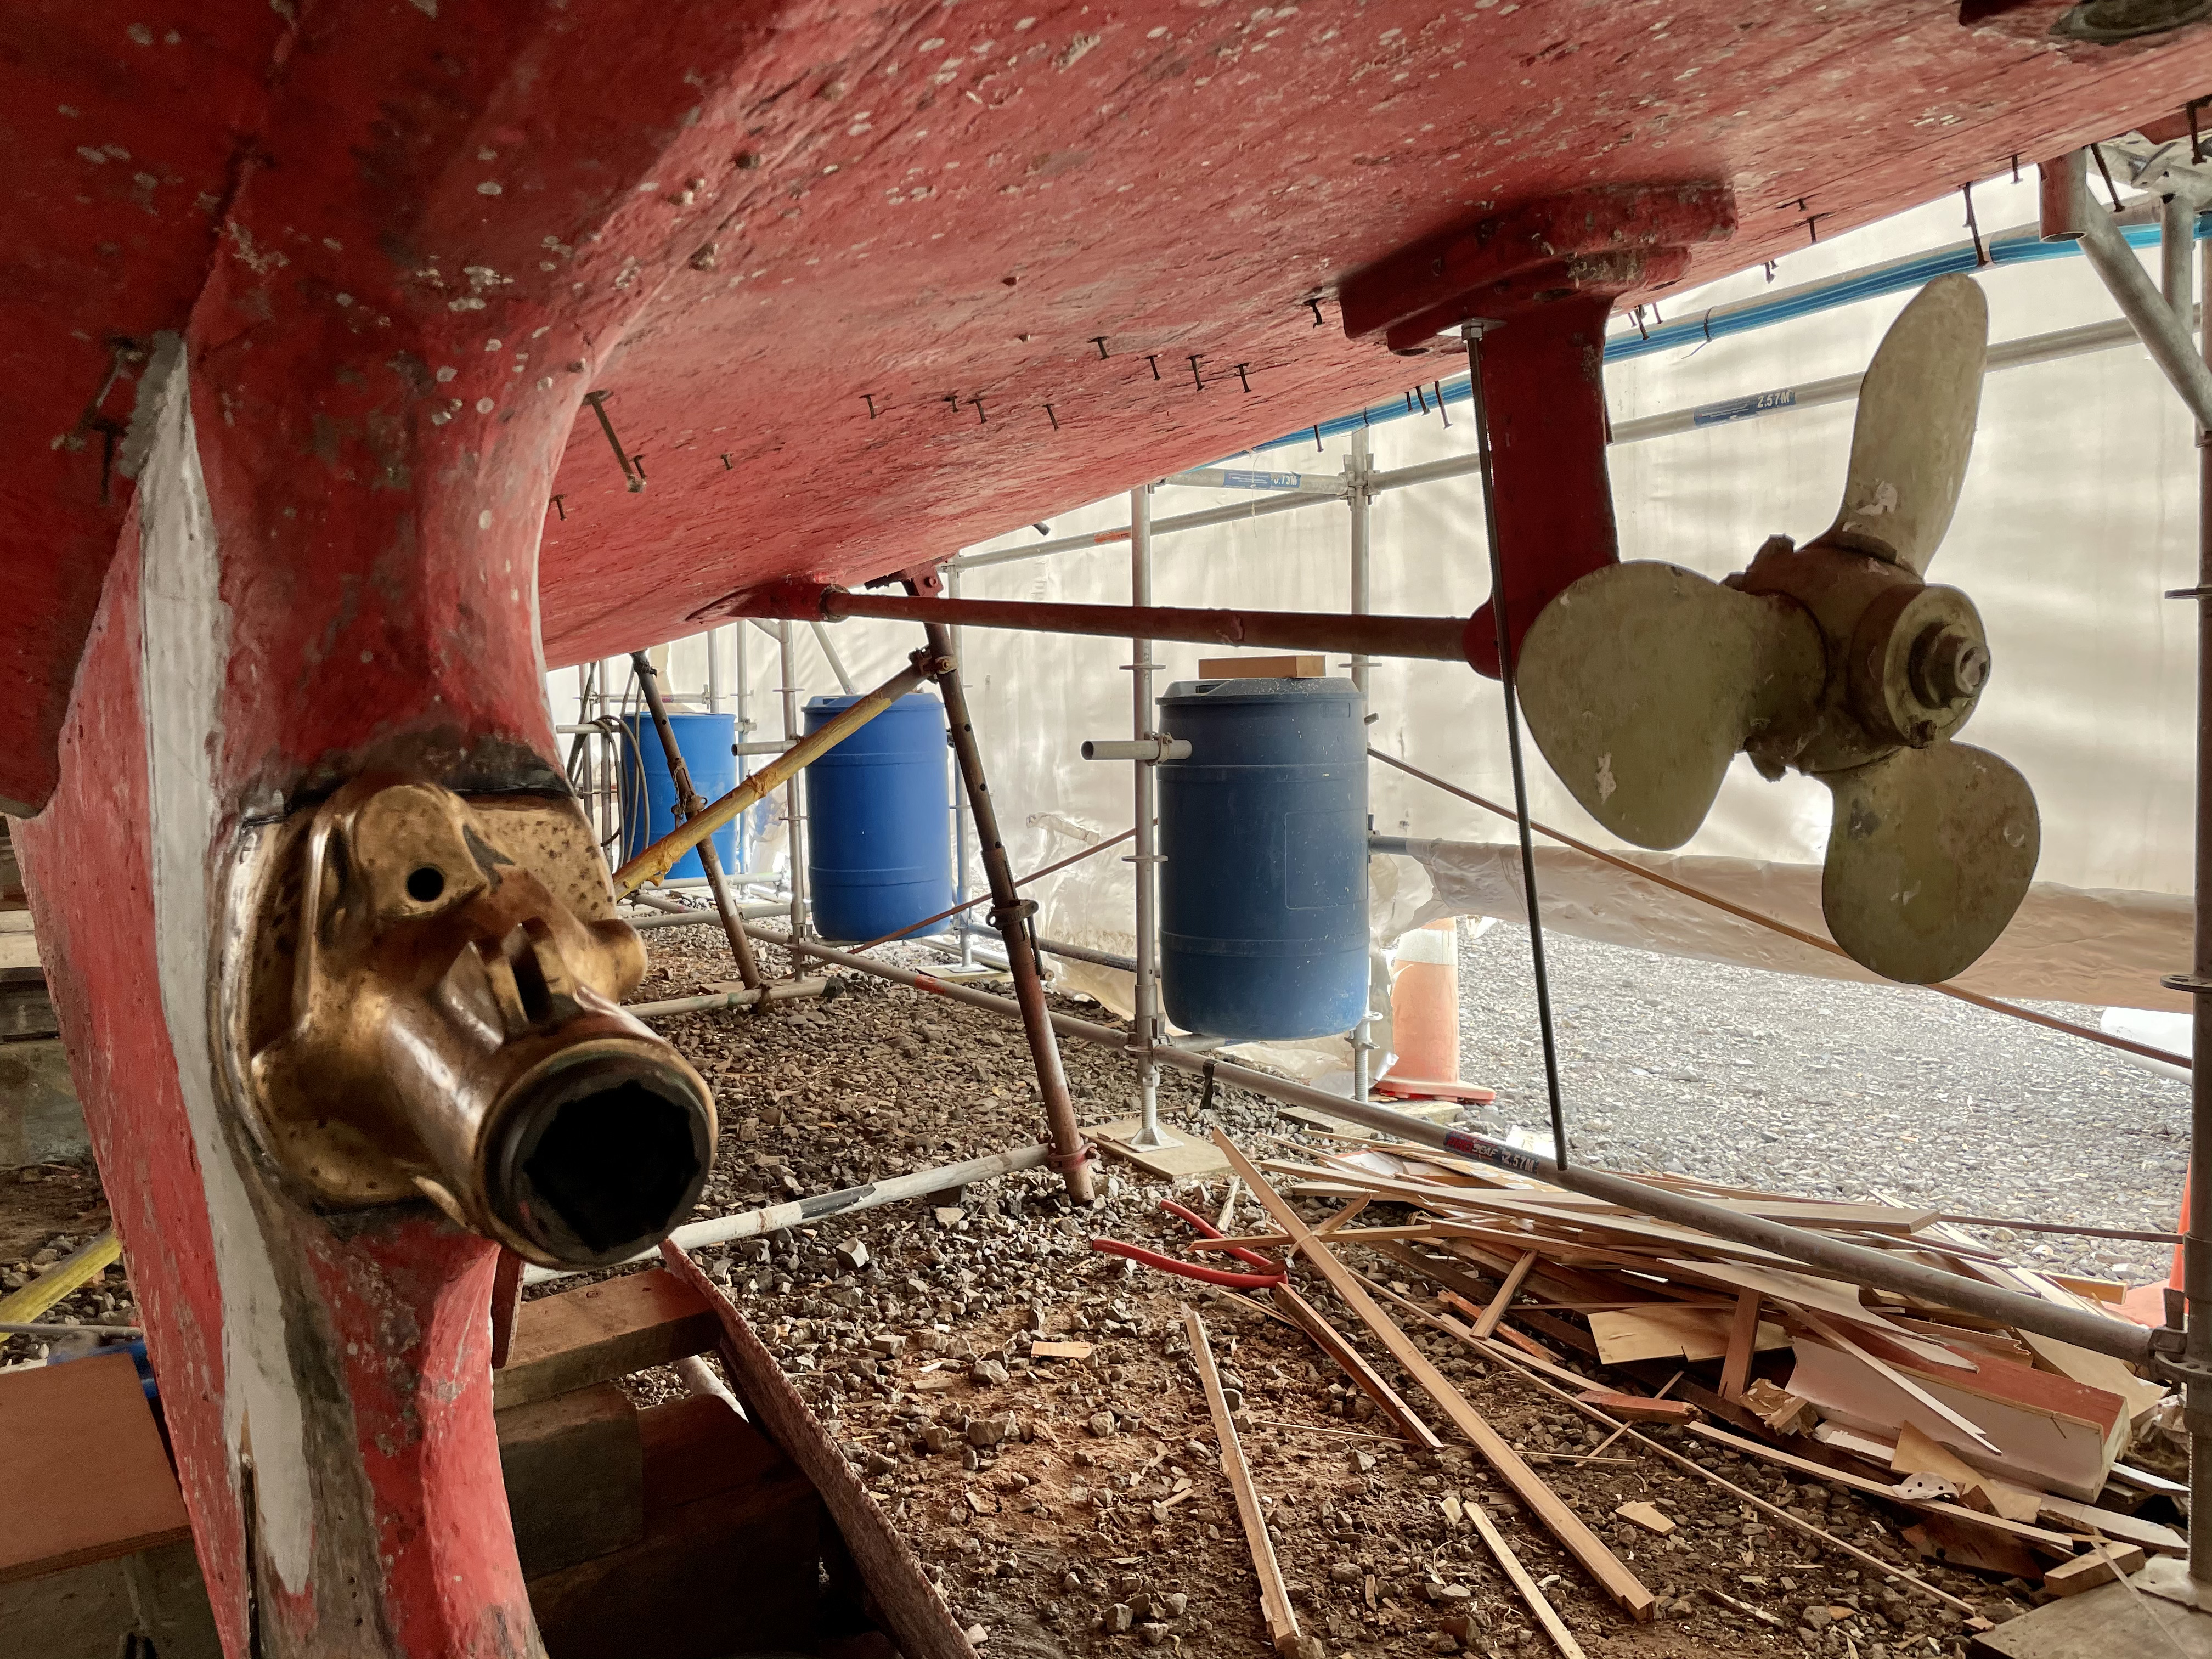
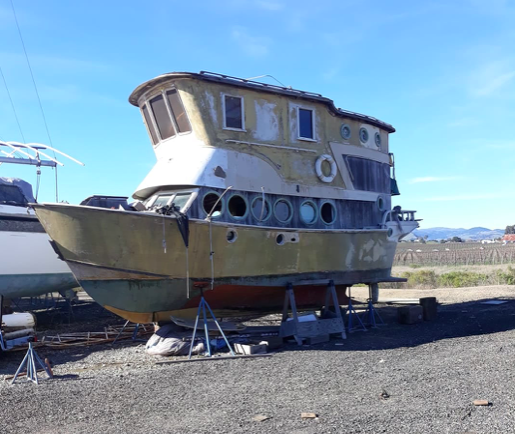
Lisa Jane The launch Lisa Jane is currently on the Waitangi Yacht Club slip, looking at the photos, probably been there for a while and probably for a while yet. Dean Wright who sent me the photos commented that she used to be a charter boat in the Bay of Islands and owned by Peter Rosoman, who had the launch – Cara Mia before it. The rather large holes both sides of the hull indicate the ‘removal’ of a significant amount of rot.Dean’s memory bank is reminding him she may have hit a rock off Tapeka Point in the B.O.I., travelling at a good clip, maybe in the 1990’s. The same memory is also recalling she was capable of 15 knots. Can anyone tell us about the boat – designer / builder/ date launched etc and what the future plans are.
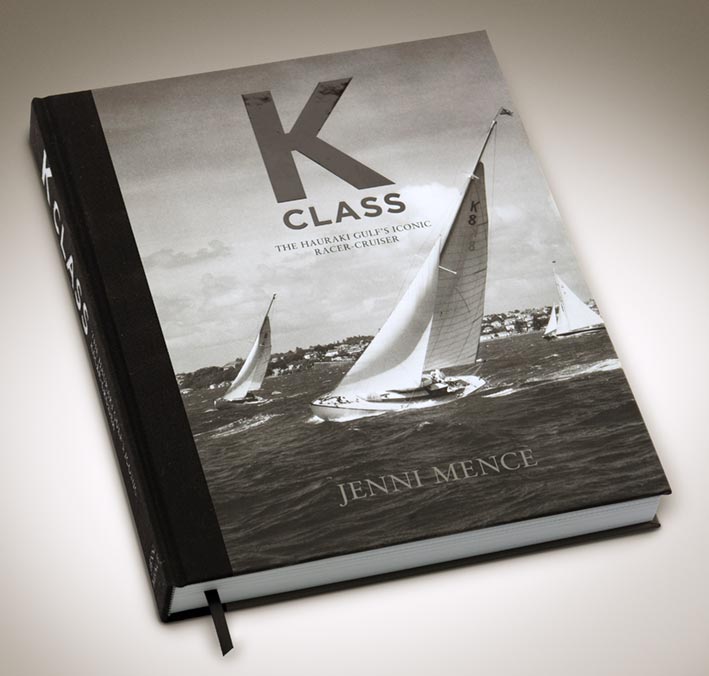
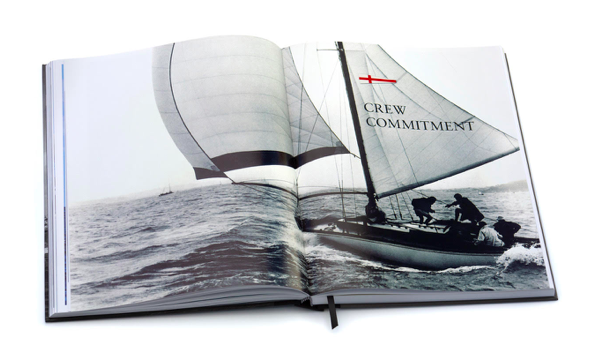
Do You Own – Have Owned – Or Know Someone That Has – A Bill Couldrey Boat WW has been contacted by Jenni Mence who is researching the boats of boat designer/builder Arnold Francis (Bill) Couldrey for a book she is writing about him, and is currently trying to locate as many of his boats as as she can. I’ll let Jenni tale the story: “Despite having made a great contribution to our maritime history, Bill is relatively unknown as a designer and builder. He worked for many years out of the ex Bailey and Lowe shed at Shoal Bay, Auckland, before retiring to Rotorua where he continued his design work. My husband and I have fully restored two Couldrey boats, a 1933 26 ft launch, and a 1950 38ft K Class yacht and these projects have sparked our interest in tracing and documenting the rest of his boats. Bill’s family have provided a list of the 83 boats Bill designed and/or built throughout his working life, which spanned from 1924 to 1975, and includes everything from sailing dinghies to launches and yachts. Unfortunately many of them are unnamed which has made tracing them difficult. I have recently published a large ‘coffee table’ book tracing the history of the K Class yachts, which includes many photos and stories of the boats, the people, and the racing, on the Hauraki Gulf throughout the 1950s and 1960s; and I would like to create something similar around Bill’s boats. As well as tracing the boats – in whatever condition they may be in now – I would also like to make contact with any previous or current owner of a Couldrey boat so that their experiences and stories may also be included in this book.” So woodys can we help Jenni with any known boats, owners (past and present), photos etc. Even if you just know the name of a boats owner, Jenni will endeavour to track them down. Jenni’s K Class book was a master piece (see below), it would be great to help bring this one to life. Jenni can be contacted at jenni@kclass.co.nz or jennimence@gmail.com
Early in the year while attending the Lake Rotoiti Classic & Wooden Boat Parade, I spotted and admired the magnificent fenders on the steam boat – Dancer. In a later conversation with her owner John, he told me he had made them and very generously offered to make me a pair for Raindance. I provided the rope and John crafted them. I meet up with John at the RNZYS during the week and we exchanged goods – WW merchandise and my famous tomato sauce for the fenders. John did comment that anyone who wants some the same is going to have to make them themselves J. Luckily John documented the process and took supporting photos – so woodys, whose brave enough to give it a go?
During the process I was reminded of a reason to pay your Classic Yacht Association subs – Fosters Chandlers offer a very attractive discount to CYA members – a nice saving when you are buying 23m of expensive rope.
I’ll let John talk you through the process. Remember click on photos to enlarge 😉
“The rope used is a synthetic that looks like an old style manila rope. It is available from Fosters, and probably other suppliers too. Note that I have given sizes here, they work with the rope Alan bought at Fosters, but are not necessarily going to work with other types. The diameter of the rope is 18mm, and Alan bought 23 metres. I halved that exactly, then made a bit of a guess as to what length of fender that would make, since the rope is slightly different to the size of my own. The problem being that you have to commit to the finished length at the very start. I settled on 600 mm which turned out to be exactly right. If necessary, extra rope can be added in, or excess can be cut off, but the first is a bit fiddly and the last is wasteful. You will also need a splicing fid, available from the same places that have the rope, and the means to cut and heat seal the end of the rope.
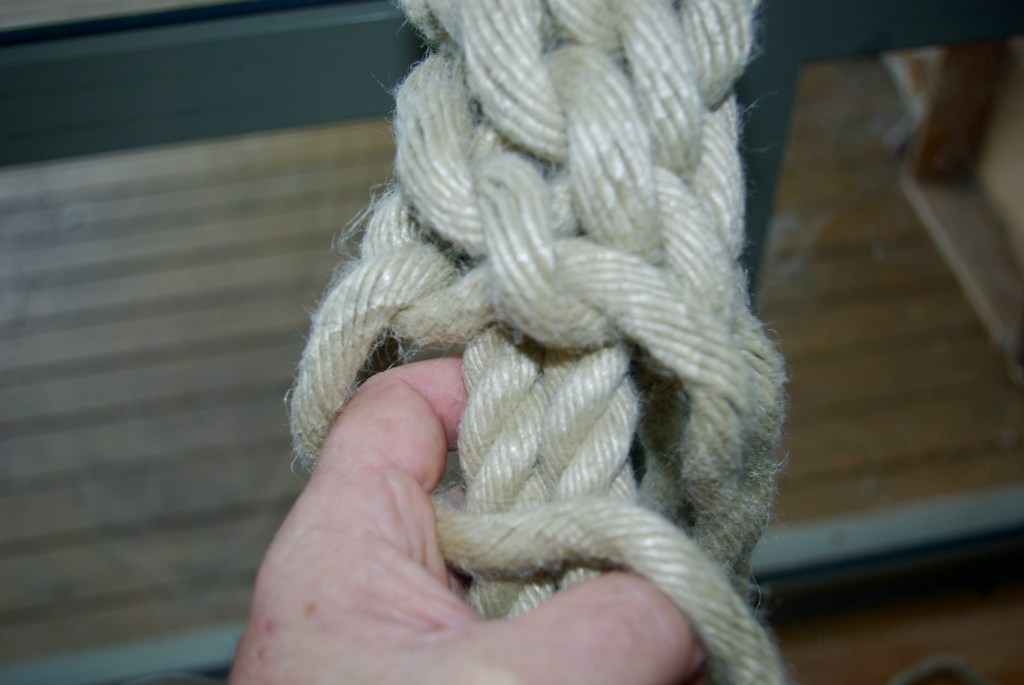
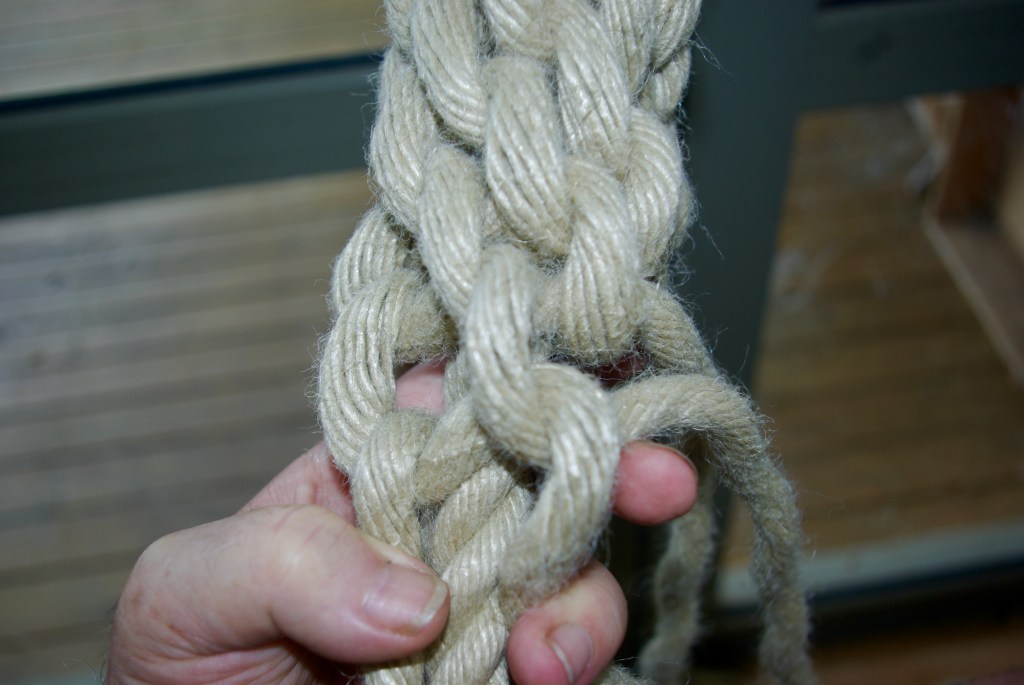
So, cut your length of 11.5 metres and fold it in half. Lash a small rope to the halfway point and attach it to some convenient item, in my case a door handle. Make a whipping around just below the loop at the top, and another one 600 mm (2 feet in old units) down. This can be seen in photo 1. The whipping will not show on the finished job, so I use ordinary white braided cord for this, about 2mm diameter.
Now, start to unlay the three strands at each end. Before you go more than an inch or two, make sure the end of each strand is well heat welded to itself, using a lighter or a candle. Try to make sure that there are no jagged edges to the heat welded ends as they can be hard on your hands and on the rope itself, tending to make it go furry as you pull the ends through the loops as you work. You will see in Photo one that all six stands have been unlaid up to the lower whipping.
Now, we really want to start with the fender the other way up, so add a temporary loop of small cord through between the two sides of the rope just above the lower whipping, and use this to attach to your convenient door handle. I haven’t shown this in the photos. Now you have six strands of unlaid rope with the two ropes for the core emerging below them in the middle. Your task now is to tie a whole lot of crown knots. Now, the process I will describe suits me as a right handed person. If you are left handed, you will probably find it easier to reverse everything, and this will make no practical difference to the finished result.
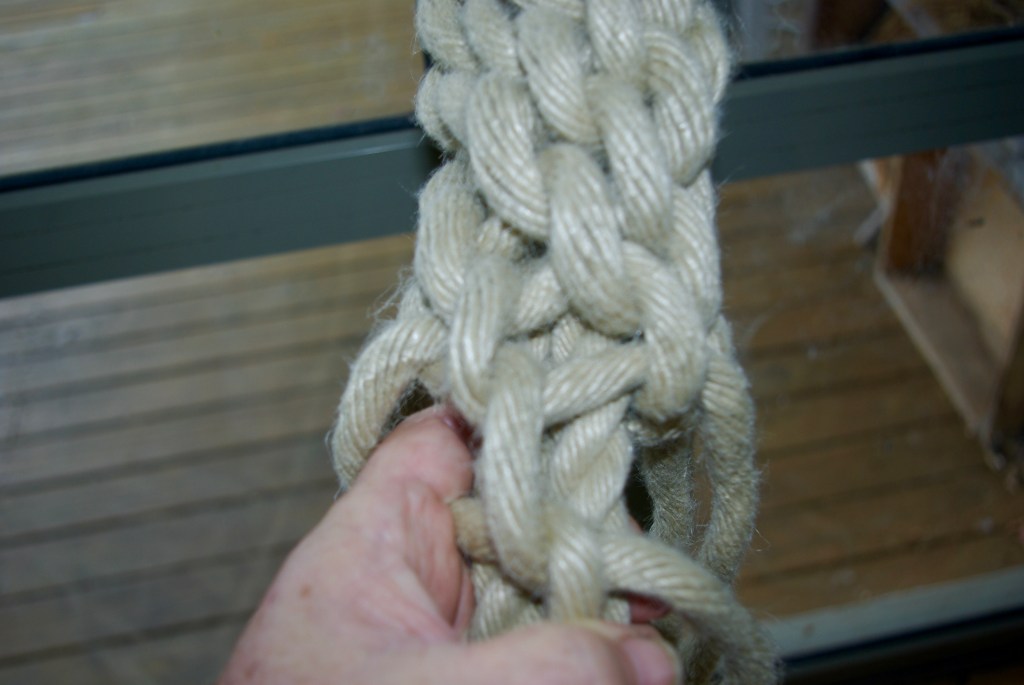
So, we take the first strand making it run downwards and to the right, putting the index finger of our left hand into the loop this makes. (Photo 3) Taking the next strand to the right, we put this over the top of the first strand where it is running horizontally to the right, and then bring it underneath and to the right. (Photo 4) This is repeated all the way around (photo 5) until we come to the sixth strand, which after it has gone under the fifth strand and then to the right, gets passed up through the loop that your index finger is hopefully still holding. (Photo 6 and 7) Once you have pulled all the slack through, you should have a nice crown knot. All you have to do is repeat this process about 35 times, give or take, and you will have done the first layer.
It is quite probable that you will make mistakes. One common one is to find that you have omitted one of the strands from the knot. Another possible one is to go through the first loop in the wrong direction. The best way to fix mistakes is to undo the knots all the way back to the mistake, even if it is quite a way back.
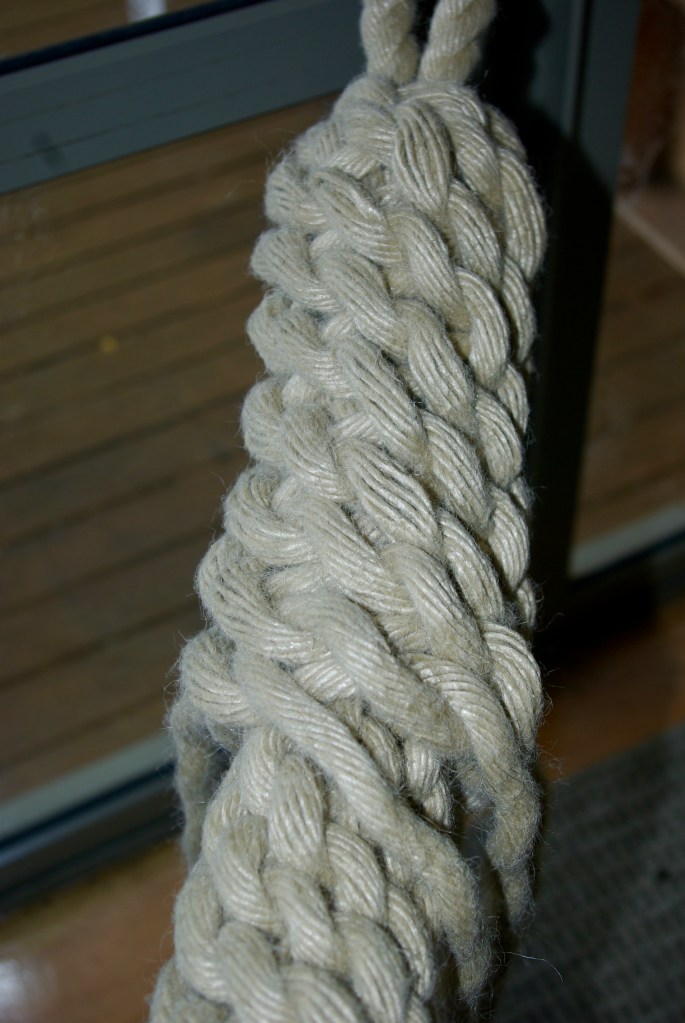
Every so often you should work some of the slack out of the worked part of the fender. Go to a point near the start and see if you can get a bit of slack in one of the strands. Work out where that strand next emerges further down, it will go under two strands before it does. (Photo 8) Work the slack down to there, then do the same at the next point where it emerges. Repeat until you reach the last knots, then choose another strand at random near the top and do the same again. Once you have done this to 3 or 4 of the strands it should all start to sit nicely. Photo 9 shows the first layer partly worked. When you reach the eye that you made at the start, make sure that your last crown knot will be enough to cover the whipping when it is all nicely tightened up. Then suspend from your door handle by the eye end and start working crown knots over the top of the existing layer. Photo 10 shows the second layer partly worked. This will be much the same as before, except that your hand with the index finger that is holding the loop will have further to reach. This layer is also more inclined to be a bit loose, especially as you reach the end. It will help here if you have made sure the first layer is tightened up reasonably well before you put the second layer on top. Photo 11 shows the last few knots being a bit unruly.
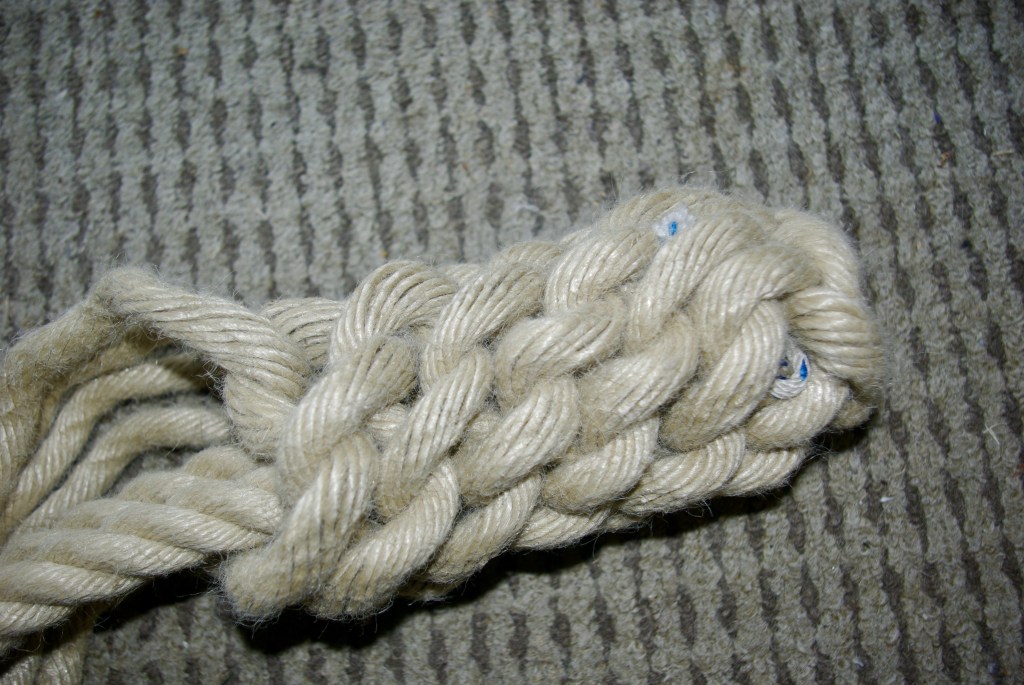
Now, hopefully when you reach the very end, each strand will be no longer than about the length of the fender. In order to make a tidy finish, we want to weave these ends under the existing work. This has two good effects, it tightens up the work, and it makes good use of the ends to add bulk to the fender. This is where your splicing fid will come in handy. Photo 12 shows the fid inserted under two strands ready to thread the loose end through. If you look at a finished fender, you will see that it has the appearance of having twisted pairs of strands spiraling around it, with short horizontal strands between them. The idea is to use the fid to work each strand under those horizontal strands, following up between the spirals, until the strand you are hiding runs out. The previously heat sealed end can then be worked under so it does not show. Photo 13 shows the appearance of the twists we are trying to hide the end of the strand between.
Now the size of rope and length specified above will make a fender about 100mm diameter by about 600 mm long. (4 inches by 2 feet for traditionalists.) Phot 14 shows a finished fender with a standard soccer ball for comparison. This is a good size for a boat maybe 10 to 15 metres long. If you want to make some a bit smaller, perhaps for a nice Whitehall rowing dinghy or similar, you can in theory scale all the sizes given and get a similar fender of a scaled length. So for instance if we halve the rope diameter to 9mm, and halve the length to 5.75 metres, we should get a fender 50mm diameter by 300mm long, or two inches by 1 foot. However I cannot guarantee that this will work for you, so you should regard the first one you make as a trial. This brings us to what to do if things are not working out for you at the end. If you find you don’t have enough length of strand left to finish the second layer and weave the ends in, the best way to salvage the job is to undo it all and move the lower whipping up by a small amount, then redo the whole thing as a slightly shorter fender. You could instead in theory add in some extra strand by using the fid to weave in the last few inches of the old strand, then adding in a new piece in the same way that you hope will be sufficient to finish the job.
Conversely, if the strands are too long as you reach the last knot, you have the choice of:
* weaving them in until you reach the top end, and then cutting off the excess.
*Figuring out how to weave in the excess coming back the other way after you reach the top.
I mentioned earlier that the crown knot can be tied either left hand or right hand. If you are really a tiger for punishment, you could try making a fender where each crown knot is the reverse of the previous. This will give a different appearance to the end result, but may also affect the amount of rope needed, and will certainly make the job much harder. I find that once I am going well, my hands get in the habit of doing the right thing, but I suspect that reversing the knot each time would lead to confusion.”
Photo 1 Starting point
Photo 2 Crown knot seen from end
Photo 3 Starting a knot
Photo 4 Put the next strand over the top then under to the right
Photo 5 Repeat with each strand
Photo 6 The last strand will go through where the index finger is.
Photo 7 put a loop through then pull through the rest of the strand
Photo 8 Working out the slack
Photo 9 Working the first layer
Photo 10 Working the second layer
Photo 11 Reaching the end
Photo 12 Using the fid to thread in the excess length
Photo 13 Note the twists each side of the fid
Photo 14 The finished article with a soccer ball for scale.
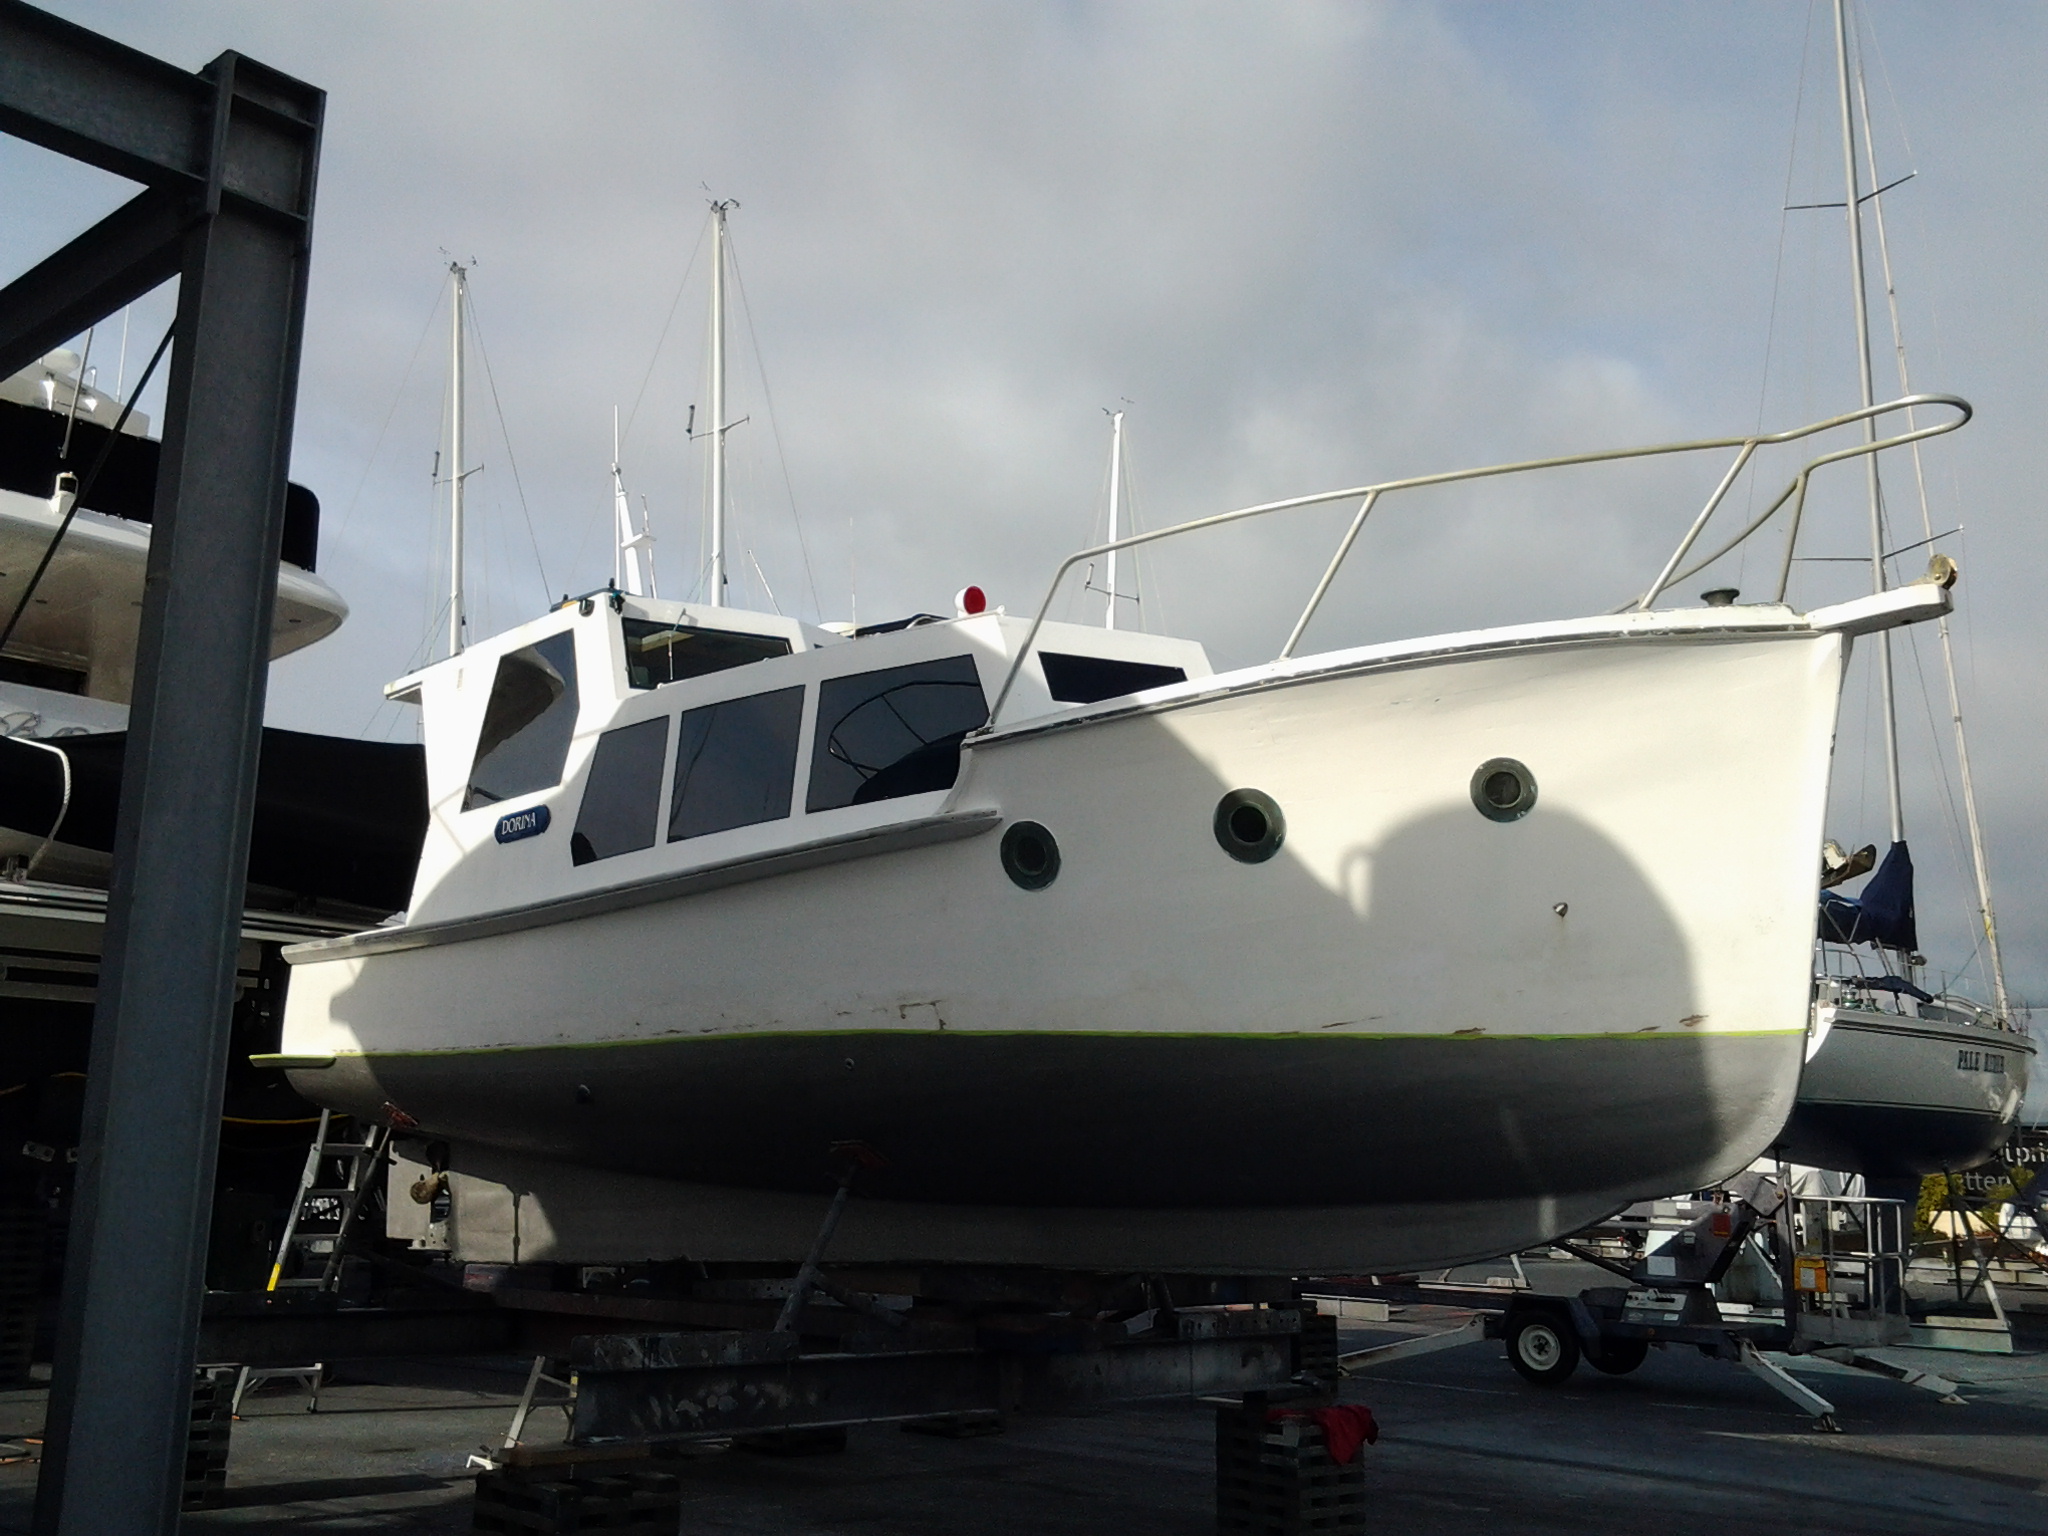
I understand that back in Feb 2021, the above 34′ launch sold on tme for approx $600, which was probably a fair price. I can’t make out her name, but its something like DORIMA ? and its rumoured to be built by Bailey & Lowe in 1927.There was no engine, being set up for twin outboards…….. At the time of sale, she was moored in the ‘Warkworth area’.
Can anyone let us know if she was bought with the intention of restoring?
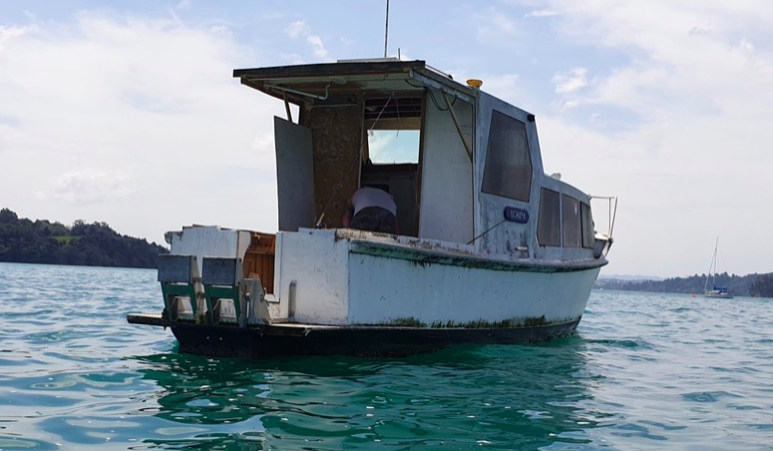
Update – I was sent a copy of the front page of last weeks Hibiscus Matters’ by a WW reader named Viviene, a local newspaper the covers the area referred to locally as the Hibiscus Coast.Seems the boat is called Dorina and has attracted a lot of attention. As the paper states and confirmed by John Bullivant – The launch is/was apparently Dorina , and recently sank at Little Manly on April 10th. It was anchored off little Manly over Easter but apparently no-one returned for it. The owner was given till the 20th April to remove it, as the Harbourmaster had declared it a wreck. Don’t know how it was removed or what happened to it . It was on the front page of the Hibiscus Matters local paper on April 21.
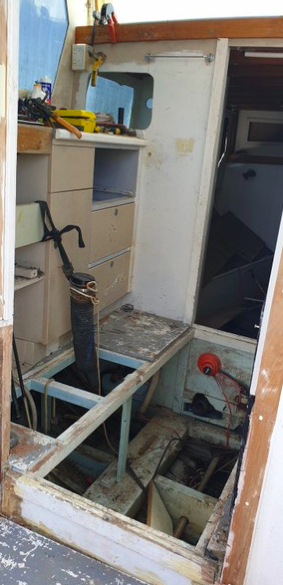
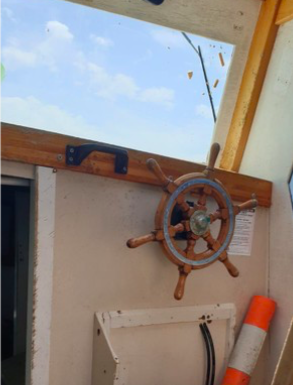
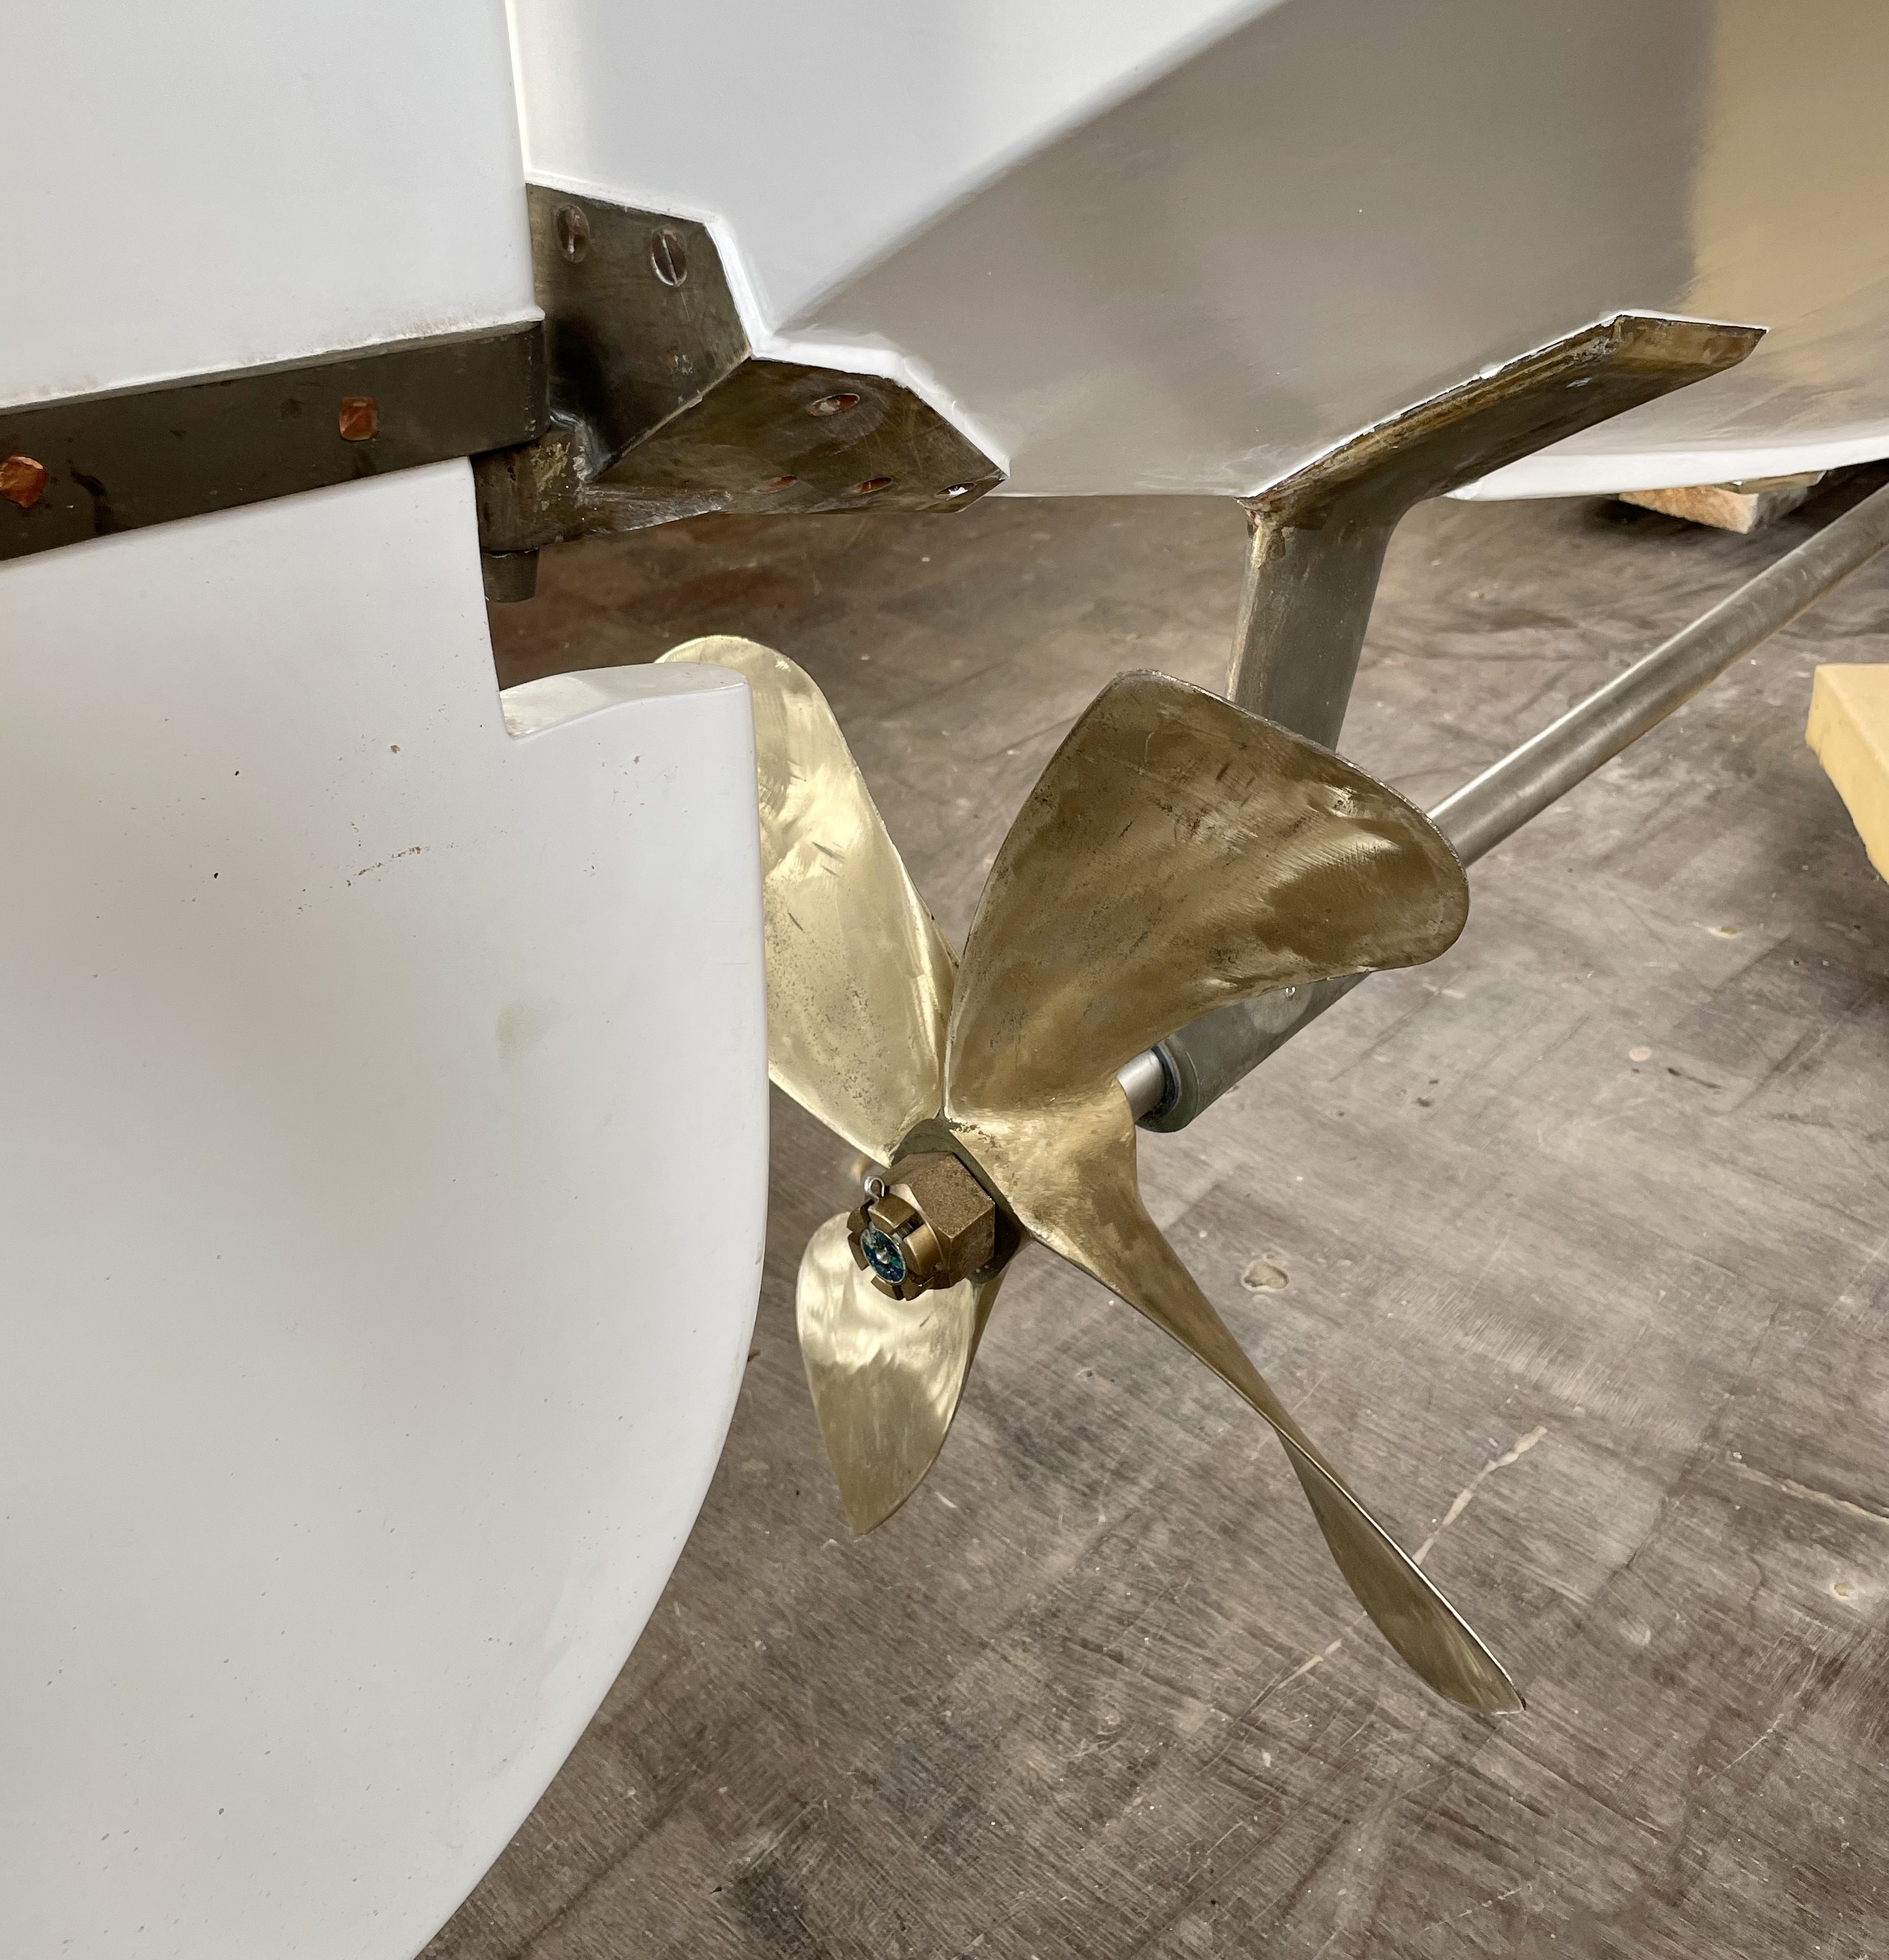
The Back Story ex Ken Ricketts “She had recent new owners who a couple of weeks ago were taking her to her new home at Te Atatu. When they got to Whangaparaoa they realised they would not have enough fuel to get them to Te Atatu, so seeing Little Manly, in a nice calm state, at that time, decided to anchor there overnight, whilst they procured more fuel, and were to intending to continue to Te Atatu the following day. However during the night a southerly storm blew up and she took in water over the stern because the stern door was left open, sank. She was then beached at Little Manly, to be pumped out. A sad note is, that whilst there overnight people were seen removing her glass from her coamings windows, and I am told they also took fishing tackle and other equipment from inside her.I believe in a previous life, she had spent time at Thames, and at Whangarei as a live aboard. It appears she has not had inboard power for a good number of years but the prop shaft and rudder are still in place.” (photos below ex KR at Gulf Harbour in 2015)
photo at Little Manly ex Len Lawerance
HEADS-UP FOR CYA LAUNCH OWNERS
This coming Tuesday night (4th May) is the Classic Yacht Association (NZ) annual boat owners meeting – where if you are lucky, between all the sailing talk, you might get the chance to discuss the past years and upcoming seasons launch related activities. Venue is the RNZYS, kicks off at 7pm. It’s always a hoot to listen to the debate on yacht race handicapping, course selection etc. See you there 🙂
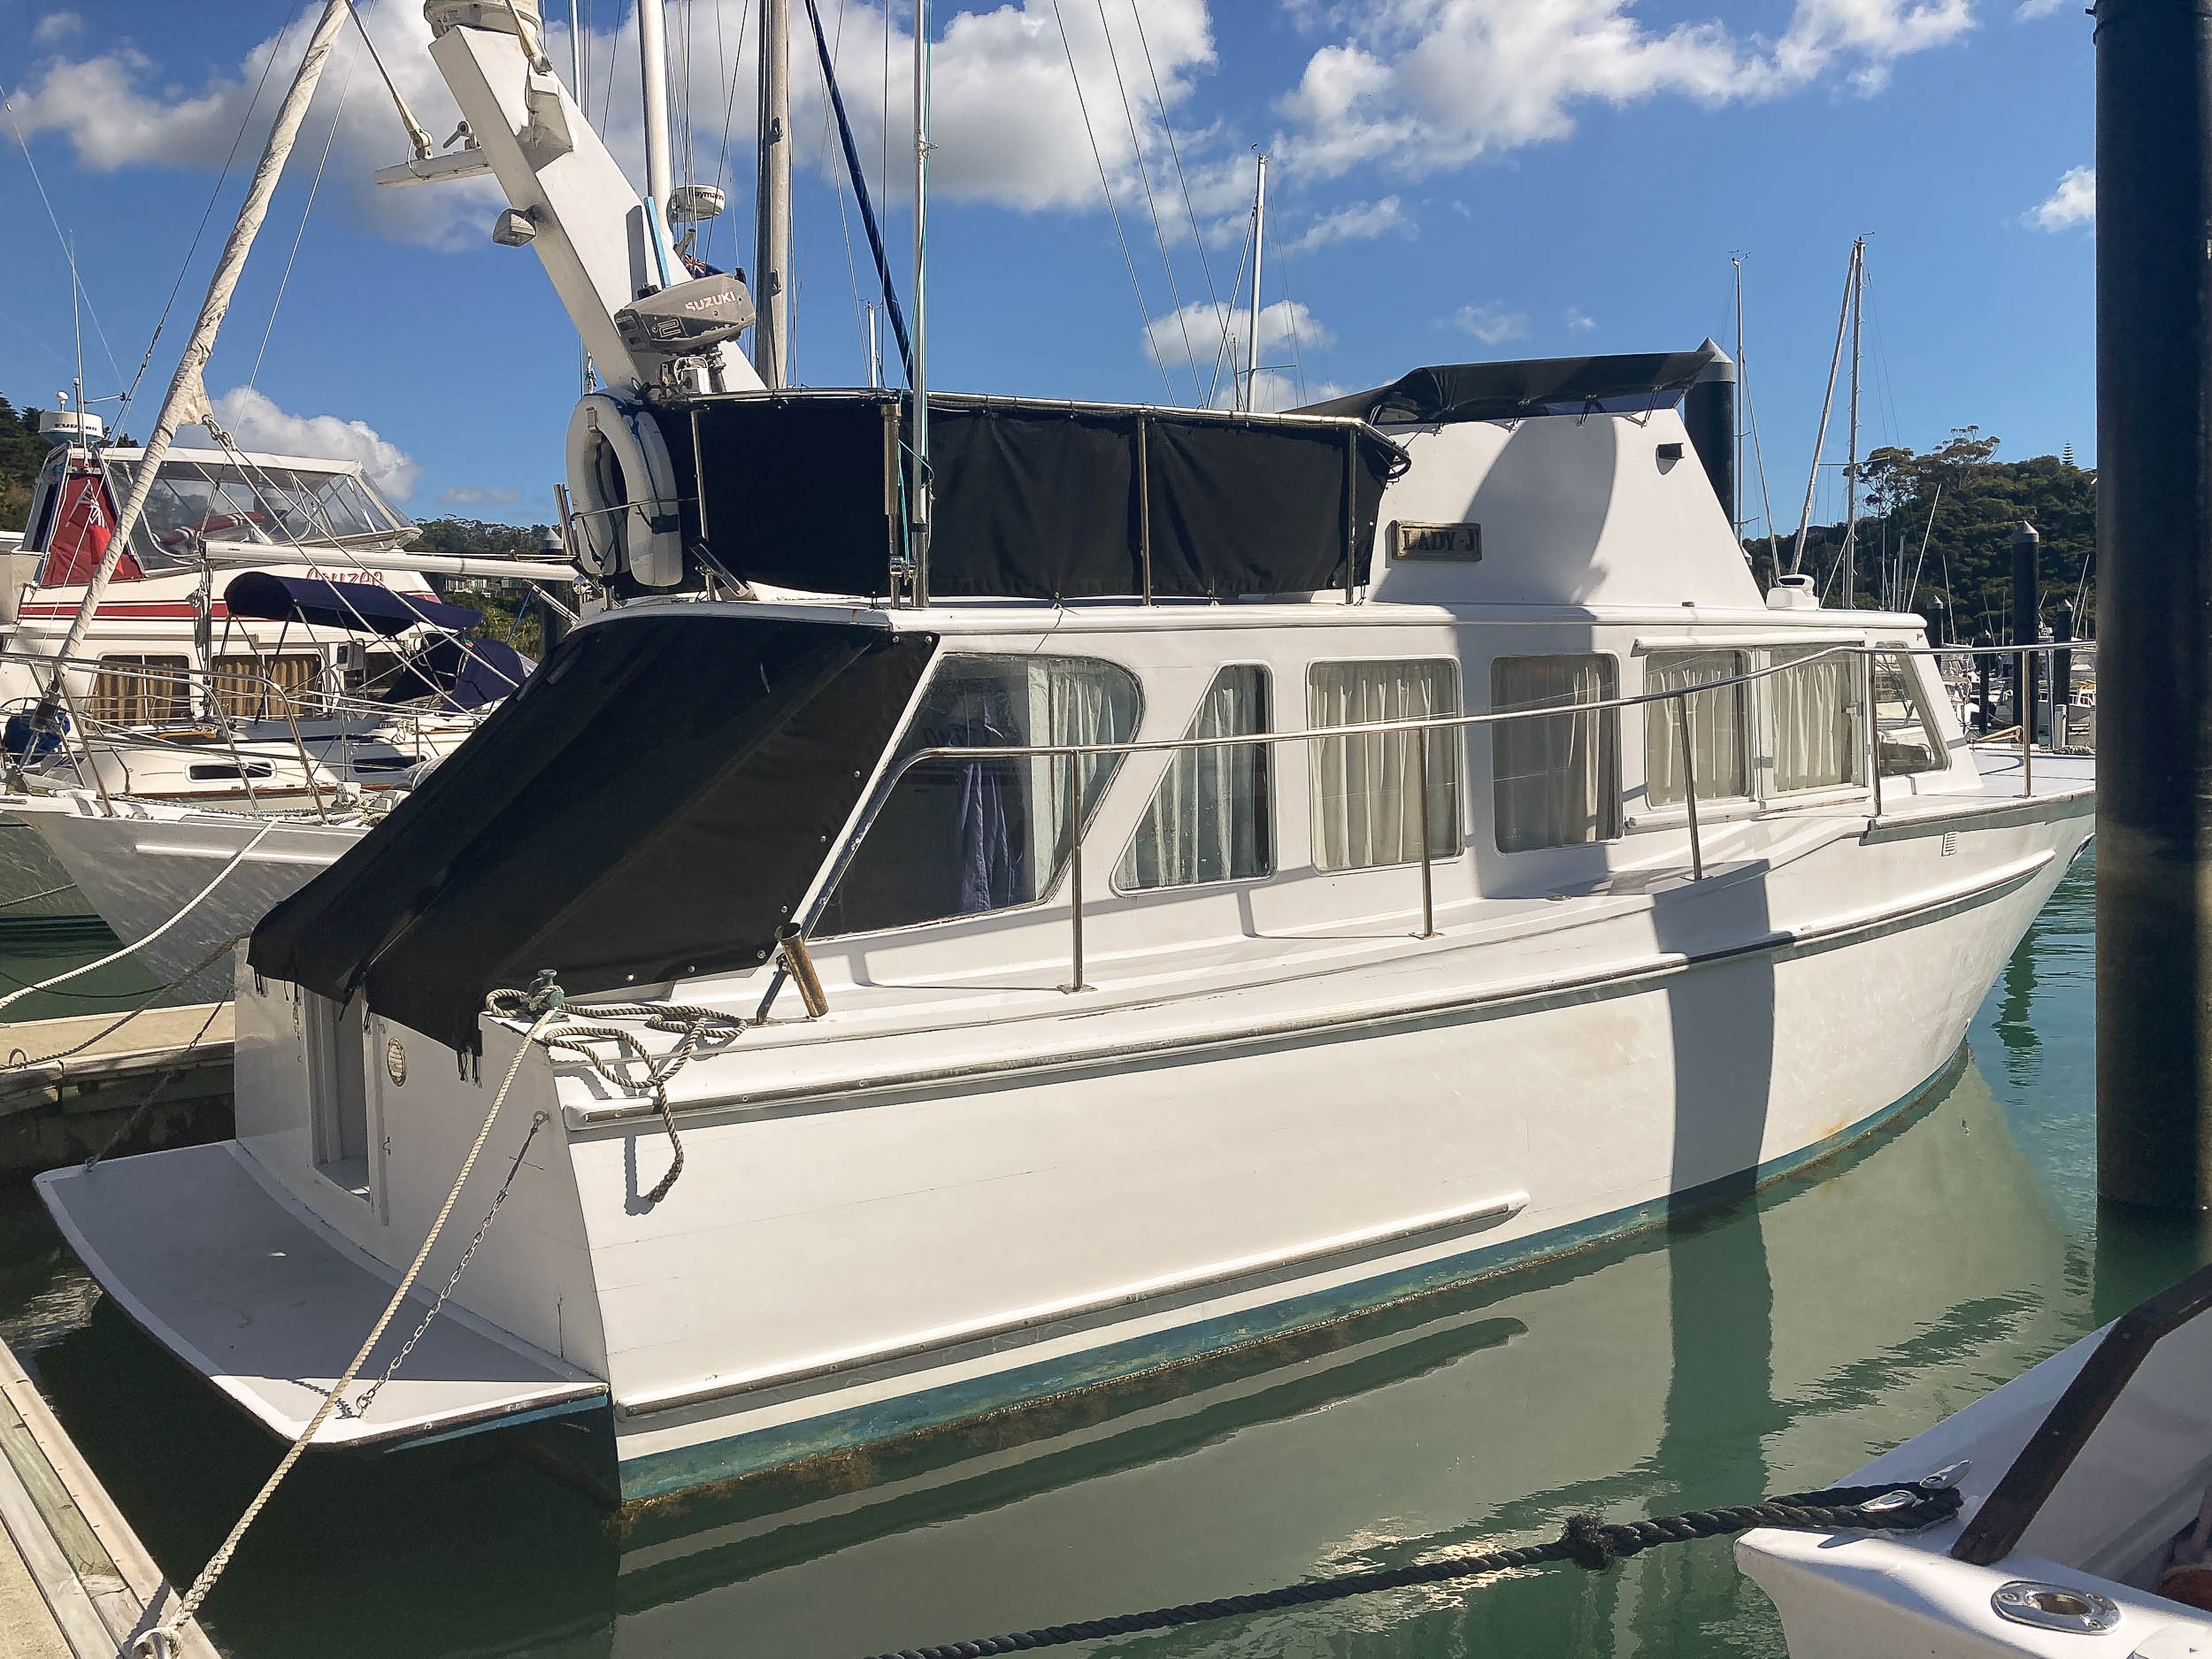
LADY J Almost one year ago WW was connected by Brian Hewitt looking for a 34’ Shipbuilders launch named – Joel, that he was a part owner of in the late 1970’s > early 1980s. We uncovered that in the 1995 >2004 period she was owned by a Gordon Cooper, who changed her name to Lady J. Lots of details and photos from both Brian and Gordon on this WW link https://waitematawoodys.com/2020/05/06/joel/
Now thanks to Dean Wright doing a Tutukaka marina walk about last weekend, we now know that Lady J resides there. Any one able to fill in details on the boats whereabouts between 2004 and 2021?
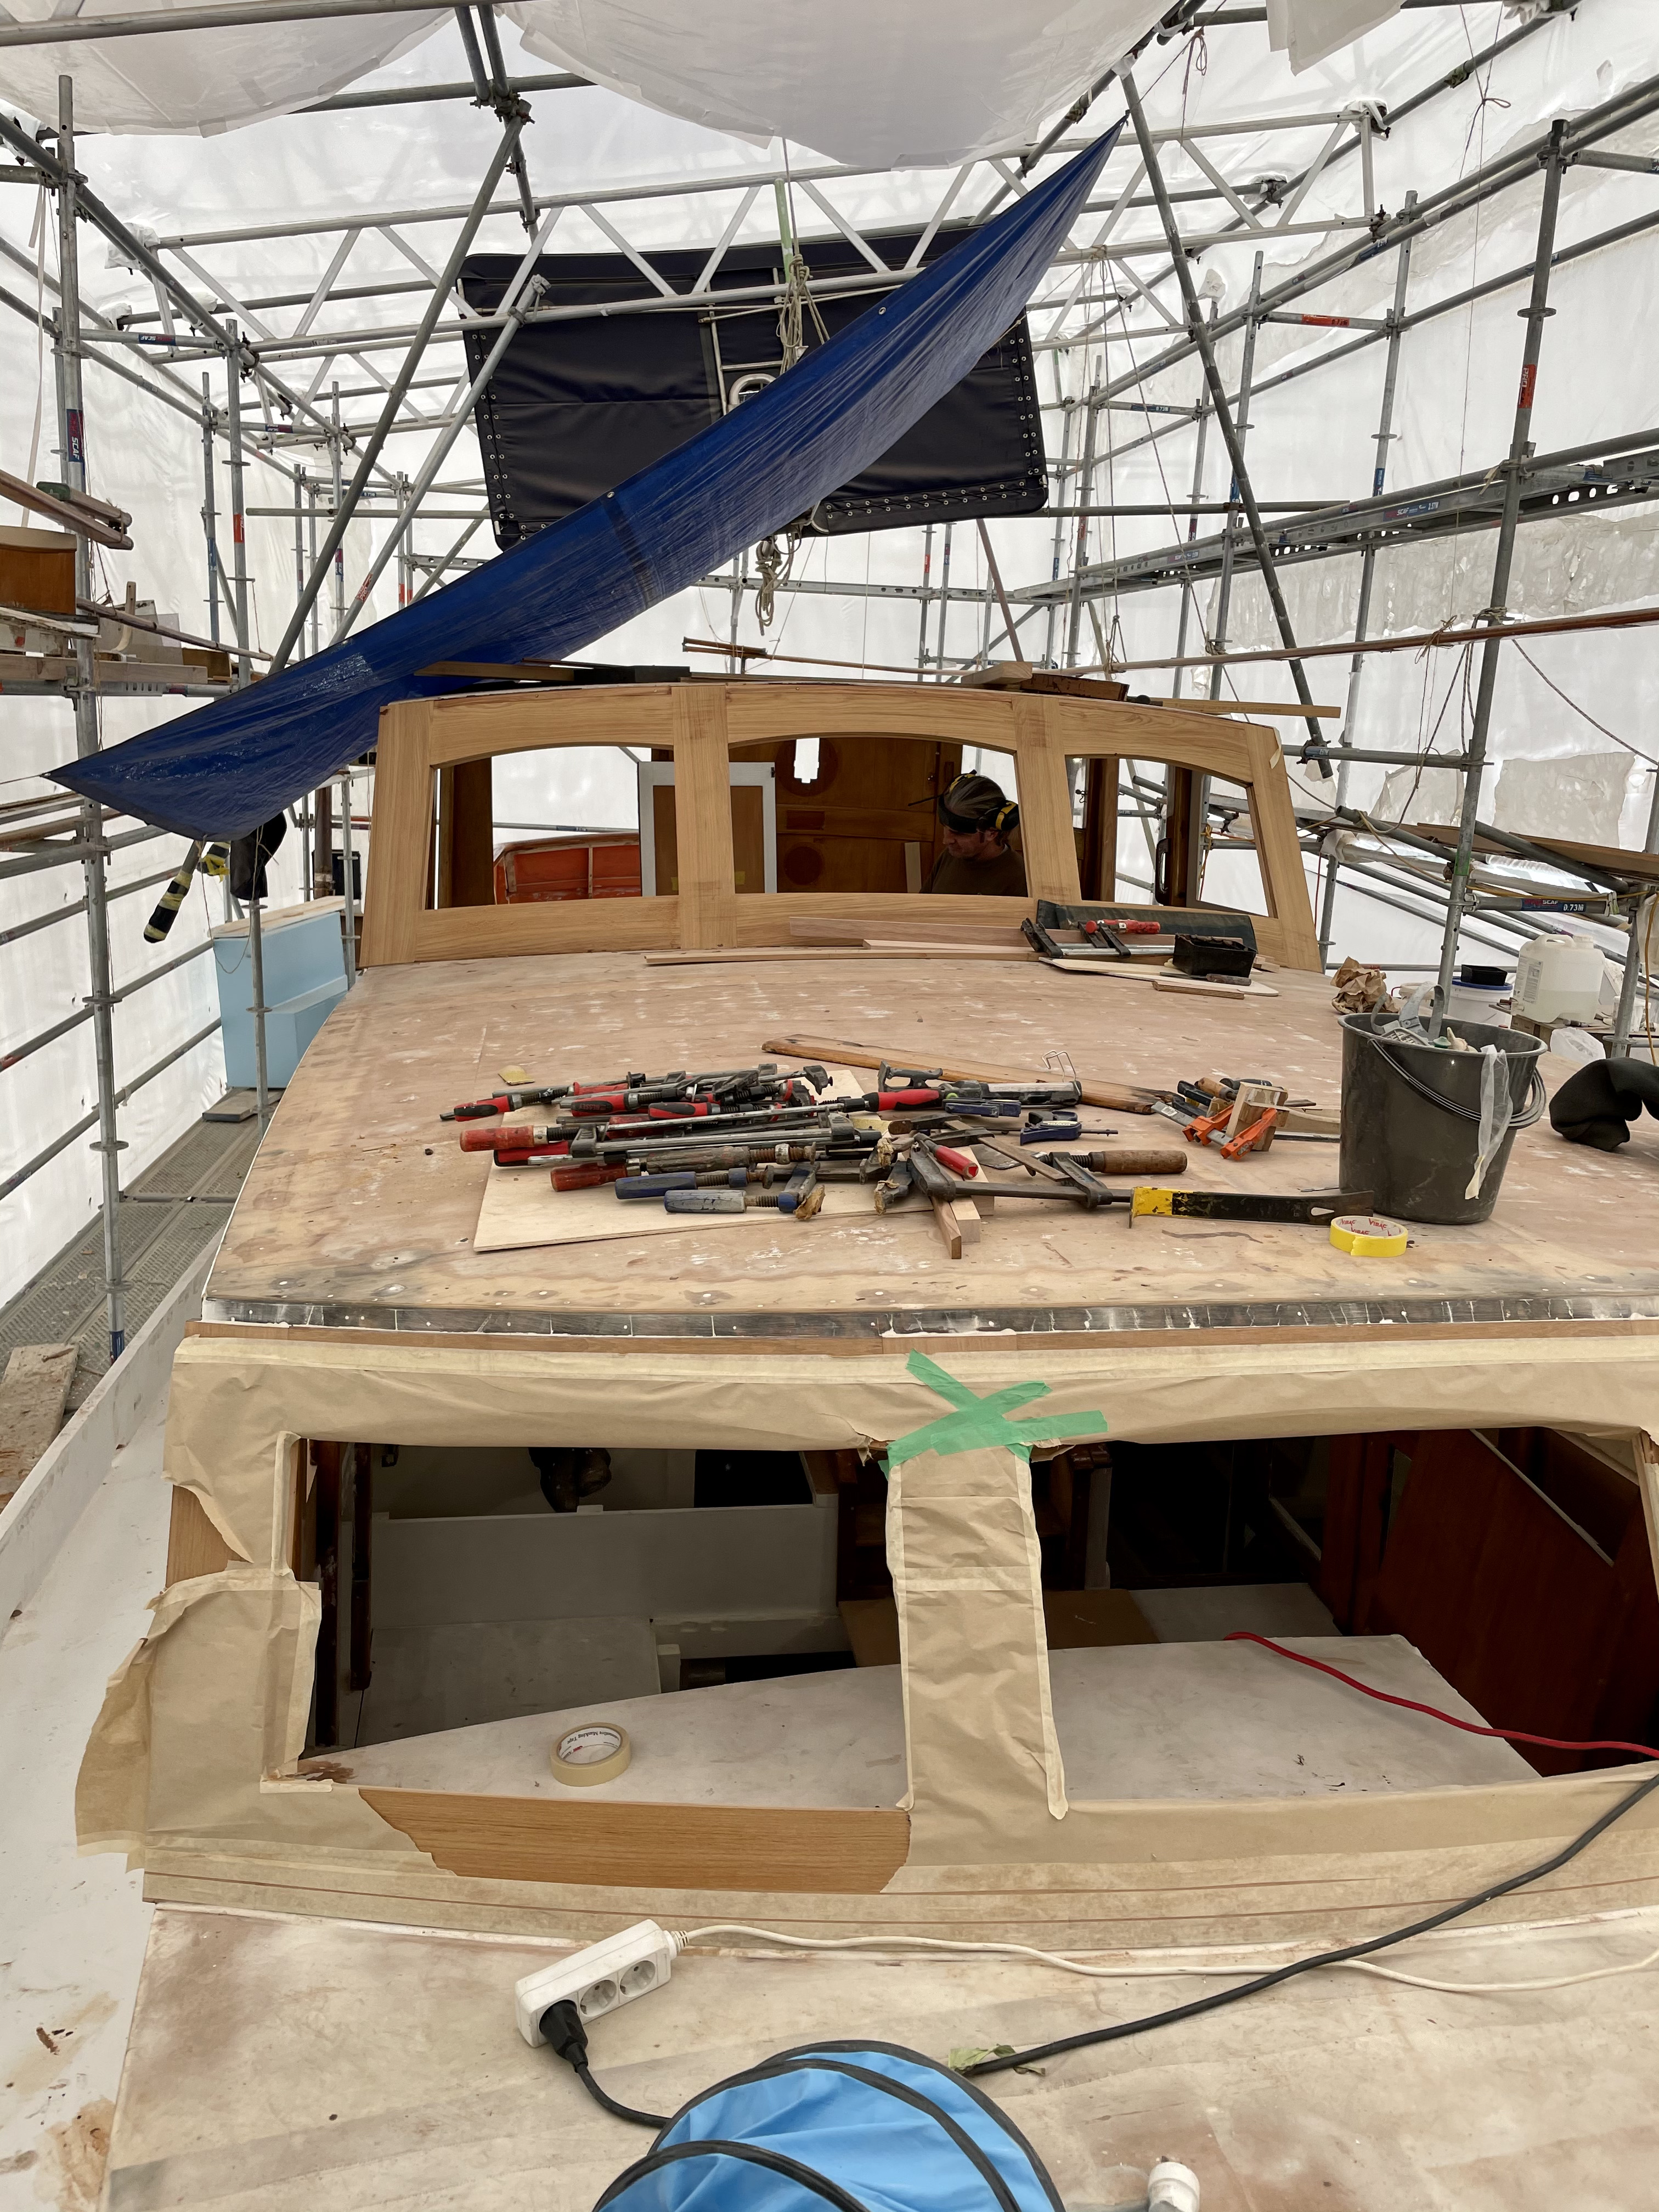
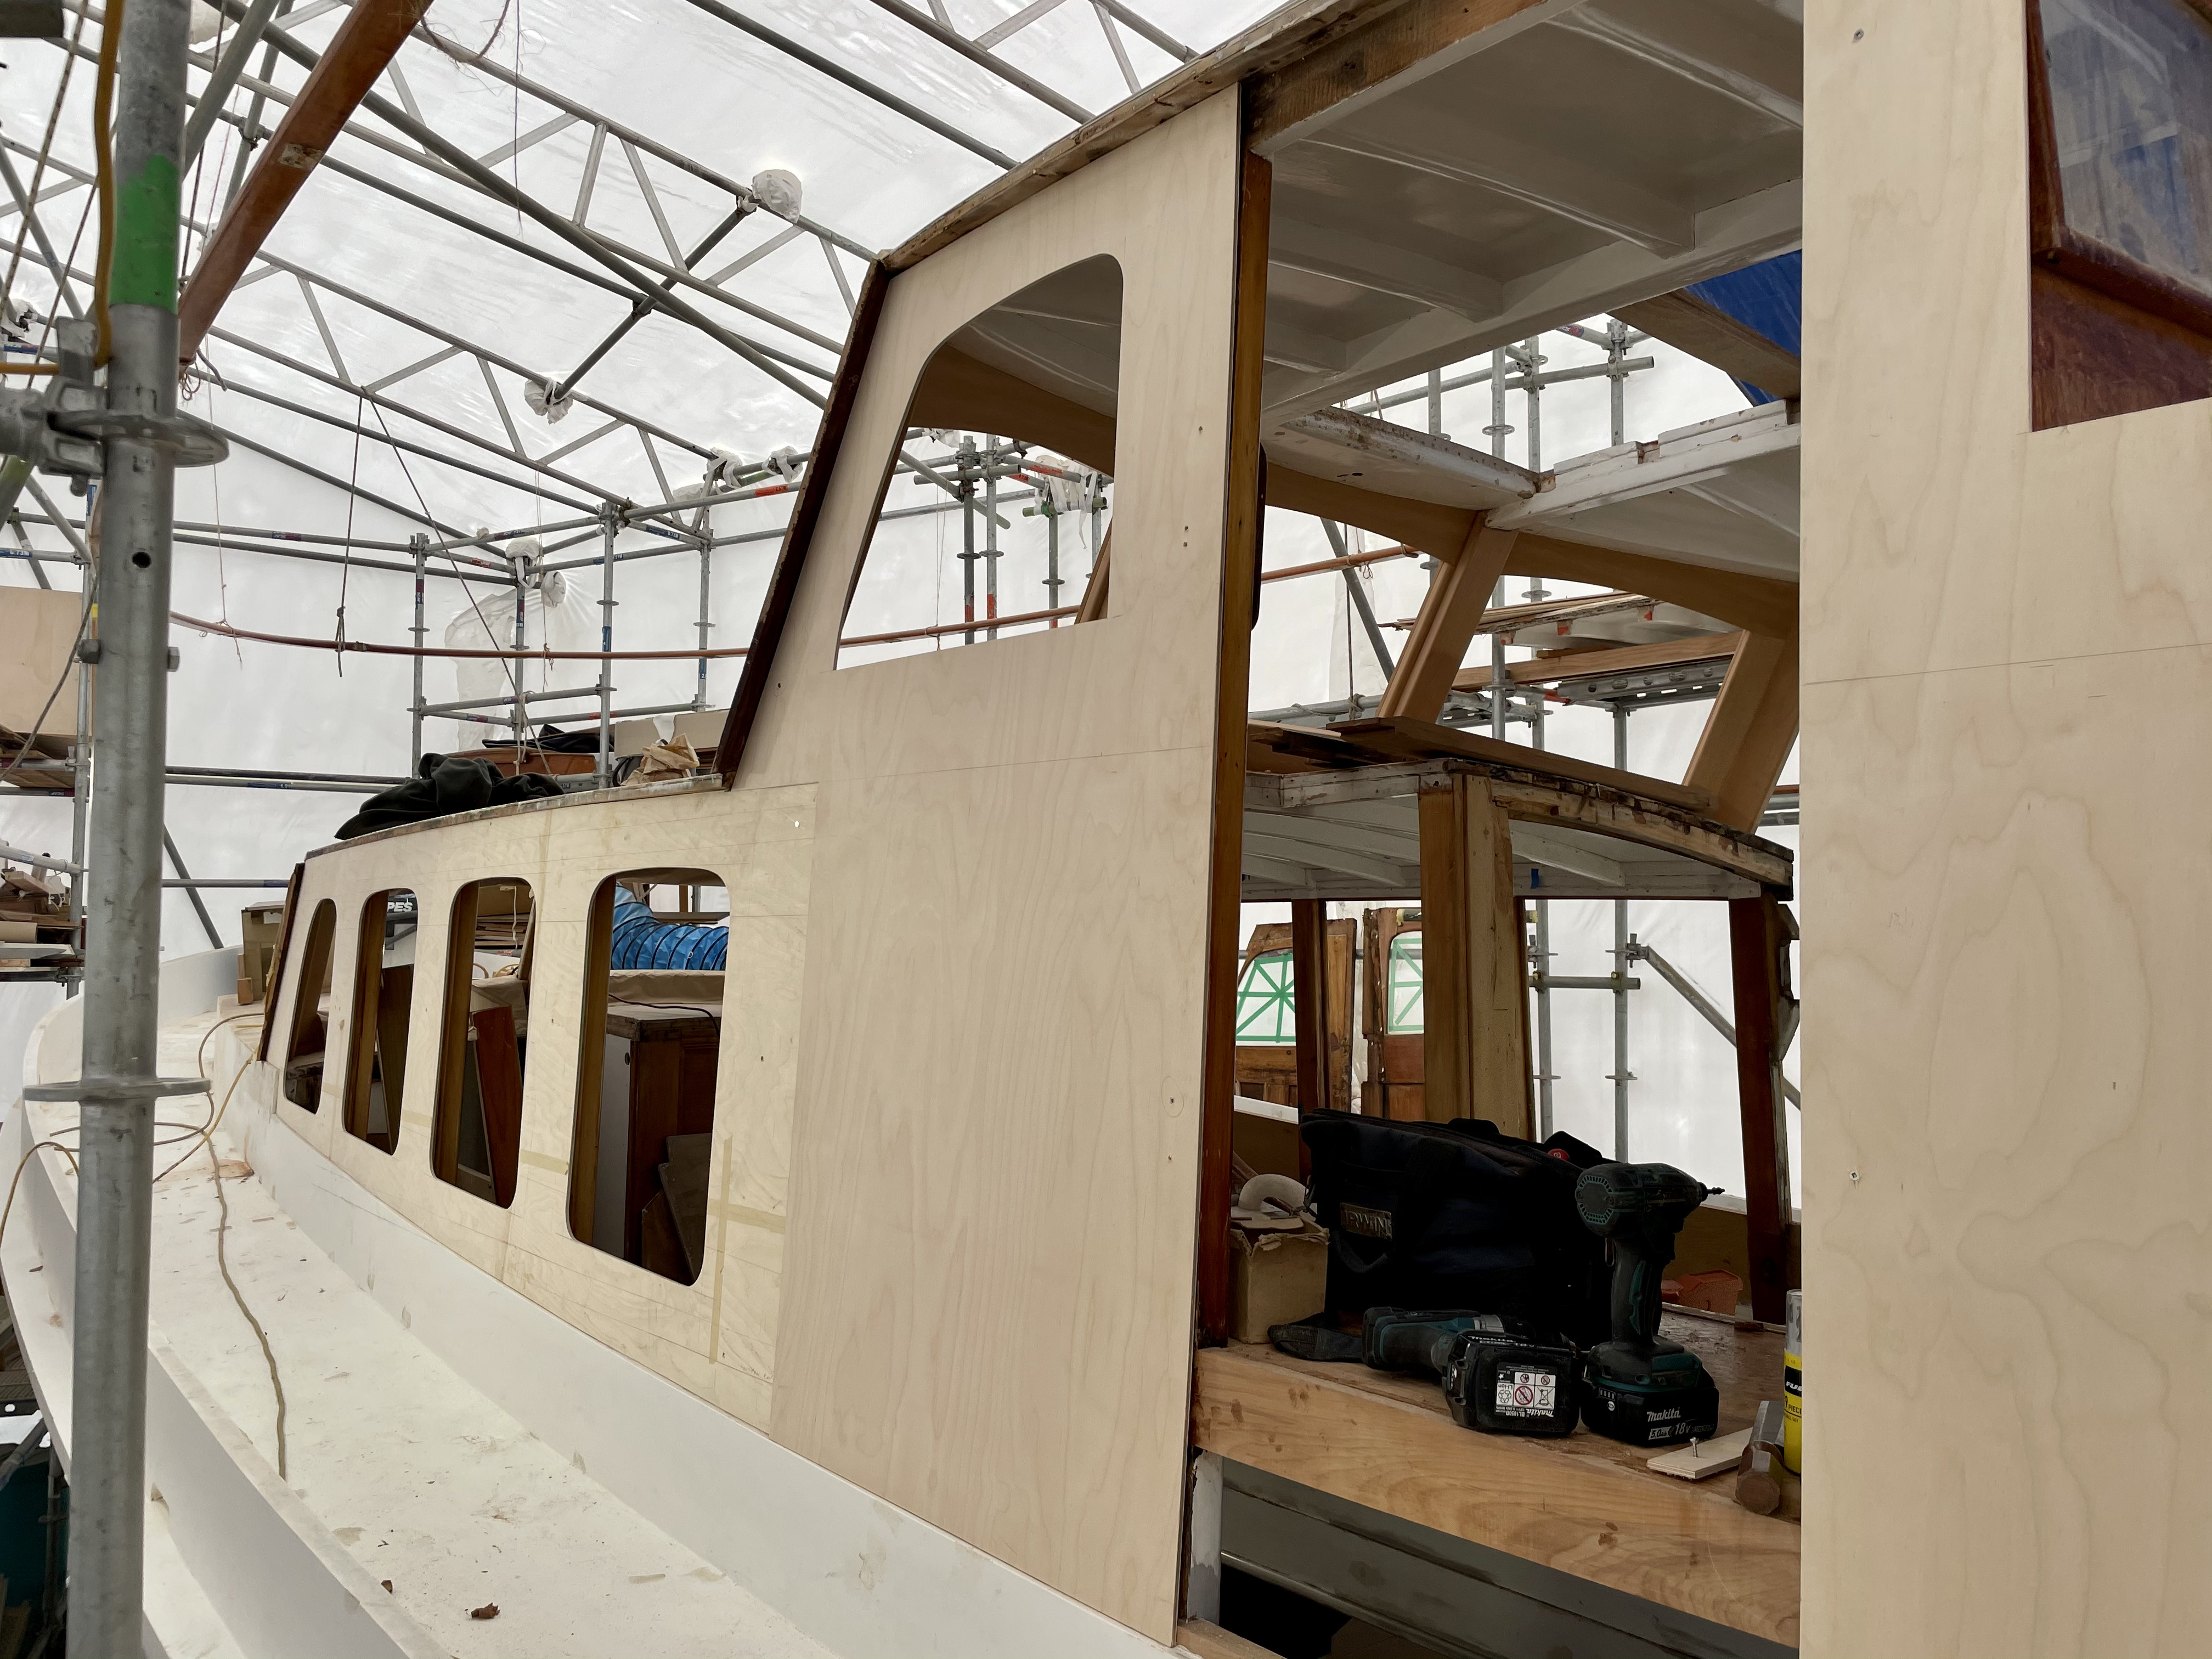
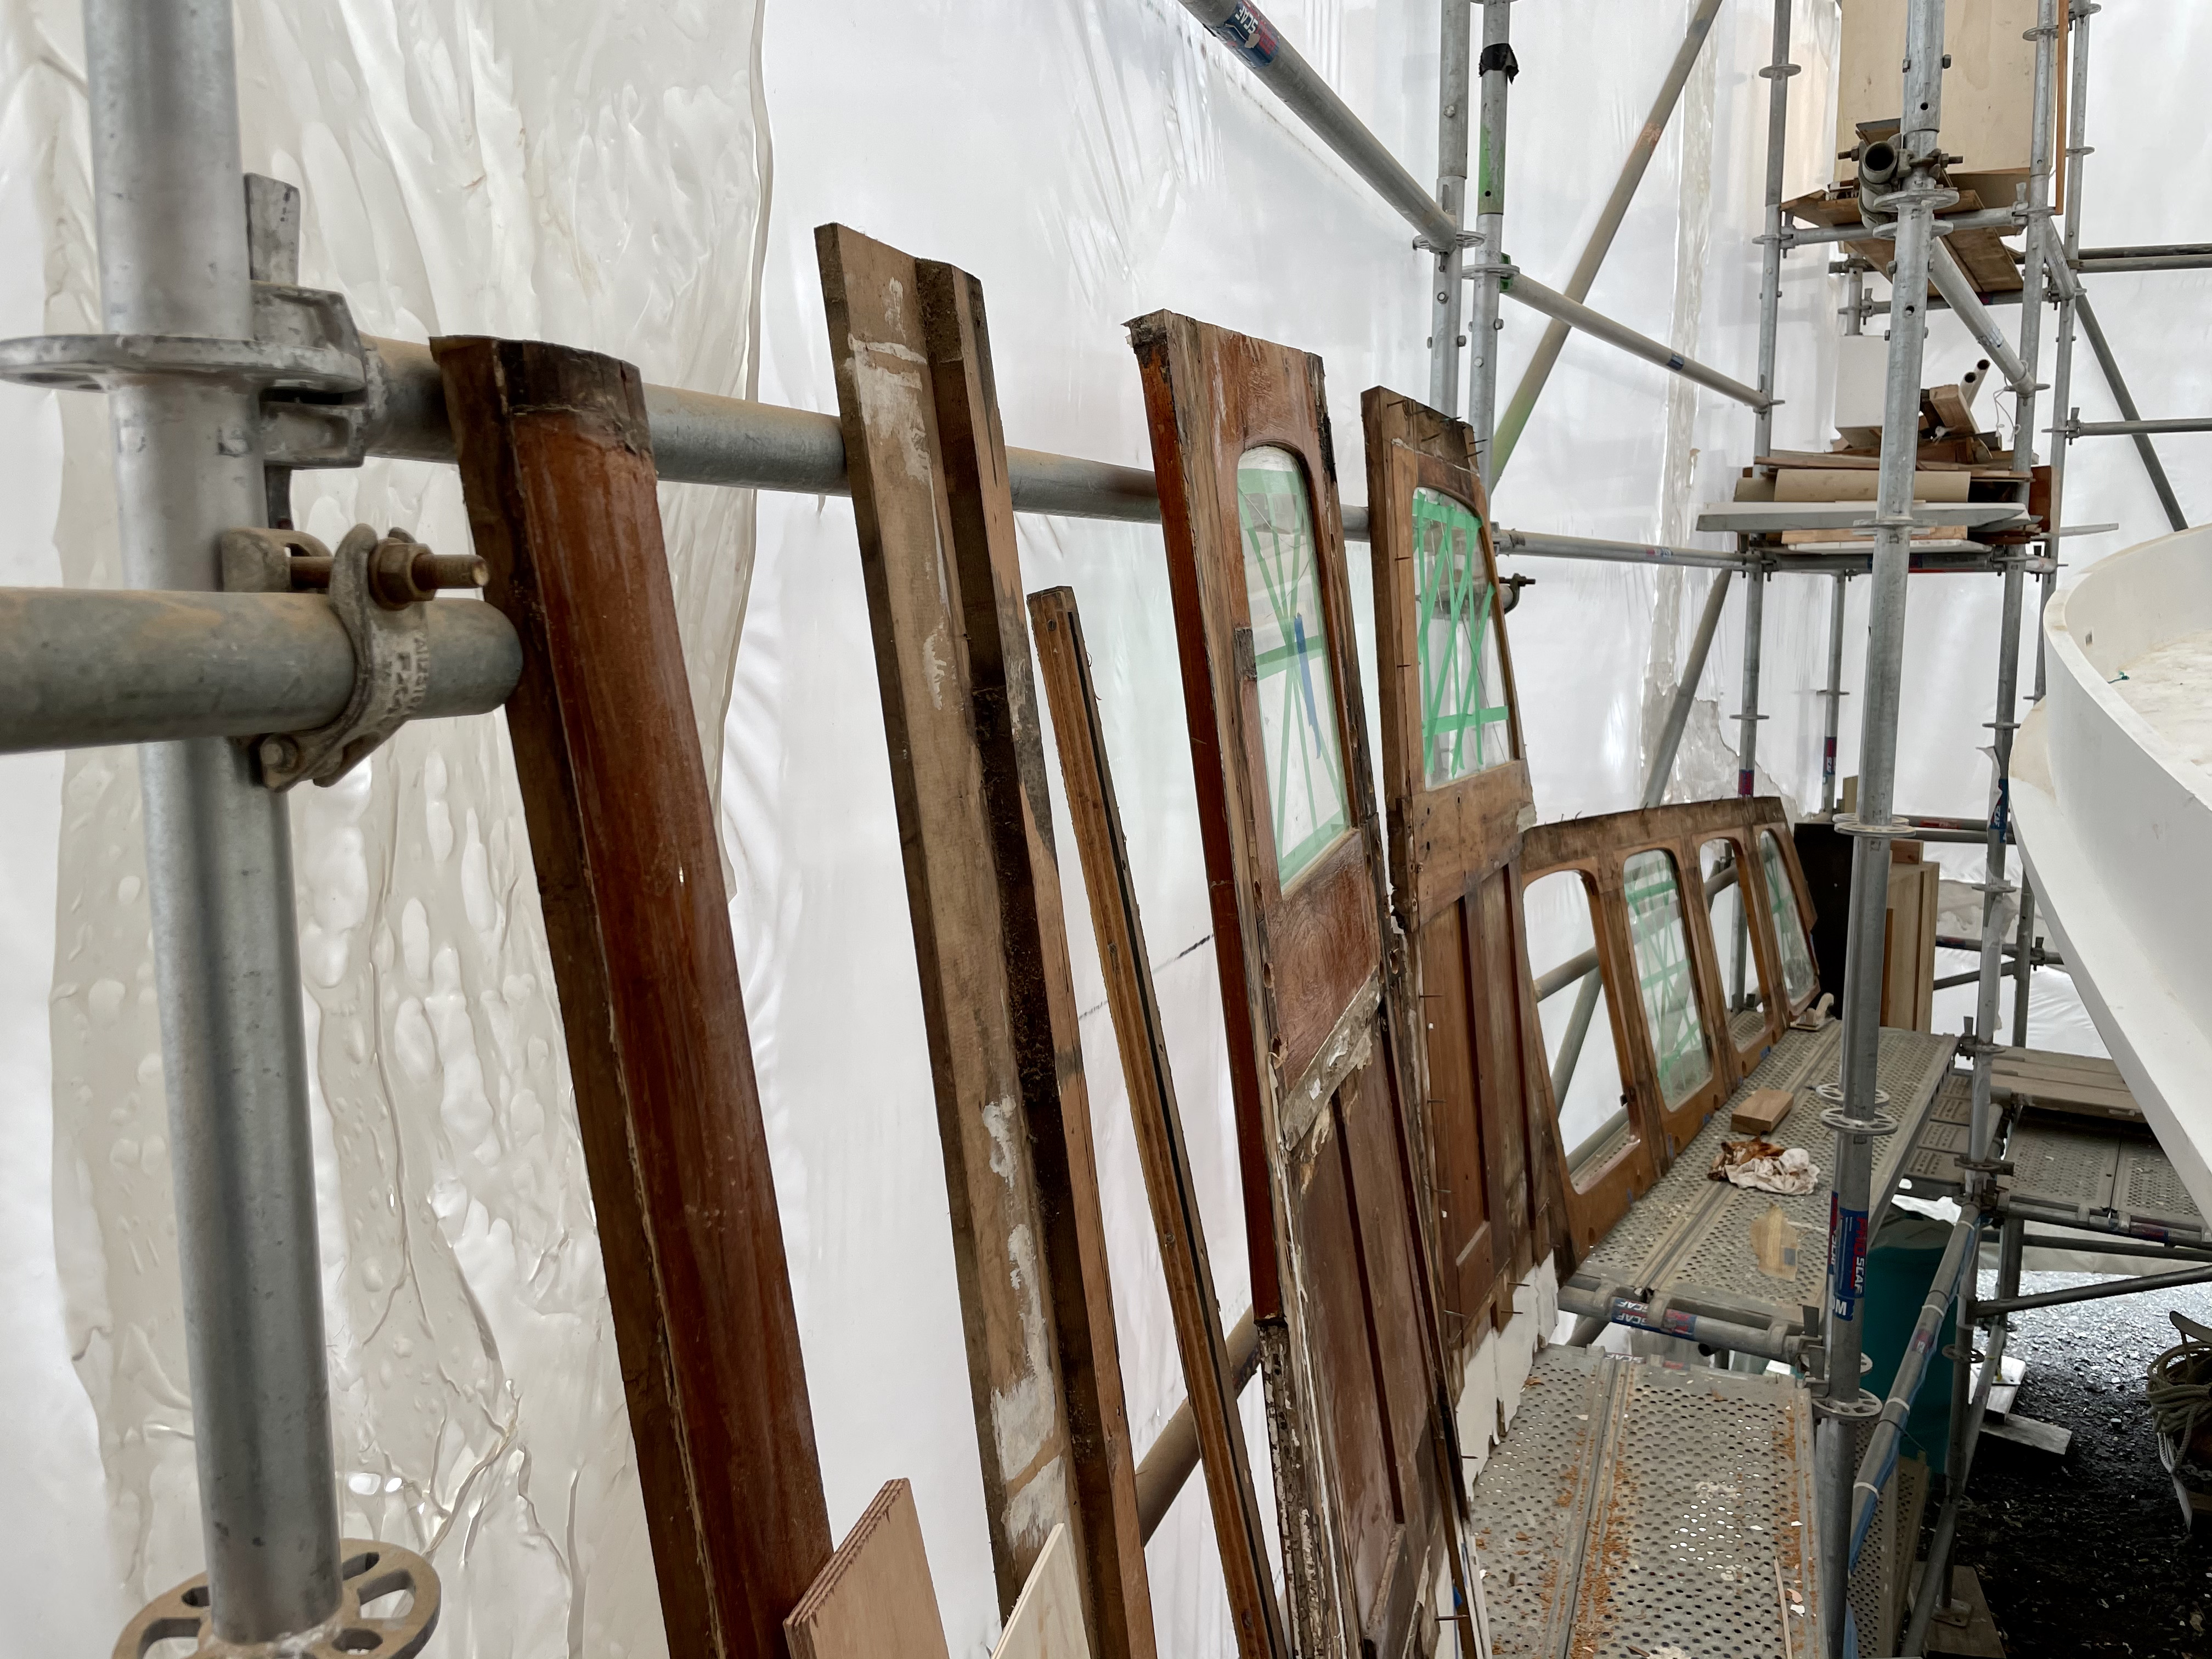
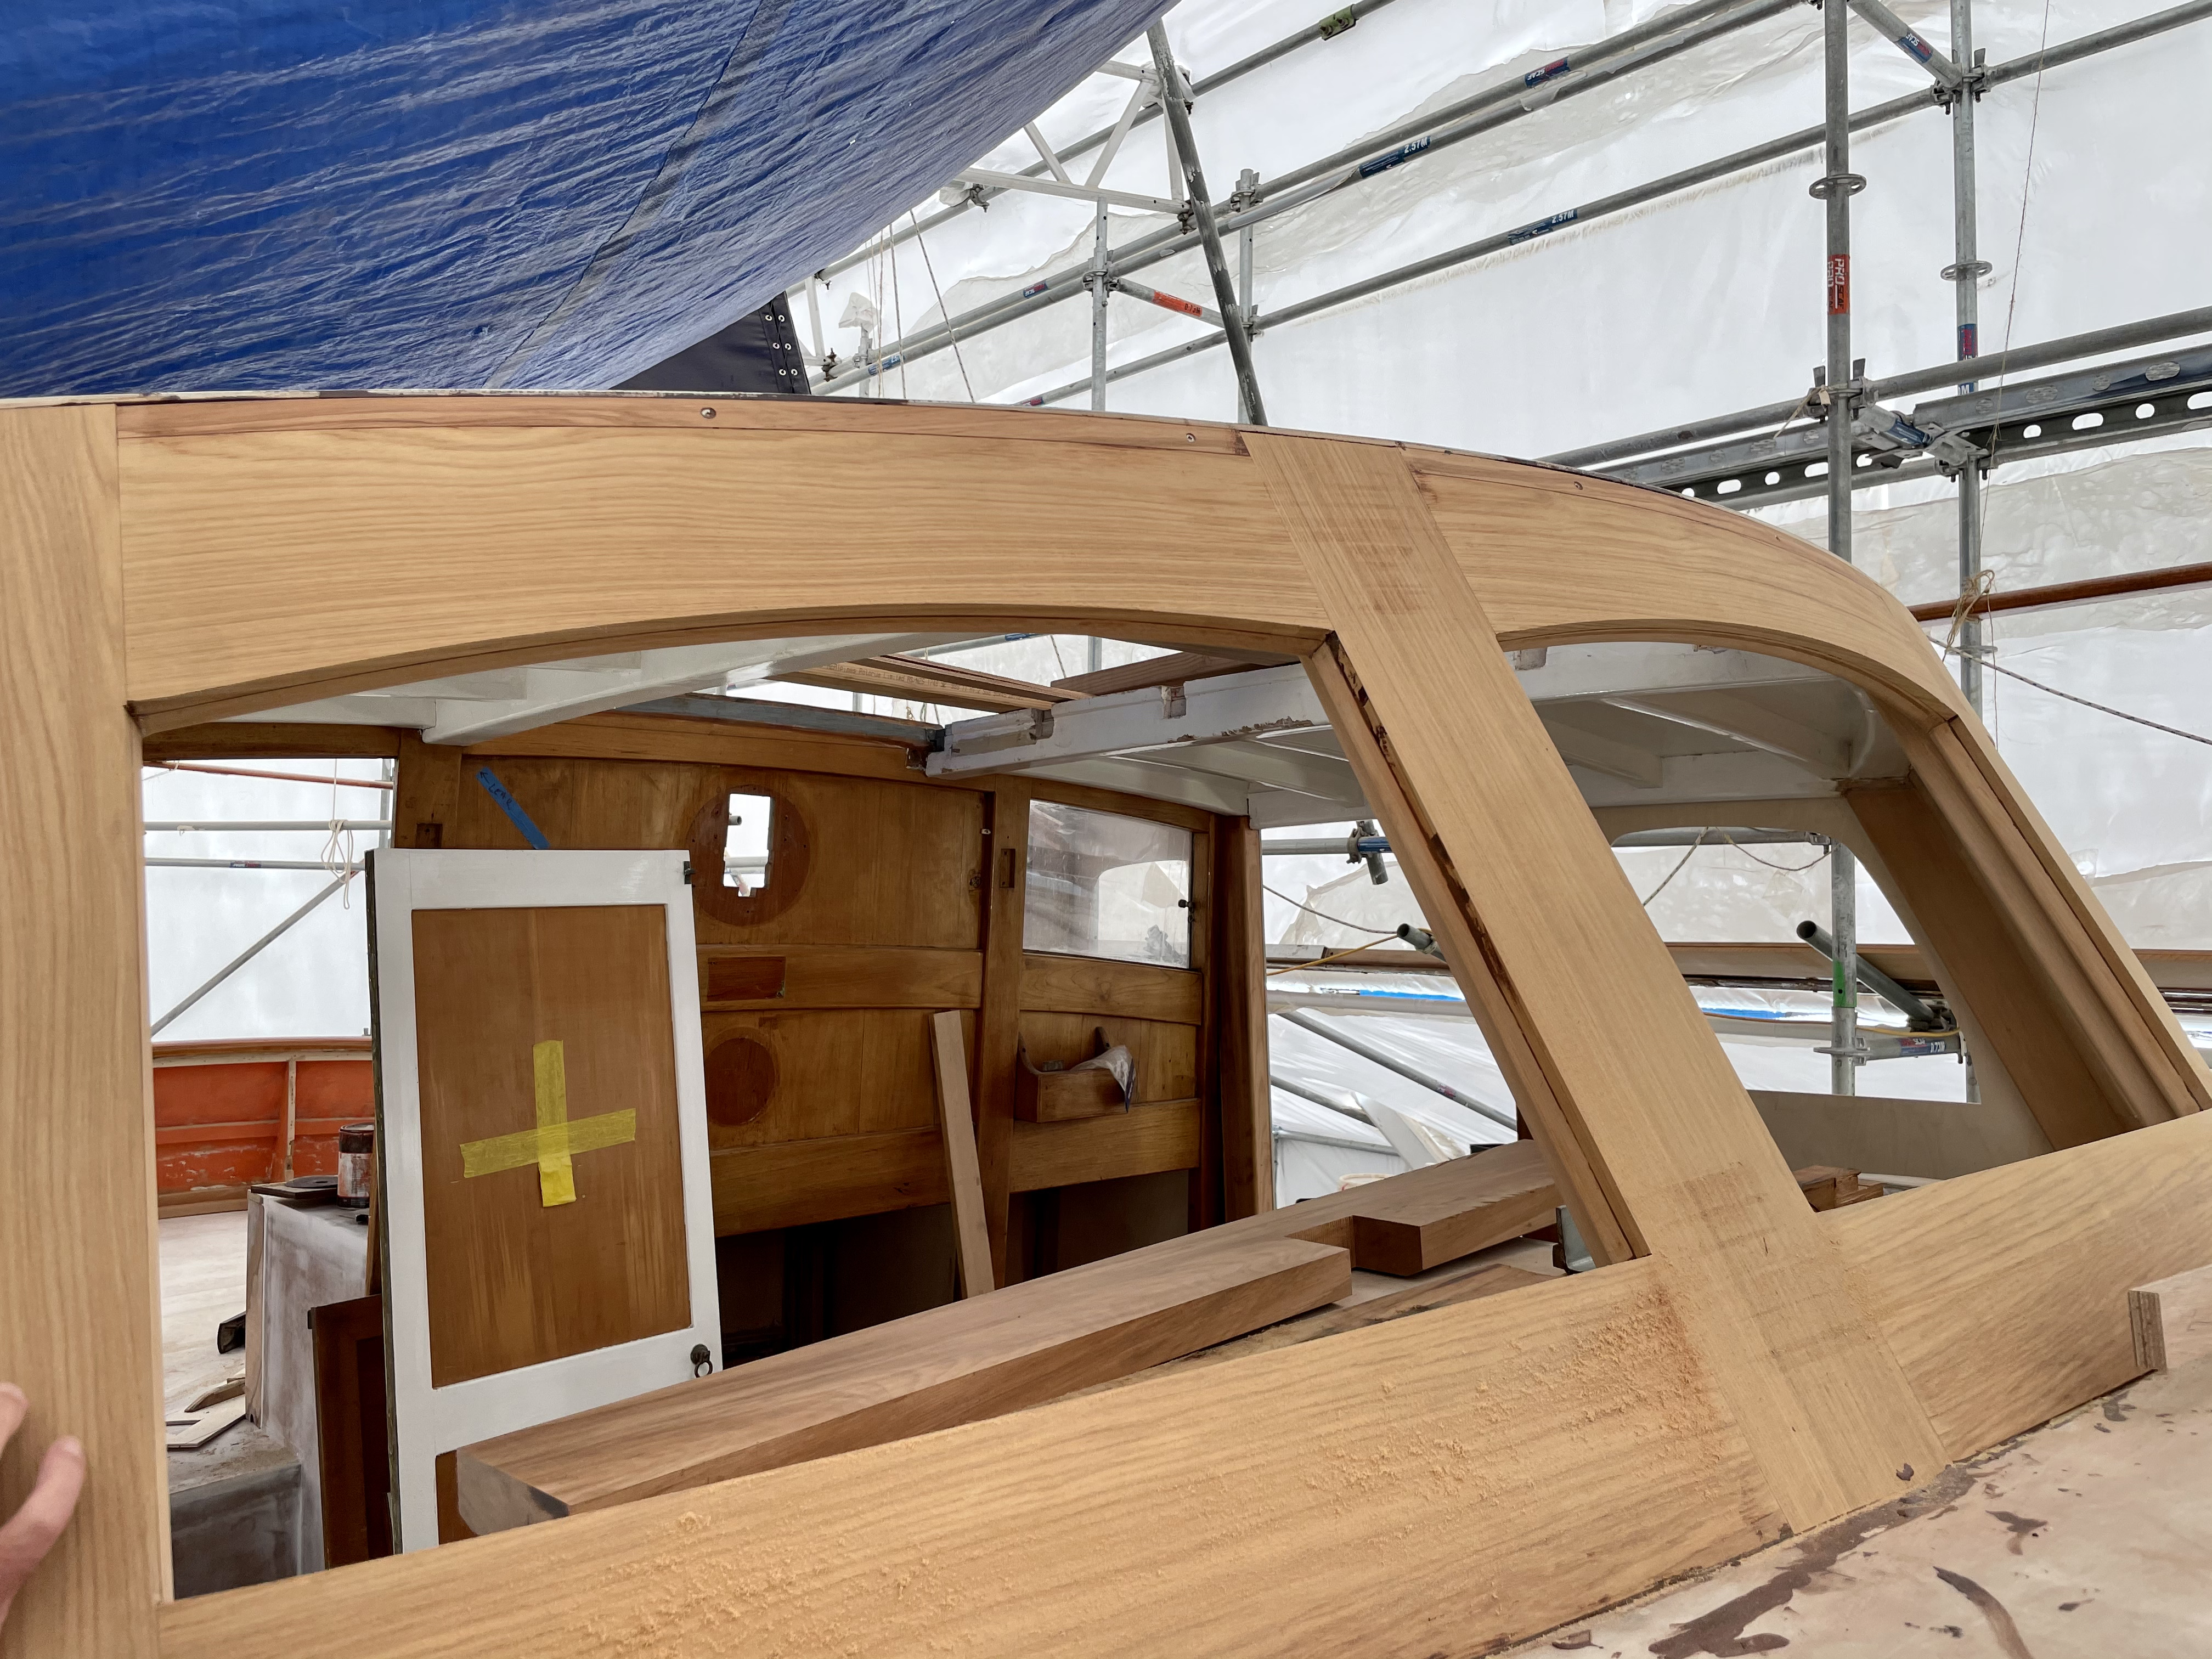
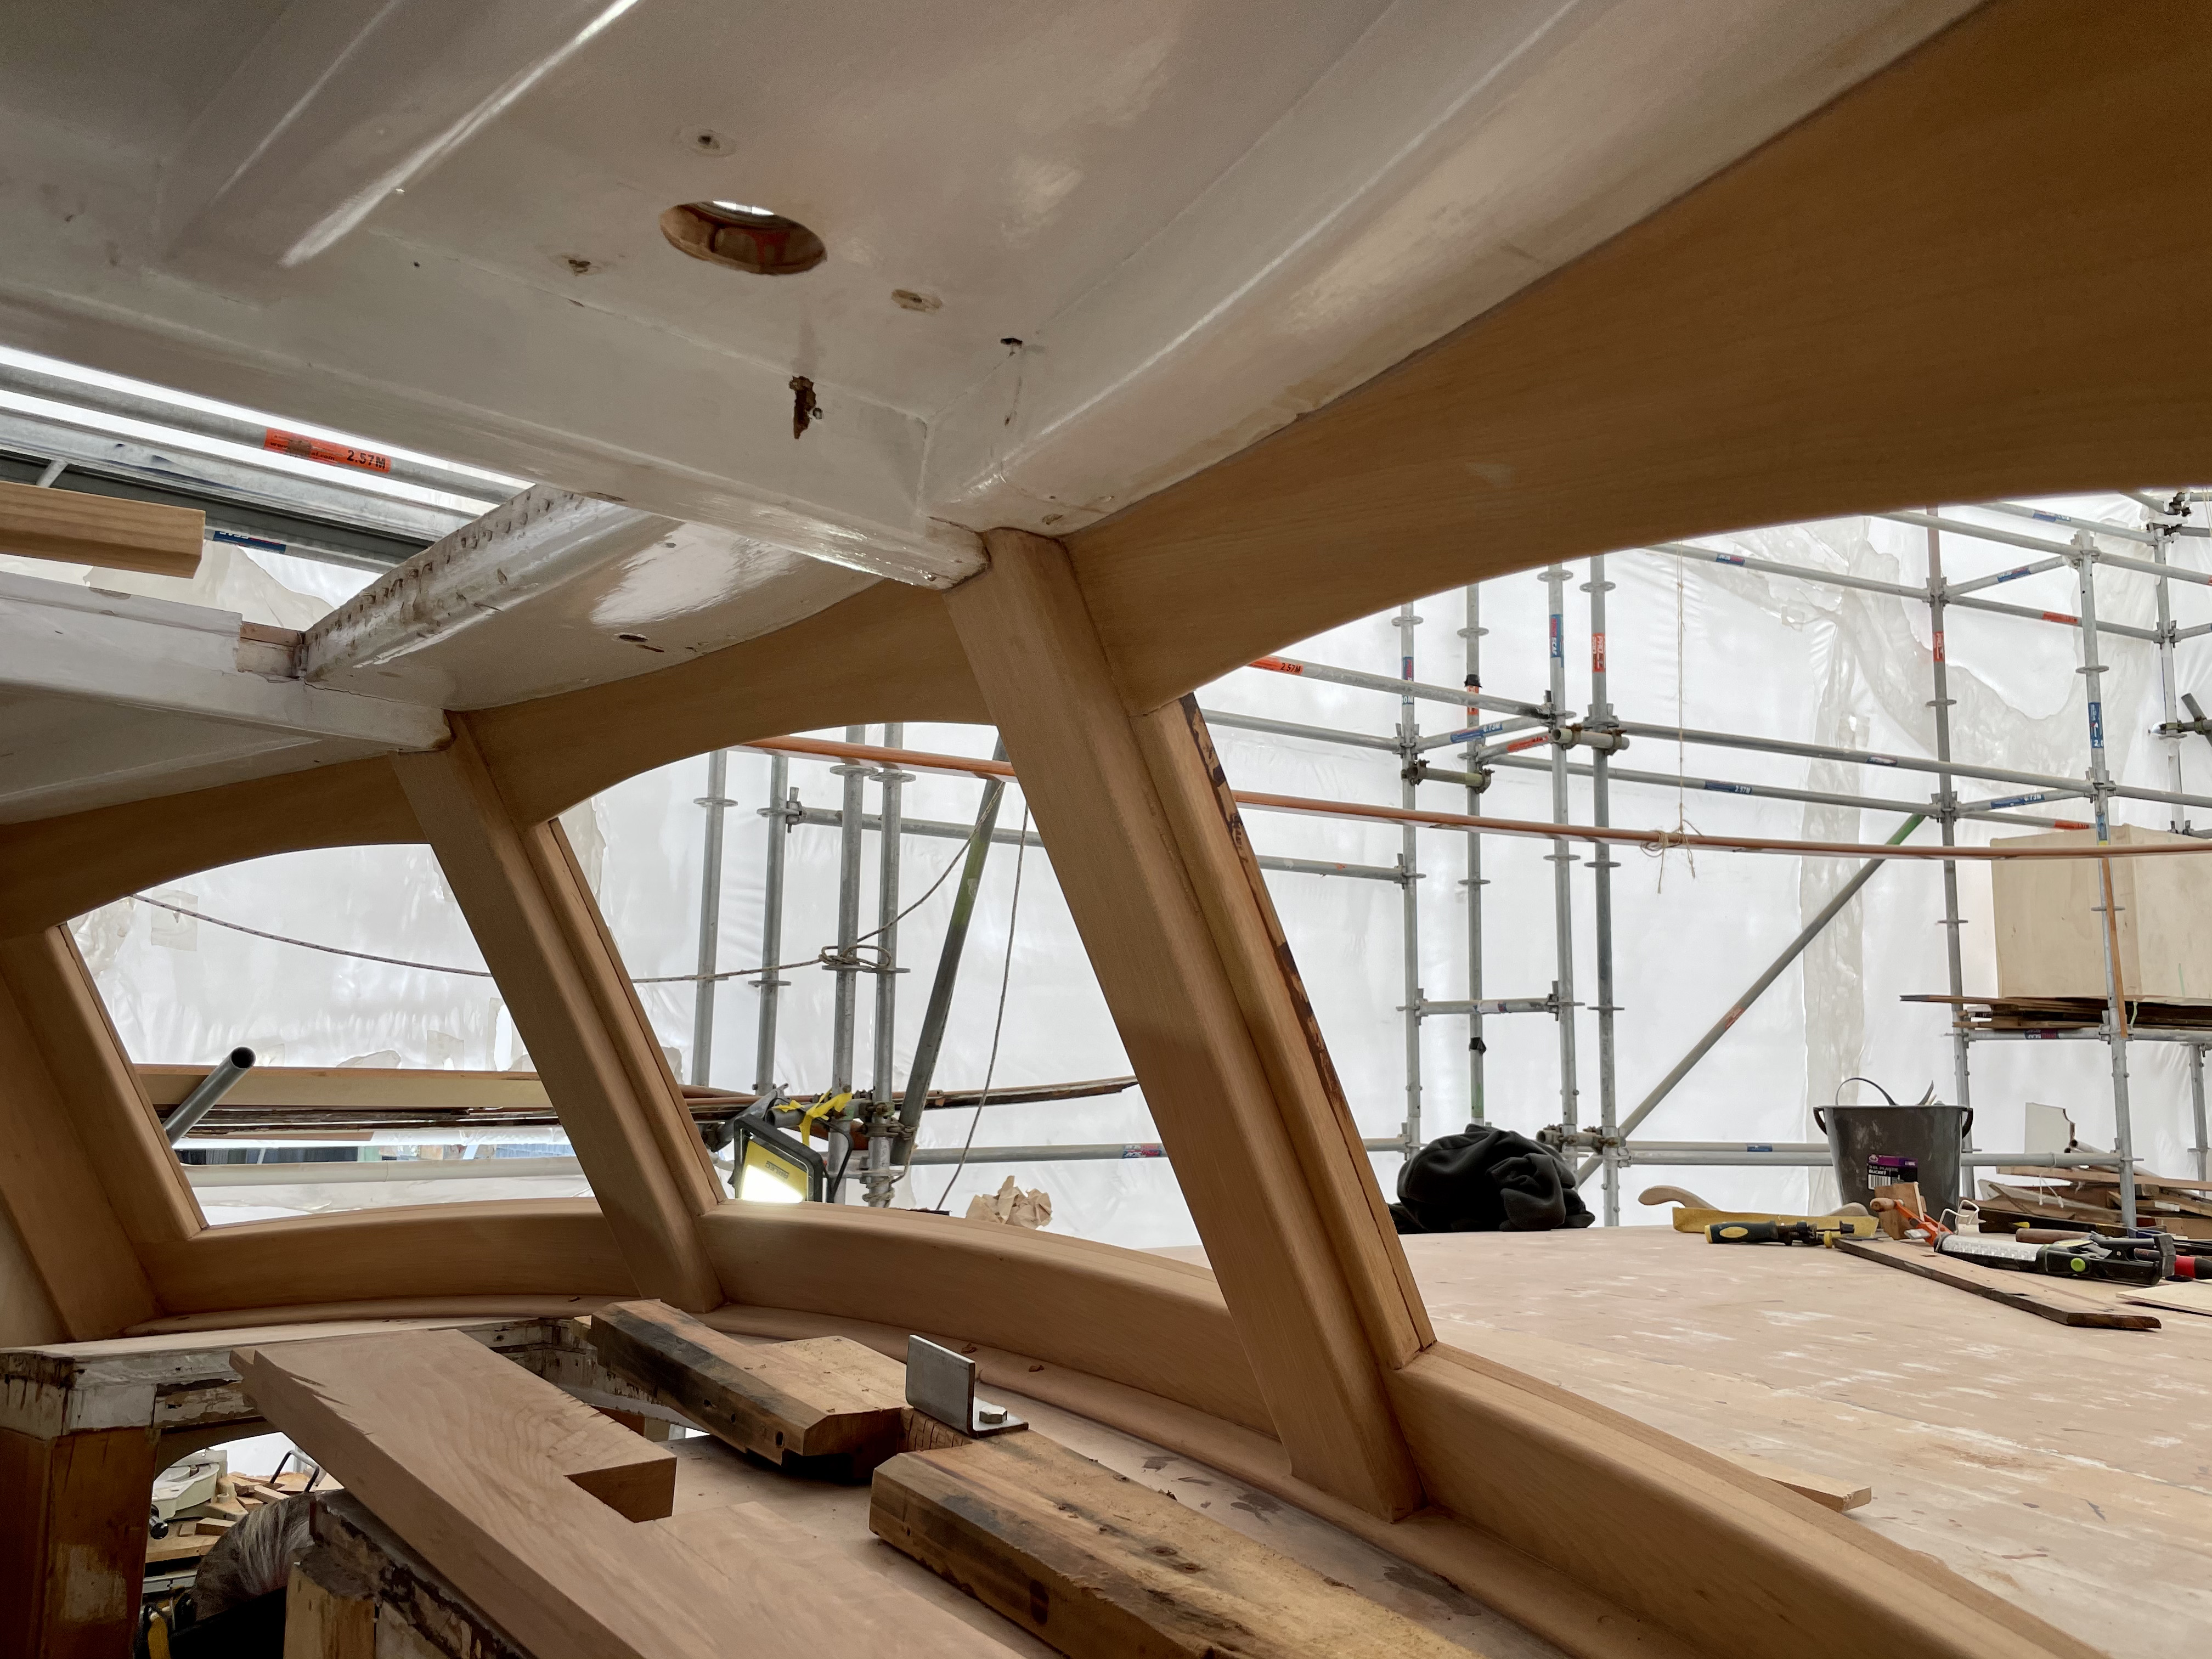
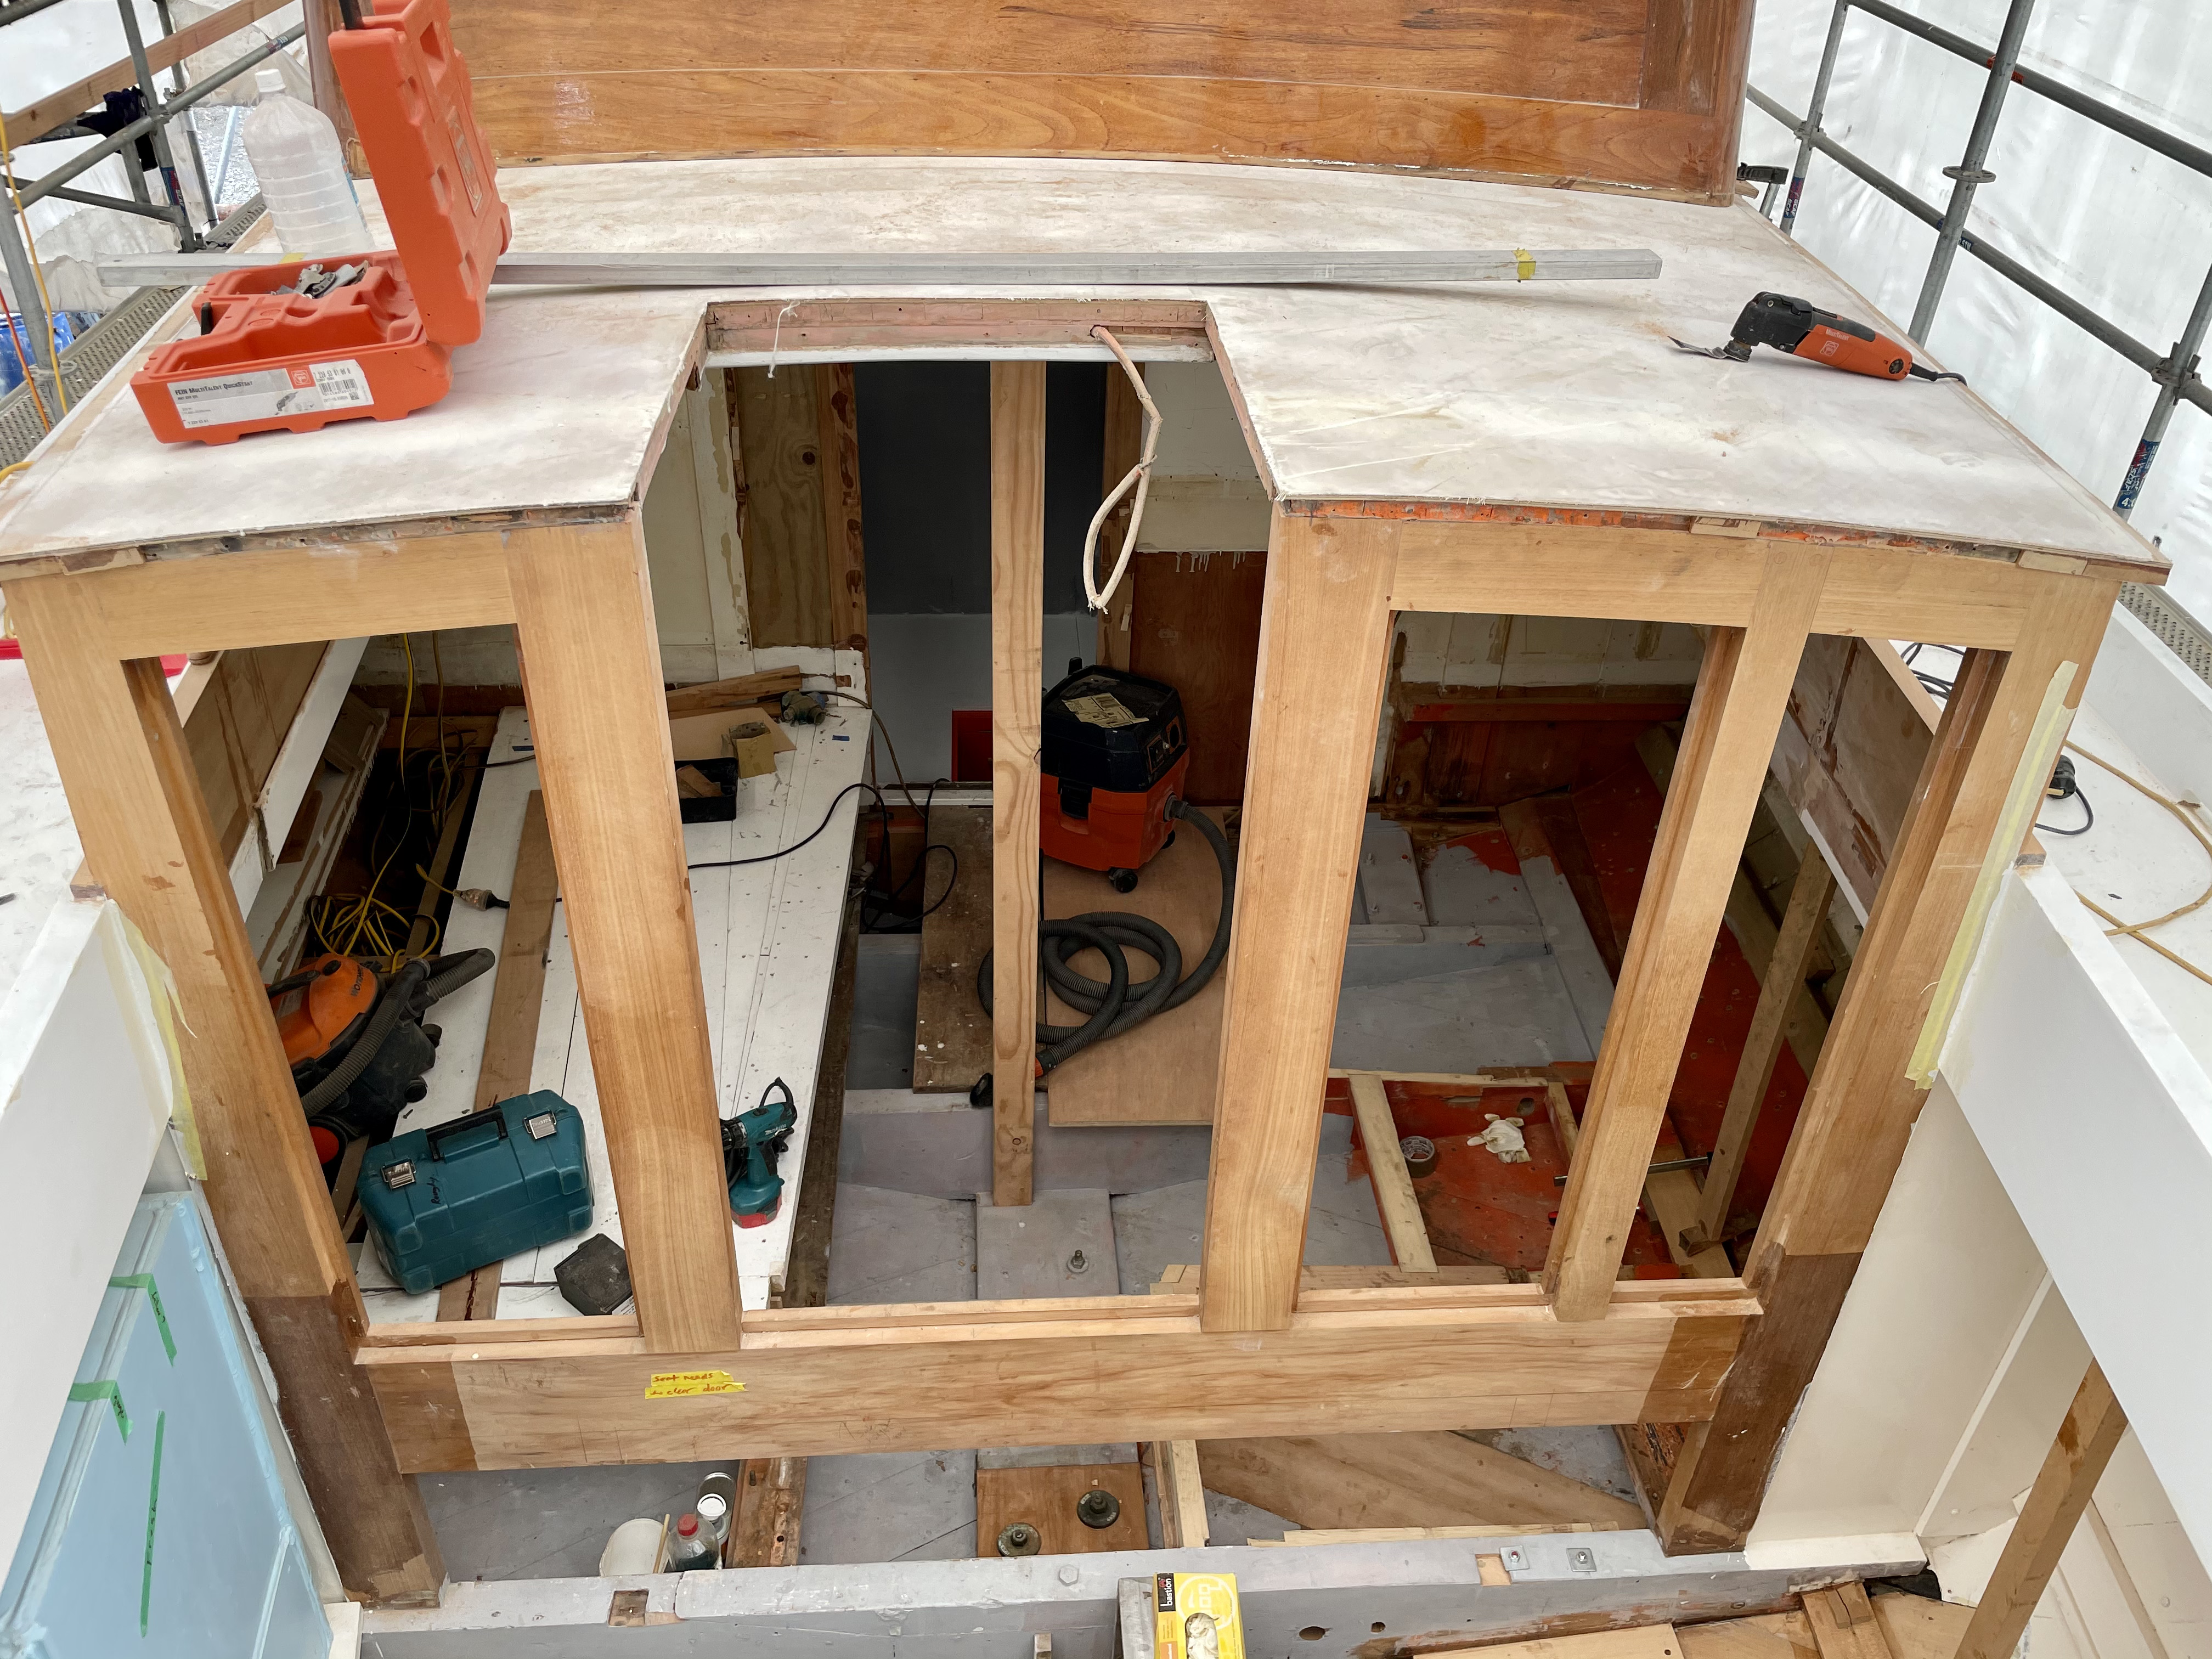
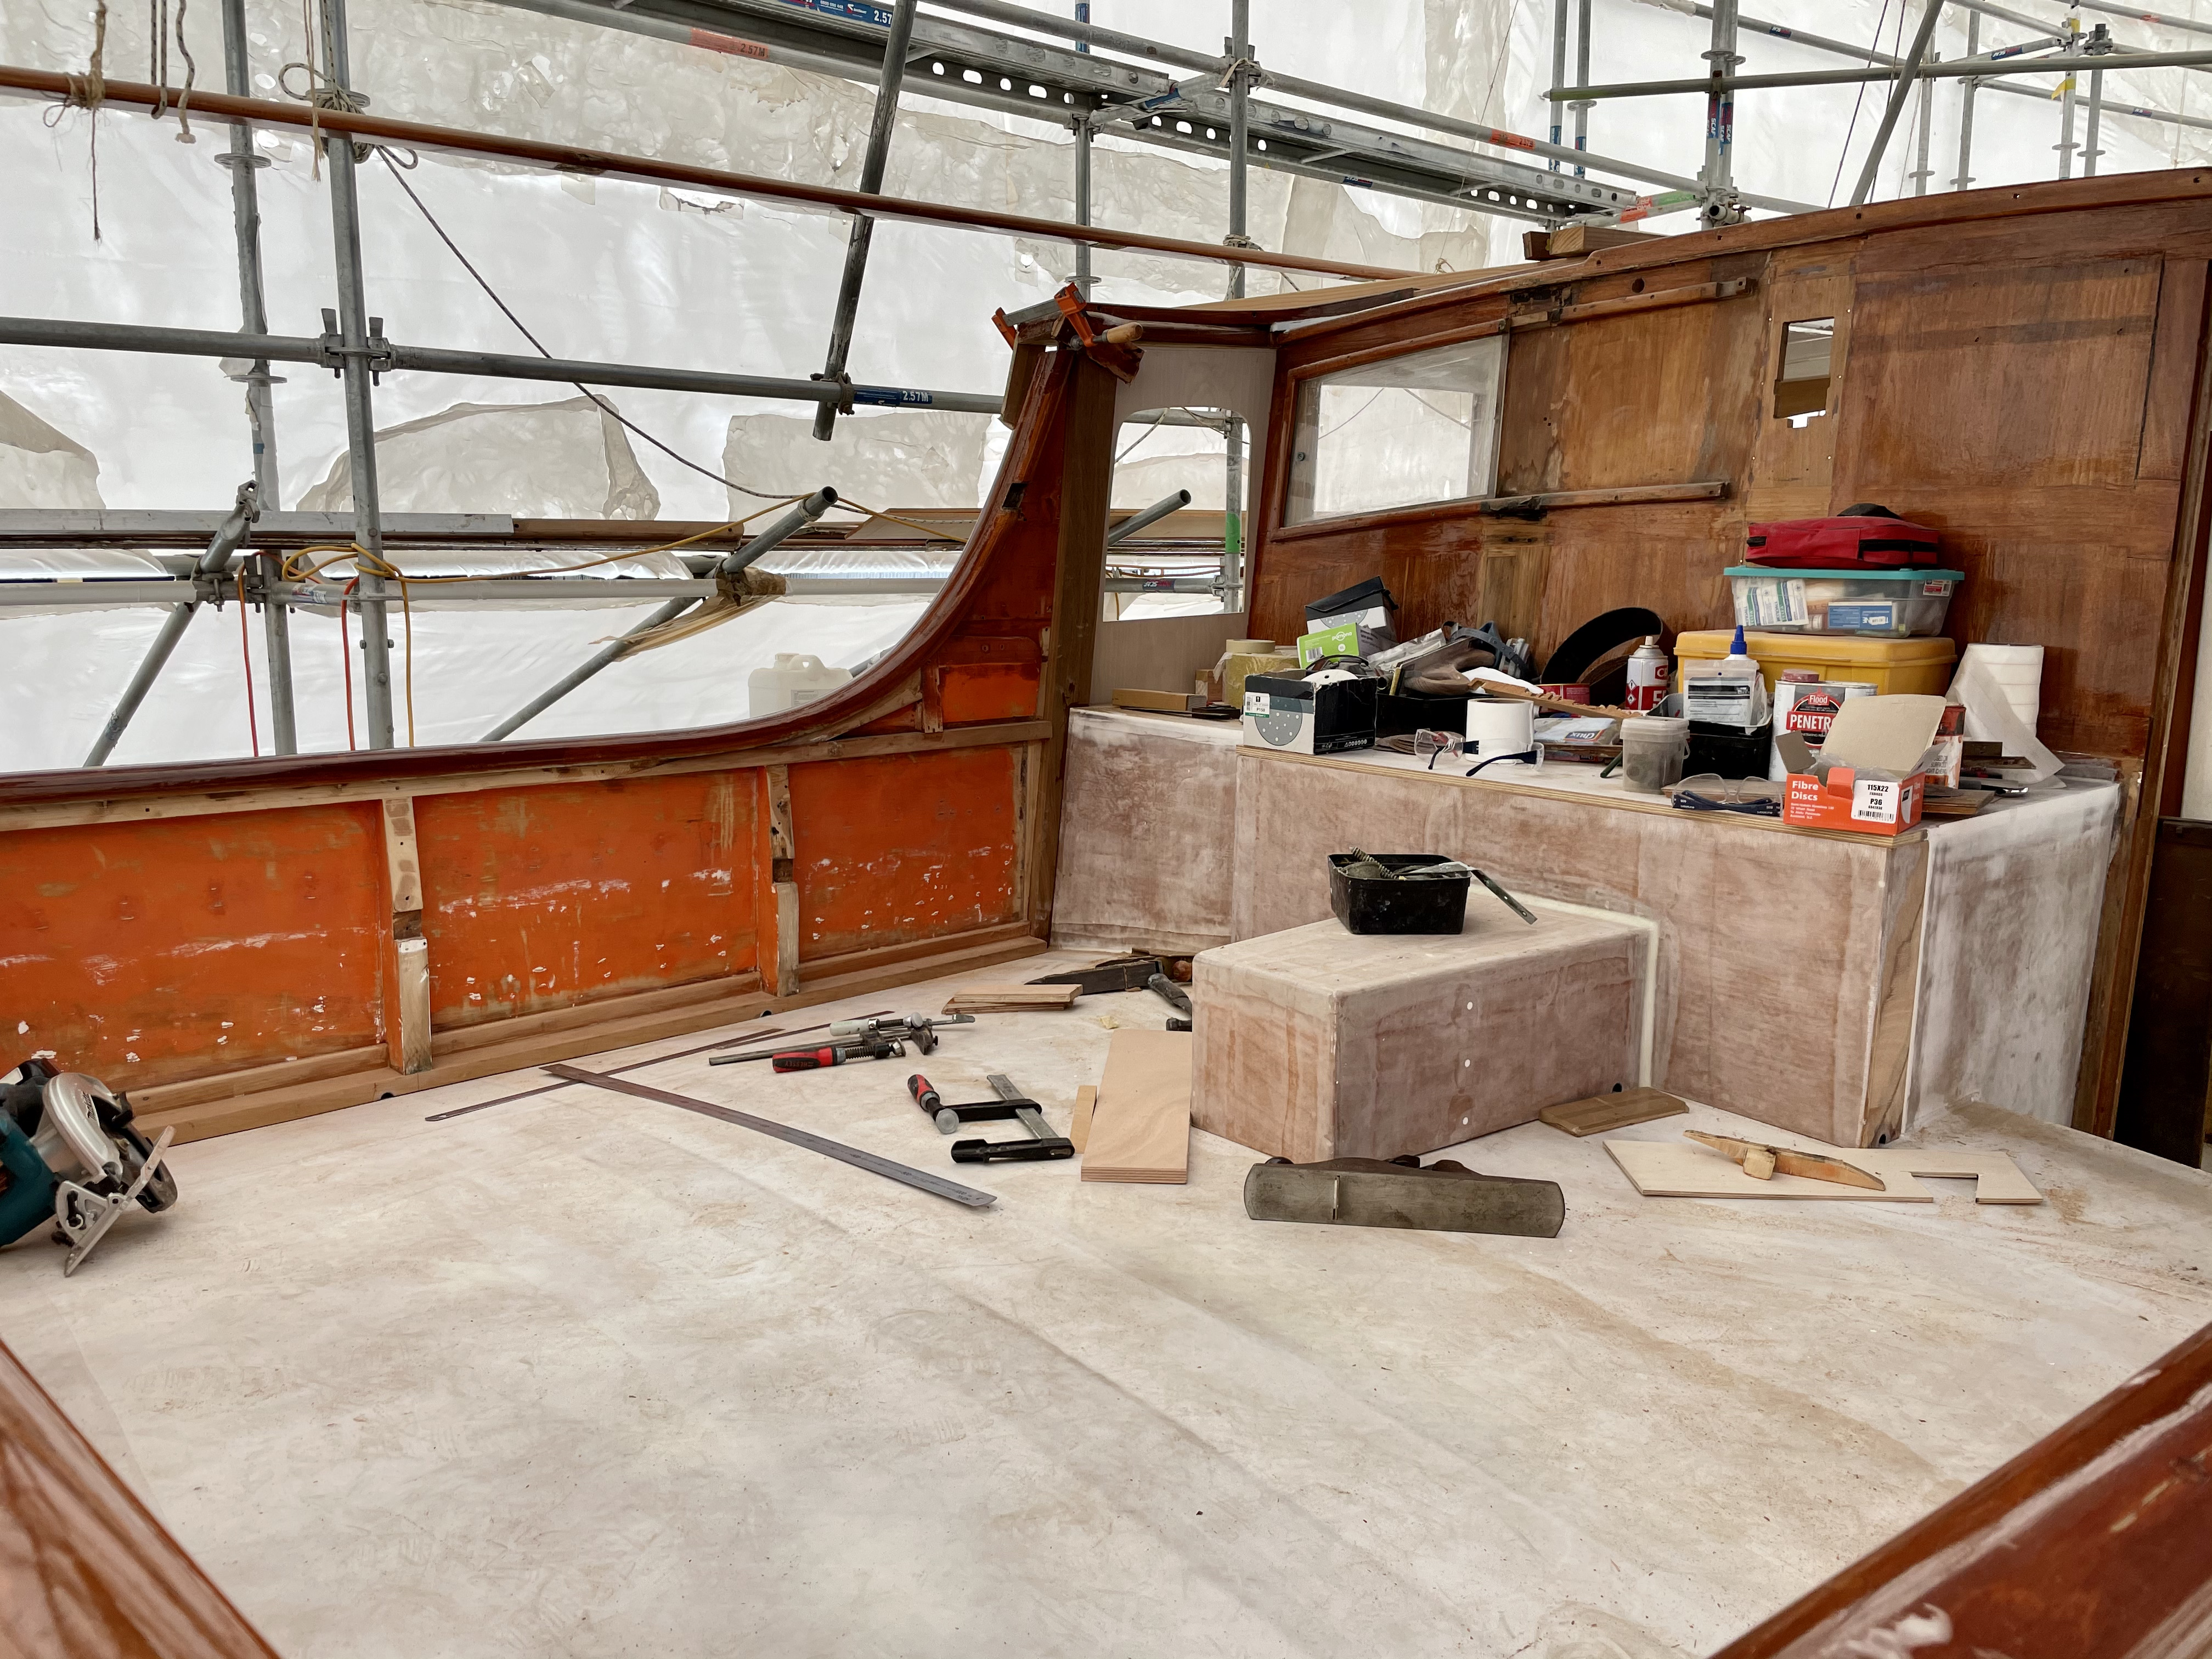
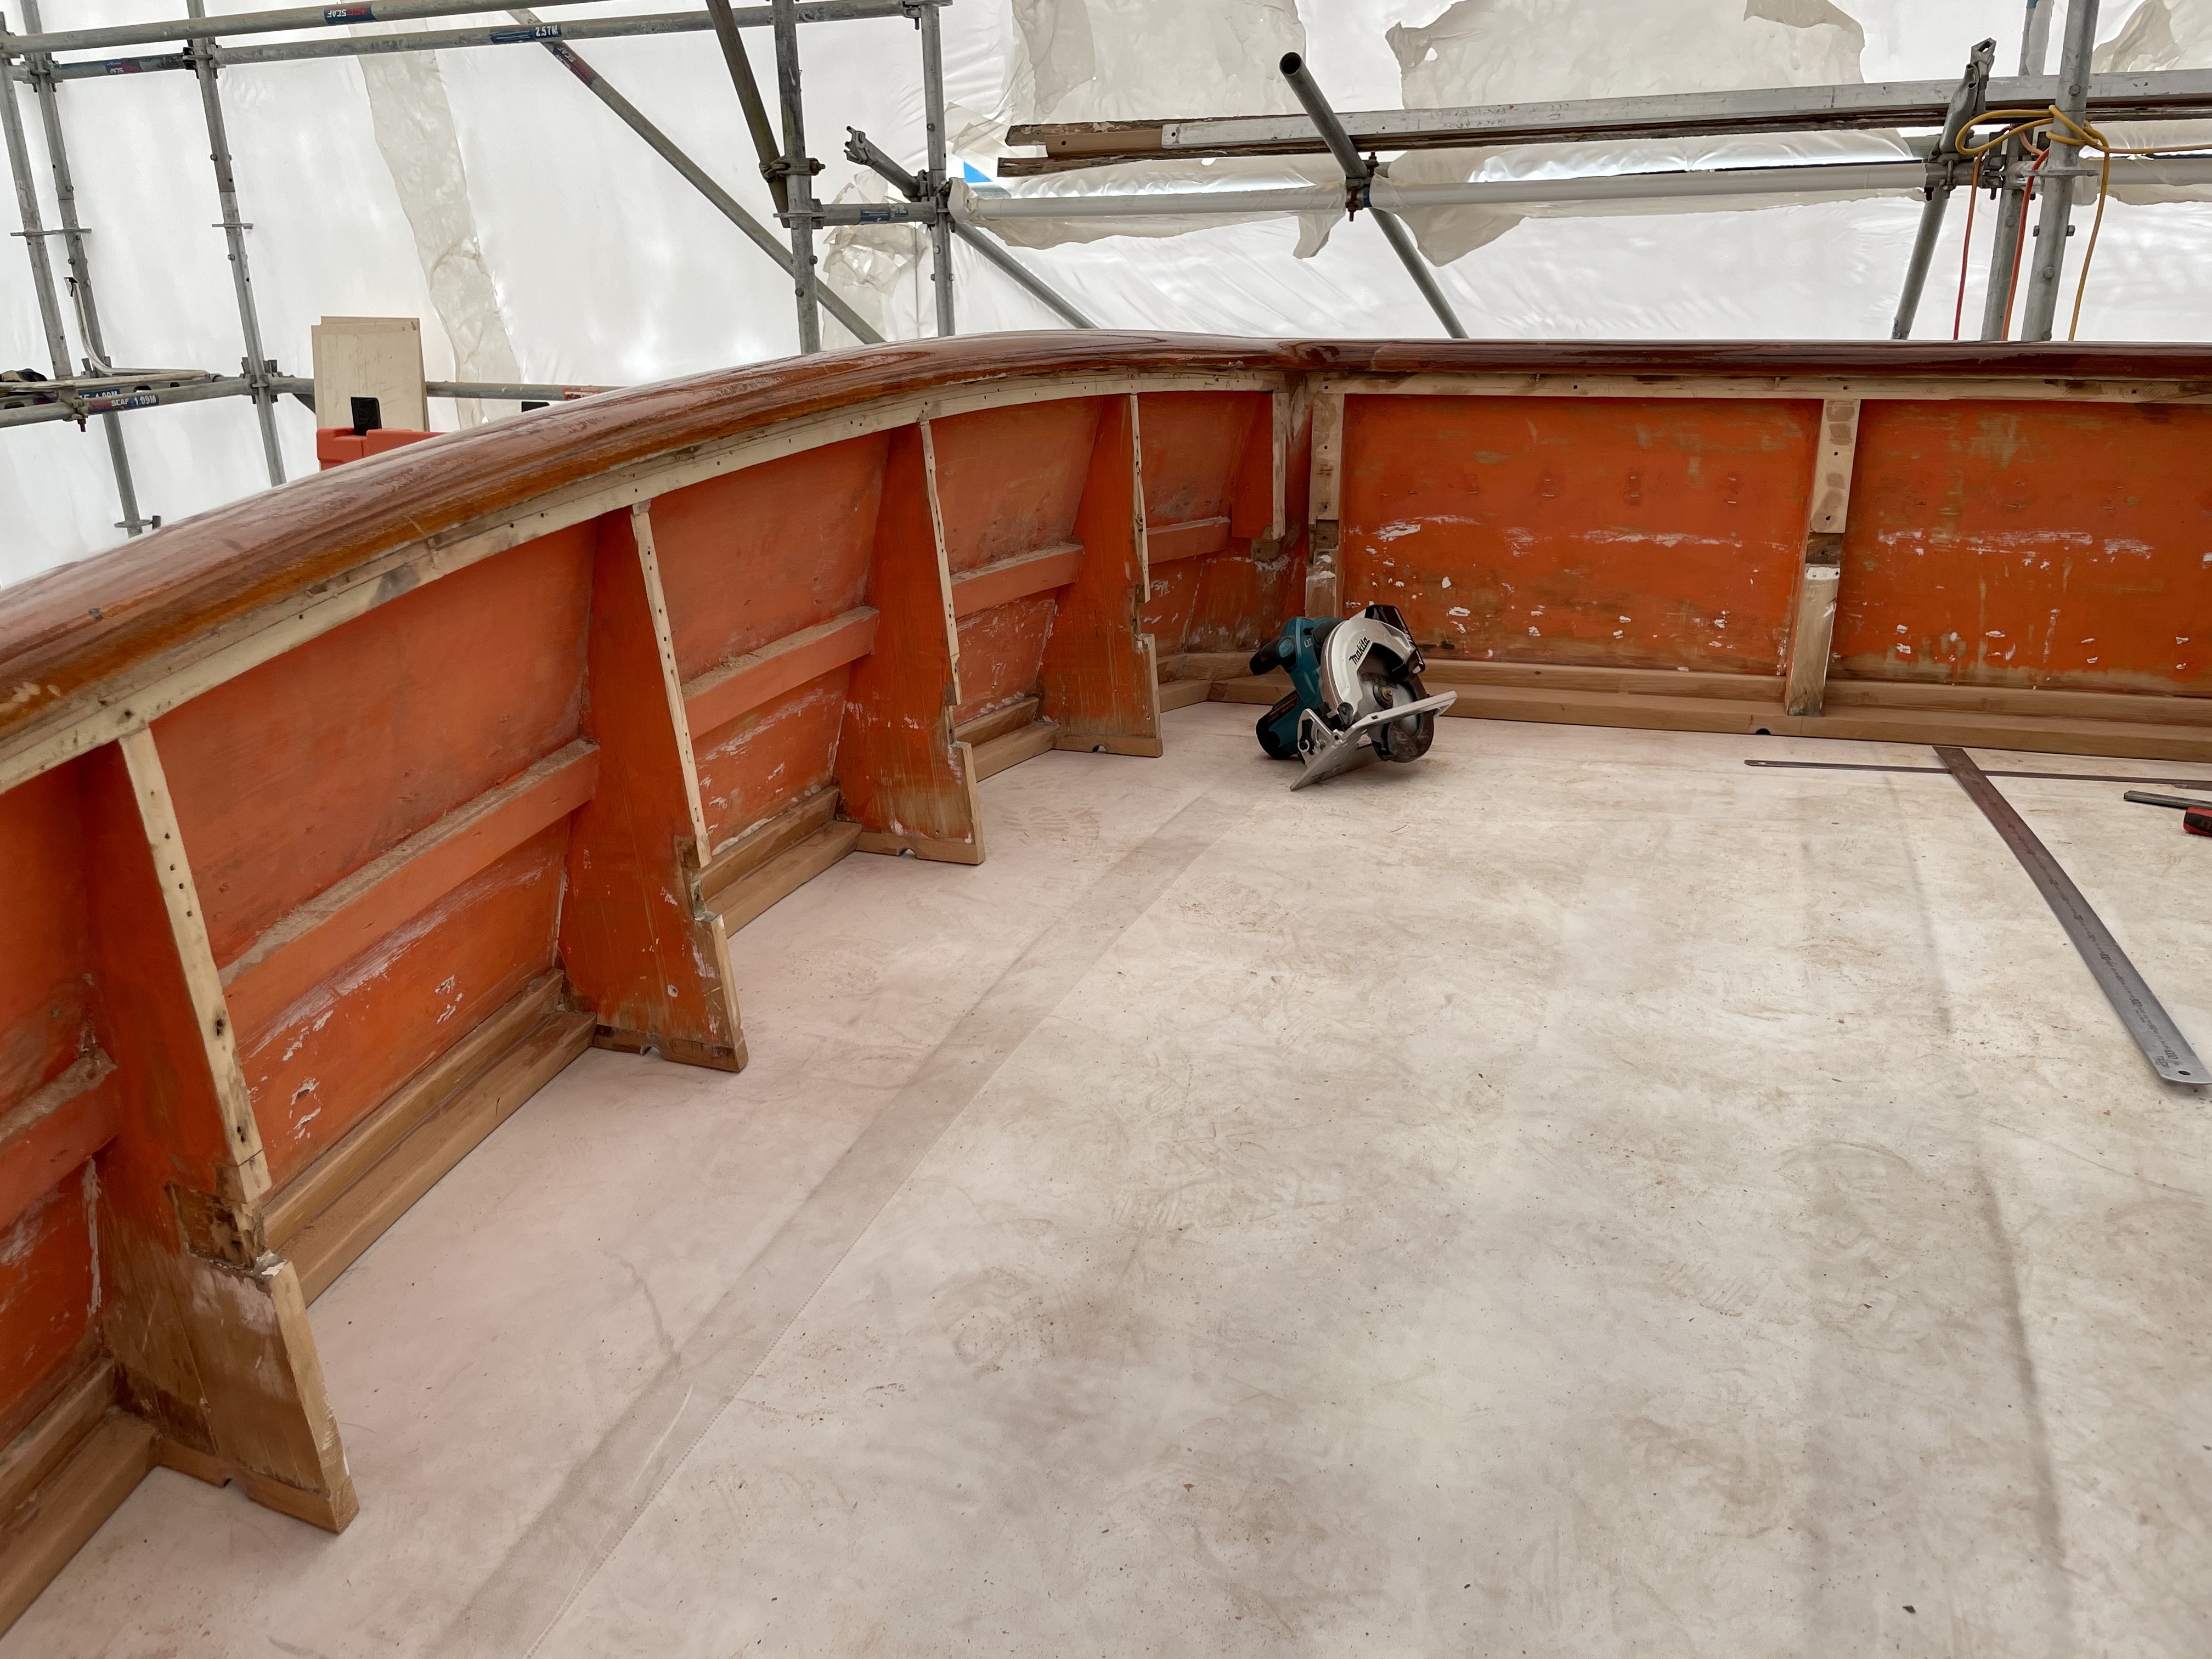
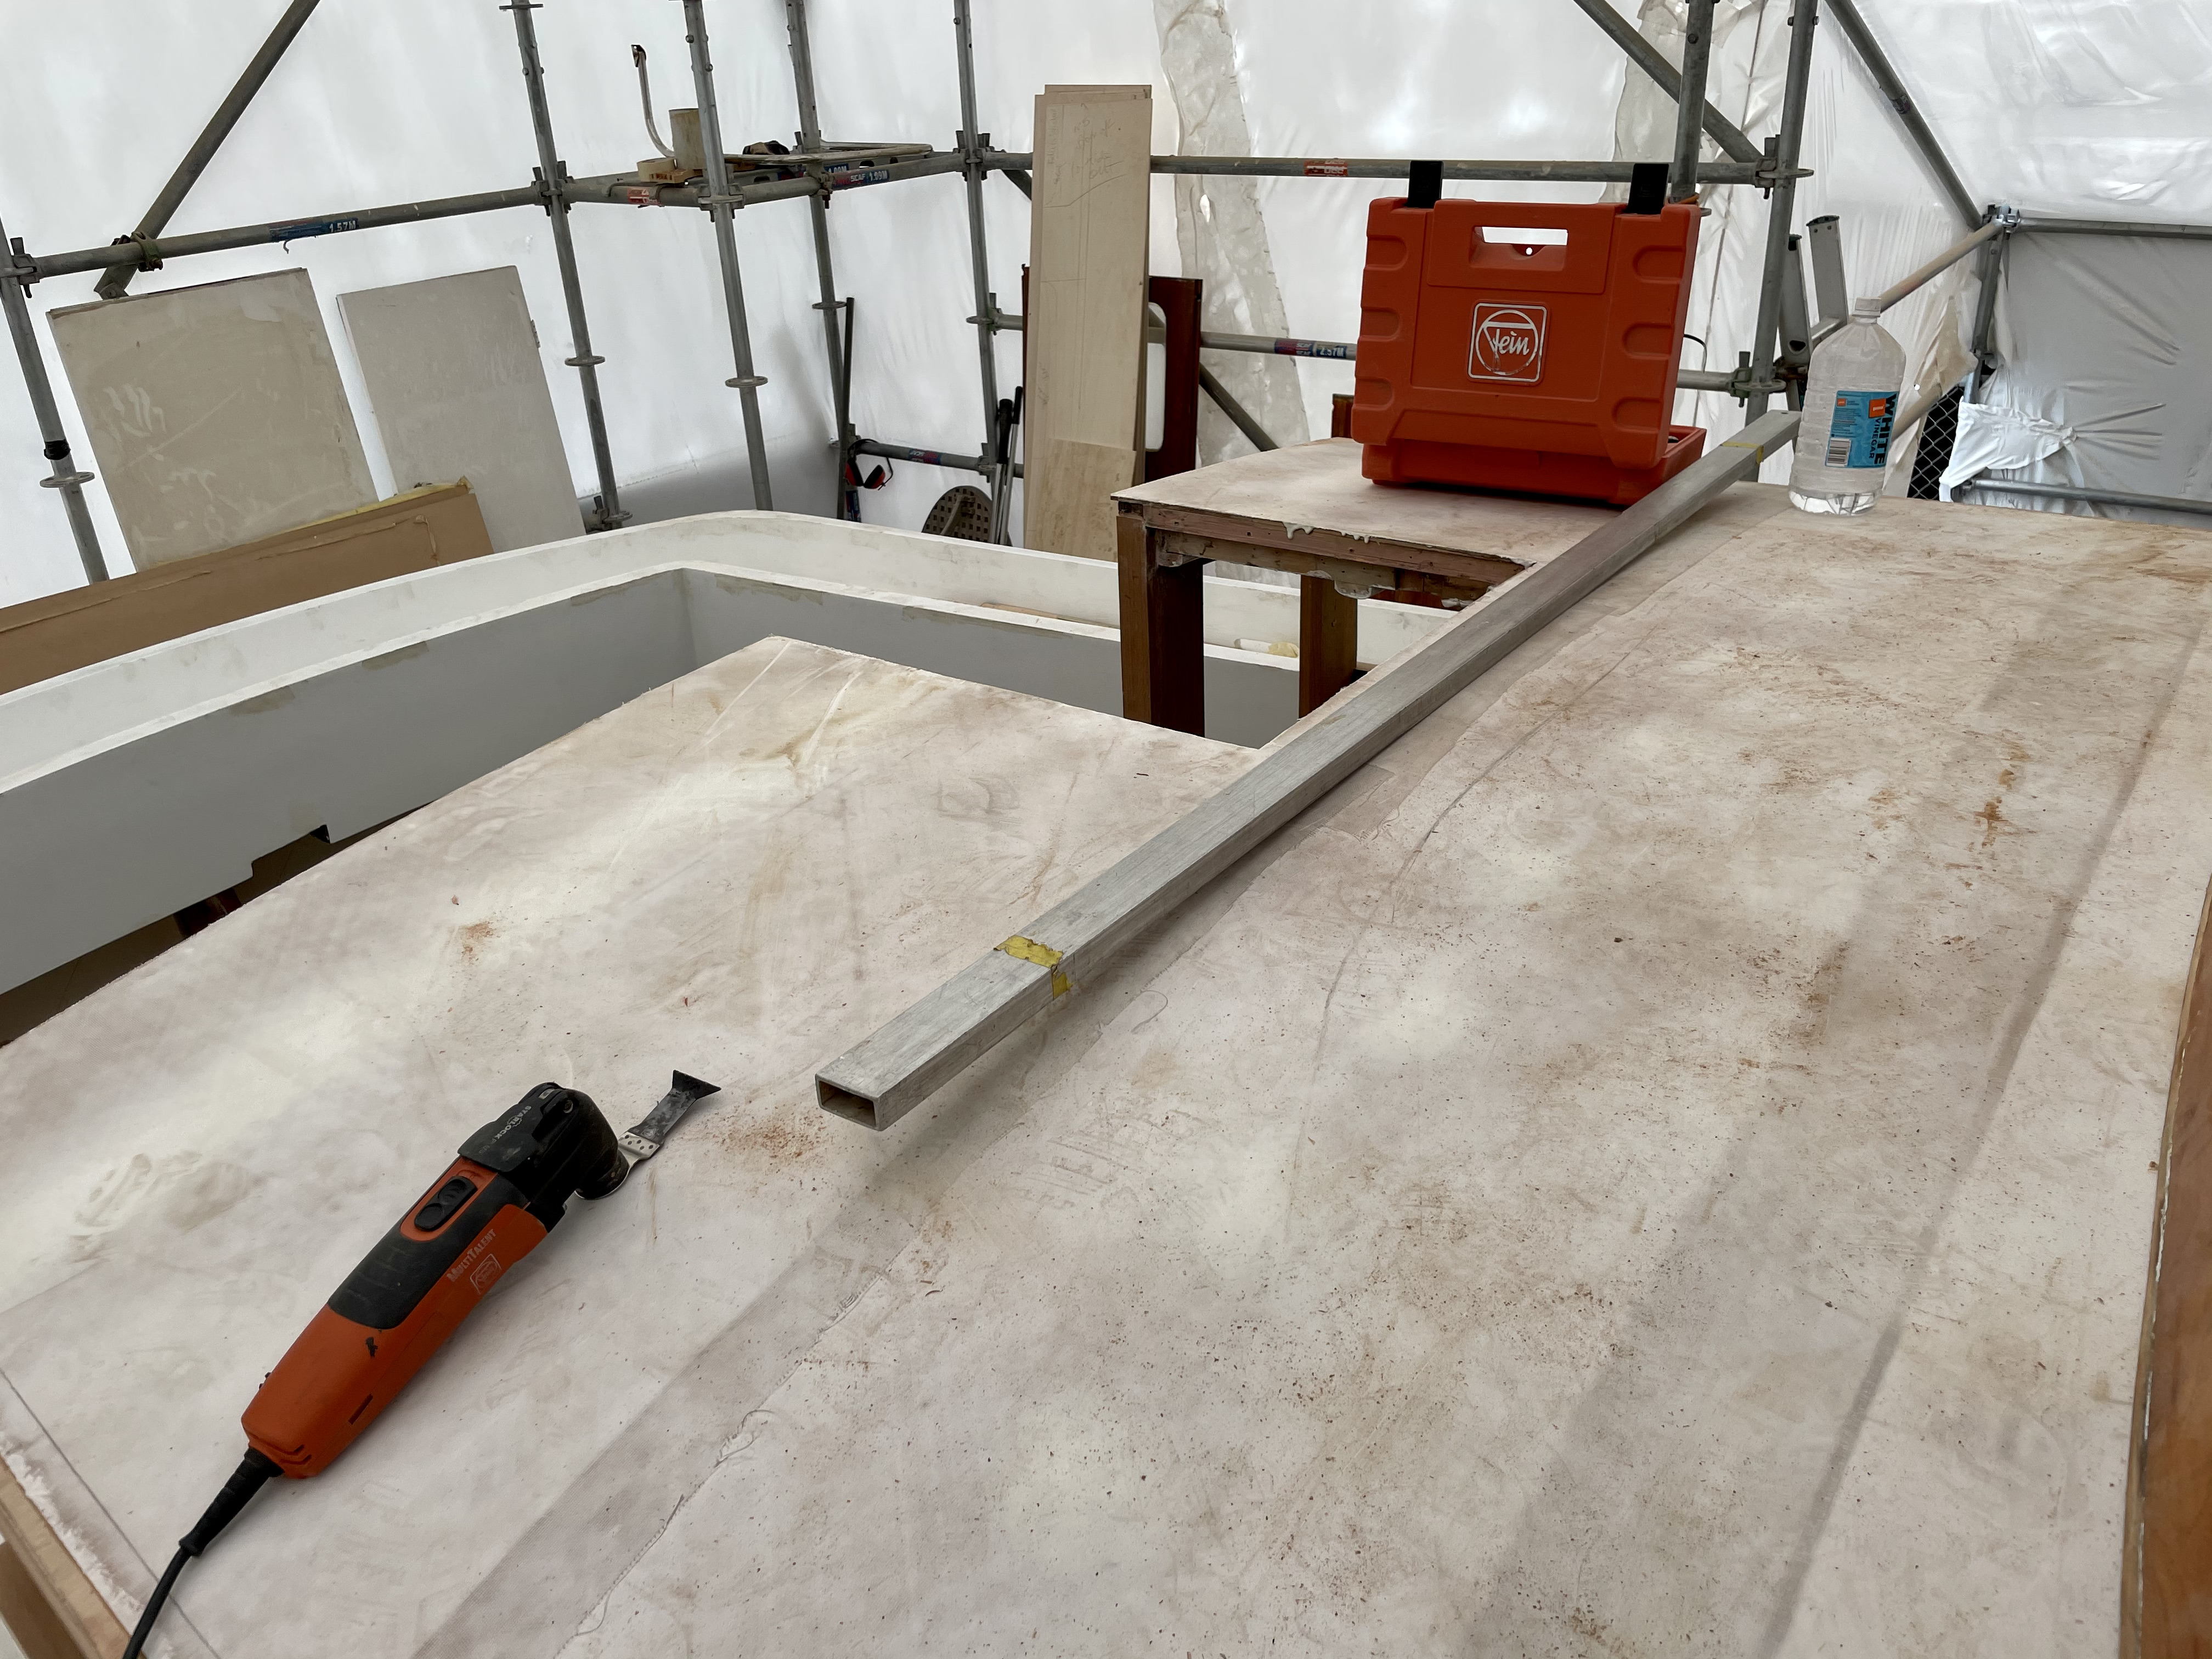
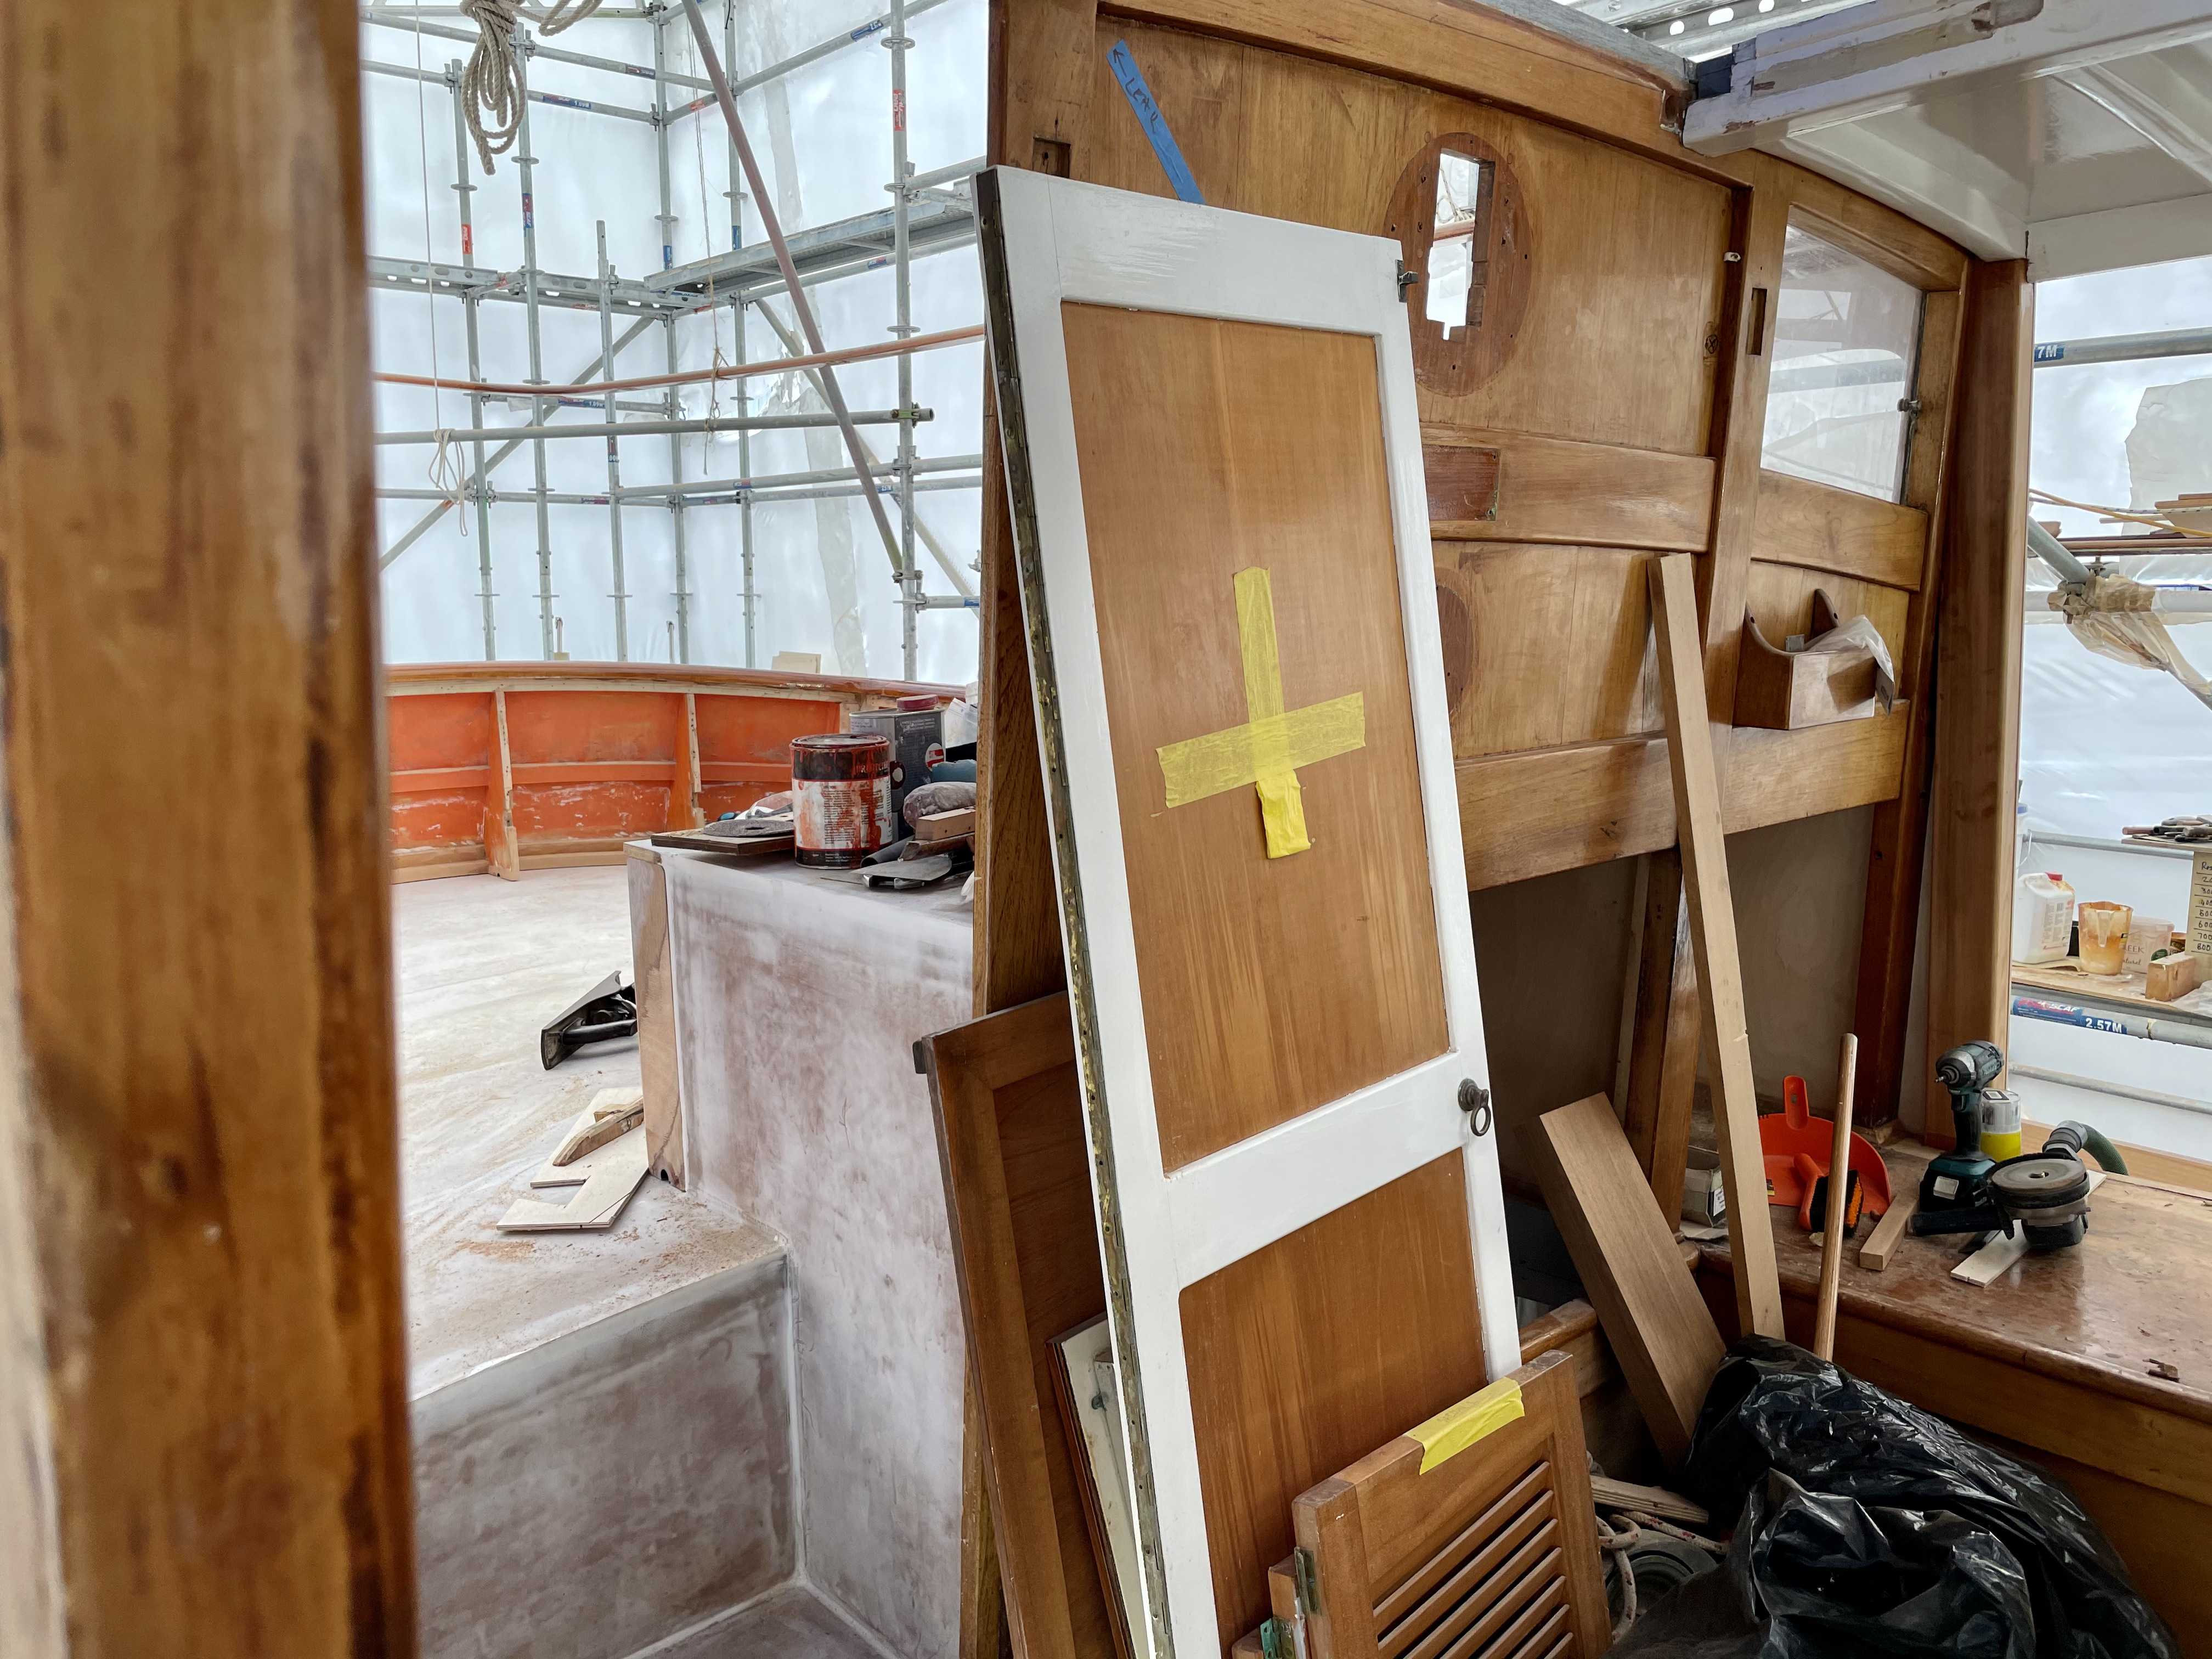
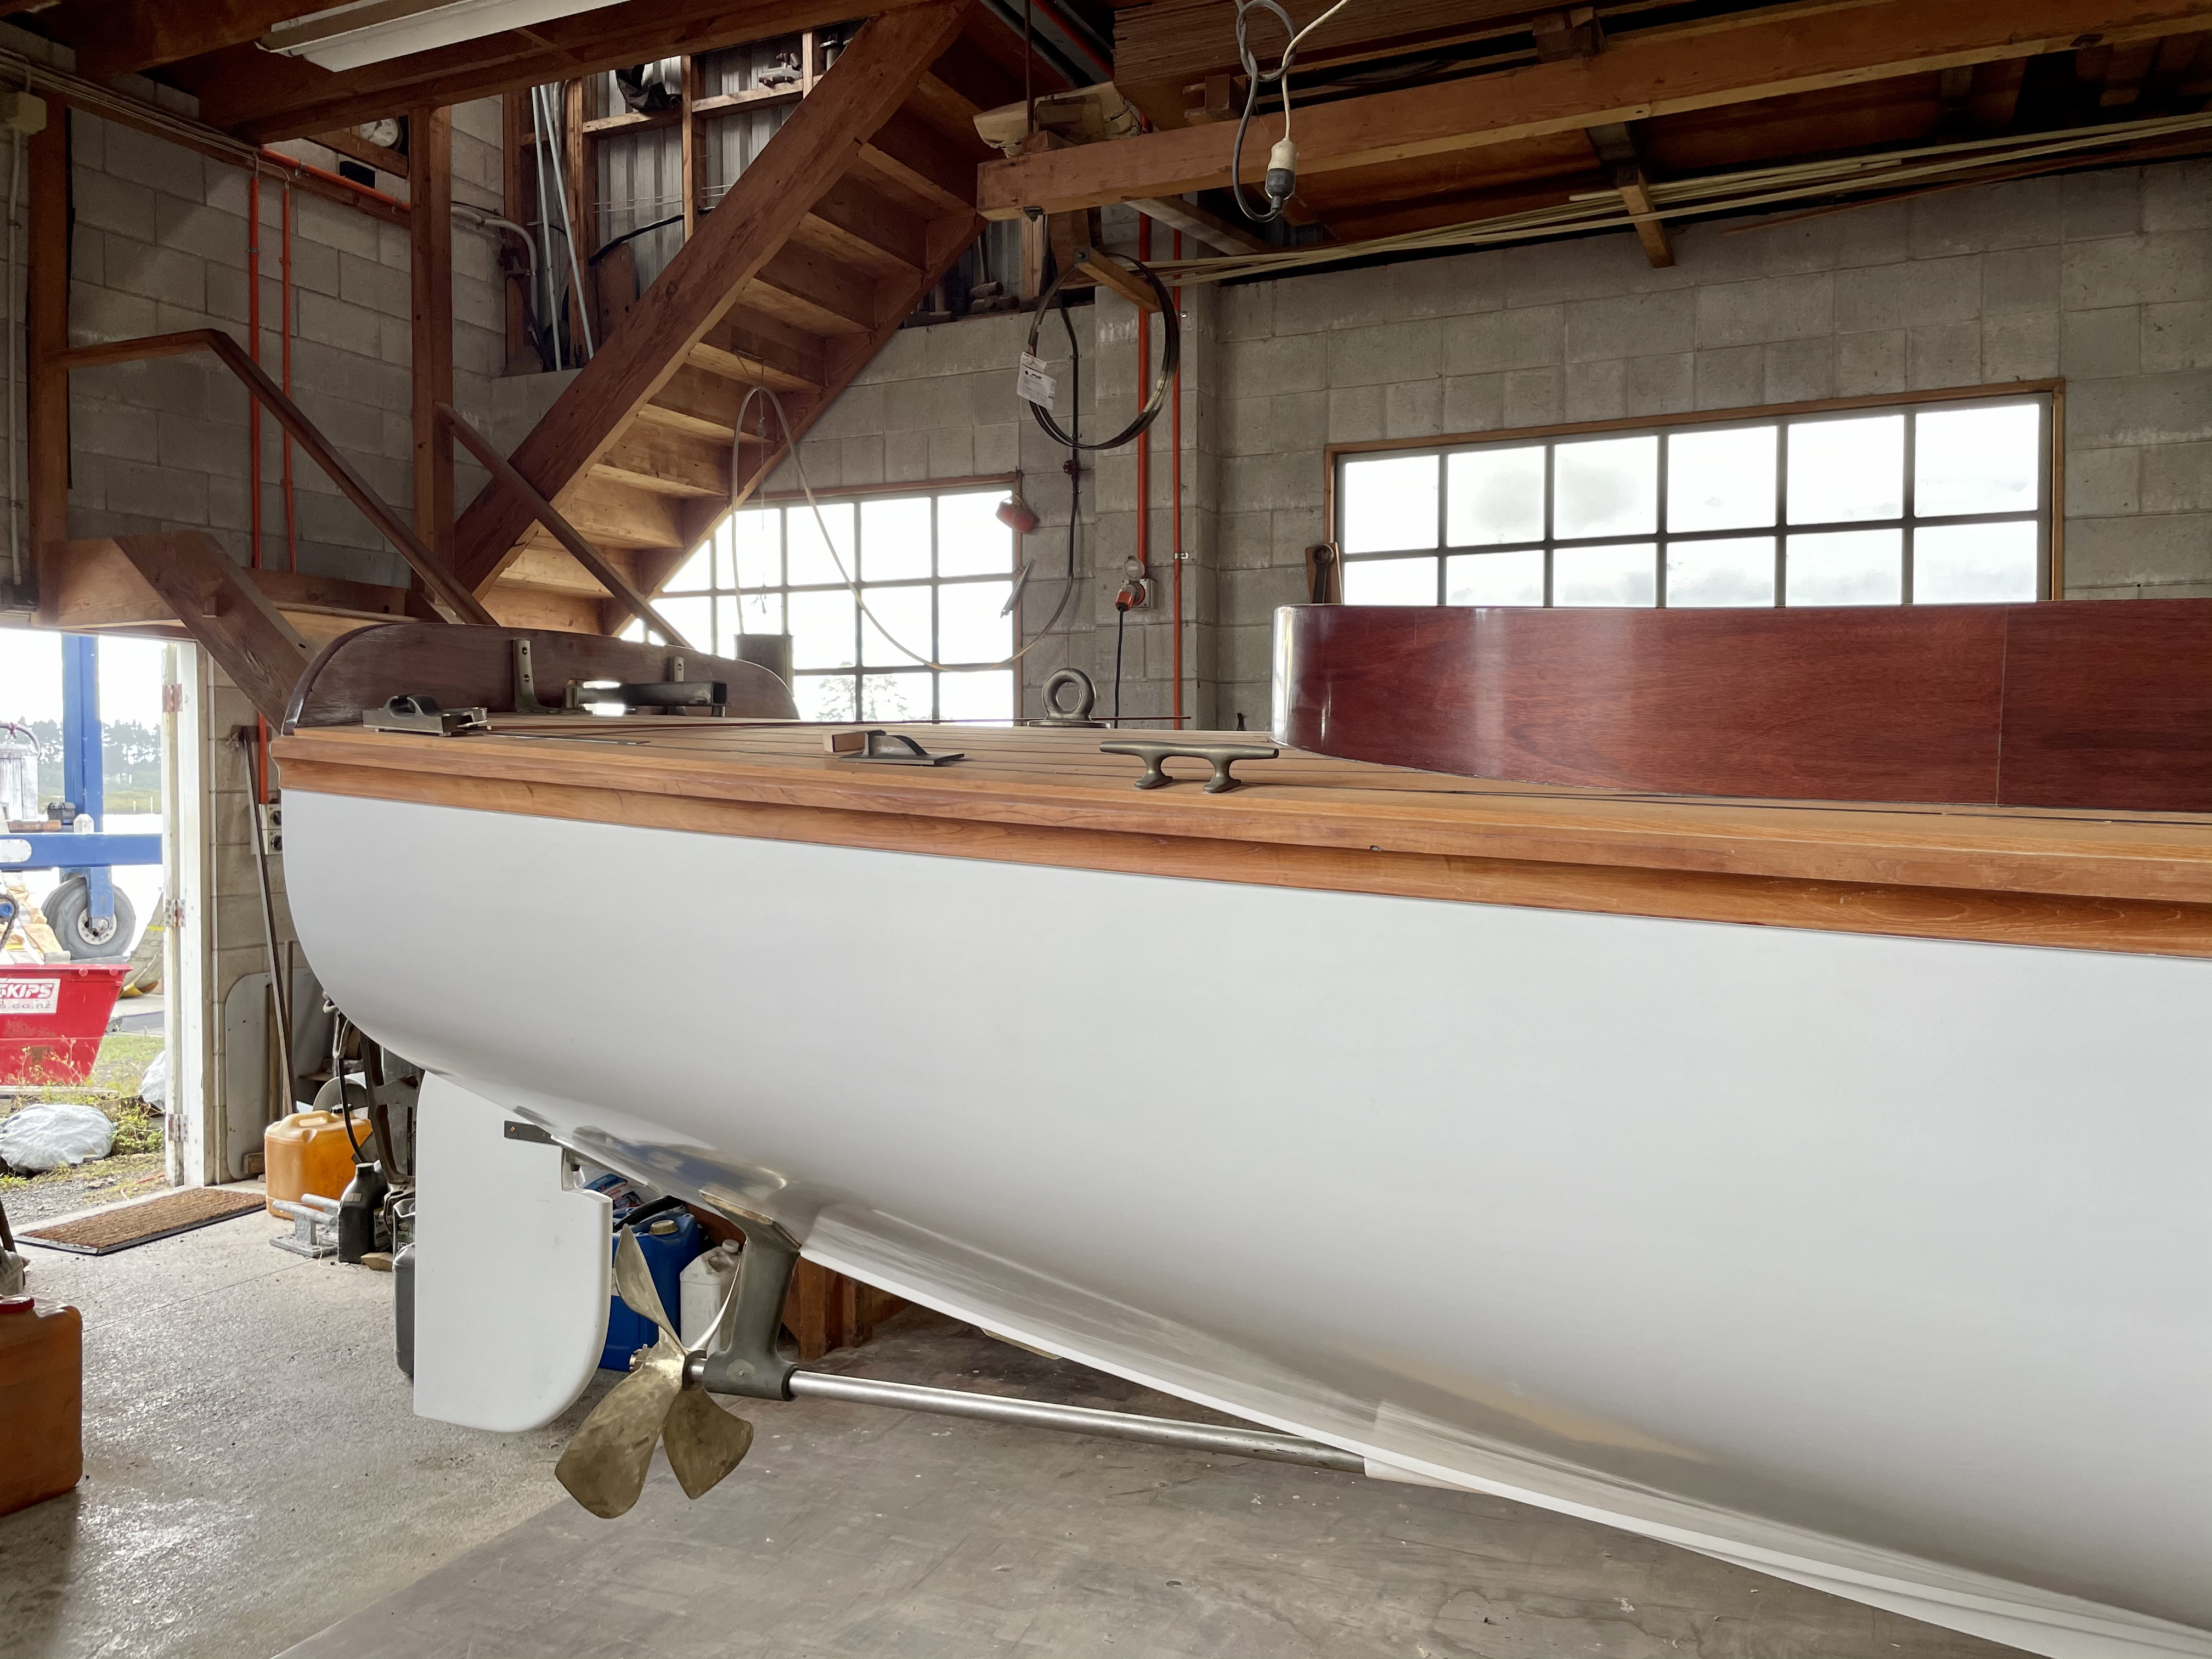
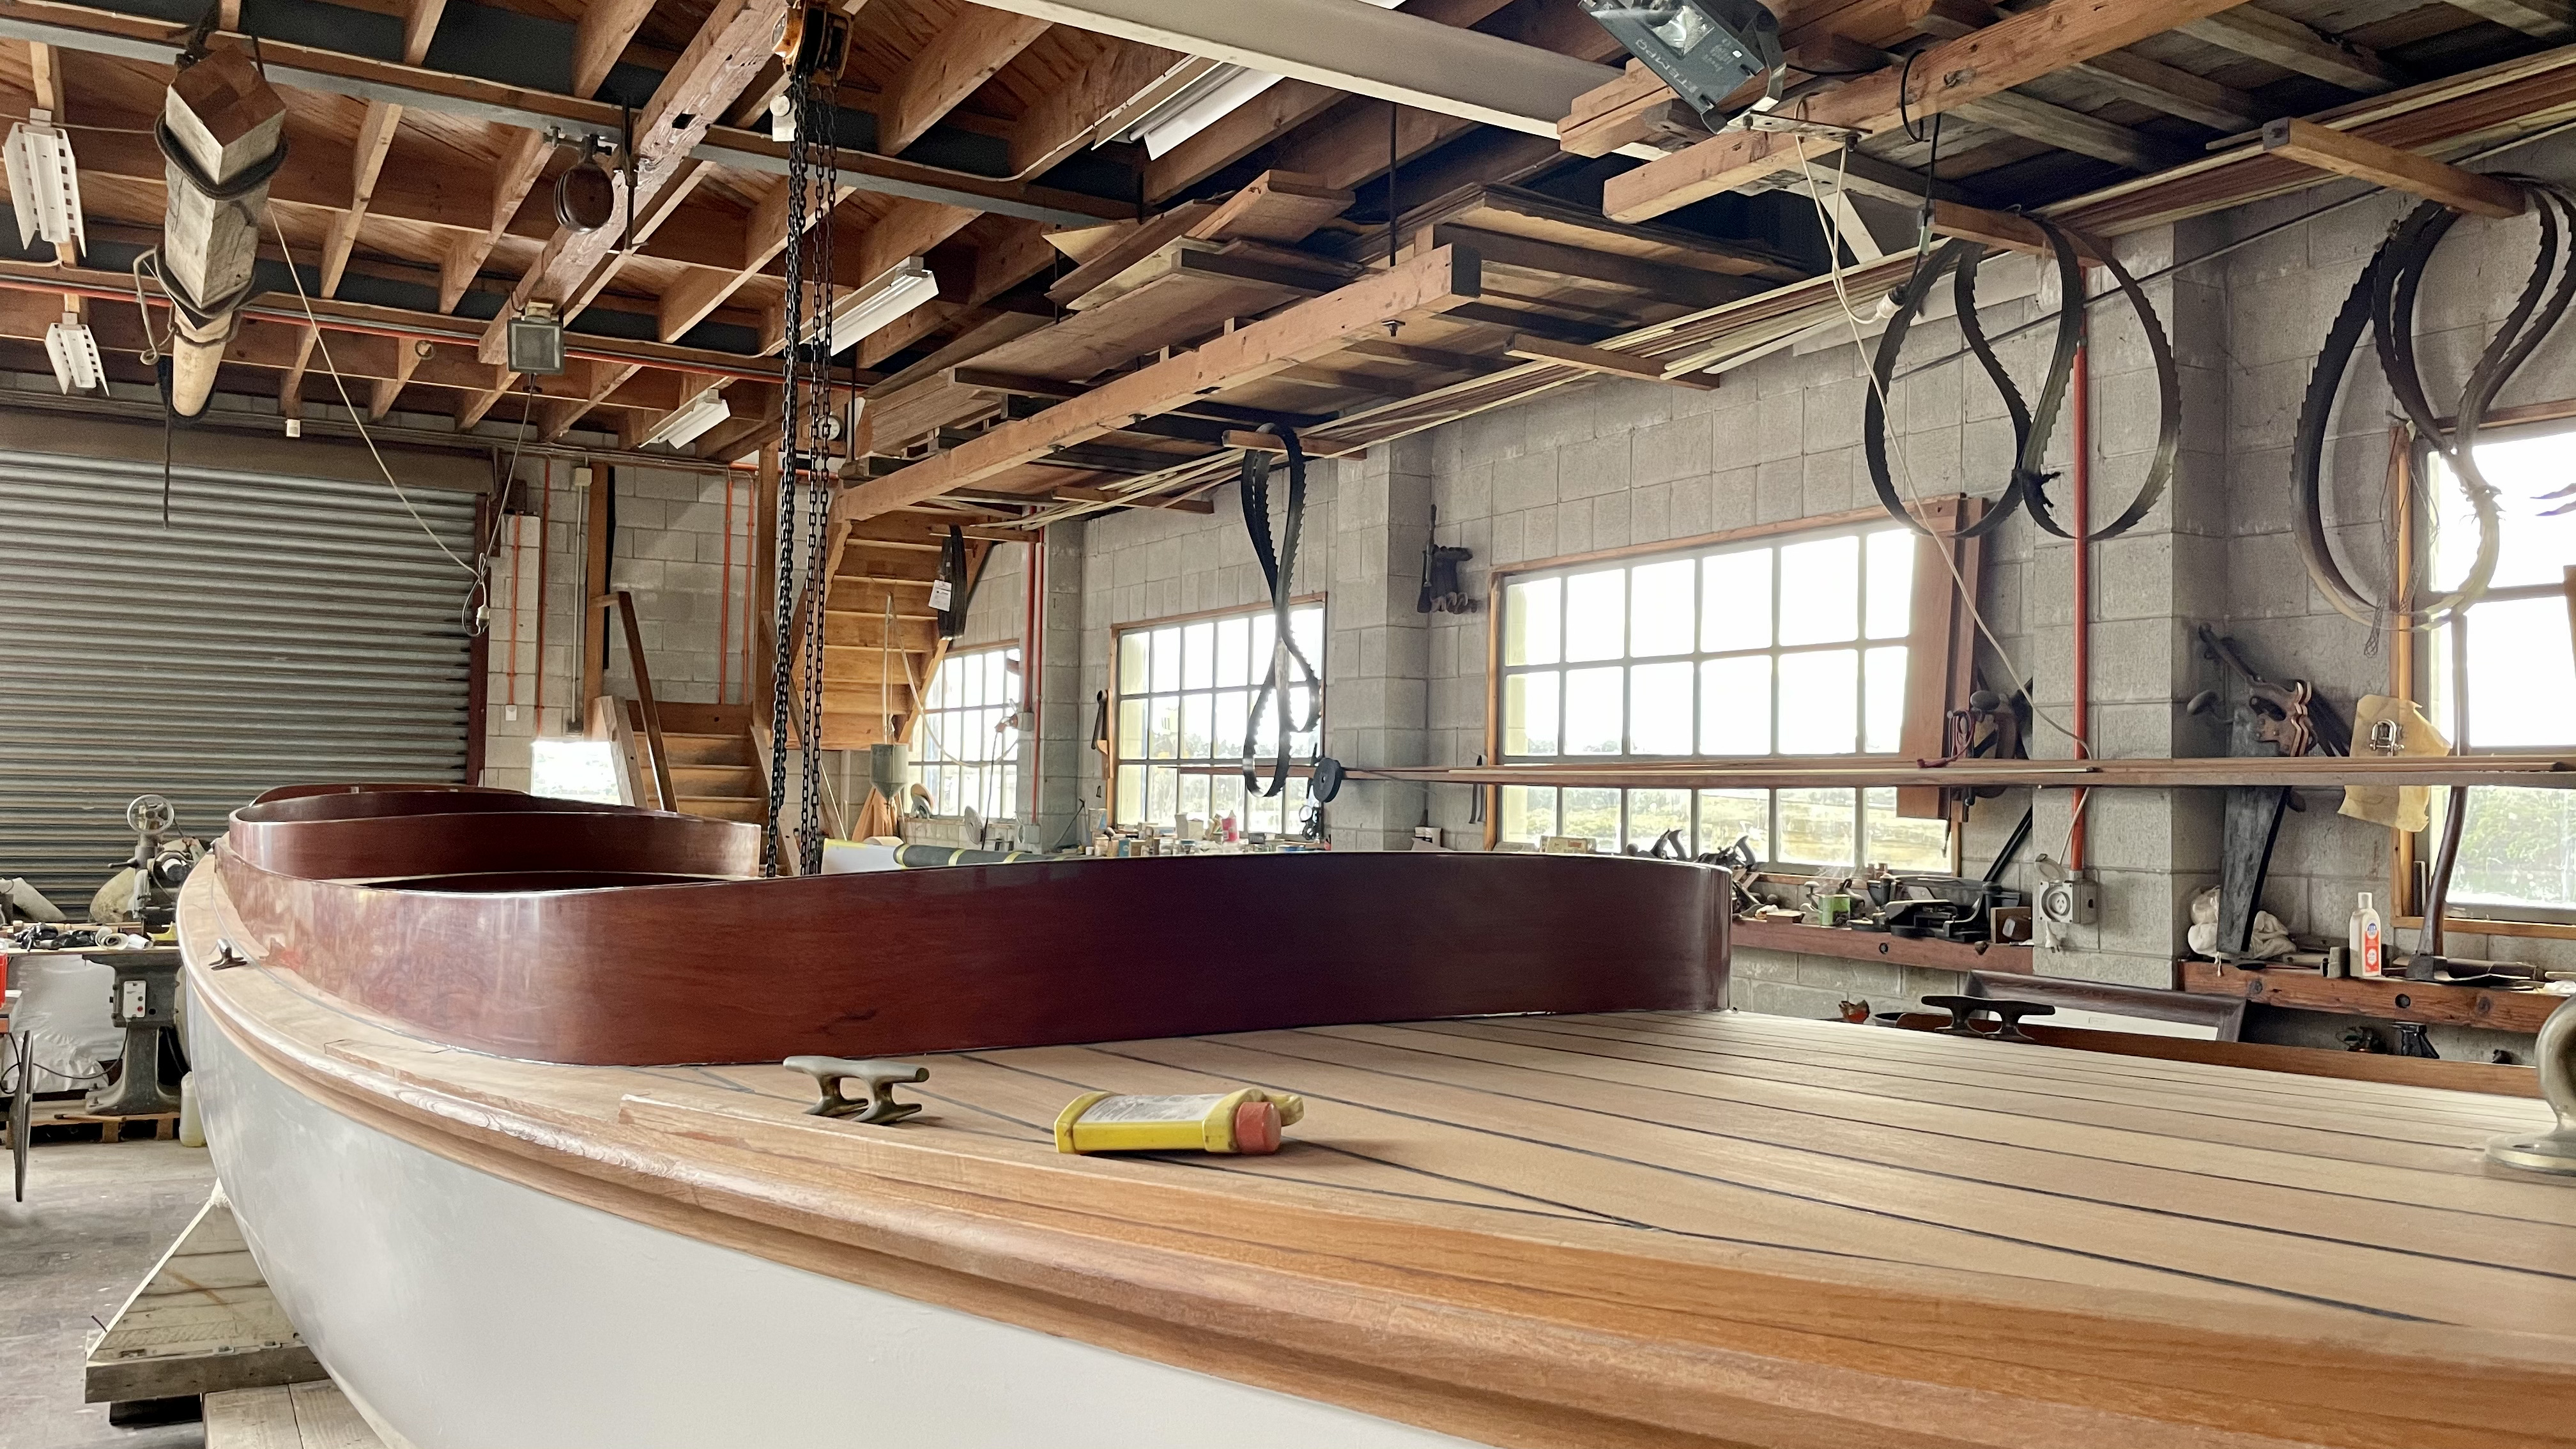
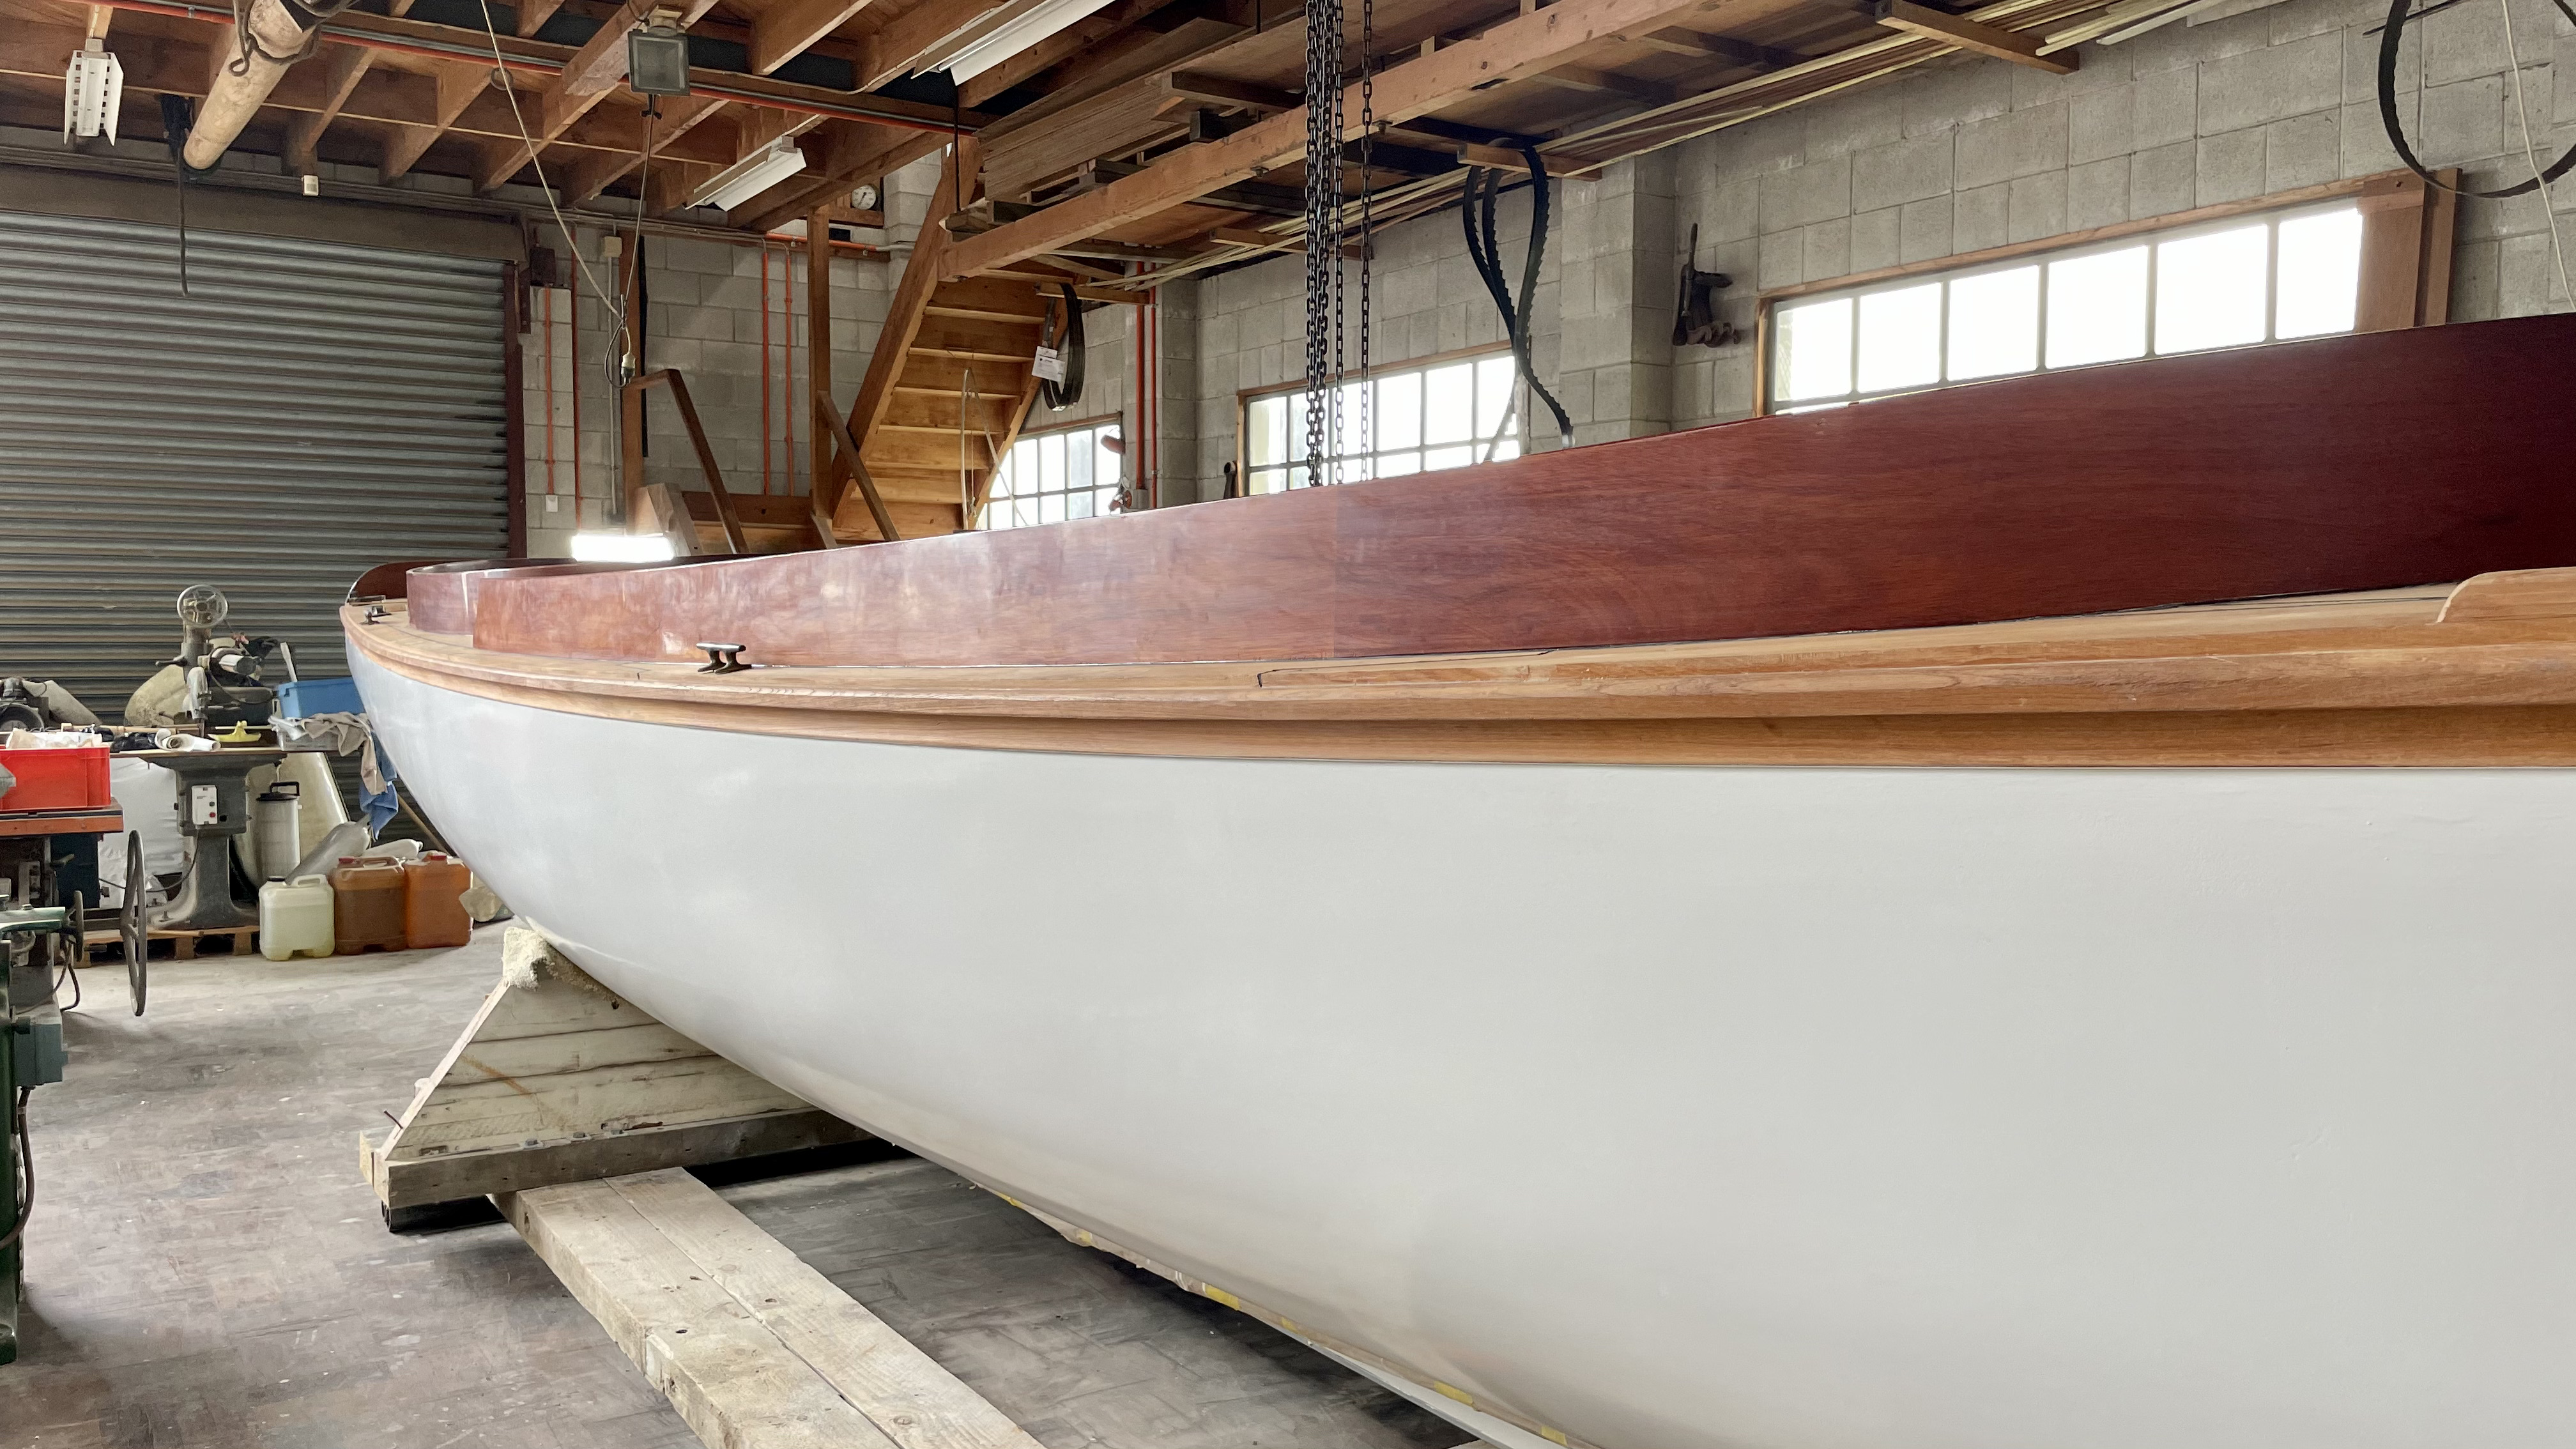
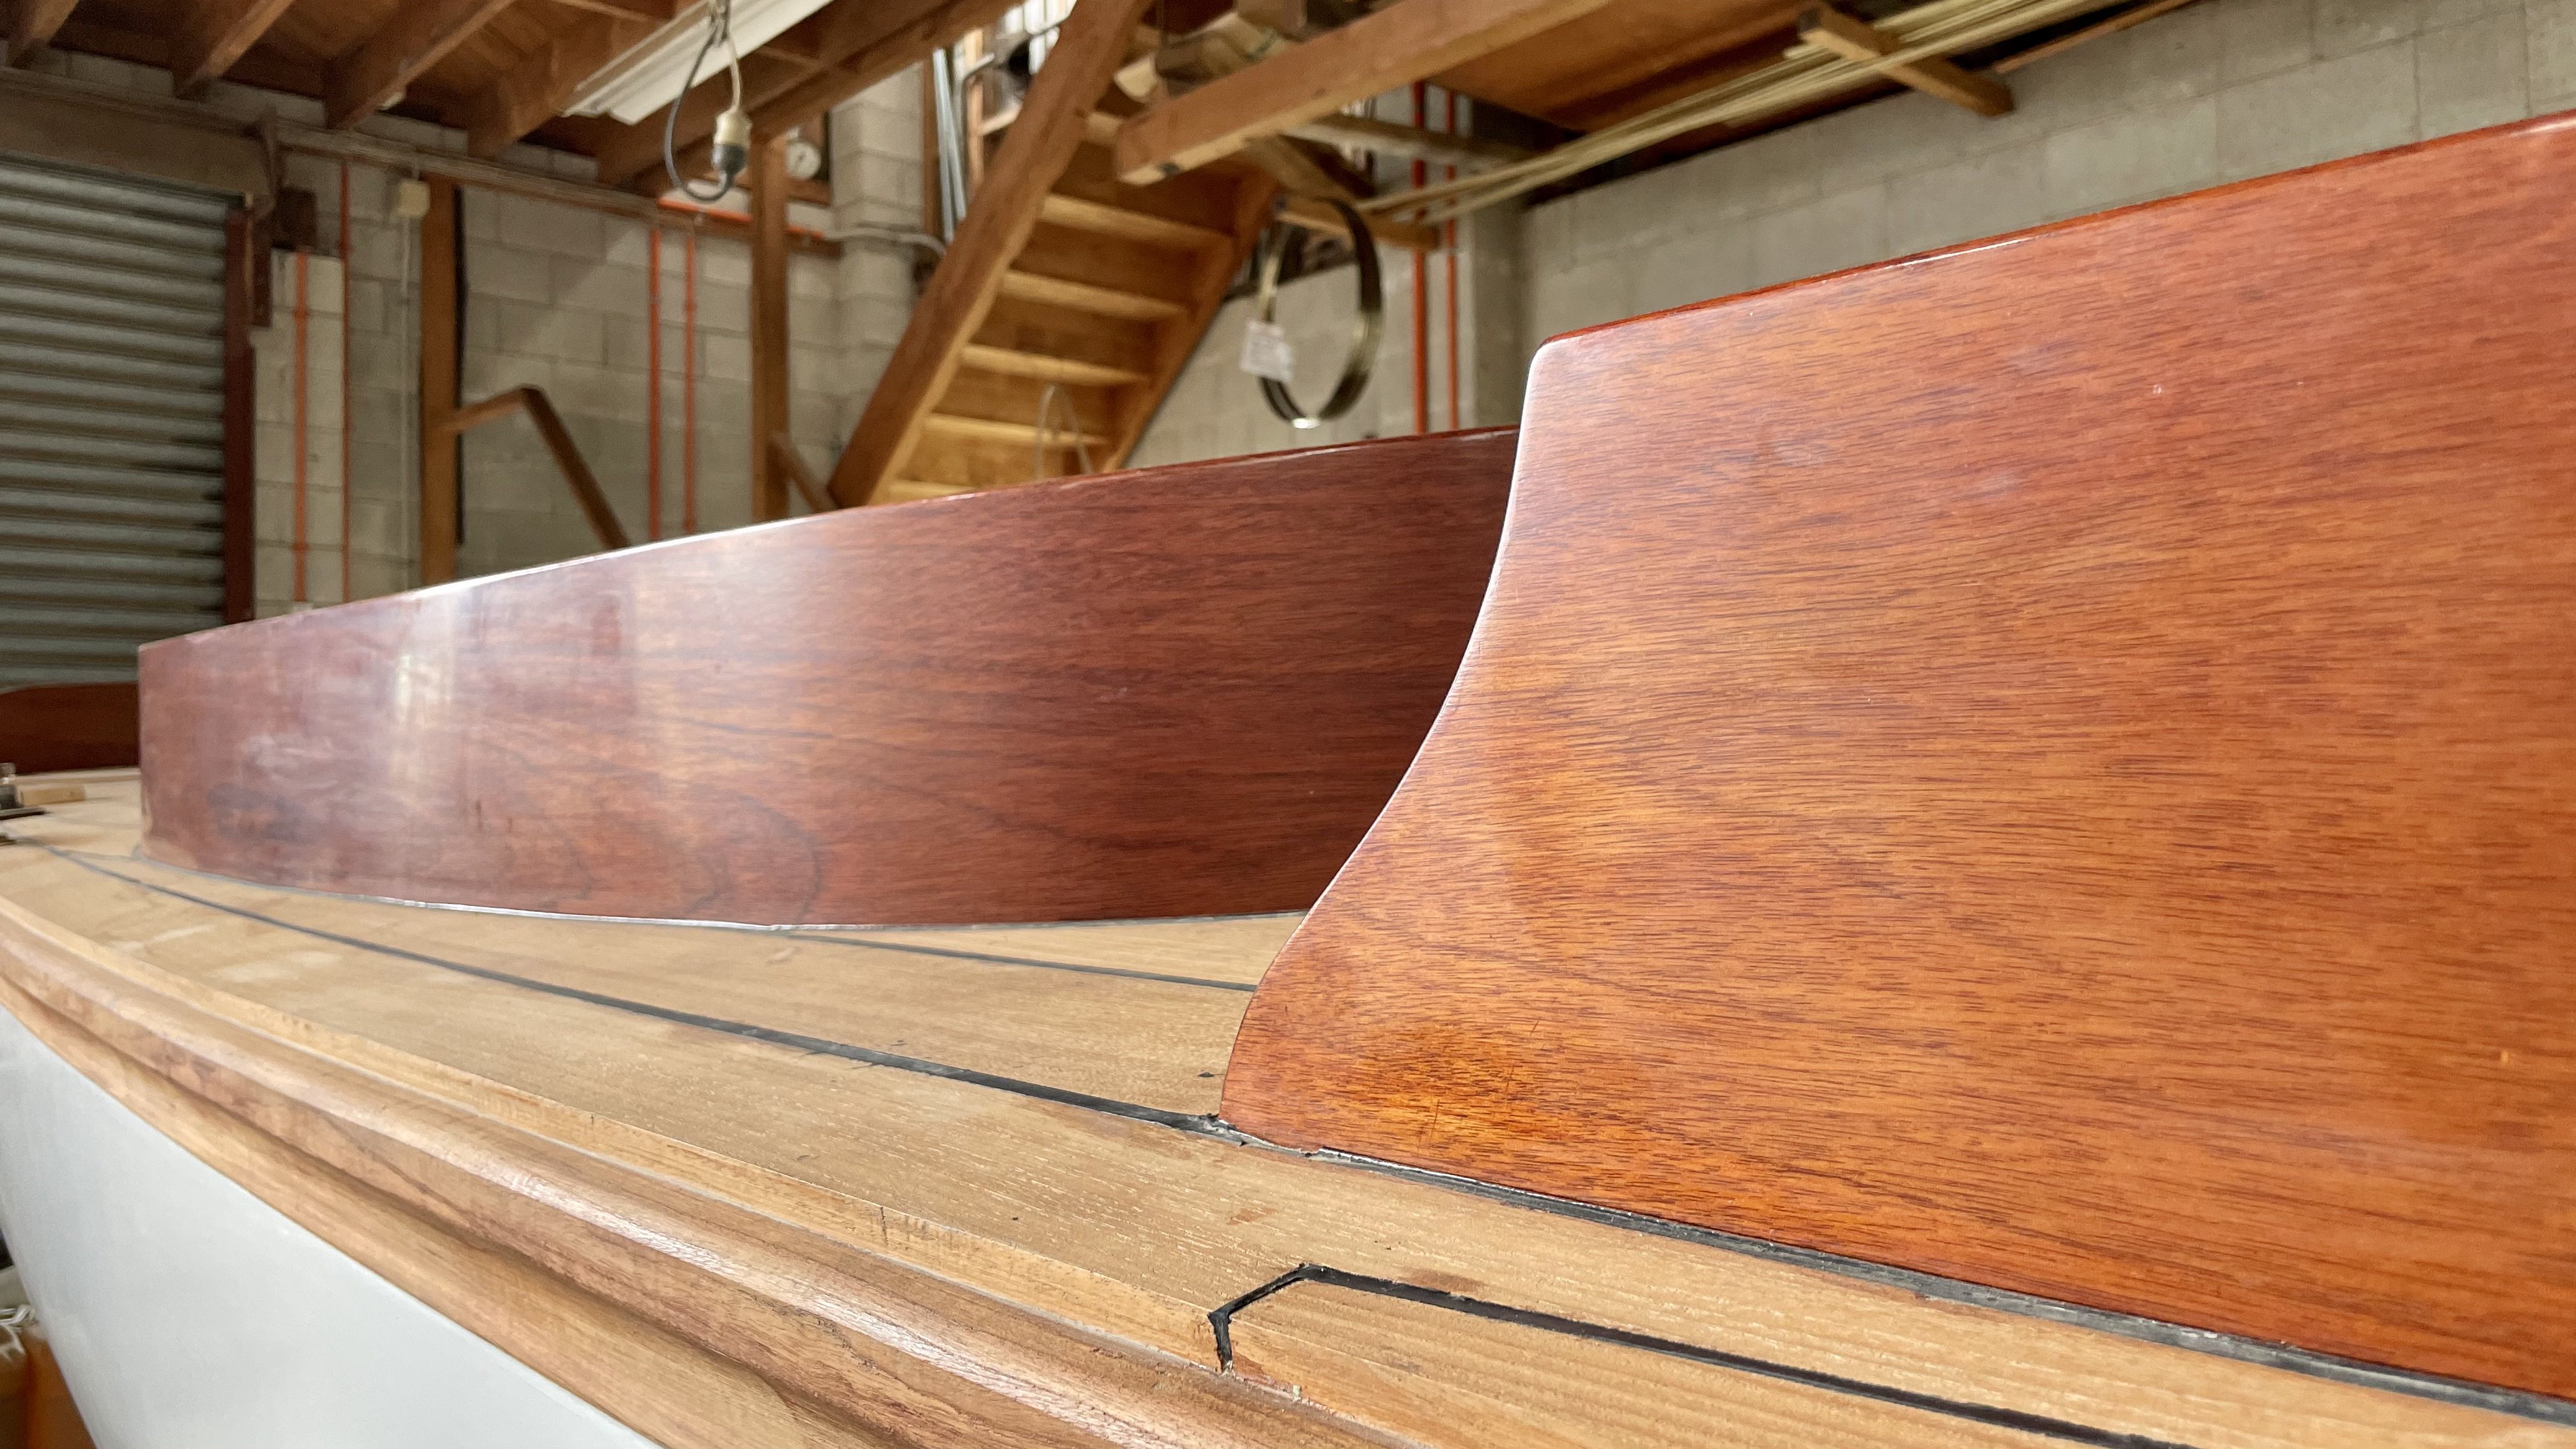
Last week myself and Jamie Hudson (Lady Crossley) pointed the car south for a pre-arranged visit to the yard where Paul Tingey is performing his magic on the 1948 Colin Wild built woody – Haunui.It was just over 5 months since I was last there and the project is moving along a great clip – check out the WW link below to view the first visit and to read the scope of the job.
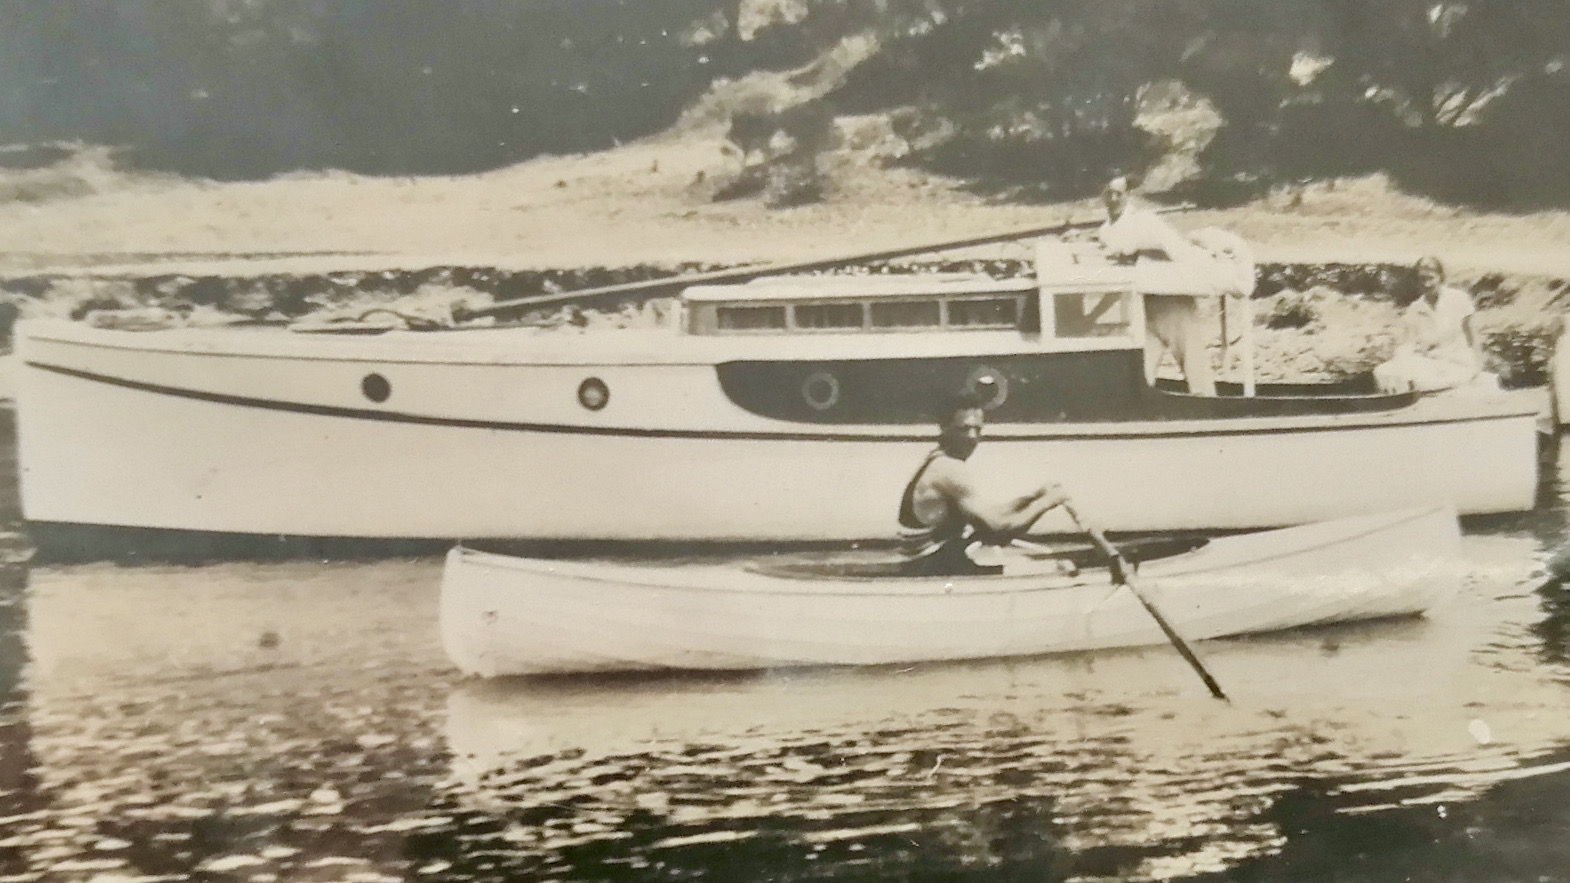
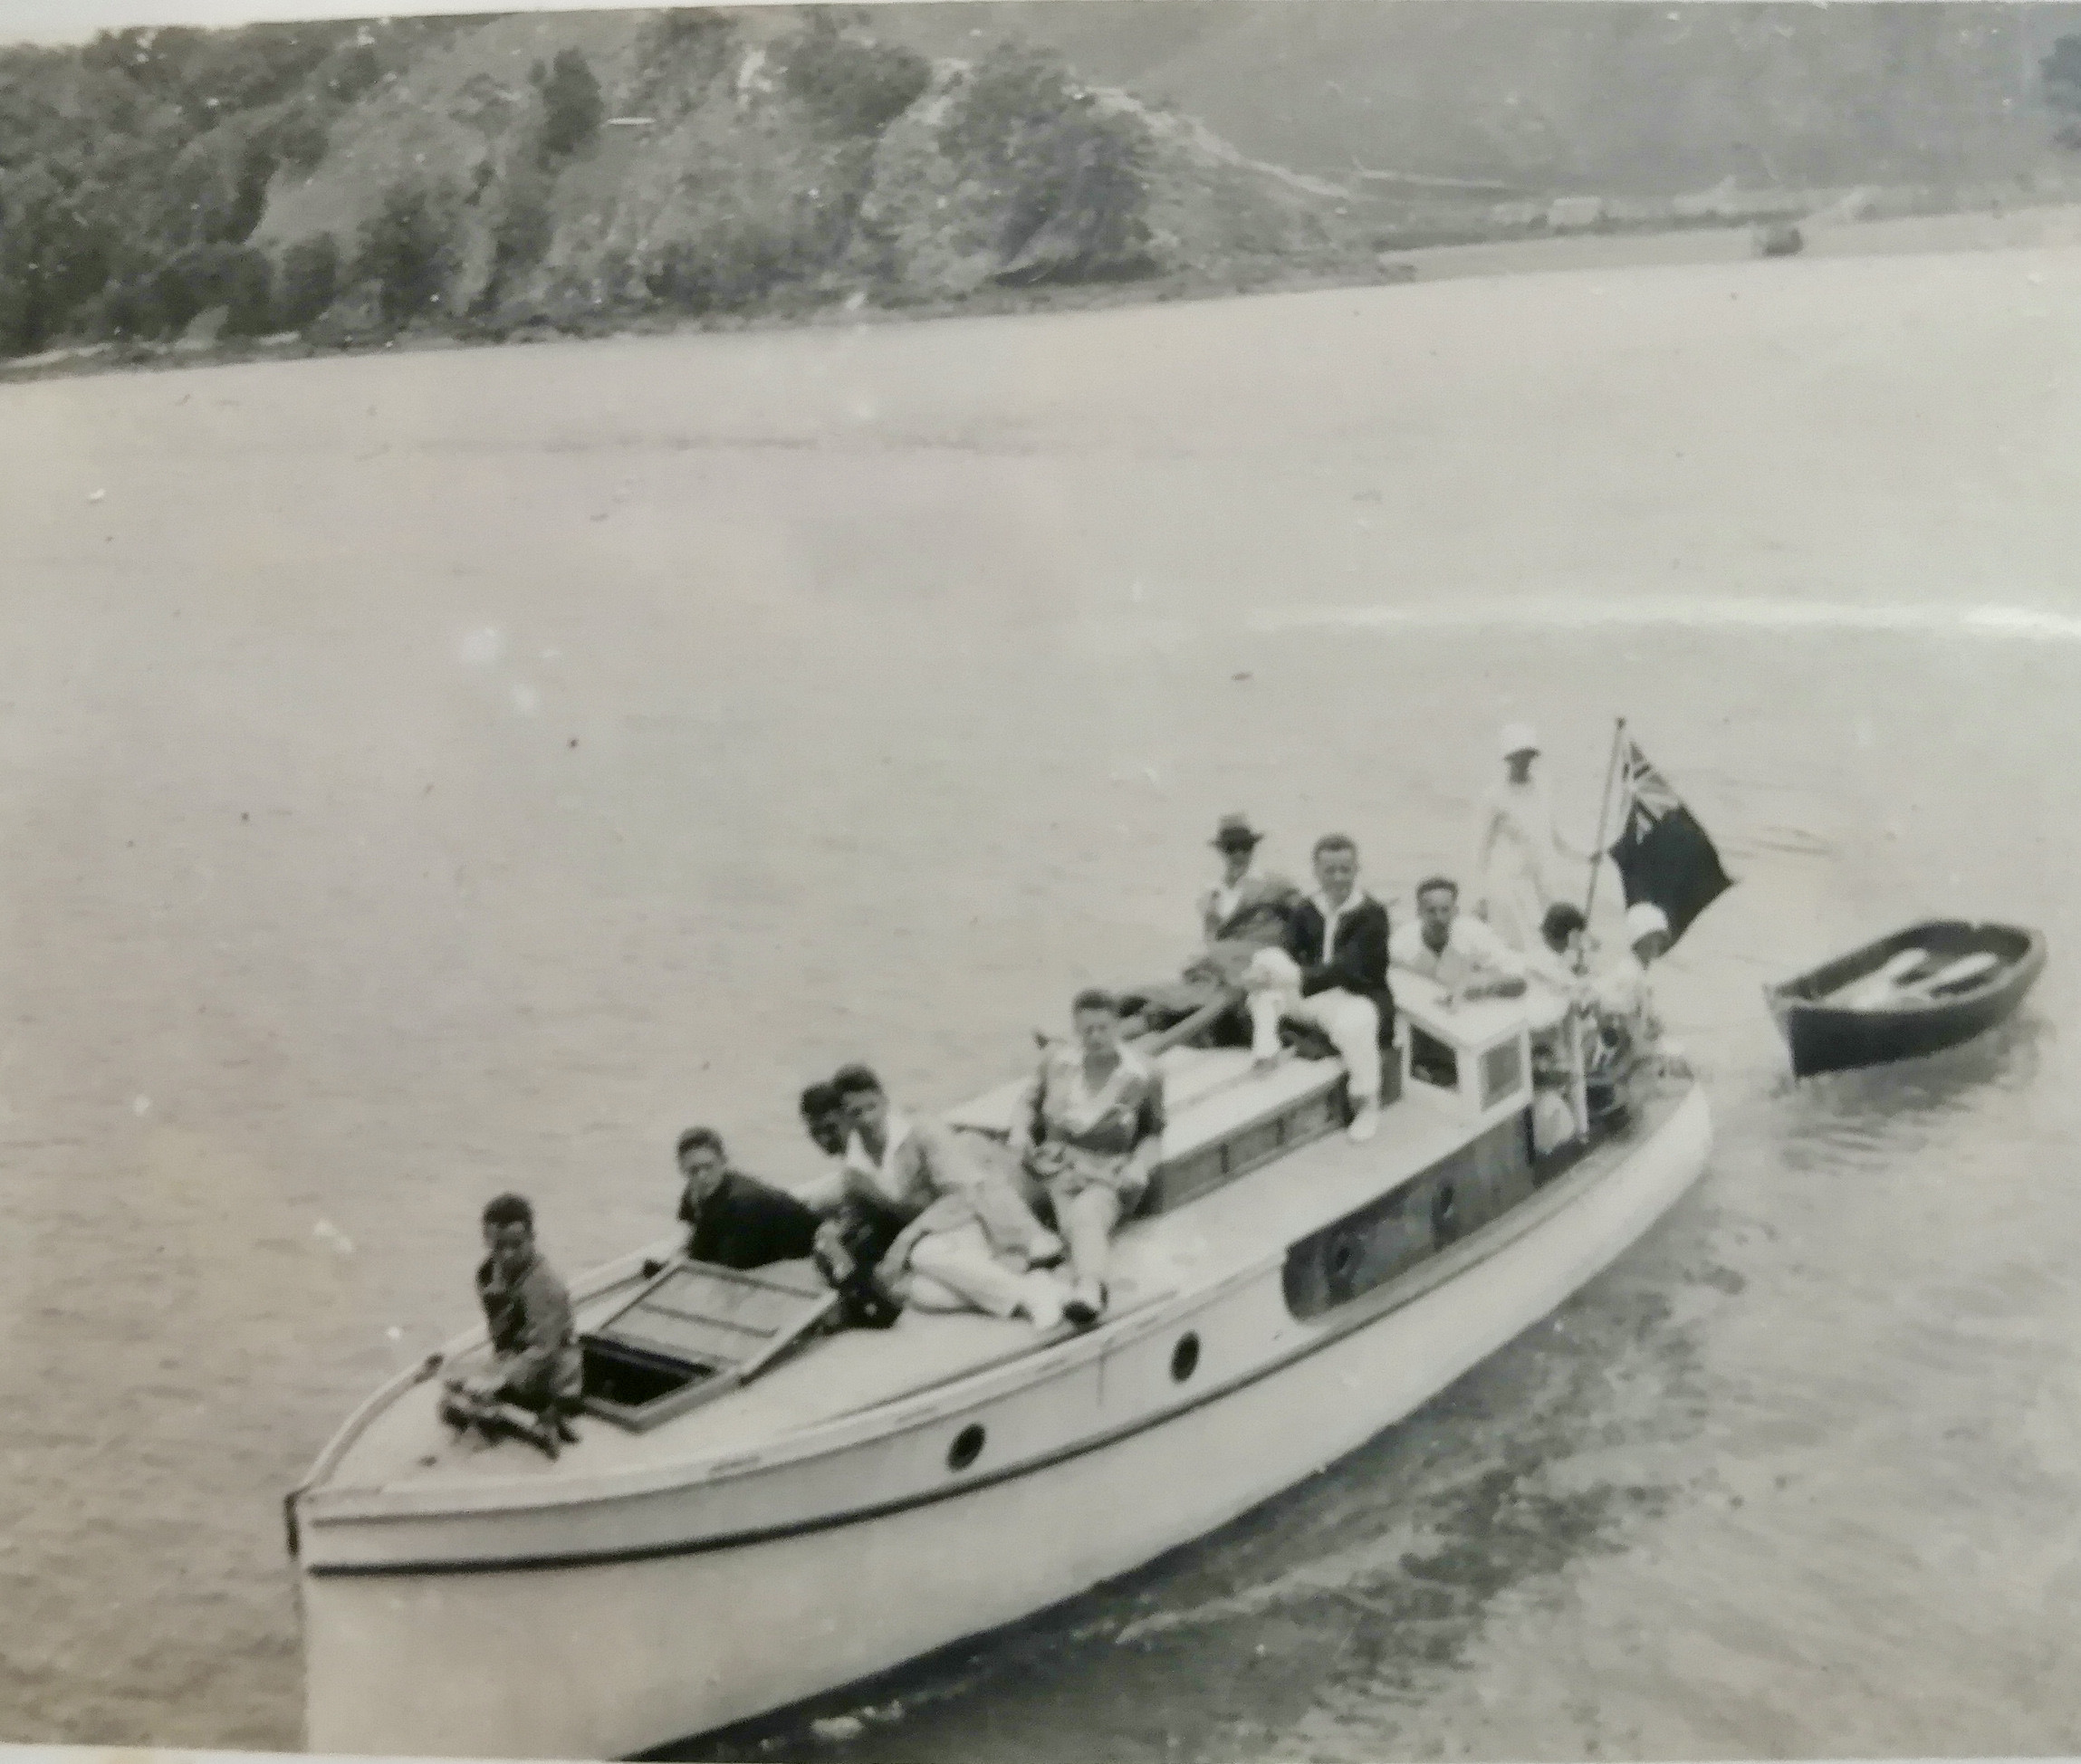
Blue Fin was built in 1948 by the Lane Motor Boat Company. Originally 38’ she was lengthened by 4’. In her early days she game fished extensively out of the Bays of Islands (Tudor Collins b/w photo below)
The above photos were taken by Dean Wright over the weekend, we see her berthed at Tutukaka, Northland. Links below to WW content ex Harold Kidd, Nathan Herbert and Dean Wright WW 2014 https://waitematawoodys.com/2014/11/26/blue-fin/
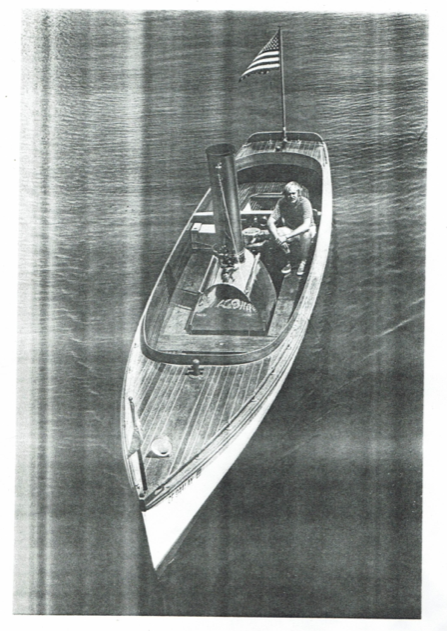
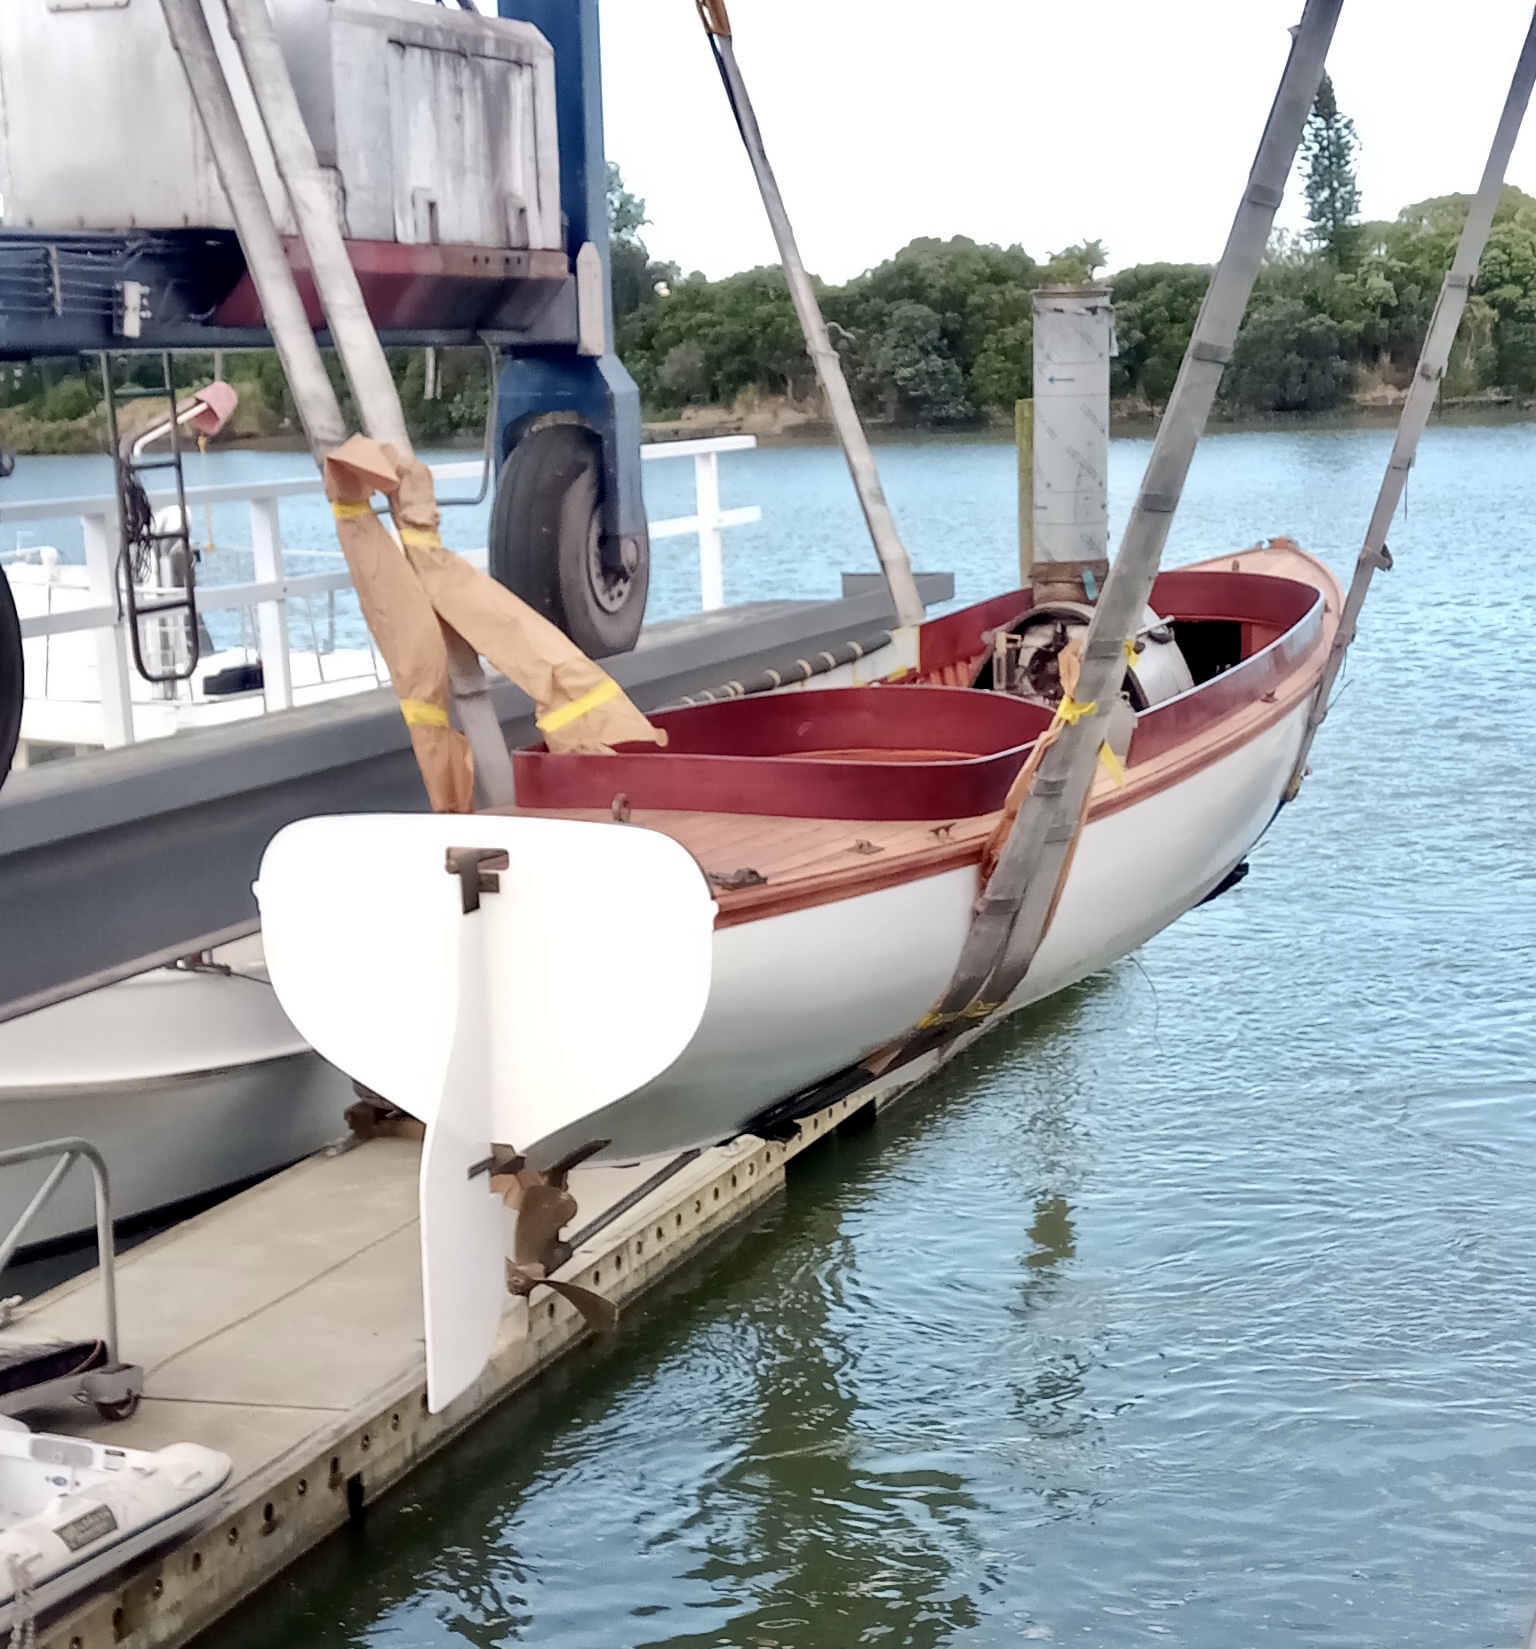
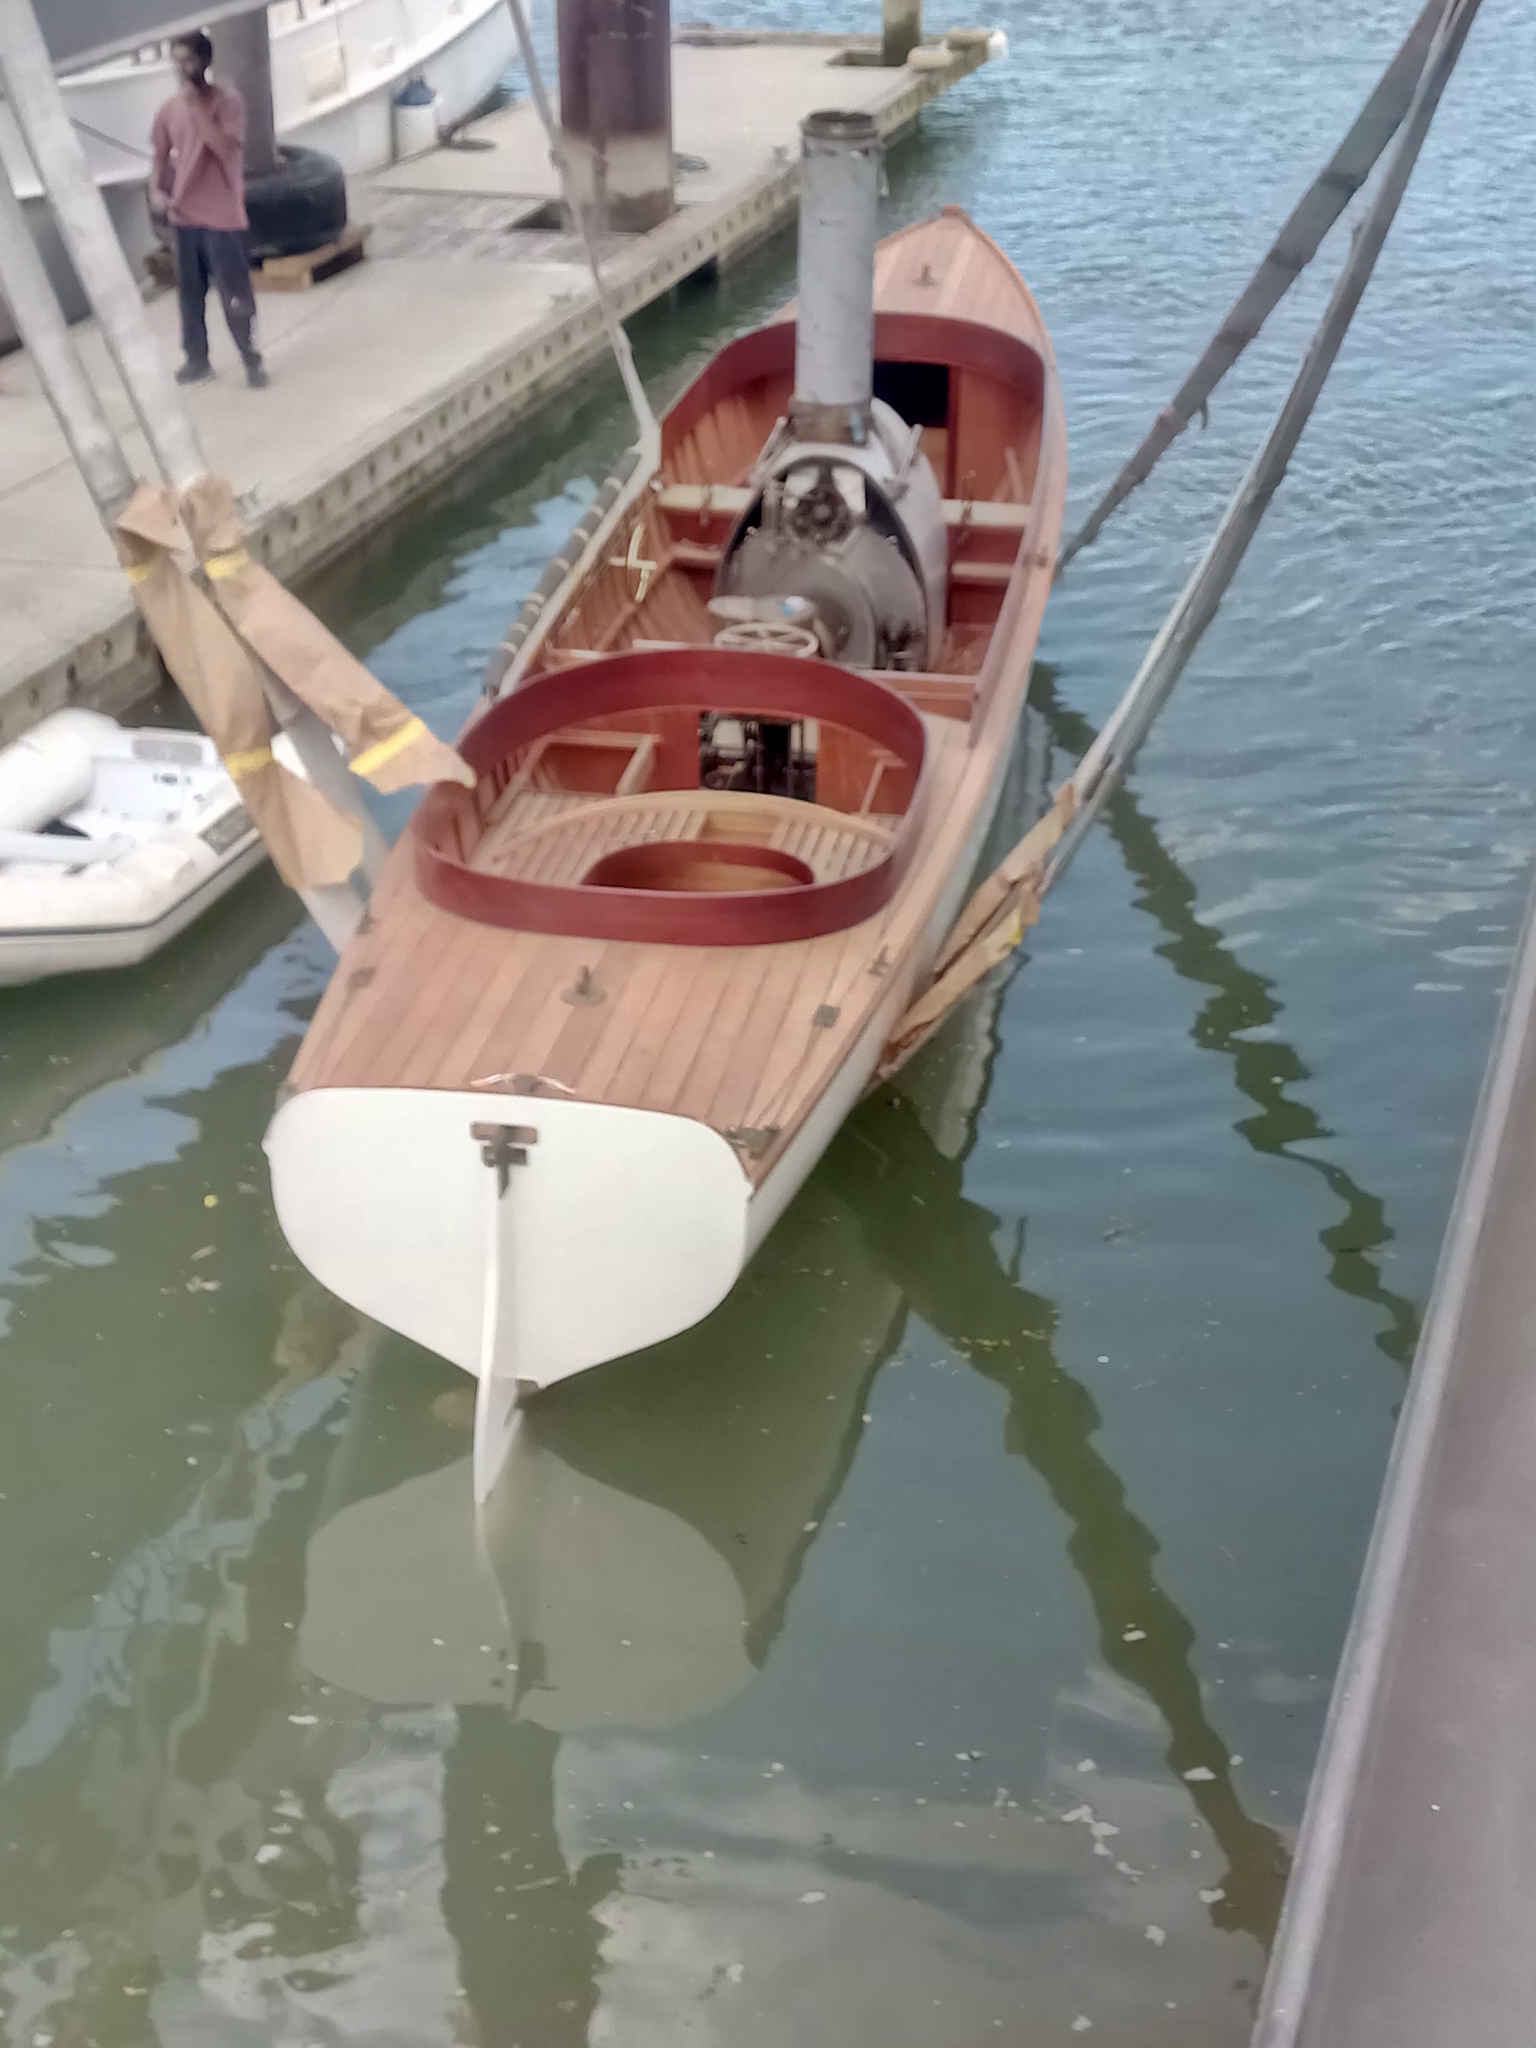
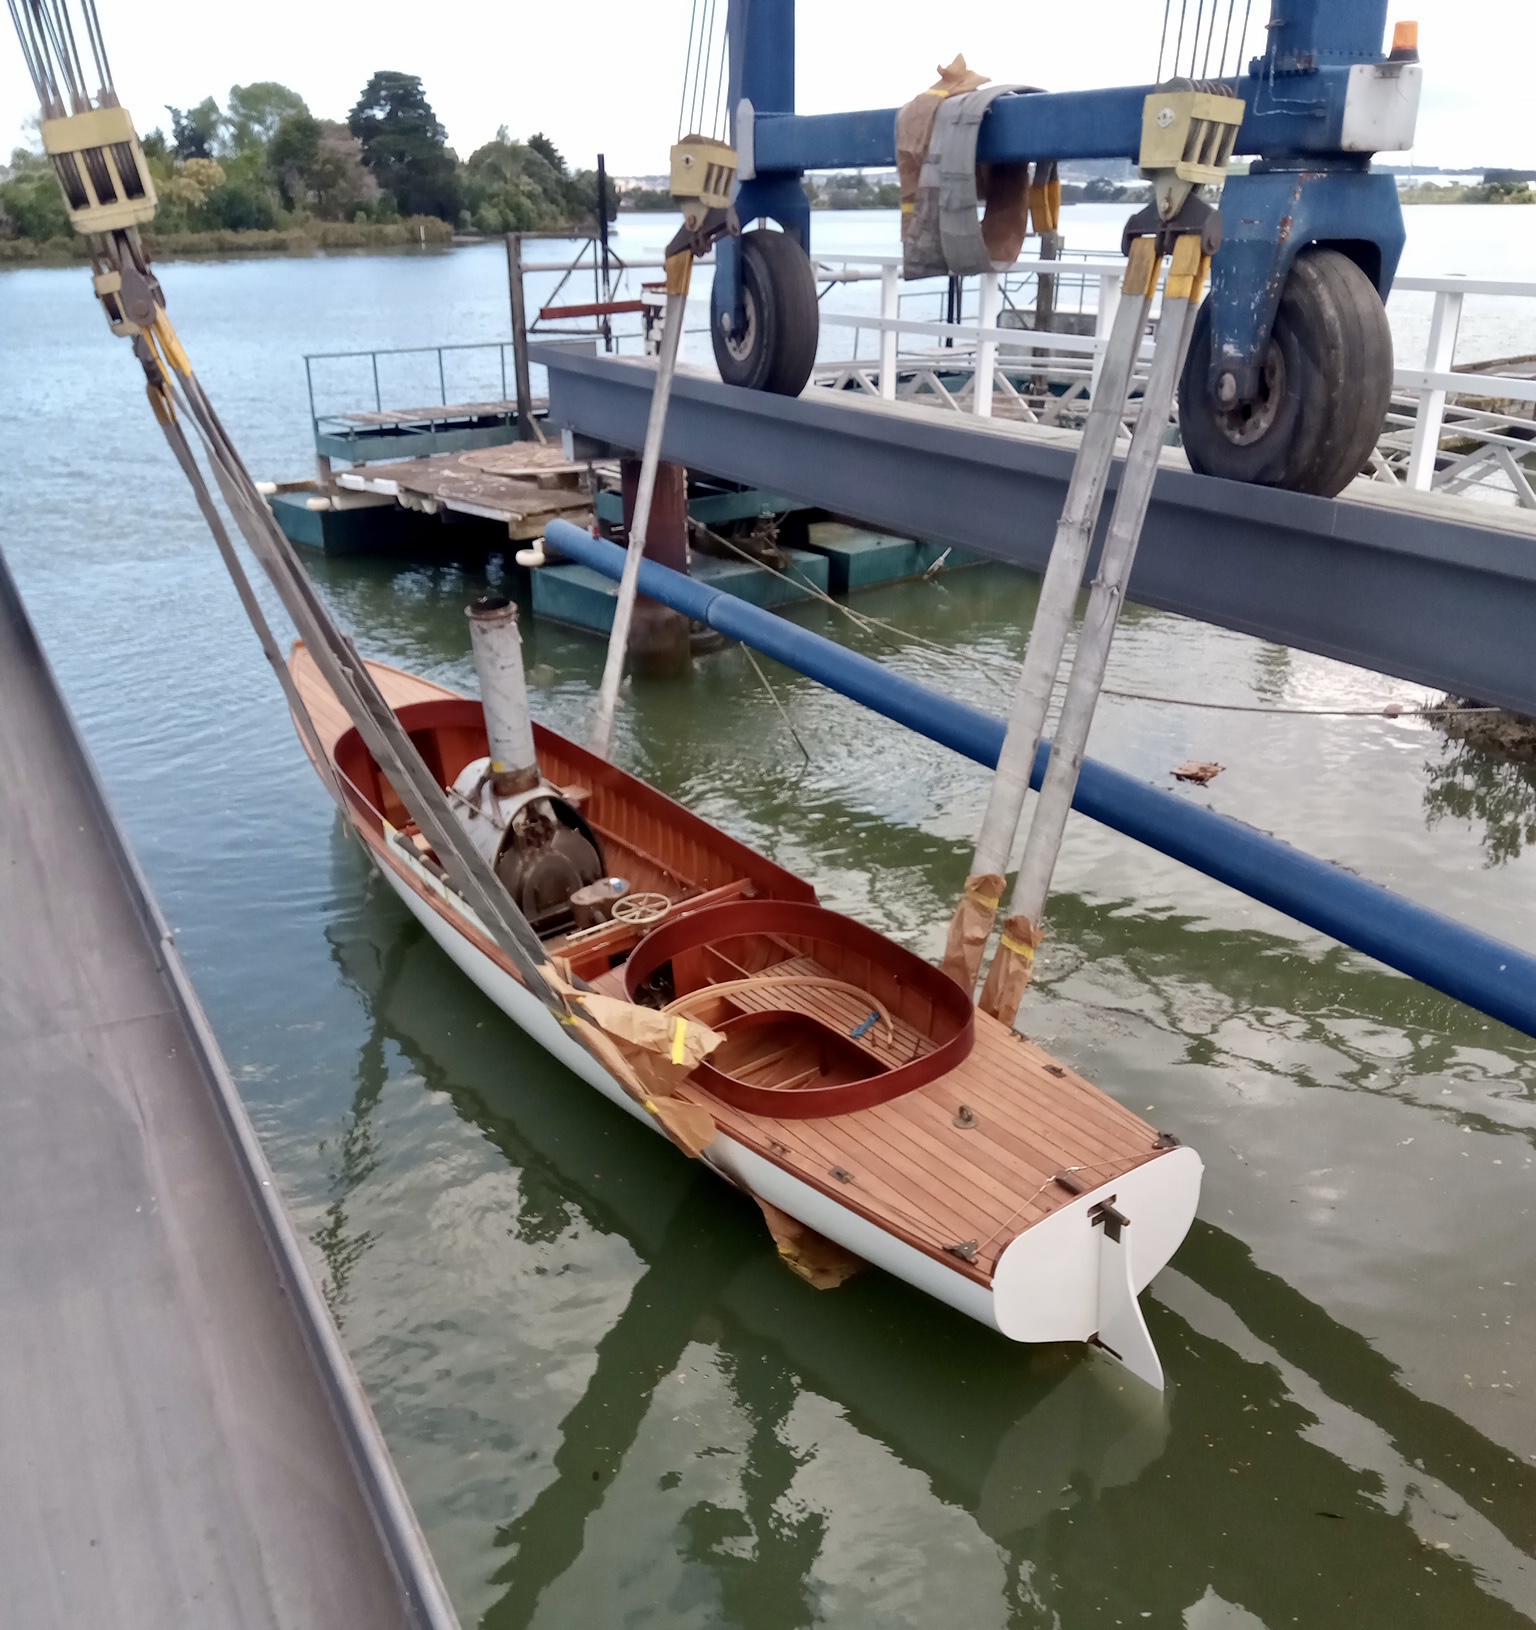
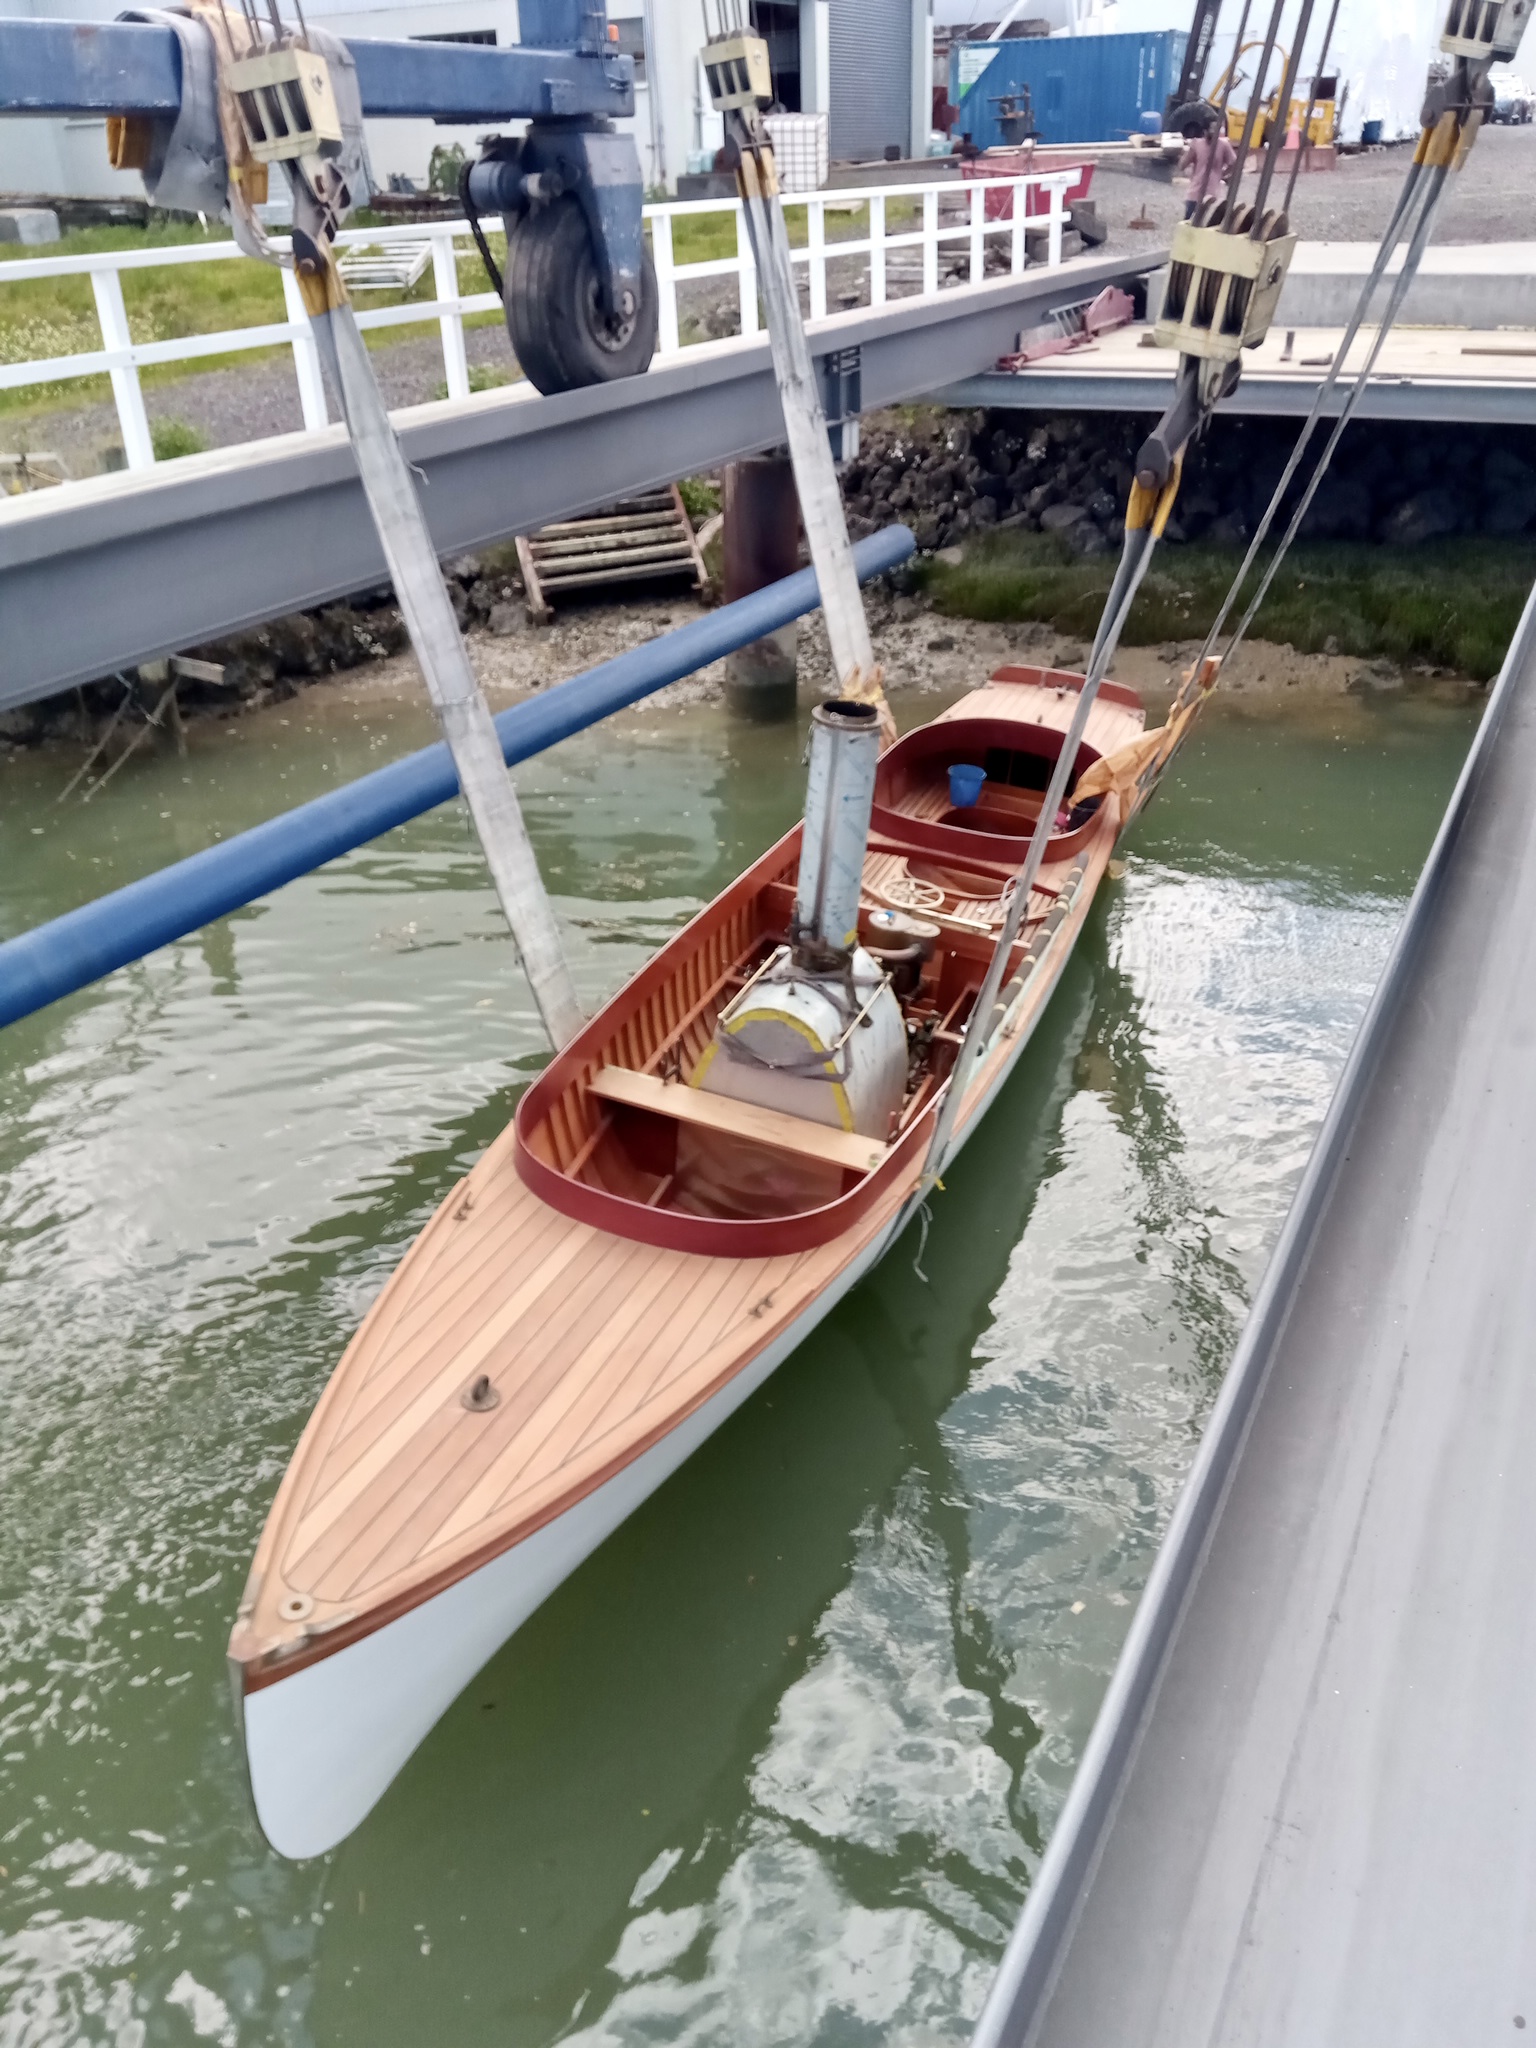
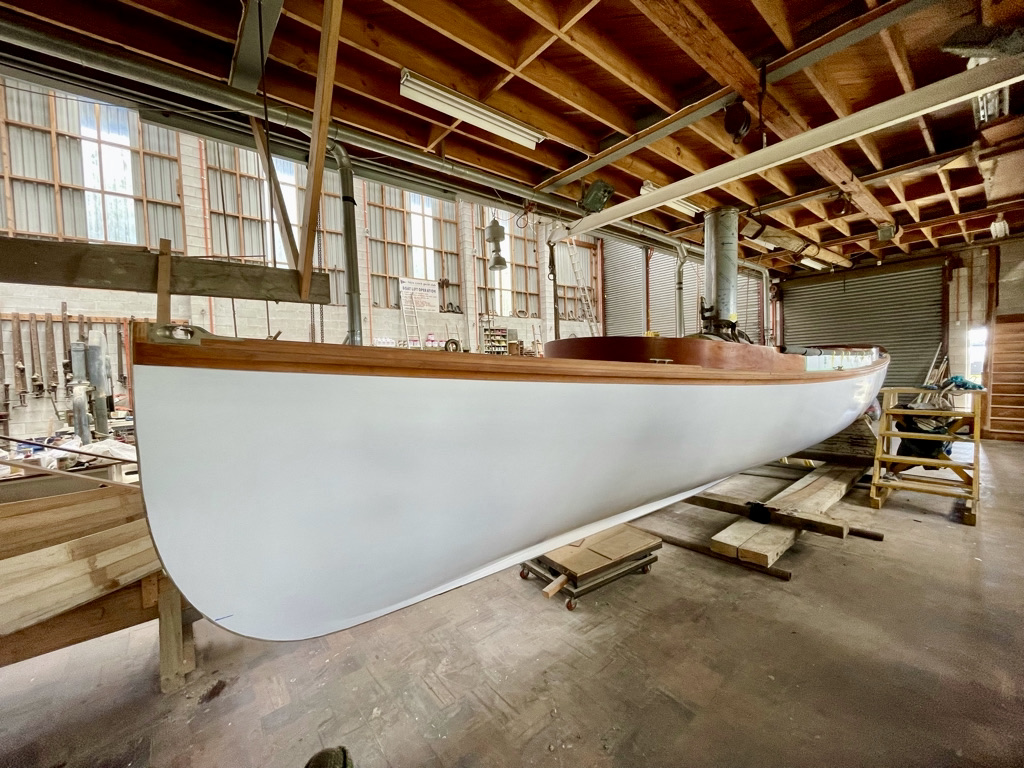
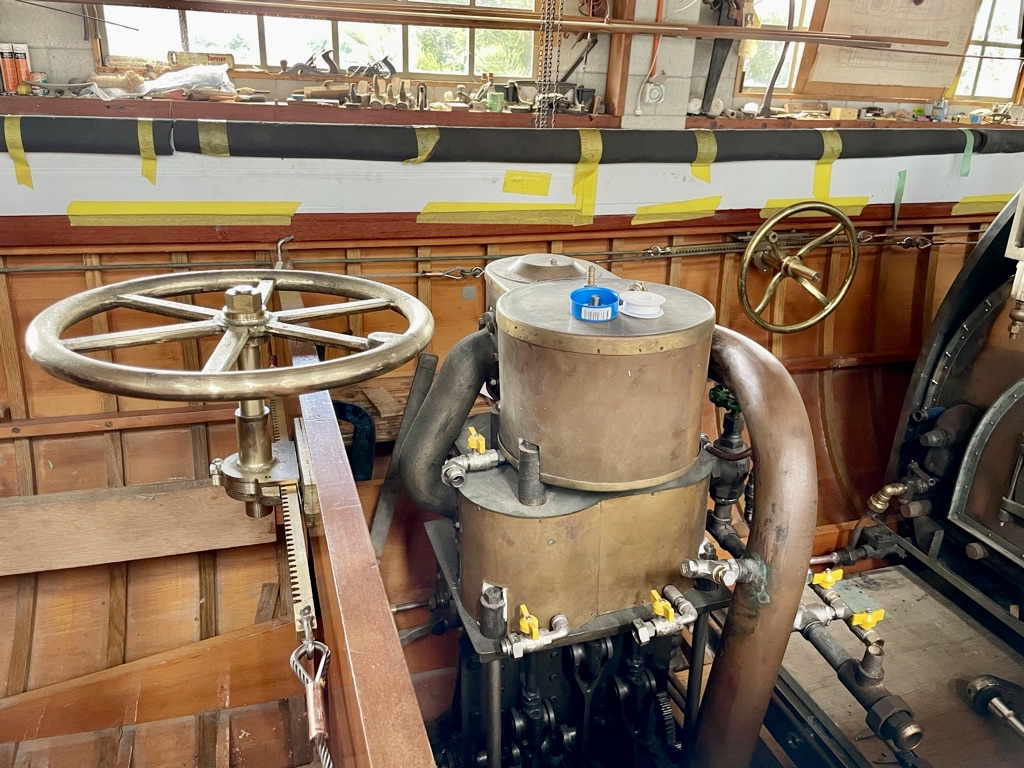
Back in 2014 we did a great story on the 34’ replica Herreshoff steam launch that Chris McMullen is building in his spare time, back then it had been 30 years in the making and now its approx 37 years, but when I called in last week, there had been some significant progress. Have a read of the 2014 WW stories to take in the magnitude of the project – everything , including the steam engine built by hand. When Chris started the project he didn’t have the benefit of the internet or google to help but in recent years he has uncovered numerous old photos that have helped with the project.
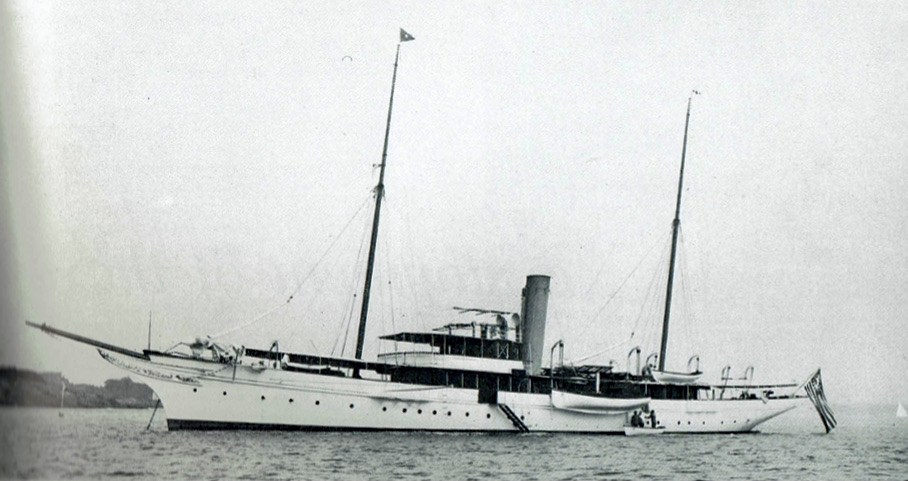
Some Background: Herreshoff Manufacturing Co build # 263 was a steam launch called “Cassandra Junior” and Chris believes that is the steam launch shown astern of beautiful 287′ S.Y. “Cassandra” in the photo below, she was stowed on the port side launch of the yacht. The Herreshoff Manufacturing Co built approximately twenty of this type of steam launch in the 27f’ > 34′. The H.M.C build # 227 – Vapor, refer photo below, was 30′ and built for the Steam Yacht “Yacoma” but Chris understands she was never used on that ship. A model of “Yacoma” at Mystic Sea Port Museum shows a steam launch but Chris assumes the ship had a more convenient modern motor boat.
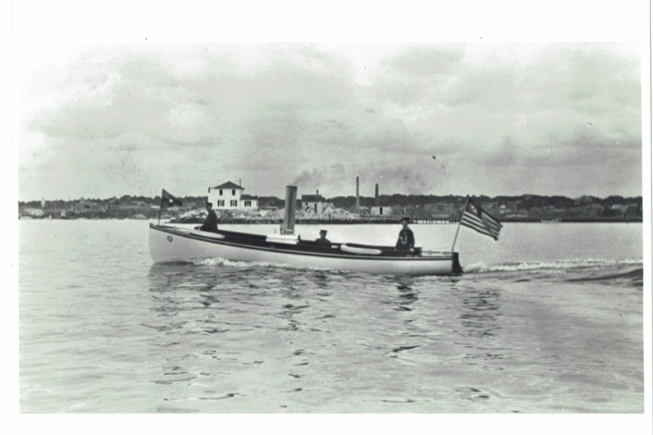
The last b/w photo below is the tender for the steam yacht ‘Wanderer’ (photo below) called ‘Wanderer Junior’. She was Herreshoff build # 270, she is American and measures 27′ 11″. Built 1909. In the back ground of the photo is the ‘Ida Lewis Yacht Club’.
The engine on Chris’s launch has been run and currently getting a tidy up before being re-installed. The main reason for the visit was to get an update on the restoration of Haunui, the 1948 Colin Wild launch – happening nearby – check in one Wednesday for that story. I took Jamie Hudson, skipper of Lady Crossley , an almost sister ship, built one year apart, fascinating to get Jamie’s view on the two boats.
H.M.C work shop – unidentified steam launch. Cassandra, with Cassandra Junior astern
Vapor with her late owner Jon Martin. Taken late 1960’s
WandererWanderer Junior – built 1909
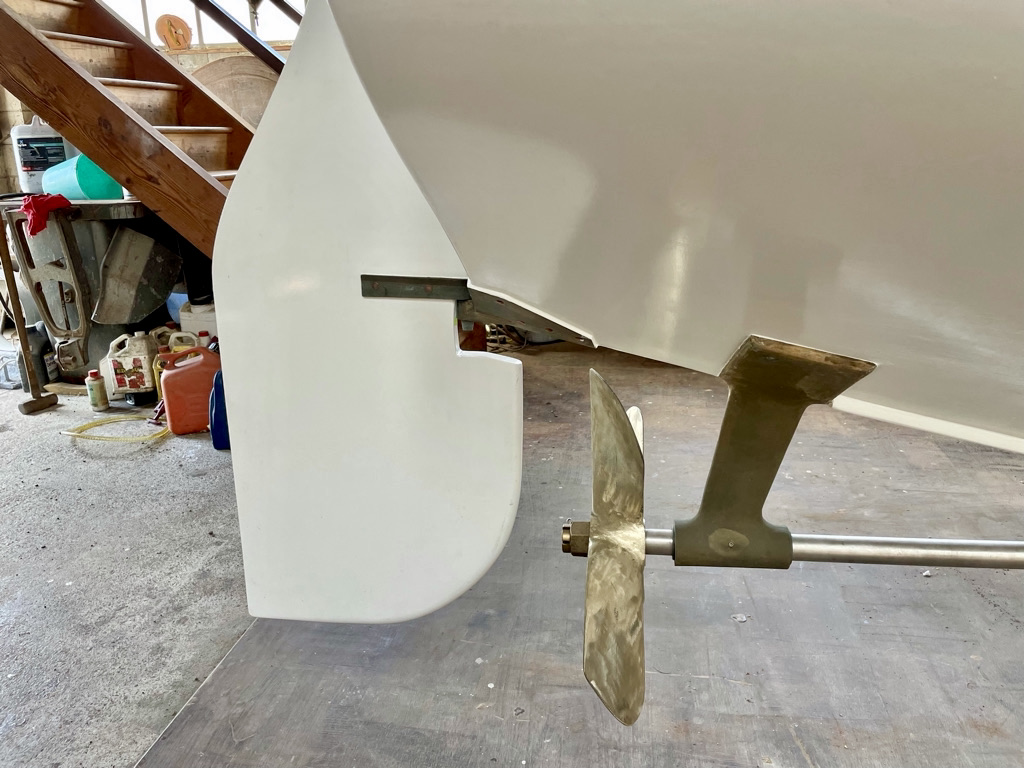
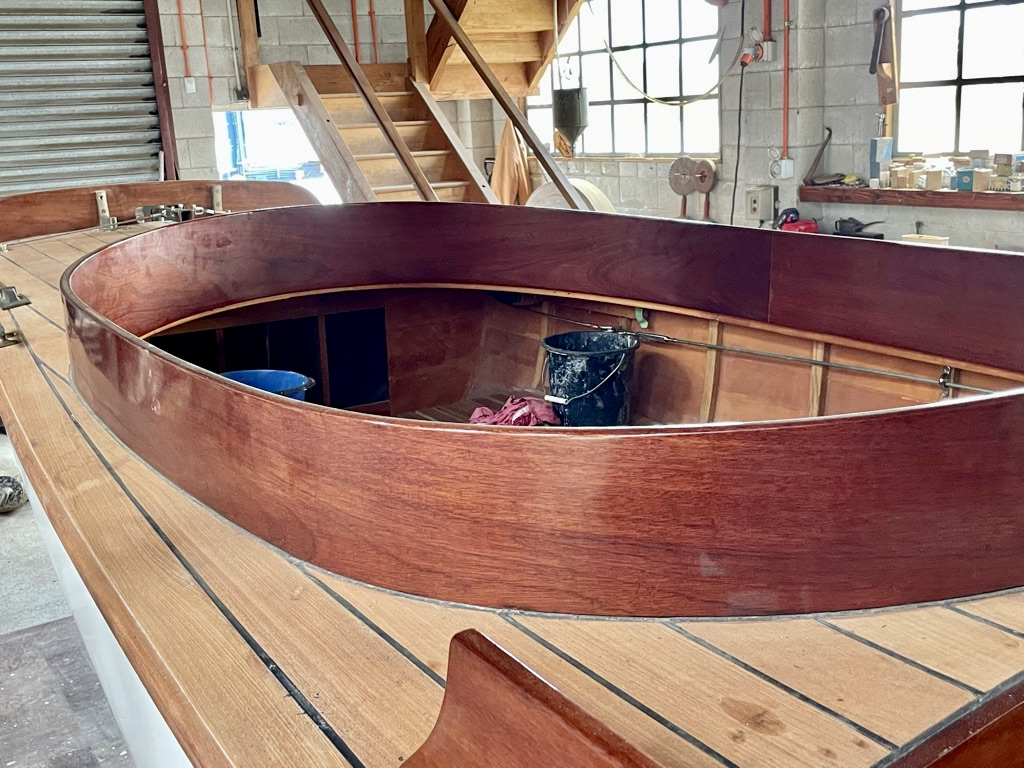
IT FLOATS – On 11-11-2021, on the upper reaches of the Tamaki River, Chris McMullen ticked off a rather large item on his to-do list. He launched his N G Herreshoff design Steam Launch. Chris commented that it was just a floatation trial, and that the design floated absolutely level. In the photos below we see her with all her machinery but with no fuel or water. Chris commented that for years he has had the greatest respect for the late Nathanial Herreshoff and devoted over thirty years (on and off) of his life to the project and is as keen as ever to get it under steam power. You can see, at the link below, the only image Chris has found of the original “Cassandra Junior” see https://www.agefotostock.com/age/en/details-photo/the-steam-yacht-cassandra-1913-creator-kirk-and-sons-of-cowes/HEZ-2696001
UPDATE 04-01-2022 – The below photos were from a shed visit in early Dec 2021, post the above water line test 🙂 click to enlarge
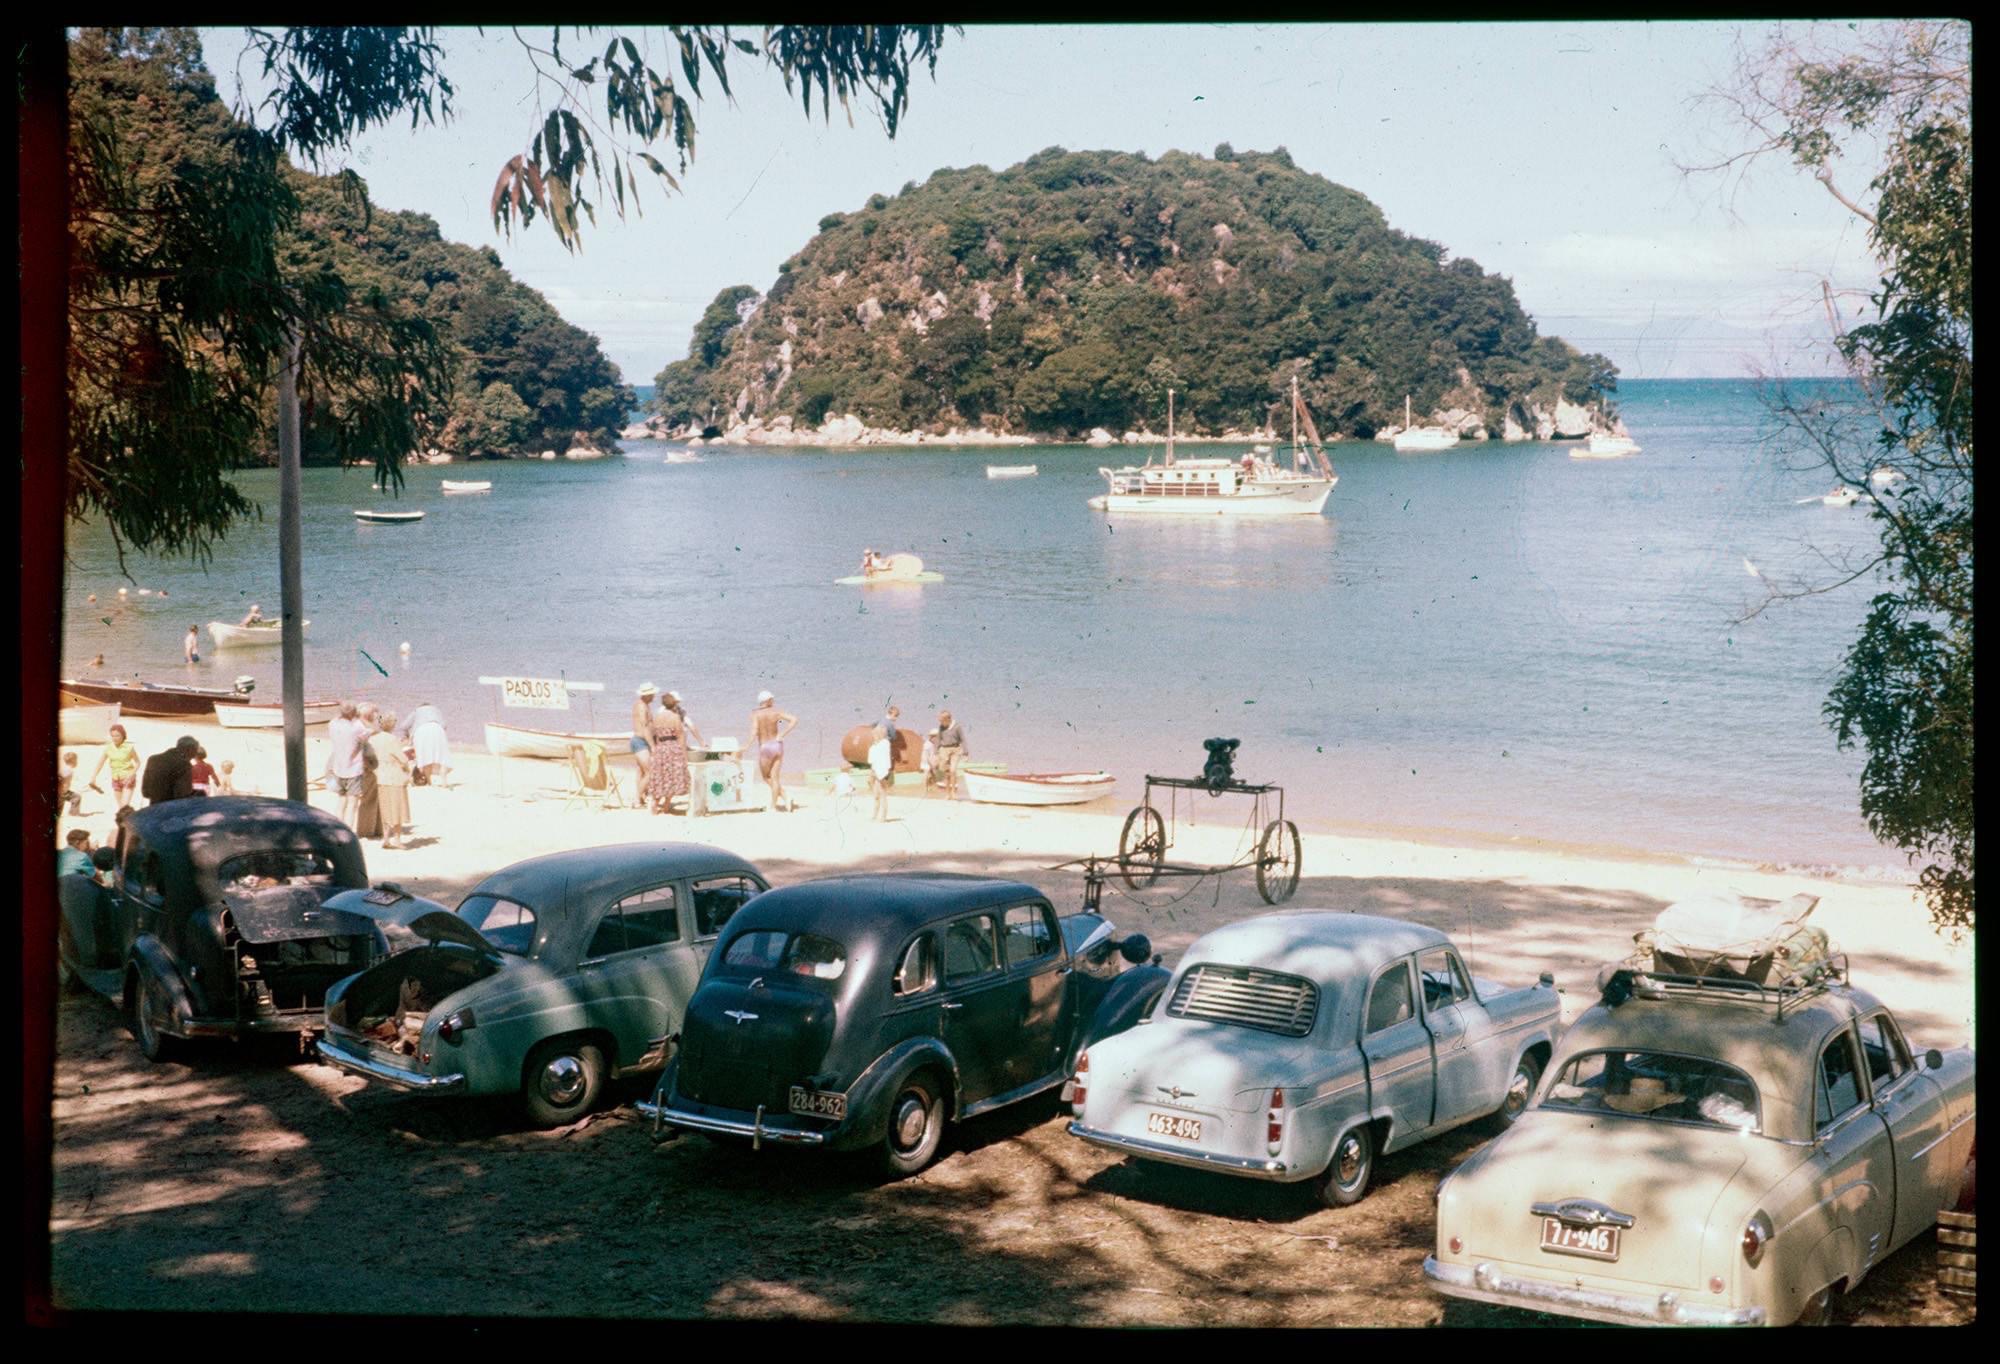
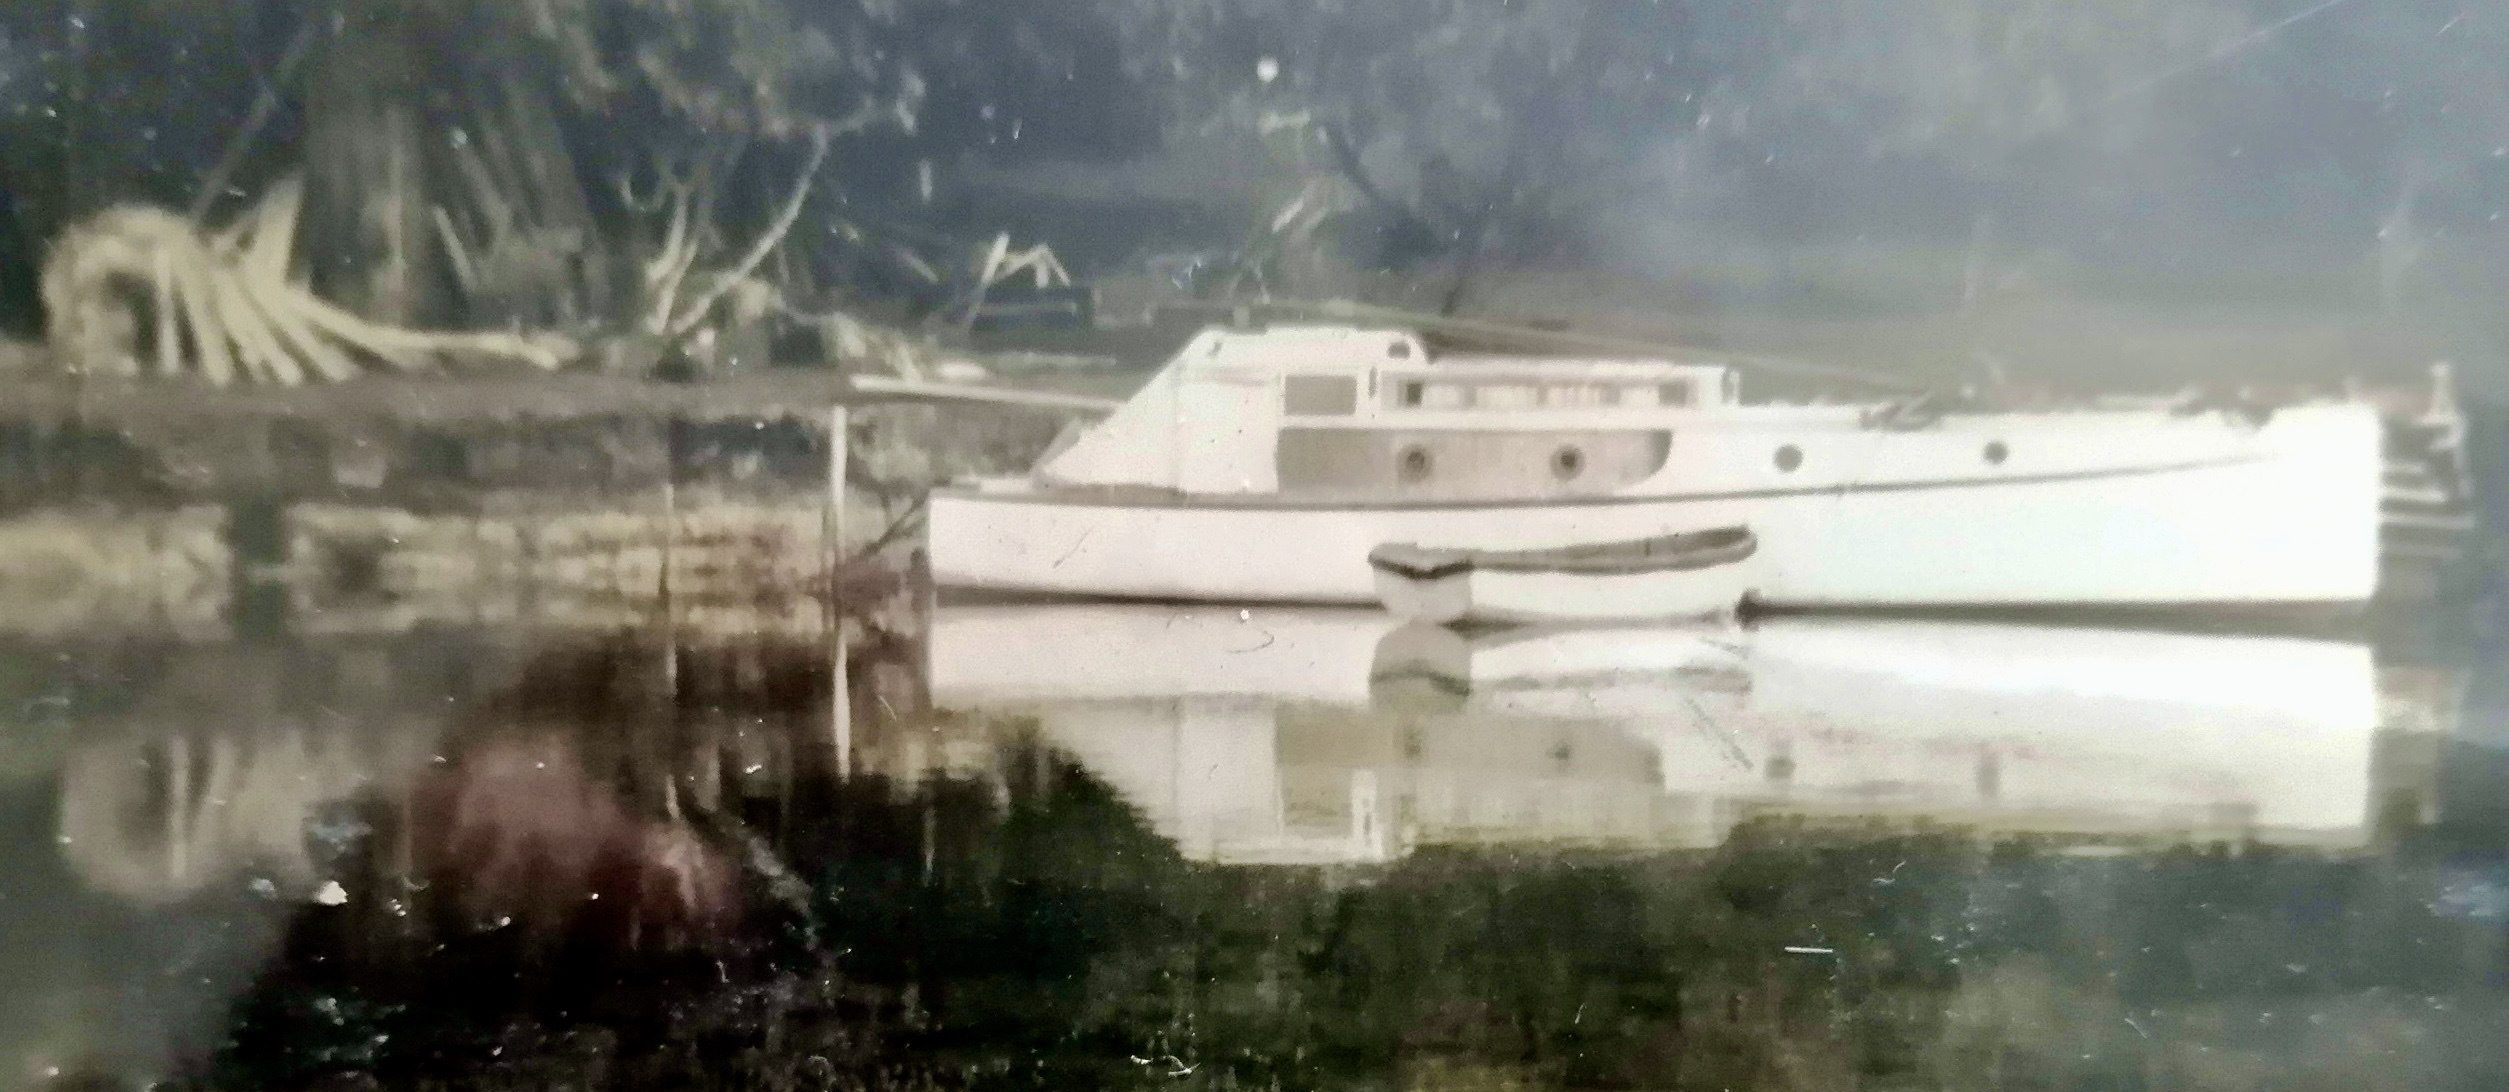
Can We ID This LaunchKOTARE Todays photo is dated 1959 and is of Kaiteriteri Beach, Motueka, Nelson – from the camera of J B Rowntree and comes to us via Maurice Sharp. Other than the addition of the commercial charter boats servicing the Abel Tasman National Park, the scene hasn’t changed much.
I have added below a close up image of the launch in the bay, are we able to put a name to her?
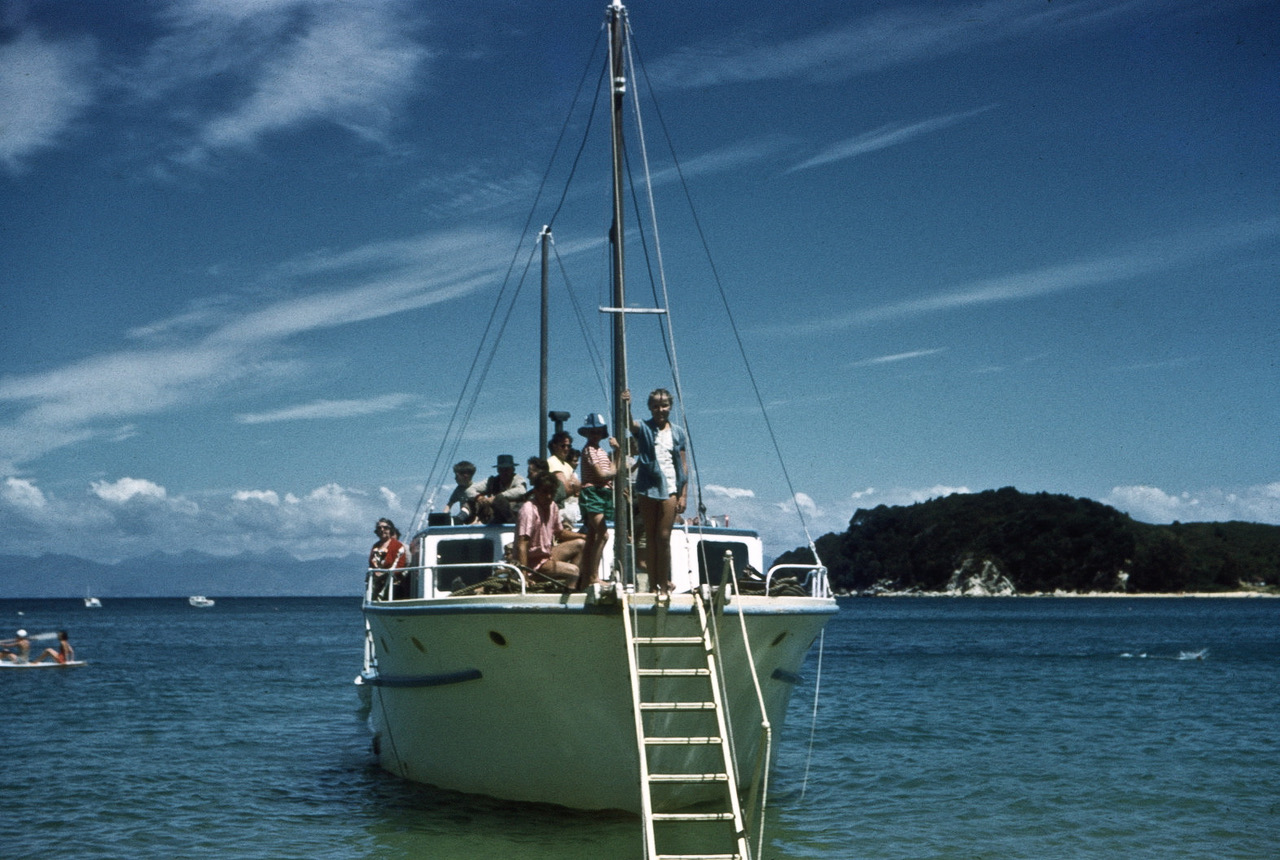
Input From Robbie Williams – the launch is Kotare owned by NEWTON NALDER and was the first of the boats offering trips into able Tasman national park she was twin screw powered by two 10 hp petter diesel she later burned and sank in Kaiteri under different ownership
Input From Brian Kitson – Kotare was built by Curnow and Wilton of Nelson and launched in November 1951 and burnt and sank at Kaiteriteri December 1966. 38ft long X 13ft beam X 2ft 6in draught. More than likely she was built of white pine. The ladder on the bow lowers to the beach for boarding and unloading passengers. Photo taken in Kaiteriteri
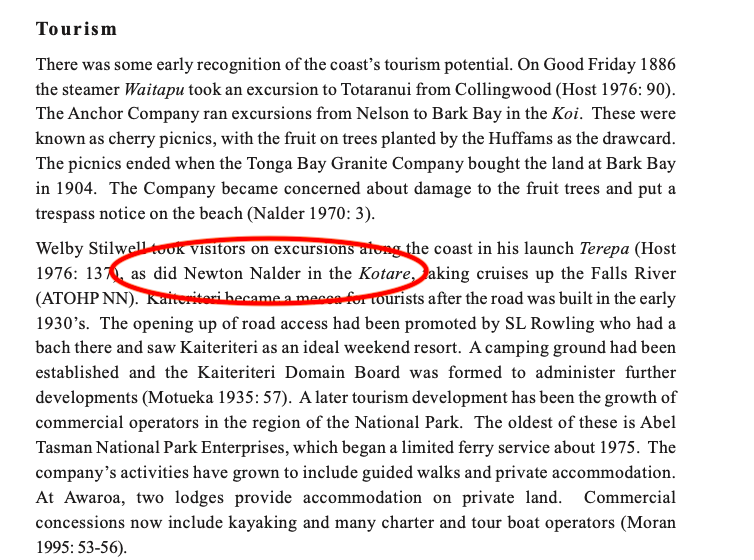
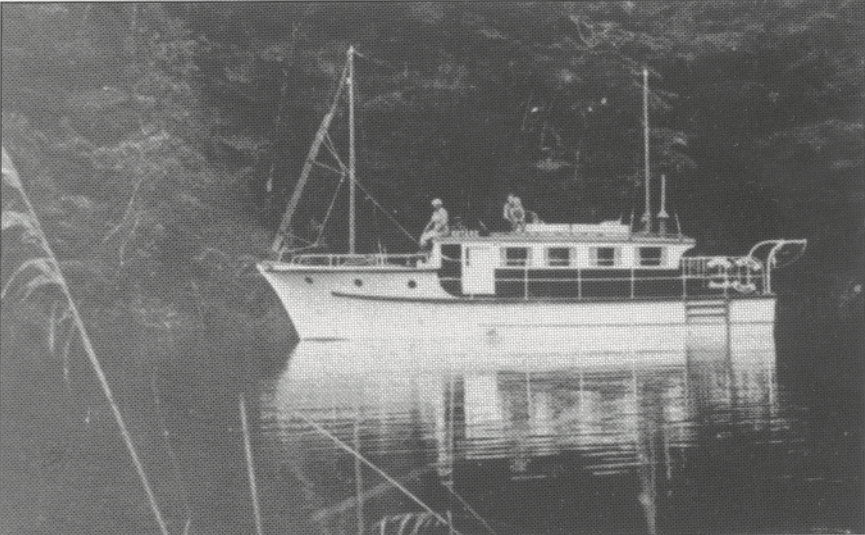
UPDATE ex John Burland – who sent in a link to a Dept of Conservation (Nelson/Marlborough) booklet on the Abel Tasman Area – screen grab below that confirms the ownership of Kotare by Newton Nalder and a photo of her in Bark Bay.
03-05-2021 Update: John Gander supplied the photo below of Kotare disembarking passengers at Kaiteriteri beach in 1959
Sometimes you have to ask yourself – is the photo for real or has it been ‘photo-shopped’, well woodys I can tell you this ones for real. But would it float?, does the builder ever intended taking her out to open water? I think we can assume that the owner was a serious DIY’er and not an actual boat builder. Kind of reminds me of a ‘boat’ at the Te Atatu Boating Club in West Auckland, but a whole lot un sea friendly.
MARINA WANTED – 12m+ Temp Only
One of our passionate woodys is looking for a 12meter+ marina in the Hobsonville / Bayswater / Westhaven area. Upwards of 6 weeks. Its a woody returning to Auckland and they need to park her while they sort out a more permanent home. Email me at waitematawoodys@gmail.com if you know of anyone hauled out for winter etc.
THE LAUNCH MIDNIGHT II AND THE CHAMBERLIIN FAMILY OF PONUI ISLAND I received an email last week from Ross Dawson, a passionate woody fan, Ross resides in Kawakawa Bay and let me know that he had just visited Peter Chamberlin in a retirement home and he kindly gave permission for Ross to take a few copies of photos in his family photo album. Peter’s son David now manages the family farm at Motunau (the South end of Ponui Island). The launch – Midnight lI according to notes in Peter Chamberlin’s photo album, was a petrol powered launch built for Peter’s father Fred (son of Charles jnr) by Lanes in 1928 and was sold to Ian Chamberlin in 1950, when Fred took delivery of the Colin Wild built diesel launch – Motunau. WW would love to learn more about Midnight II and what became of her.This weekend I will share the story of – Midnight, the Chamberlin’s yacht. Before we finish today – Ross has a hobby horse he would like to exercise 🙂 I’ll let Ross tell the story “I want to comment on, what seems to be a common theme whereby Aucklanders from the earliest colonial times right up to the present day, seem to think that privately-owned Gulf islands are a legitimate place to wander at will, help one’s self to whatever is lying around, and to depart leaving behind much more than one’s footprints! The old newspaper articles surprised me that petty theft, and not so petty theft was perhaps as common in 1800’s as it is today.
The first items I noticed, up to about 1900, were advertisements promising rewards for “information leading to the prosecution of persons who had stolen large quantities of standing and cut wood”…probably tea tree I am guessing. ( Auckland used huge quantities of firewood for domestic heating & cooking in colonial times)
From about 1900 for perhaps 30 years, the adverts changed to dire threats of prosecution for dastardly scow operators helping themselves to beach shingle. (Ted Ashby’s book “Phantom Fleet” gives a good explanation of illegal shingle extraction)
Other newspaper public notices refer to other problems of shooting of pigs and farm stock. It seems the Chamberlin families might have been justified in having jaundiced views about their mainland neighbours, and it is surprising that they have managed to maintain a reputation of being gracious hosts to visitors and willing helpers to boatees in need of rescue.
Even today, they deserve better from the wider Auckland public. As a long time yachtsman myself, often anchoring in Ponui’s many bays, I am sometimes horrified by the casual way boating people feel it okay to roam over the island, sometimes even with their dogs. Some even think it okay to browse around the farm buildings…do they actually think Ponui is public estate?
And while I am on a rant, where do all the plastic bait bags littering the beaches come from…not accidental discharges from Auckland storm water drains! A great stain on the reputation of the majority of well behaved boating community. My heart goes out to the Island owners who also pay eye-watering land rates to a City Council that does very little by way of public services which we take for granted on the mainland.”
Update ex Ross Dawson – he meant to add – “No criticism intended”